High-Protein Beef Quesadilla
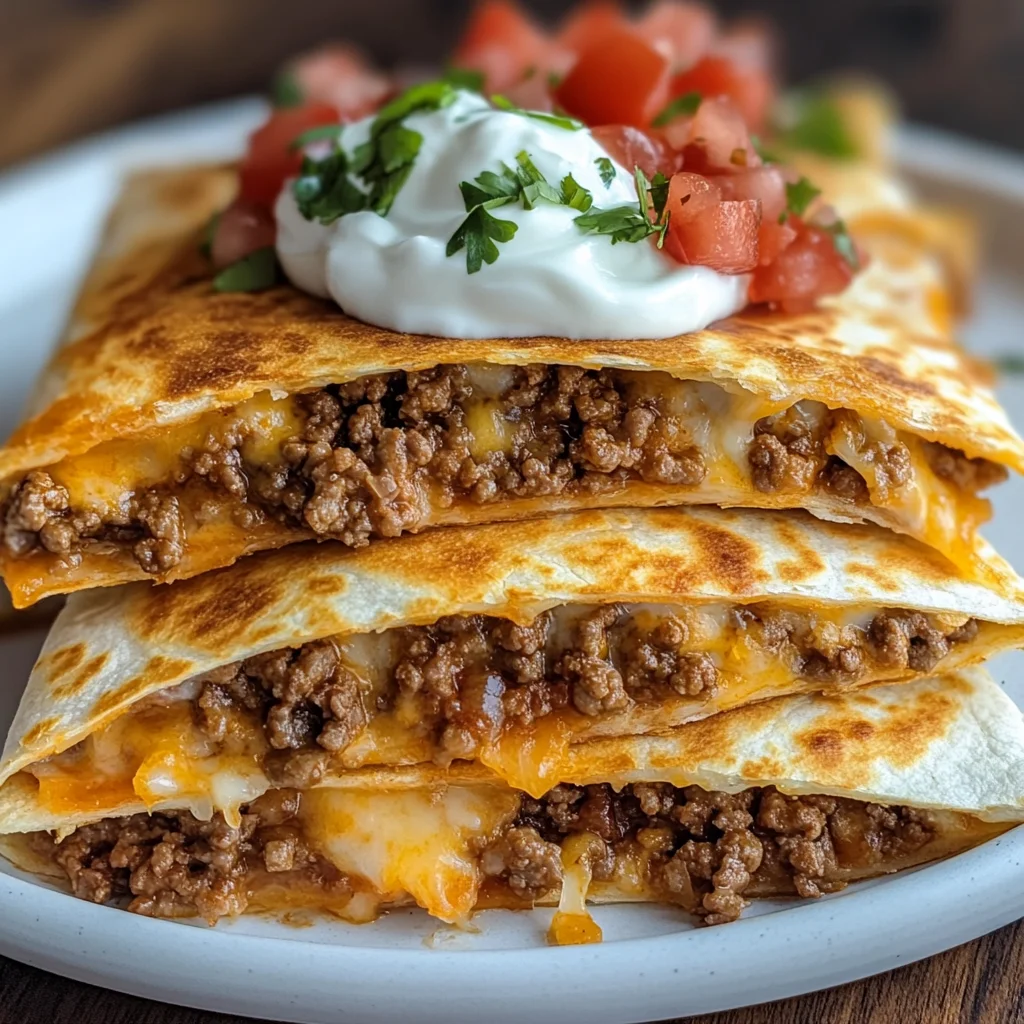
There’s something truly magical about a High-Protein Beef Quesadilla, isn’t there? It’s not just a meal; it’s an experience that wraps you in warmth and satisfaction. Picture this: a golden-brown tortilla, crisp on the outside, yielding to a sumptuous, gooey filling of seasoned ground beef and melted cheddar cheese. Each bite is a delightful symphony of flavors that dances on your palate, with the freshness of pico de gallo cutting through the richness, and a dollop of light sour cream adding a cooling contrast. This isn’t merely food; it’s comfort wrapped in love, bringing together all those cozy moments we cherish around the dinner table or post-workout when you crave something hearty yet nutritious.
And let’s not forget how versatile this dish can be! It’s perfect for busy weeknights when time is tight but your appetite is roaring. You might find yourself whipping up this protein-packed delight faster than you can say quesadilla! The beauty lies in the simplicity of its preparation—making it an ideal choice for meal prep too! Whether you’re looking to refuel after a workout or simply want to indulge in a satisfying lunch without feeling weighed down, this High-Protein Beef Quesadilla has got your back. Trust me when I say that once you try making this at home, you’ll never look at takeout the same way again!
High-Protein Beef Quesadilla: A Flavorful Fiesta in Every Bite
Let’s embark on this culinary journey together! Making a High-Protein Beef Quesadilla is not just about following steps; it’s about creating memories and enjoying the process. As we dive into the ingredients and techniques, I promise you’ll see how easy it is to bring this delicious dish to life in your kitchen.
Ingredients:
As we gather our ingredients, imagine the vibrant colors and enticing aromas that will soon fill your kitchen. Each component plays a vital role in crafting not just a meal but an experience that nourishes both body and soul.
- 4 oz lean ground beef (93% or leaner), cooked with taco seasoning. This ingredient serves as the heart of our quesadilla—a protein powerhouse that brings depth and richness to every bite. Choosing lean ground beef ensures that you’re keeping things healthy without sacrificing flavor. When cooked with taco seasoning, it transforms into a savory filling that’s utterly intoxicating. Look for beef labeled as extra lean for optimal results; this option allows us to indulge in all its glory while keeping calories in check.
- 1 high-fiber tortilla (like Xtreme Wellness). The tortilla acts as both vessel and canvas for our delicious fillings—it’s crucial for achieving that crispy exterior while holding everything together beautifully. Opting for high-fiber tortillas adds nutritional value without compromising on taste or texture. These tortillas are often lighter than traditional options but still deliver on that satisfying chewiness we crave in a quesadilla. If you’re looking for alternatives, whole wheat or low-carb tortillas can also work wonders!
- ¼ cup shredded cheddar cheese. Ahh, cheese—the glue that binds our quesadilla together! Cheddar brings not only creaminess but also an irresistible sharpness that complements the seasoned beef perfectly. When choosing cheese, go for freshly shredded rather than pre-packaged versions; they melt more evenly and create that gooey texture we adore. If cheddar isn’t your favorite, feel free to experiment with Monterey Jack or pepper jack for an added kick!
- 2 tbsp pico de gallo. This fresh salsa adds brightness and zing to our quesadilla—a refreshing pop against the rich filling! Made from diced tomatoes, onions, cilantro, and lime juice, pico de gallo offers layers of flavor and texture that elevate each bite to extraordinary heights. You can easily make your own at home or pick up some from the store if you’re short on time; just make sure it’s fresh!
- 2 tbsp light sour cream. Finally, we have our creamy companion: light sour cream! It adds a luscious finish to each bite while balancing out the robust flavors of beef and cheese beautifully. Not only does it bring moisture but also a tangy flair that ties everything together harmoniously. If you’re looking for alternatives due to dietary preferences, Greek yogurt works wonderfully as a healthier substitute!
Equipment You’ll Need:
Now that we’ve gathered all our essential ingredients let’s talk about the tools you’ll need—these trusty partners will make your cooking experience smoother and more enjoyable! Having the right equipment is non-negotiable when it comes to achieving culinary success.
- Skillet or frying pan – A good quality skillet is vital for browning your ground beef evenly while also ensuring your quesadilla crisps up perfectly during cooking. Cast iron skillets are fantastic choices due to their heat retention properties; however, any non-stick frying pan will do just fine if that’s what you have on hand!
- Spatula – This handy tool is essential for flipping your quesadilla without losing any of its glorious filling! A wide spatula helps you lift and turn things over easily while keeping everything intact—absolutely paramount if you want picture-perfect wedges.
- Cutting board – No kitchen is complete without one! Use it as your workspace when assembling the quesadilla—keeping things tidy makes cooking more enjoyable and prevents accidents while slicing through those crispy edges later.
Now that we have our ingredients prepped and tools ready let’s dive into preparing our flavorful High-Protein Beef Quesadilla!
Step 1: Sizzling Sensation – Brown Your Beef
First things first: let’s get our beef sizzling in that skillet! Begin by heating up your skillet over medium heat—it should be hot enough so water droplets dance across its surface but not so hot that anything burns instantly upon contact. Once heated, add in 4 ounces of lean ground beef along with taco seasoning—this mixture infuses each morsel with bold flavors reminiscent of summer barbecues or cozy family dinners around the table.
As you break apart the meat with your spatula, listen closely—the sizzle tells you all you need to know about doneness! Aim for browning rather than boiling; browning caramelizes those natural sugars within the beef creating profound depth in flavor while rendering excess fat away—a win-win situation! Keep stirring occasionally until fully cooked through (about 5–7 minutes)—this step is crucial because undercooked meat simply won’t cut it here!
Step 2: Layering Love – Assemble Your Quesadilla
Once you’ve successfully browned your beef like an absolute pro, it’s time to assemble our masterpiece! Grab one high-fiber tortilla—this will act as both base layer and protective shield—and place it flat onto a clean surface or directly into your skillet if there’s room enough left over after browning meat.
Now comes my favorite part: layering! On one half of the tortilla generously spread out those glorious crumbles of seasoned ground beef followed by sprinkling ¼ cup shredded cheddar cheese evenly atop them like confetti at an exciting celebration! Make sure every bit gets coated well so every bite delivers maximum cheesy goodness!
Step 3: Fold & Toast – Crispy Perfection Awaits
This next step might seem simple but trust me—it’s where magic happens! Carefully fold over half of your tortilla containing all those delicious fillings toward its untouched side like flipping pages in an enchanting storybook filled with savory delights waiting ahead! Gently press down with spatula ensuring no filling escapes during cooking—which could lead us astray from achieving crispy perfection!
Continue cooking on medium heat until golden brown (around 2–3 minutes); keep checking underneath using slightly lifting spatula—it should be crisp yet tender enough not too firm against teeth when biting into heavenly layers awaiting inside! Flip carefully once browned before returning back onto heat allowing other side achieve same glorious golden color too before removing from stove altogether!
Step 4: Slice & Serve – Indulge In Every Bite
Finally—the moment we’ve all been waiting for has arrived! Remove your beautifully toasted quesadilla from skillet onto cutting board where it’ll sit proudly awaiting its destiny—being sliced into wedges readying itself for eager taste buds craving adventure ahead!
Using sharp knife (or pizza cutter if available), slice through perfectly formed triangles taking care not squish fillings too much during process—perfectly balanced bites await discovery here friends! And don’t forget about garnishing alongside fresh pico de gallo plus dollops light sour cream ready at hand—this last touch elevates dish further connecting flavors harmoniously together transporting everyone enjoying meal straight into culinary bliss out wherever they may be seated around table tonight…
Stay tuned as we explore even more culinary tips in future steps—but remember: enjoy every moment spent creating joyous memories right here within walls kitchen filled laughter love shared amongst friends family alike… Bon appétit!
Step 5: Sizzling Symphony of Flavors
Now that your ground beef is perfectly browned and infused with the zesty taco seasoning, it’s time to layer this flavor-packed filling onto your tortilla. Take a high-fiber tortilla like Xtreme Wellness—trust me, this choice is absolutely paramount because it adds not just structure but also a hearty dose of fiber, making the meal more filling without unnecessary calories. Place the tortilla on a clean, flat surface and sprinkle about a quarter cup of shredded cheddar cheese onto one side. I always opt for sharp cheddar because its robust flavor complements the seasoned beef beautifully; you want that contrast of creamy richness against the savory meat.
Next, spoon your perfectly seasoned beef right over the cheese. Don’t skimp on this step! You want a generous layer so each bite is bursting with flavor. The cheese acts as a glue here, binding everything together as it melts in the cooking process. When you’re done layering, fold the tortilla gently in half, pressing down slightly to keep everything snug inside. This step isn’t just about aesthetics—it’s about creating a sturdy quesadilla that won’t fall apart when you’re ready to dig in. I promise you’ll be amazed at how satisfying this simple act can be!
Step 6: Toasting to Perfection
In this next step, we will toast our quesadilla to golden perfection—a process that transforms our raw ingredients into a crispy masterpiece! Heat up a non-stick skillet over medium heat; patience here is key! It might take a minute or two for the skillet to reach that sweet spot where it’s hot enough to create that delectable crunch but not so hot that it burns the tortilla before the cheese has a chance to melt. Trust me on this—if your skillet isn’t adequately heated, you risk ending up with a soggy bottom instead of that delightful crunch we’re aiming for.
Once your skillet is ready, carefully place your folded quesadilla in there and let it sizzle away! You should hear an enticing crackle as it begins to cook—that sound is music to any home cook’s ears! Allow it to cook for about 2-3 minutes on one side before gently lifting an edge with a spatula to check for doneness. You’re looking for a beautiful golden-brown color; if it looks more pale than golden, give it another minute or so—don’t rush this step! Once you achieve that perfect hue, flip it over and let the other side toast for an additional 2-3 minutes until both sides are uniformly browned and crispy. The melting cheese inside will create an utterly intoxicating experience as it melds with the savory beef.
Step 7: The Art of Cutting
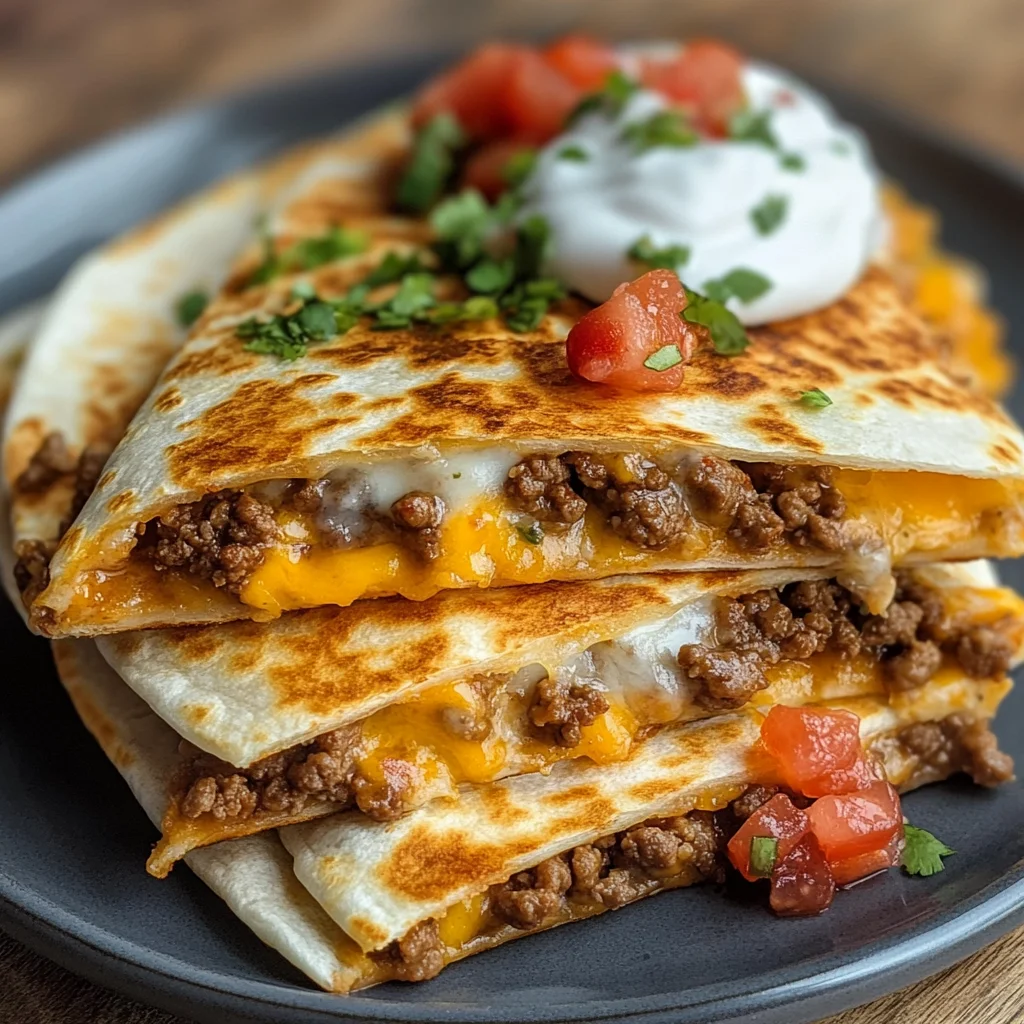
With your quesadilla now toasted and oozing with cheesy goodness inside, it’s time for one final flourish before serving—cutting and plating! Using a sharp knife or pizza cutter, slice your quesadilla into wedges. I usually cut mine into four pieces; this not only makes them easier to handle but allows for sharing (if you’re feeling generous!). As you cut through, notice how effortlessly the knife glides through; it’s such a rewarding moment when all those layers of melted cheese stretch out like gooey ribbons.
Now let’s talk presentation; while taste is paramount, how food looks can elevate the entire dining experience! Arrange your wedges on a plate and take a moment to admire them—the crispy edges beckoning you closer. For an added touch of freshness and color, serve alongside small bowls of pico de gallo and light sour cream. The vibrant colors contrast beautifully against the golden quesadilla; plus, those contrasting flavors—zesty pico against creamy sour cream—create an extraordinary balance on your palate.
Step 8: Final Touches Before Indulgence
At last! Your High-Protein Beef Quesadilla is ready to shine at its best moment—the first bite! But hold on just one second; let’s ensure we enhance this experience even further before diving in. Take those small bowls of pico de gallo and light sour cream and place them right next to your quesadilla wedges on the plate. This isn’t just decoration; these condiments are crucial elements that bring brightness and freshness to each bite.
When you’re ready to serve, make sure everyone has access to both toppings so they can customize their quesadilla experience based on their preferences—a little pico here for zestiness or sour cream there for creaminess can transform each wedge into something unique! And remember, enjoying food is not just about sustenance; it’s about creating memories around shared meals with loved ones or simply treating yourself after a long day. So grab those wedges while they’re still warm and dive into this crispy delight—you’ve crafted something truly extraordinary today!
As you savor each bite of your High-Protein Beef Quesadilla—crispy exterior giving way to melty goodness—I encourage you to relish not only in its deliciousness but also in the joy of having created something special from scratch. Happy cooking!
Storage and Enjoyment Tips for Your High-Protein Beef Quesadilla
Now that you’ve crafted this delightful High-Protein Beef Quesadilla, it’s time to dig in and savor every mouthful! But let’s be real for a moment; sometimes, you might have leftovers (though I can’t imagine that happening too often because they’re just so good!). If you do find yourself with some extra quesadilla, don’t worry! I’ve got you covered with tips on how to store those delicious bites so they maintain their scrumptiousness for future enjoyment.
Storing Leftover High-Protein Beef Quesadilla
To keep your leftover High-Protein Beef Quesadilla in peak condition, you’ll want to place them in an airtight container. This is absolutely paramount, as it prevents moisture from creeping in and making your crispy quesadillas soggy. When stored properly in the fridge, these beauties can last up to three days. But trust me when I say they are best enjoyed fresh! To maintain their quality even longer, consider placing a slice of bread inside the container. This little trick helps absorb any excess moisture, keeping your quesadillas perfectly crisp and delicious. When you’re ready to indulge again, simply reheat them on a skillet over medium heat or pop them in the oven until heated through, and you’ll be transported back to that first bite experience!
Freezing the High-Protein Beef Quesadilla for Later
If you anticipate needing a quick meal option down the line, freezing these quesadillas is an excellent idea! To freeze them properly, let your cooked quesadillas cool completely before wrapping each one tightly in plastic wrap or aluminum foil. Then, place them in a freezer-safe bag or container. They’ll keep beautifully for up to three months! When you’re ready to enjoy one from frozen, there’s no need to thaw—just toss it straight into a preheated skillet or oven until it’s golden brown and heated through. The convenience of having these protein-packed delights ready at a moment’s notice is truly remarkable! Imagine coming home after a long day and knowing that a scrumptious dinner awaits you in the freezer—it’s like having little treasures tucked away just for you.
High-Protein Beef Quesadilla

Indulge in the comforting warmth of a High-Protein Beef Quesadilla that’s as satisfying as it is nutritious. This delightful dish features a crispy, golden-brown tortilla enveloping seasoned ground beef and melted cheddar cheese, enhanced by the freshness of pico de gallo and light sour cream. Perfect for busy weeknights or post-workout refueling, this protein-packed quesadilla is not only quick to make but also a wonderful meal prep option. Create delicious memories with every bite of this easy-to-make recipe that transforms simple ingredients into an unforgettable culinary experience.
- Prep Time: 10 minutes
- Cook Time: 10 minutes
- Total Time: 20 minutes
- Yield: Serves 1
- Category: Main
- Method: Frying
- Cuisine: Mexican
Ingredients
- 4 oz lean ground beef (93% or leaner), cooked with taco seasoning
- 1 high-fiber tortilla (like Xtreme Wellness)
- ¼ cup shredded cheddar cheese
- 2 tbsp pico de gallo
- 2 tbsp light sour cream
Instructions
- Heat a skillet over medium heat and brown the ground beef with taco seasoning until fully cooked (about 5–7 minutes).
- Lay the tortilla flat and sprinkle half with shredded cheddar cheese.
- Spoon the seasoned beef over the cheese, then fold the tortilla in half.
- Cook in the skillet for 2-3 minutes on each side until golden brown and crispy.
- Slice into wedges, serve with pico de gallo and light sour cream.
Nutrition
- Serving Size: 1 serving
- Calories: 320
- Sugar: 2g
- Sodium: 590mg
- Fat: 12g
- Saturated Fat: 6g
- Unsaturated Fat: 5g
- Trans Fat: 0g
- Carbohydrates: 32g
- Fiber: 7g
- Protein: 24g
- Cholesterol: 70mg