One Pot Gnocchi Chicken Pot Pie
There’s something undeniably magical about gathering around the table for a warm, hearty meal that feels like a big hug. The aroma of comfort food wafting through the air has an uncanny ability to transport us back to simpler times, where laughter mingled with the sizzling sounds of cooking, creating a symphony of warmth and nostalgia. That’s exactly what you’ll experience with my One Pot Gnocchi Chicken Pot Pie. This recipe is not just about satisfying hunger; it’s about creating moments, fostering connections, and nurturing our souls with each bite. As I reminisce about cozy evenings spent with loved ones, I can’t help but smile at how this dish has become a cherished staple in my kitchen—a beautiful marriage between chicken pot pie and dumplings, all wrapped into one extraordinary creation that cooks in under 30 minutes.
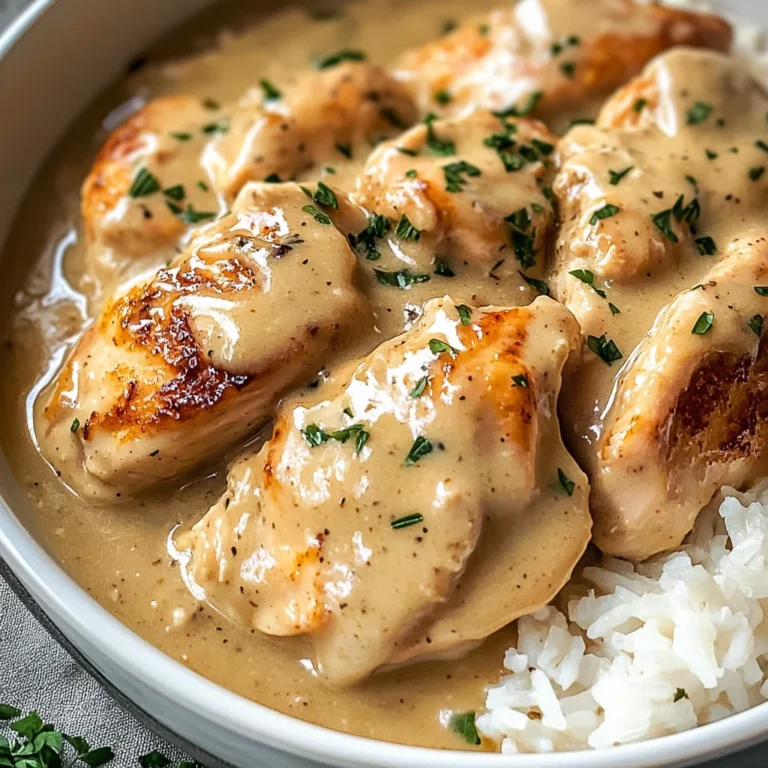
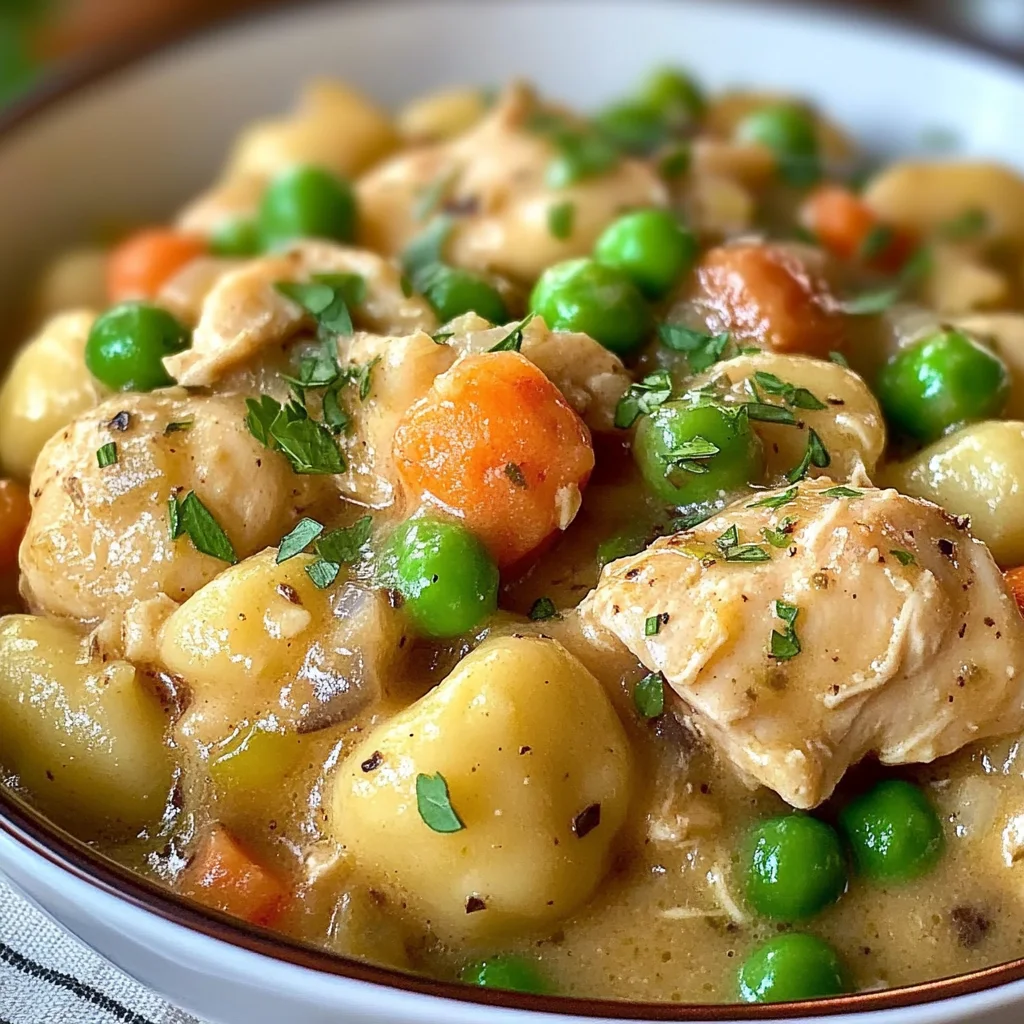
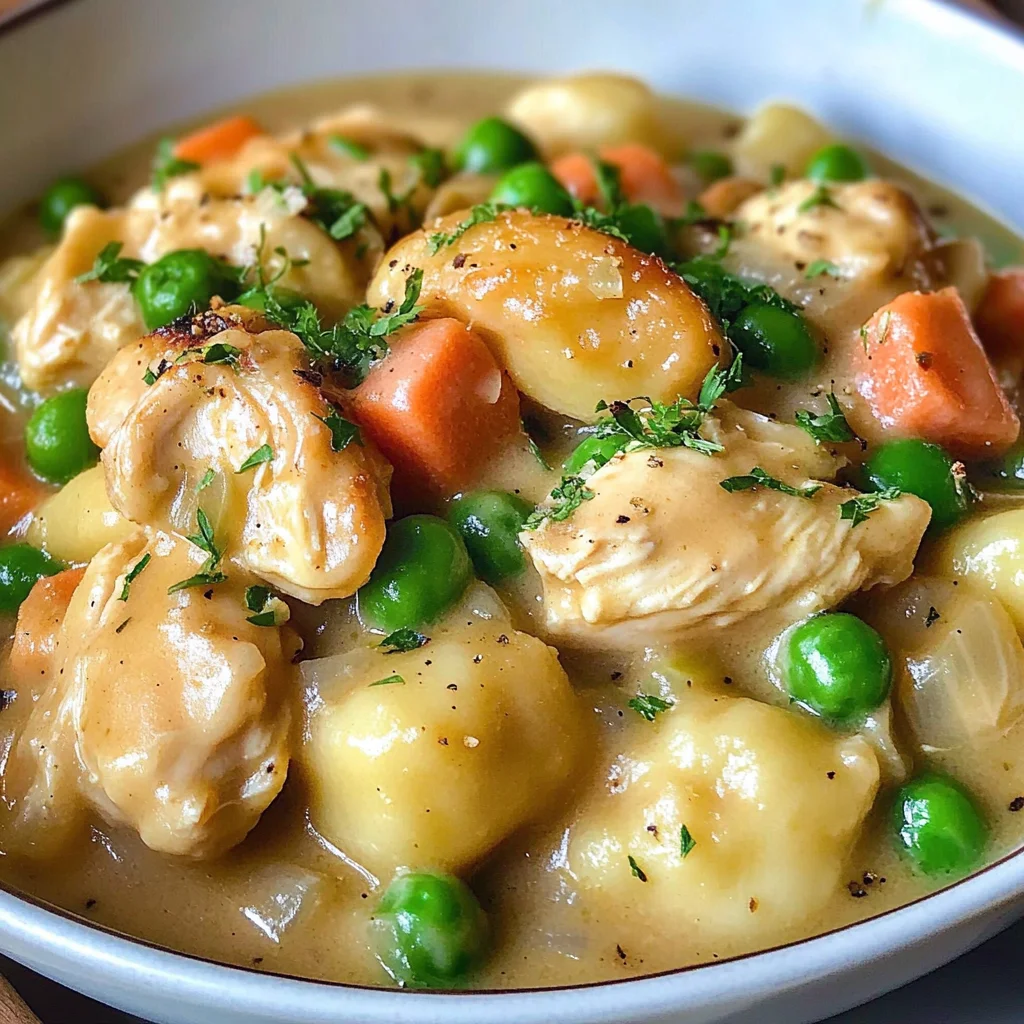
Now, let’s dive deeper into why this recipe resonates so profoundly with so many of us. The essence of comfort food often lies in its ability to evoke feelings of safety and home. Chicken pot pie has long been celebrated as a classic American dish, one that brings forth memories of family dinners and holiday gatherings. However, by introducing gnocchi into the mix, we elevate this dish to new heights—transforming traditional flavors into something refreshingly modern while still holding onto those comforting roots we adore. Picture yourself ladling generous portions into bowls, witnessing the creamy broth enveloping tender gnocchi, peas bursting with sweetness, and shredded chicken offering its delicate charm—a truly extraordinary experience awaits you!
One Pot Gnocchi Chicken Pot Pie: Comfort in Every Bite
This One Pot Gnocchi Chicken Pot Pie is the ultimate answer to your weeknight dinner dilemmas—a delightful concoction that unites the best features of two beloved dishes while remaining gloriously simple. Trust me when I say that once you taste this dish, it will find a permanent home in your recipe rotation. With minimal cleanup and maximum flavor, you’ll feel like a culinary wizard as you whip up this hearty meal that satisfies both your taste buds and your soul.
Ingredients:
As we embark on this culinary journey together, let’s take a moment to appreciate each ingredient that will play an integral role in crafting our One Pot Gnocchi Chicken Pot Pie. Each component adds depth and richness to the final dish—and understanding their purpose makes all the difference!
- 4 Tablespoons butter or vegan butter: Butter is a cornerstone of flavor in this recipe; it creates a rich base that enhances everything it touches. If you’re opting for vegan butter, look for high-quality brands made from vegetable oils that mimic the creamy texture and flavor of traditional butter. This is crucial because it sets the stage for sautéing our aromatic vegetables beautifully without burning them and contributes to that luxurious mouthfeel we crave.
- 1 cup sliced carrots: Carrots bring not only vibrant color but also natural sweetness to balance out savory elements in our pot pie. When sautéed, they caramelize slightly, releasing their sugars—this process elevates their flavor profile from ordinary to extraordinary! Opt for fresh carrots that are firm without any soft spots; they’ll provide that lovely crunch before they soften during cooking.
- 4 oz mushrooms (sliced): Mushrooms add an earthy note and umami richness that deepens the overall flavor experience of our dish. They are like little sponges soaking up all those delicious juices while adding their own unique twist! Choose cremini or button mushrooms for their mild flavor; ensure they are clean and dry so they can caramelize beautifully rather than steaming.
- 1 large or 2 small ribs celery (thinly sliced): Celery contributes freshness and a subtle crunch as well as aromatic qualities that enhance our veggie medley. When properly sliced thinly, it cooks uniformly and integrates seamlessly into our sauce without being too overwhelming—just enough to offer texture contrast.
- 1 large shallot or small onion (chopped): Shallots have a milder flavor compared to onions but pack a punch when it comes to adding depth! They lend sweetness while also providing aromatic layers essential for building flavor right from the start. Make sure they’re finely chopped for even cooking throughout.
- homemade seasoned salt and pepper: Seasoning is absolutely paramount! A homemade seasoning blend allows you complete control over flavors—experiment with herbs you love! The right amount will heighten every ingredient’s natural flavors without dominating them; trust your palate here!
- 2 cloves garlic (pressed or minced): Garlic introduces an intoxicating aroma as it cooks—there’s nothing quite like it! It adds warmth and complexity to your dish while serving as a wonderful bridge between other flavors used here; pressing releases more oils compared to chopping!
- 1 teaspoon poultry seasoning: This blend typically includes sage, thyme, marjoram, rosemary—perfectly suited for chicken dishes! It evokes memories of roast dinners while enhancing our pot pie’s savory essence without overpowering other ingredients.
- Pinch dried thyme: Thyme brings an herbaceous brightness that cuts through creaminess beautifully; just don’t go overboard! A pinch goes a long way—dry herbs can be surprisingly potent!
- 3 Tablespoons gluten-free flour (or AP flour if not GF): Flour acts as our thickening agent here—the magic behind transforming broth into a luscious sauce! If you’re going gluten-free, make sure you’re using certified gluten-free flour blends so everyone can enjoy this comforting meal safely!
- 2 cups chicken stock or broth: Stock provides immense flavor—it’s like liquid gold! Homemade is always best if you have it on hand; otherwise store-bought works just fine too—look for low-sodium varieties so you can control seasoning!
- 1 cup milk (any kind; I use unsweetened almond milk): Milk adds creaminess that binds everything together wonderfully; choose whatever suits your dietary needs best! Non-dairy options like almond milk work remarkably well here without sacrificing flavor.
- 12 oz package gluten-free gnocchi: Gnocchi serves as the star component—the dumpling-like pillows soak up all those rich flavors from our sauce while providing delightful texture contrasts! Fresh or frozen varieties work great; just follow package instructions for cooking time.
- 1-1/2 cups shredded chicken breast (~1/2 lb pre-cooked): Shredded chicken brings heartiness along with protein content—we want enough to fill bowls generously! Use leftover roasted chicken or rotisserie chicken if short on time—it’ll infuse even more deliciousness in no time flat!
- 1/2 cup frozen peas: Peas add bursts of sweetness alongside beautiful color contrast against creamy sauce—it’s like confetti in our bowl! Using frozen means less prep time since they’re ready-to-go straight from the bag!
Equipment You’ll Need:
Having the right tools at your disposal makes all the difference when preparing any recipe—and my One Pot Gnocchi Chicken Pot Pie is no exception! These essential partners will help guide you through each step smoothly:
- Dutch oven or large soup pot – A heavy-bottomed pot distributes heat evenly while allowing for browning without burning—a critical element when sautéing vegetables at high temperatures! If you don’t have one handy yet don’t worry—any large saucepan will do as long as it’s deep enough for simmering.
- Wooden spoon or spatula – This trusty tool is perfect for stirring—you want something sturdy yet gentle enough not to scratch non-stick surfaces if applicable. Wooden spoons also provide excellent control over folding ingredients together gently without damaging delicate textures!
- Measuring cups & spoons – Accurate measurements ensure consistency every time—you’ll want these tools close by throughout cooking so there are no surprises later on!
Now that we’re armed with knowledge about ingredients along with essential tools let’s dive into preparing this delightful One Pot Gnocchi Chicken Pot Pie together!
Step 1: Sauté Your Aromatic Base
First things first—we’re about to create layers upon layers of flavor starting with our aromatic base! Heat up your Dutch oven or large soup pot over medium-high heat until it’s nice and warm—this step ensures even heating throughout which promotes better sautéing results across all veggies involved here. Once hot enough (you can test by sprinkling some water droplets inside), add those four tablespoons of butter (or vegan butter) directly into the pan—it’ll melt beautifully within seconds turning into liquid gold that coats everything perfectly!
As soon as that buttery goodness begins bubbling away invitingly (which should only take about 30 seconds), toss in your sliced carrots alongside mushrooms first—they’ll need slightly longer cook times compared to other vegetables here due their density level—sauté them gently until mushrooms release their liquid completely (about 3–4 minutes). Once they’ve softened nicely season generously using homemade seasoned salt plus freshly cracked black pepper according personal preference before adding celery along with shallots/onions next—they’ll begin caramelizing quickly once introduced bringing delightful sweetness back again while continuing developing depth across entire mixture overall…so don’t rush this step—it makes such significant impact on final outcome overall trust me absolutely paramount toward achieving success down road ahead!
Step 2: Infuse Flavor with Garlic & Herbs
Now it’s time for another layer—the fragrant goodness waiting patiently behind door number two… garlic! Add freshly pressed/minced cloves straight into pan once veggies have reached desired tenderness level allowing aroma waft through kitchen instantly captivating everyone nearby… sauté just until fragrant emerges (this usually takes around 1–2 minutes max) then sprinkle poultry seasoning plus pinch dried thyme atop mixture ensuring everything gets coated evenly before moving forward next phase altogether.
This infusion process serves multiple purposes—it heightens existing aromas already present while setting stage perfectly further enhancing flavors created thus far pushing boundaries beyond expectations set earlier during initial preparation steps…don’t forget folks’ noses are mighty powerful tools too—they’ll hint whether something smells divine means we’re headed right direction indeed!
Step 3: Thicken It Up!
Next up comes crucial moment folks—adding flour gives us desired thickness required within finished product itself making certain sauce luscious enough cling onto every single piece remaining inside bowl afterward enjoying meal together thereafter… Sprinkle three tablespoons carefully across veggie medley ensuring even distribution amongst various components prior stirring gently until fully coated evenly throughout mixture allowing flour cook off slightly meanwhile preventing raw taste lingering afterwards during consumption later too…
After about minute passes pour in chicken stock/broth slowly whilst continuously stirring vigorously simultaneously avoid lumps forming instead creating smooth velvety texture emerging before us gradually becoming visible gradually amidst swirling motions taking place inside pot itself don’t be shy though keep whisking away folks’ enthusiasm shows through action performed here today translates directly onto plate itself later on too promising incredible dining experience awaits everyone gathered round table soon enjoying feast prepared lovingly beforehand…
Step 4: Simmer Together
Once combined thoroughly allow mixture come alive simmer gently stirring occasionally watching closely ensures nothing sticks bottom surface avoiding potential disaster looming nearby threatening future culinary endeavors altogether… Turn heat up medium-high allowing everything bubble merrily away until reaches perfect simmer point visually recognizable moment arrives indicating readiness next phase including gnocchi introduction officially beginning journey toward glorious conclusion ahead awaits eagerly anticipated dinner gathering now drawing nearer ever closer too…
Keep an eye out especially during first few minutes making sure doesn’t boil furiously over causing mess everywhere around kitchen instead focus energy maintaining steady simmer where flavors meld harmoniously together creating masterpiece worthy admiration post-work hard put forth earlier trust me well worth investment made ultimately yield results reflecting talent showcased within each bite finally enjoyed afterwards together amidst laughter followed warmth radiating hearts full joy surrounding ambiance shared between friends/family alike celebrating life cherished moments treasured forevermore captured collectively forever etched memories formed deep down beneath surface experienced firsthand alongside loved ones near dear heart…
I can’t wait for you to try this recipe—I promise you’ll fall head over heels for its comforting embrace just as I have over years past relishing every single spoonful savored imparting pure happiness along way shared between those surrounding table alike sharing stories laughter resonate deeply touching lives forevermore united through food shared lovingly crafted blessed hands preparing delicious meals bringing people closer together no matter distance separating them apart days gone by….. Enjoy every moment spent creating magic inside kitchen today friends…it truly means world knowing flavors await discovery unfold adventure awaits ahead boundless possibilities lie ahead waiting explore new horizons filled joy laughter love unfold naturally….
Step 5: Building Flavor with the Flour Mixture
Now that your aromatic vegetable medley has softened and practically filled your kitchen with a delightful symphony of scents, it’s time to deepen those flavors further. Sprinkle the gluten-free flour over this vibrant mix, ensuring every morsel is coated. This step is crucial because the flour acts as a thickening agent, binding everything together and giving your One Pot Gnocchi Chicken Pot Pie that luxurious, creamy texture we all crave. As you stir to coat the vegetables, you’ll want to let this cook for about a minute. This brief cooking time allows the flour to toast slightly, enhancing its flavor while removing that raw taste which can sometimes linger if not cooked.
While you’re doing this, keep an eye on the heat—medium is perfect here. You don’t want things to brown too much; instead, look for a light golden hue on the vegetables as they absorb the flour’s essence. Once you’ve stirred it all in and let it cook for a minute, it’s time to add in your chicken broth. Pour it in slowly while stirring continuously to avoid any lumps from forming—this part is all about creating a smooth and silky base for our pie filling. Trust me on this; being patient now will pay off big time later!
Step 6: The Creamy Transformation
With the broth incorporated and bubbling gently in your pot, it’s time to amp up that creaminess factor by adding in your milk. I typically reach for unsweetened almond milk because it gives just enough richness without overpowering the dish. As you pour it in, continue stirring until you see a beautiful blend of colors—rich browns from the broth and creamy whites from the milk swirling together like liquid gold. Bringing this mixture to a simmer is crucial; it’s at this point that flavors meld together beautifully, creating an utterly intoxicating aroma that fills your home.
Keep stirring occasionally as you wait for this magical moment. A simmer means you’ll see gentle bubbles forming around the edges of your pot but not a full-on boil—this is important! Boiling can lead to curdled milk or overly thickened sauce that might clump instead of becoming luxuriously smooth. After about 3-5 minutes of gentle simmering, you’ll notice that everything is beginning to thicken; that’s exactly what we’re aiming for! This velvety base will cradle our gnocchi and chicken beautifully in just a few moments.
Step 7: Gnocchi Time – The Heart of Comfort
Here comes one of my favorite parts—you’re about to introduce those lovely little gnocchi into this comforting mix! Gnocchi are so wonderfully pillowy and soft; they soak up all those delicious flavors as they cook. Take your pre-packaged gluten-free gnocchi (or regular if gluten isn’t a concern) and gently fold them into the simmering mixture. Stir them in carefully so each piece gets enveloped in that creamy goodness we’ve created together.
Now turn down the heat slightly—medium should do just fine—as you allow everything to simmer for another 5-6 minutes. You might be tempted to rush through this step, but please don’t! This is where those gnocchi transform from simply being doughy little dumplings into flavor-infused bites of heaven! You want them tender but not mushy; keep an eye out for their slight puffiness as they cook—the perfect visual cue that tells you they’re ready to soak up even more flavor! If at any point it feels too thick while cooking, feel free to add a splash more broth or milk; we want this filling creamy but not overly dense.
Step 8: Incorporating Chicken and Peas – A Colorful Finale
As soon as those gnocchi have reached their tender state, it’s time for one last flourish before serving up your masterpiece! Gently fold in your shredded chicken breast along with those vibrant frozen peas—this final addition brings both color and nutrition into our dish. The shredded chicken will warm through quickly since it’s already cooked; as you stir it into the pot, watch how the pieces mingle with those fluffy gnocchi and tender vegetables—it’s like watching friends come together at a reunion!
This part only takes about 2-3 minutes; you’ll know it’s ready when everything feels heated throughout and looks invitingly cohesive. Now take a moment here—don’t rush! Taste and adjust seasoning if needed; perhaps sprinkle in some additional homemade seasoned salt or fresh black pepper based on your preference. Each bite should be profoundly satisfying, bursting with warmth and comfort yet balanced enough not to overwhelm your palate.
Once everything is nicely combined and heated through, it’s time for serving! Picture ladling generous portions into bowls where steam rises gently—a true sight for sore eyes after a long day—and watch as each person digs in with eager anticipation.
Final Touches – Serving Your One Pot Gnocchi Chicken Pot Pie
There’s something incredibly rewarding about serving up a meal like this One Pot Gnocchi Chicken Pot Pie—it’s not just food; it’s love poured into every ingredient and every step taken along the way. Take out your favorite rustic bowls or plates (if you have some family heirlooms tucked away somewhere special, now’s their time to shine!), ladle out hearty portions brimming with colorful veggies, plump gnocchi, tender chicken, and pops of green from those peas.
Garnish with freshly cracked black pepper or perhaps sprinkle some chopped parsley over top if you’re feeling fancy—these little touches elevate your dish even further! And trust me when I say this: serve it hot right away so everyone can enjoy that comforting warmth while savoring each bite slowly—not only does it taste amazing fresh off the stove but there’s something profoundly extraordinary about sharing good food amongst friends or family gathered around your table.
So there you have it—a truly delightful recipe that’s easy enough for weeknight dinners yet elegant enough for special occasions! Let me know how yours turns out—I can’t wait to hear about all those smiles around your dinner table!
Storage and Enjoyment Tips for Your One Pot Gnocchi Chicken Pot Pie
Ah, the moment has finally arrived! Your kitchen smells heavenly, and you’re about to dive into a bowl of pure comfort with this One Pot Gnocchi Chicken Pot Pie. I can already imagine the satisfying warmth as you scoop a generous portion into your favorite bowl. But before you indulge completely, let’s chat about how to preserve that delightful goodness for later enjoyment. You know what they say: good food is meant to be shared, and leftovers can be just as thrilling!
Storing Leftover One Pot Gnocchi Chicken Pot Pie
To keep your delicious creation fresh and flavorful, I recommend transferring any leftovers into an airtight container. Glass containers are fantastic because they don’t retain odors or stains like plastic can, but whatever you have on hand will work just fine! Store it in the refrigerator where it will keep beautifully for about 3-4 days. Now, here’s a little pro tip: if you’re worried about the gnocchi soaking up too much moisture and becoming mushy, place a slice of bread in with your leftovers; it’ll absorb excess moisture and help maintain that perfect texture. When you’re ready to enjoy your meal again, simply reheat in the microwave or on the stovetop until it’s warmed through. Trust me, the flavors only deepen over time, making each bite even more satisfying!
Freezing One Pot Gnocchi Chicken Pot Pie for Later
If you’ve made a big batch (which I highly encourage!), freezing portions is a brilliant option that ensures you’ll always have a comforting meal at your fingertips. To freeze properly, allow the pot pie to cool completely before transferring it into freezer-safe containers or heavy-duty freezer bags—this prevents ice crystals from forming. It can stay frozen for up to three months without losing its charm! When you’re ready to enjoy it again, simply thaw overnight in the fridge and then reheat gently on the stove or in the oven until warmed all the way through. The beauty of freezing this dish lies in its convenience; imagine coming home after a long day and knowing that this cozy meal is just waiting for you!
So there you have it—now you’re armed with everything you need to store your One Pot Gnocchi Chicken Pot Pie while keeping all those comforting flavors intact.
One Pot Gnocchi Chicken Pot Pie

Indulge in the ultimate comfort food experience with this One Pot Gnocchi Chicken Pot Pie. Imagine tender gnocchi nestled in a creamy, savory broth alongside shredded chicken and vibrant vegetables, all simmered to perfection in just one pot. This dish captures the essence of nostalgia while presenting a modern twist that will become a family favorite. Ideal for busy weeknights or cozy gatherings, this recipe is not only simple to prepare but also packed with flavor and warmth. With a cooking time of under 30 minutes, you can serve up hearty portions that embrace both your taste buds and your soul.
- Prep Time: 10 minutes
- Cook Time: 20 minutes
- Total Time: 30 minutes
- Yield: Serves approximately 4
- Category: Main
- Method: One Pot Cooking
- Cuisine: American
Ingredients
- 4 Tablespoons butter or vegan butter
- 1 cup sliced carrots
- 4 oz mushrooms, sliced
- 1 large rib celery, thinly sliced
- 1 large shallot or small onion, chopped
- 2 cloves garlic, minced
- 1 teaspoon poultry seasoning
- 3 Tablespoons gluten-free flour
- 2 cups chicken stock or broth
- 1 cup milk (any kind)
- 12 oz package gluten-free gnocchi
- 1 cup shredded chicken breast (~1/2 lb pre-cooked)
- 1/2 cup frozen peas
Instructions
- In a Dutch oven over medium-high heat, melt the butter. Sauté carrots and mushrooms for about 3–4 minutes until softened.
- Add celery, shallots, garlic, poultry seasoning, salt, and pepper; sauté for another minute until fragrant.
- Sprinkle flour over the vegetable mixture and stir to coat evenly. Cook for an additional minute.
- Gradually pour in chicken broth while stirring continuously to avoid lumps; bring to a simmer.
- Stir in milk until well combined and let simmer gently for about 5 minutes until thickened.
- Fold in gnocchi, then reduce heat slightly and cook for an additional 5–6 minutes until gnocchi are tender.
- Incorporate shredded chicken and frozen peas; mix until heated through (about 2–3 minutes). Adjust seasoning if needed.
Nutrition
- Serving Size: 1 serving
- Calories: 480
- Sugar: 6g
- Sodium: 830mg
- Fat: 20g
- Saturated Fat: 10g
- Unsaturated Fat: 8g
- Trans Fat: 0g
- Carbohydrates: 53g
- Fiber: 4g
- Protein: 22g
- Cholesterol: 60mg