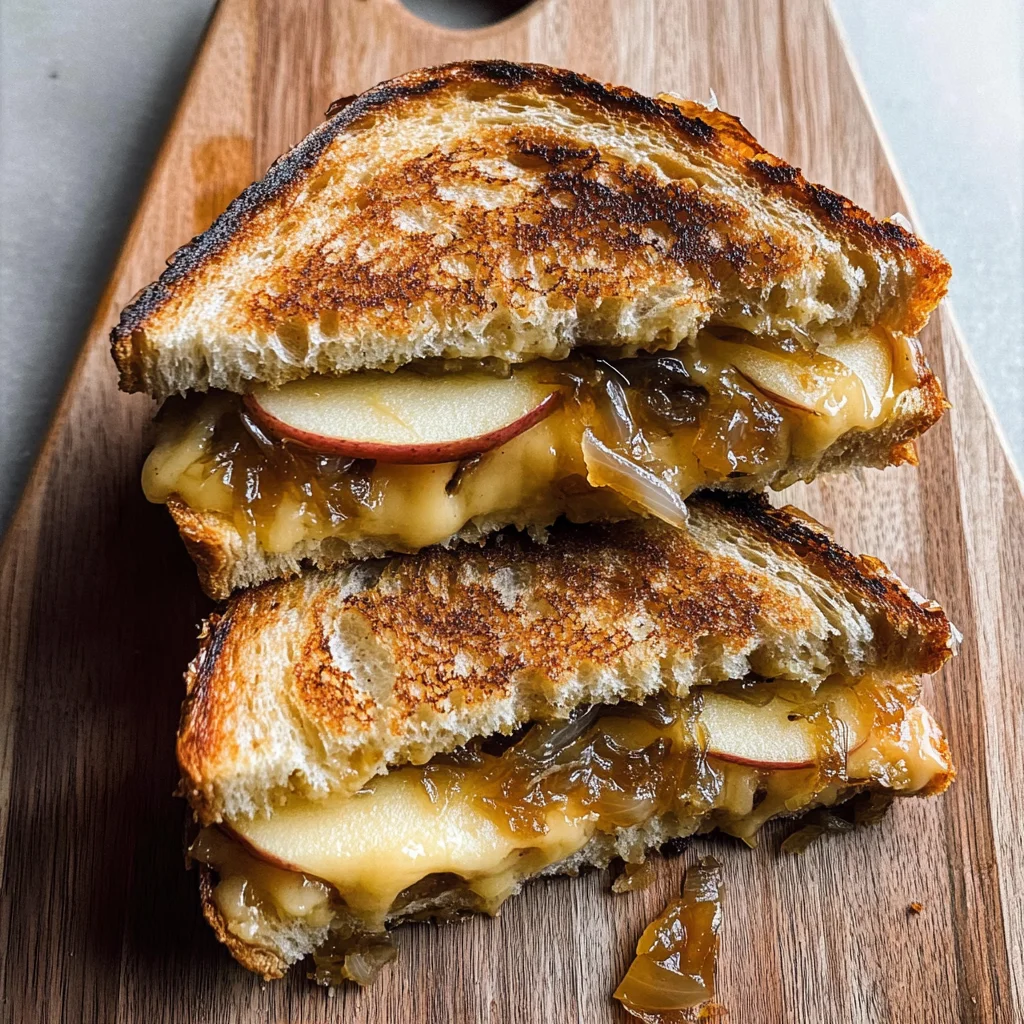
Caramelized Onion and Apple Grilled Cheese Sandwich
There’s something magical about the combination of caramelized onions and sweet apples nestled between layers of melting cheese, all embraced by crispy, golden-brown sourdough. The Caramelized Onion and Apple Grilled Cheese Sandwich is more than a mere meal; it’s a warm hug on a chilly day, a cozy reminder of fall harvests, and an irresistible invitation to gather around the table. Picture this: as you take your first bite, the gooey cheddar and brie blend perfectly with the rich sweetness of the caramelized onions and the crisp tartness of honeycrisp apples. It’s a symphony of flavors that dance together in perfect harmony, making each mouthful profoundly satisfying.
This delightful grilled cheese sandwich is not just another twist on a classic; it takes the traditional comfort food we know and love to new heights. With autumn knocking at our doors, what better way to celebrate than by incorporating seasonal ingredients that evoke nostalgia? The beauty of this recipe lies in its ability to bridge tradition with innovation—transforming simple ingredients into something truly extraordinary. As you bite into this sandwich, you’re not just tasting food; you’re experiencing memories, warmth, and the essence of home-cooked goodness.
Caramelized Onion and Apple Grilled Cheese Sandwich: A Cozy Fall Delight
Welcome to one of my favorite recipes! The Caramelized Onion and Apple Grilled Cheese Sandwich is the perfect way to embrace those cool evenings when all you want is something warm, comforting, and utterly delicious. I can’t wait for you to experience how each component works together so beautifully—this is one sandwich that will become a staple in your kitchen!
Ingredients:
As we embark on this culinary journey together, let’s take a moment to appreciate each ingredient that brings this grilled cheese sandwich to life. Every component plays its part in crafting an unforgettable experience.
- 4 slices sourdough bread. Sourdough is my go-to choice for grilled cheese because its tangy flavor beautifully complements both sweet and savory fillings. When selecting your bread, look for a loaf with a good crust and chewy interior. This texture is crucial—it ensures that your sandwich holds up against all that gooey cheese without getting soggy during cooking. If sourdough isn’t available, feel free to swap it out for another rustic bread like ciabatta or whole grain—you want something hearty!
- 1 tbsp fresh sage (chopped). Fresh herbs are like magic in cooking! Sage adds an earthy depth and aromatic quality that elevates this sandwich beyond your average grilled cheese. When paired with butter, as we’ll do later in the recipe, it becomes utterly intoxicating—think warm notes of fall wafting through your kitchen! If fresh sage isn’t on hand, dried sage can work in a pinch; just remember that dried herbs are more potent than fresh, so use about one teaspoon instead.
- 6 tbsp unsalted butter, divided (room temp). Butter is our secret weapon here! It’s essential for creating that golden crust while also adding richness to our filling. Room temperature butter spreads easily onto the bread without tearing it apart—a non-negotiable step for achieving that perfect crispy exterior. Using unsalted butter gives you control over the saltiness of your dish; I promise you won’t regret splurging on high-quality butter for this recipe!
- 1 honeycrisp apple (thinly sliced). Honeycrisp apples are whimsical little gems! Their balance of sweetness and acidity adds brightness against the richness of the cheeses and caramelized onions. When choosing an apple for this sandwich, opt for one that feels firm to avoid mushiness after cooking—nobody wants a soggy apple slice in their grilled cheese! If honeycrisps aren’t available, any tart variety such as Granny Smith will do wonders.
- 2 large yellow onions (sliced 1/2 inch thick). Onions are truly transformative when caramelized—they turn from sharp and pungent into sweet and luscious liquid gold through slow cooking. Slice them thickly so they hold their shape as they cook down; we want those lovely caramel bits! Don’t rush this step—patience is key here—as they develop their deep color over time.
- 8 oz cheddar cheese (grated). Cheddar brings a sharp creaminess that melts beautifully between layers of bread. I recommend using sharp cheddar here because its bold flavor stands up against the sweetness from the onions and apples—it’s about creating balance! Grate your own cheese if possible; pre-shredded varieties often contain anti-caking agents that can prevent proper melting.
- 2 oz brie cheese (sliced into 1/2 slivers). Brie adds an extra layer of creaminess with its buttery texture—the contrast with cheddar creates a luxurious experience in every bite! When selecting brie at the store, look for one that’s soft but not overly runny; it should have some firmness yet yield easily when pressed gently.
- 2 tsp kosher salt. Salt enhances flavors; it’s absolutely paramount in our recipe! It draws out moisture from vegetables while boosting sweetness during caramelization—it’s what turns ordinary ingredients into extraordinary dishes. Make sure you’re using kosher salt here since its larger grains dissolve more slowly than table salt—allowing you greater control over seasoning.
- 1 tbsp olive oil. A splash of olive oil helps create an ideal environment for cooking those beautiful onions evenly without burning them too quickly—a technique known as sautéing! It also adds a subtle fruity note that complements other flavors well while keeping things light.
Equipment You’ll Need:
Having the right tools makes this entire process smoother and more enjoyable—I promise you’ll thank yourself later! While these may not be ingredients, they are essential partners in creating something wonderful.
- Skillet – A sturdy skillet is crucial for achieving even heat distribution while caramelizing onions or grilling sandwiches perfectly golden brown on both sides. Cast iron skillets are particularly great because they retain heat exceptionally well but any non-stick or stainless-steel skillet will work just fine!
- Spatula – A flat spatula will become your best friend during flipping sandwiches without losing precious filling inside! Look for one with a wide base so you can lift those hefty sandwiches easily without mess—trust me, it’s worth investing in!
- Cutting board & chef’s knife – A good cutting board provides space for slicing veggies efficiently while protecting countertops from damage. Pair it with a sharp chef’s knife—the foundation of any kitchen—for effortless chopping through onions or apples alike!
Now that we’ve gathered our ingredients and tools let’s dive into preparing that scrumptious Caramelized Onion and Apple Grilled Cheese Sandwich!
Step 1: The Art of Caramelizing Onions
Before we assemble our masterpiece, we need to begin with those luscious caramelized onions—they’re truly what make this dish shine! Start by heating 2 tablespoons of unsalted butter in your skillet over medium heat until melted—a delightful aroma will fill your kitchen almost instantly! Add sliced onions gently stirring every few minutes to coat them evenly with buttery goodness while avoiding burning them at high temperatures—a gentle touch goes far here! After about ten minutes or so has passed sprinkle in 1 teaspoon kosher salt which helps draw moisture out aiding us further along our journey toward sweet perfection.
Continue cooking these beauties while stirring every few minutes until they reach deep golden-brown hues after approximately 30-40 minutes overall cooking time—this slow transformation brings out incredible sweetness through natural sugars released during the process—it’s simply magical! If at any point during cooking things appear too dry or start sticking add splashes (about 1 tablespoon) water which helps deglaze pan bits left behind allowing flavors mingling together seamlessly!
Step 2: Sage Butter Bliss
While those heavenly onions are caramelizing away let’s prepare our flavorful sage-infused butter—it’s going to be spread onto our bread before grilling giving us ultimate crispiness infused with aromatic herbaceous notes throughout every bite! Combine chopped sage leaves into remaining room temperature butter along with 1 teaspoon kosher salt mixing until fully incorporated—this simple addition elevates standard grilled cheese elevating it beyond expectations entirely creating what I like calling ‘comfort food sophistication’!
Step 3: Assembling The Magic
Now comes my favorite part—the assembly where all these components come together harmoniously creating pure deliciousness captured between two slices of bread! Start by laying down one piece of unbuttered sourdough onto your clean workspace then top generously first placing slices brie followed closely by grated cheddar ensuring full coverage before layering crisp honeycrisp apple slices slightly overlapping creating visually appealing presentation atop these cheeses now add quarter cup caramelized onion goodness followed finally by additional cheddar layer before crowning off everything else atop another piece sourdough spread side generously slathered previously prepared sage butter facing outward ready grill!
Step 4: Searing To Perfection
With sandwiches now assembled let’s move onto searing these beauties until perfectly browned crunchy exteriors beckon diners near! Heat up remaining tablespoon olive oil within skillet bringing temperature back up medium allowing oil shimmer indicates readiness ensuring no sticking occurs after placing first sandwich down gently press down firmly using spatula encouraging even browning across surface area cook approximately six minutes each side watching closely preventing over-browning flip once golden brown crust formed repeat same steps second batch if needed patience definitely pays off here trust me when I say crispy exterior paired rich melty filling creates sheer bliss upon tasting delicious creations crafted together today!
I hope you’re feeling excited as we journey through crafting this delightful Caramelized Onion and Apple Grilled Cheese Sandwich—it promises nothing short than satisfaction upon serving warm alongside favorite soup or salad enjoying company around table sharing stories laughter lasting memories created together through heartfelt meals shared amongst loved ones truly defines comfort food essence itself don’t forget enjoy every moment take pleasure savoring deliciousness created within kitchens today… Bon appétit!
Step 5: Crafting the Flavorful Sage Butter
Ah, the sage butter! This is where your sandwich begins to take on a truly glorious personality. Start by taking those four tablespoons of room temperature unsalted butter and placing them in a small bowl. Then, sprinkle in that freshly chopped sage and one teaspoon of kosher salt. Now, here’s where the magic happens: using a fork or a spatula, mash and mix the sage into the butter until it’s well combined and fragrant. Trust me, this step is absolutely paramount because sage has such an earthy, aromatic quality that elevates every bite of your grilled cheese into a comforting embrace of flavors.
Once you have your sage butter ready, set it aside for a moment. You’ll want to let those flavors meld together while you assemble your sandwiches. Don’t skip this step! The longer the mixture sits, the more the herbs infuse into the butter, creating an utterly intoxicating spread that will add depth to your sandwich. I promise you; this little bit of patience will reward you with flavor that sings harmoniously with both the sweet caramelized onions and the crisp apple slices!
Step 6: Assembling Your Flavor Symphony
Now comes one of my favorite parts—assembling this masterpiece! Grab a slice of sourdough bread and lay it down on a clean cutting board or plate. This first slice is going to be the foundation for something truly extraordinary. Start by layering on those luscious slivers of brie cheese; it’s going to be melty and creamy, creating a beautiful contrast with all those other ingredients. Next up, sprinkle on about half of your grated cheddar cheese—this sharpness will balance wonderfully with the sweetness from our caramelized onions and apples.
Continue building by fanning out thin slices of honeycrisp apple over the cheese; don’t rush this step! Make sure they’re slightly overlapping but not overcrowded because each bite deserves that burst of freshness. Now for the pièce de résistance: take about a quarter cup of those beautifully caramelized onions we lovingly prepared earlier and pile them high over the apples. It’s crucial to distribute them evenly so each mouthful brings that rich sweetness we’ve worked so hard on achieving! Finally, finish off this heavenly stack with another generous layer of cheddar cheese before placing your second slice of sourdough bread on top like a cozy blanket.
Step 7: Ready for Grilling Bliss
At this point, you might be feeling pretty proud of your creation—and rightly so! But we’re not done yet; it’s time to get these sandwiches sizzling in a skillet! Heat up a non-stick skillet over medium heat and add one tablespoon of olive oil. This step is incredibly important because it helps create that golden crust we all crave while preventing any sticking or tearing as we flip our sandwich later on.
While the skillet heats up—take a moment!—and spread about one tablespoon of your fragrant sage butter generously over the top slice of bread before placing it in the skillet, butter side down. You want that warm embrace from the butter to meld with our already flavorful assembly as it sizzles away. After carefully laying down your sandwich in the pan, spread an additional layer of sage butter onto the exposed top side as well. This double layer ensures maximum flavor infusion while also ensuring that gorgeous golden crust develops as it grills.
Step 8: Perfecting That Golden Crust
Now comes one of my absolute favorite parts—the grilling! Allow your sandwich to cook undisturbed for about six minutes before peeking underneath (but resist flipping too early!). You want to see that gorgeous golden-brown color forming—a sign that all those wonderful ingredients are melding together beautifully inside. The key here is patience; rushing means losing out on that crispy texture which is non-negotiable for a truly satisfying grilled cheese experience.
After six minutes have passed, gently flip your sandwich using a sturdy spatula—if there’s any resistance at all when flipping, give it another minute or so before attempting again; trust me on this one! Allow it to cook for an additional six minutes until both sides are perfectly crisped and browned like liquid gold against each other. If you find yourself craving even more richness (and who doesn’t?), consider adding another dab of sage butter around the edges of your cooking sandwich during this time; it’ll melt in beautifully while enhancing that decadent flavor profile even further!
Final Touches: Savoring Every Moment
Once both sides are gloriously golden brown and crispy perfection has been achieved, carefully remove each sandwich from the skillet and let them rest for just a minute or two—it might feel torturous to wait but trust me; letting them rest allows all those incredible flavors to settle into their rightful places within those layers!
As you cut through each sandwich, watch how gooey that cheddar is surrounded by sweet apples and smoky onions—it’s nothing short of mesmerizing! Serve these beauties warm with perhaps a side salad or some homemade vegetable soup if you’re feeling ambitious (and why wouldn’t you?). Each bite is not just food but an experience—a deeply satisfying journey through fall flavors that wraps you in warmth just like grandma used to do with her famous hugs.
So go ahead; dig in with gusto knowing you’ve created something magical today—a Caramelized Onion and Apple Grilled Cheese Sandwich that’s bound to become an instant classic among family favorites! Enjoy every moment—you deserve it!
Storage and Enjoyment Tips for Your Caramelized Onion and Apple Grilled Cheese Sandwich
Oh, my friends, what a marvelous culinary adventure we’ve embarked on together! As you take that first glorious bite of your Caramelized Onion and Apple Grilled Cheese Sandwich, the taste of sweet caramelized onions mingling with crisp apple slices and gooey cheese is nothing short of magical. But let’s not forget about the joy of savoring this creation later! Whether you’re planning to indulge in leftovers or save some for another day, I have you covered with essential storage tips to keep that delightful flavor intact.
Storing Leftover Caramelized Onion and Apple Grilled Cheese Sandwich
When it comes to storing those luscious leftover sandwiches, I recommend using an airtight container to lock in every ounce of that deliciousness. Place them in the fridge where they can happily chill for up to three days. Trust me, this is crucial for maintaining their scrumptious integrity! To keep the bread from getting too soggy—a common enemy of grilled cheese—try placing a paper towel inside the container. This little trick absorbs extra moisture while allowing your sandwiches to breathe just enough. Now, here’s the fun part: when you’re ready to enjoy them again, give them a quick reheat in a skillet over low heat. This way, you’ll bring back that golden crust and ooey-gooey cheese, making it feel as if it was just made fresh from the pan. Each bite will remind you why you loved them so much in the first place!
Freezing Components for Later
Now, if you’re like me and love meal prepping or simply want to have this deliciousness at your fingertips whenever a craving strikes, freezing is an absolute game changer! For optimal results, I suggest freezing only the caramelized onions and sliced apples separately—this ensures they retain their flavors beautifully. Let those caramelized onions cool completely before transferring them into a freezer-safe bag or container; they can last up to three months frozen! On a busy weeknight when time is scarce but cravings are high, simply pull out what you need and let them thaw in the fridge overnight or pop them straight into your skillet while you’re preparing your sandwich. The convenience of having these delightful elements prepped ahead of time means that you can whip up a new masterpiece in no time at all. It’s like having a secret stash of happiness waiting patiently for you!
So whether it’s savoring your freshly made sandwiches or enjoying those delectable leftovers later on, I promise you’ll find joy in every bite!
Conclusion:
As we wrap up our journey through this enchanting recipe, I can’t help but feel excited about what we’ve created together—the Caramelized Onion and Apple Grilled Cheese Sandwich isn’t just another meal; it’s a celebration of flavors that dance harmoniously on your palate! The combination of sweet caramelized onions melded with tart apple slices creates an utterly intoxicating experience, while the rich cheeses add layers of creamy goodness that elevate this dish beyond ordinary comfort food. Each component has its role in crafting this extraordinary delight; I hope my passion shines through as brightly as this sandwich does on your plate.
This recipe is an absolute must-try—not just because it tastes amazing but also due to the sheer joy that comes with making it. Picture yourself gathering around the kitchen with friends or family, laughter filling the air as you whip up these sandwiches together. They shine during cozy fall evenings when all you want is something warm and comforting or even during casual weekend brunches when life feels leisurely and sweet. The aroma wafting through your home as they cook will draw everyone near—there’s something profoundly satisfying about pulling these golden beauties off the stove!
Imagine savoring one with a side of homemade tomato soup—oh my goodness, that’s comfort food perfection right there! For an afternoon pick-me-up, pair it with a crisp green salad tossed with vinaigrette; the acidity perfectly balances the richness of the sandwich. And if you’re feeling adventurous for dessert afterward? Treat yourself to some fresh fruit or melt-in-your-mouth chocolate treats because why not indulge after such an exquisite main course?
Feeling adventurous? This recipe is wonderfully adaptable! You could swap out honeycrisp apples for tart Granny Smiths if you’re craving more zing or even experiment with different cheeses—perhaps gouda or pepper jack for some spice! If you’re looking to lighten things up slightly without sacrificing flavor, try adding some sautéed spinach alongside those heavenly caramelized onions—it adds color and nutrition without compromising taste. Don’t hesitate to explore—you might stumble upon your own perfect variation! So grab those ingredients, gather your loved ones around, and dive into creating something magical together; I can’t wait to hear how yours turns out!
Caramelized Onion and Apple Grilled Cheese Sandwich

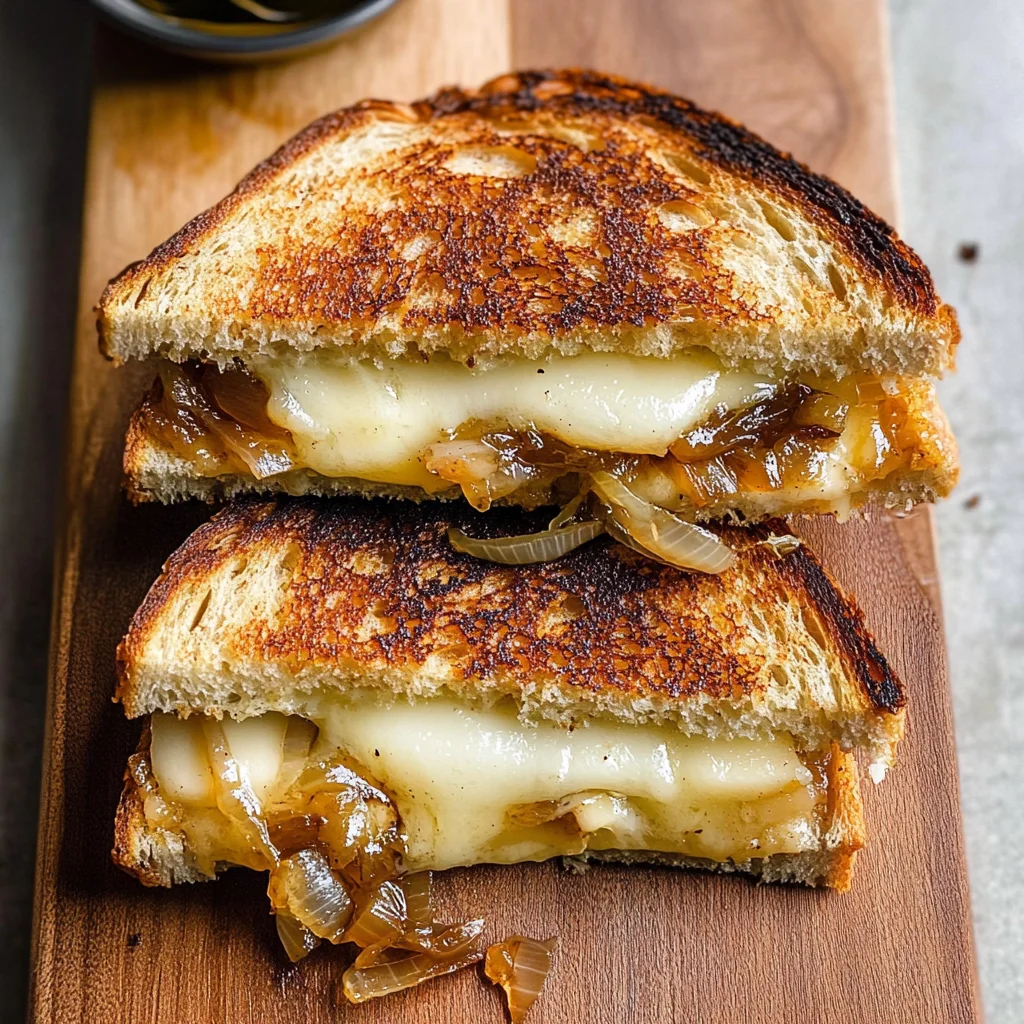
Indulge in the warmth of autumn with the Caramelized Onion and Apple Grilled Cheese Sandwich—a delightful twist on a classic comfort food. This gourmet sandwich features layers of gooey cheddar and creamy brie, perfectly balanced by the sweet richness of caramelized onions and the crisp tartness of honeycrisp apples, all nestled between crispy, golden-brown sourdough bread. Each bite transports you to cozy evenings filled with laughter and warmth, making it the perfect dish to share with loved ones.
- Prep Time: 15 minutes
- Cook Time: 40 minutes
- Total Time: 55 minutes
- Yield: Serves 2 sandwiches 1x
- Category: Main
- Method: Grilling
- Cuisine: American
Ingredients
- 4 slices sourdough bread
- 1 tbsp fresh sage (chopped)
- 6 tbsp unsalted butter, divided (room temp)
- 1 honeycrisp apple (thinly sliced)
- 2 large yellow onions (sliced 1/2 inch thick)
- 8 oz cheddar cheese (grated)
- 2 oz brie cheese (sliced into 1/2" slivers)
- 2 tsp kosher salt
- 1 tbsp olive oil
Instructions
- Start by caramelizing the onions in butter over medium heat until deep golden brown (30-40 minutes).
- Mix room temperature butter with chopped sage and salt to create sage butter.
- Assemble the sandwich: layer brie, cheddar, apple slices, caramelized onions, and more cheddar between two slices of sourdough.
- Spread sage butter on the outside of each slice.
- Grill in a skillet over medium heat until both sides are golden brown and the cheese is melted (about 6 minutes per side).
Nutrition
- Serving Size: 1 sandwich (250g)
- Calories: 520
- Sugar: 10g
- Sodium: 720mg
- Fat: 28g
- Saturated Fat: 15g
- Unsaturated Fat: 11g
- Trans Fat: 0g
- Carbohydrates: 45g
- Fiber: 4g
- Protein: 21g
- Cholesterol: 60mg