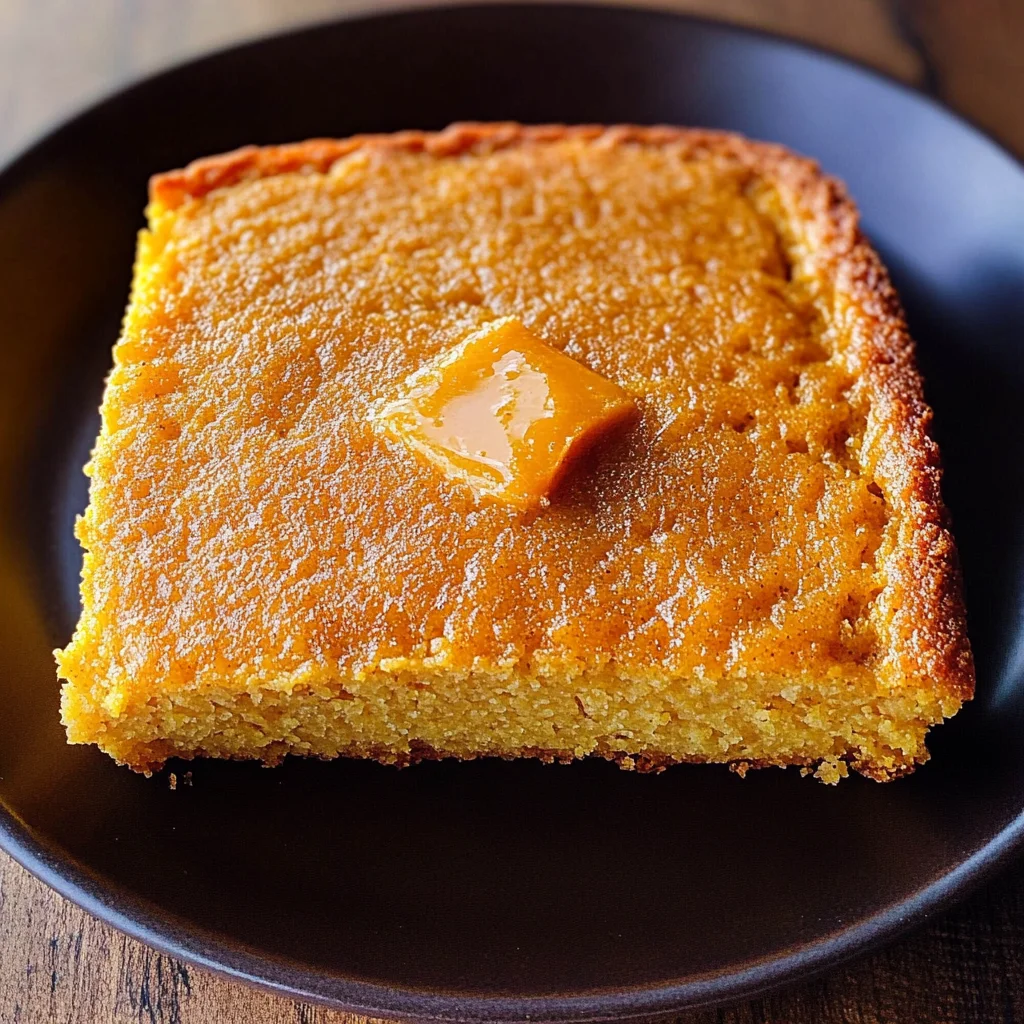
Brown Sugar Sweet Potato Cornbread
There’s something profoundly beautiful about cooking that transcends mere sustenance; it’s an art form, a way to connect with our roots and share joy with those we love. This Brown Sugar Sweet Potato Cornbread is not just a recipe; it’s a heartfelt invitation to experience the warmth of home, the laughter of family gatherings, and the comfort of cherished memories. Imagine stepping into a cozy kitchen, where the aroma of sweet potatoes mingles with the rich scent of warm cornmeal baking in the oven. The moment you take your first bite, you’re enveloped in a symphony of flavors—a delightful fusion between a tender corn muffin and a slice of sweet potato pie. I promise you, this cornbread will become your go-to dish for both casual meals and special occasions.
This dish has been passed down through generations in my family, embodying a sense of tradition while allowing for personal twists. It’s perfect for holiday feasts or simply as a cozy side to accompany your favorite soup on a chilly evening. The beauty lies not only in its taste but also in its versatility; it pairs beautifully with savory dishes or can hold its own as a deliciously sweet treat. Trust me on this one: once you try this Brown Sugar Sweet Potato Cornbread, you’ll understand why it holds such a special place in my heart.
Brown Sugar Sweet Potato Cornbread: A Harmonious Blend of Sweetness and Comfort
You’re about to embark on a delightful culinary journey! With its moist texture and subtle sweetness, this cornbread brings an element of nostalgia that feels like a warm embrace. As we gather our ingredients and tools, let’s dive deep into what makes each component essential for crafting this flavorful treat.
Ingredients:
As we gather our ingredients for this lovely cornbread recipe, let’s take a moment to appreciate each one’s role in creating this masterpiece. Cooking with intention not only elevates the flavor but also enhances our connection to the food we make.
- 1 1/4 cups self-rising cornmeal. This golden-yellow staple is what gives our cornbread its distinct flavor and texture. Self-rising cornmeal contains baking powder and salt which simplifies our process—no need for extra leavening agents! Look for finely ground cornmeal for that perfect lightness; it should feel soft to the touch rather than gritty. If you can’t find self-rising cornmeal, you can easily make your own by combining regular cornmeal with baking powder and salt.
- 1 cup all-purpose flour. Flour is another key player here; it provides structure while balancing out the moisture from the sweet potatoes. All-purpose flour works beautifully as it helps achieve that tender crumb we’re aiming for in our Brown Sugar Sweet Potato Cornbread. Opt for unbleached flour if possible—it has more nutrients and flavor than bleached varieties.
- 1 cup sweet potato mashed. Sweet potatoes are not just delicious; they bring natural sweetness and moisture to our cornbread that is simply divine. When selecting sweet potatoes, look for ones that are firm with smooth skin—this ensures they’ll be sweet and creamy once cooked. You can roast or steam them before mashing; I often prefer roasting because it caramelizes their sugars beautifully.
- 1 teaspoon baking powder. This ingredient is crucial because it provides lift during baking, ensuring our cornbread has that lovely rise. While we’re using self-rising cornmeal, an additional kick from baking powder will enhance the fluffiness even more—don’t skip this step!
- 1/2 teaspoon baking soda. Baking soda works hand-in-hand with acidity (which we’ll find later) to create carbon dioxide bubbles that help the batter rise further during baking. It’s an essential part of achieving that light texture.
- 3/4 teaspoon salt. Salt may seem simple, but it’s paramount in balancing flavors—all sweetness needs a little salt to truly shine! It enhances every bite, making the overall experience absolutely extraordinary.
- 1 cup whole milk. Milk adds richness and moisture to our cornbread batter while also helping activate our leavening agents properly when mixed in with other wet ingredients. Whole milk creates creaminess which takes this cornbread to another level; if you’re looking for alternatives, unsweetened almond or oat milk can work wonders too!
- 1/2 cup butter melted. Butter brings flavor and tenderness; it’s essential for achieving that melt-in-your-mouth quality we all adore in baked goods! Melted butter ensures even distribution throughout the batter—just make sure it’s cooled slightly so you don’t scramble your eggs when combining.
- 2 eggs lightly beaten. Eggs are non-negotiable—they bind everything together while providing moisture and richness necessary for structure within our cornbread! Lightly beating them before adding allows them to incorporate smoothly into the batter without any streaks.
- 1/2 cup brown sugar. Ahh, brown sugar—the star of sweetness! It adds complexity thanks to its molasses content which contributes deeper flavors compared to granulated sugar alone. The caramel notes pair beautifully with sweet potatoes creating an unforgettable taste experience!
- 1 teaspoon vanilla. Vanilla extract might seem like an optional addition but trust me—it elevates flavors incredibly! Just a splash turns simple ingredients into something magical by enhancing sweetness without overpowering other elements at play here.
- 1 tablespoon molasses. Molasses adds depth along with sweetness while keeping things moist—that’s what makes this cornbread utterly intoxicating! If you don’t have molasses on hand or want less sugar overall, consider using maple syrup instead—just adjust quantities accordingly!

Equipment You’ll Need:
Before diving into making our scrumptious Brown Sugar Sweet Potato Cornbread, let’s talk about some essential tools that will make your cooking experience smoother and more enjoyable! Having reliable equipment at hand transforms cooking from a chore into an exciting adventure!
- Large mixing bowl – A sturdy bowl is vital when combining ingredients; it allows ample space for mixing without spilling over! Opting for glass or stainless steel means durability plus easy cleanup afterward—two major wins!
- Whisk or electric mixer – For blending wet ingredients seamlessly together before folding them into dry ones later on—ensure there are no lumps left behind! A whisk gives you control over texture whereas an electric mixer saves time if you’re whipping up large batches (and who wouldn’t want extras?).
- Cast iron skillet (or baking dish) – I adore using cast iron skillets because they retain heat beautifully which helps create that coveted crispy crust on your cornbread while maintaining softness inside—it really is worth investing in one if you haven’t already!
- Measuring cups & spoons – Precision matters when it comes to baking! Accurate measurements ensure consistent results every time so definitely keep these handy—they’ll be your best friends throughout this process.
With all these wonderful components ready at hand, let’s get started on preparing your magnificent Brown Sugar Sweet Potato Cornbread that’ll fill your home with warmth and joy!
Step 1: Combining Dry Ingredients
To begin crafting this delicious cornbread, we’ll start by gathering those dry ingredients together—this step sets the foundation for everything else ahead! In your large mixing bowl (the one you’ve chosen), combine 1 ¼ cups self-rising cornmeal alongside 1 cup all-purpose flour followed by ½ cup brown sugar—which will add just enough sweetness—and then finally sprinkle in 1 teaspoon baking powder along with ½ teaspoon baking soda plus ¾ teaspoon salt too! The reason behind mixing these dry elements first is simple: it ensures even distribution throughout your batter later on—a crucial aspect that guarantees consistent taste across each slice you serve up!
Step 2: Preparing Wet Ingredients
Now let’s focus on creating those wet components which give life (and moisture) back into our mixture! In another bowl (preferably medium-sized), take your prepared mashed sweet potato (about one full cup) alongside two lightly beaten eggs already waiting patiently there too—you’ll want them combined well before moving forward so whisk gently until blended nicely together without streaks remaining visible anymore either way! Then pour in half-a-cup melted butter plus one full cup whole milk along with one teaspoon vanilla extract & tablespoon molasses—each offering unique layers upon layers of flavor yet again—it becomes truly extraordinary once combined effectively later down this road ahead…
Step 3: Merging Dry & Wet Mixtures
Alrighty then—now comes perhaps my favorite part where all these delightful elements unite harmoniously together! Carefully pour those beautiful wet components right into those dry ones previously mixed earlier… Now here’s where patience pays off: use either spatula or whisk gently—just enough motion needed here until mostly incorporated though do avoid overmixing since doing so risks making tough bread instead of fluffy goodness as desired instead… Once combined nicely yet still lumpy—that’s perfect—we’re eager now toward finalizing things shortly!
Step 4: Prepping Cast Iron Skillet
As we prepare everything towards final stages now ahead—we mustn’t forget about preparing cast iron skillet next up here folks… So grab yours from wherever stored away & begin heating over medium-high heat (remember safety first!) until hot enough—and then pour remaining melted butter directly onto surface evenly coating bottom nicely too… This step proves vital because browning gives us extra flavorful crust forming soon upon placing batter down afterward right away following shortly behind moments later…
With each step bringing us closer toward indulging ourselves within slices filled overflowing happiness & warmth—I can hardly contain excitement bubbling forth just thinking about sinking teeth right inside freshly baked goodness soon enough coming out oven crisp outside yet oh-so-soft within too… Let’s keep going shall we?
Step 5: The Sweet Symphony of Flavor Blending
Now that you have your dry ingredients beautifully combined, it’s time to mix the wet ones. In a separate bowl, take your one cup of mashed sweet potato—make sure it’s smooth and creamy, like a warm hug on a chilly day. The secret here is to really beat together the sweet potato with the lightly beaten eggs, melted butter, and vanilla extract until everything is harmoniously blended. Why do I stress blending? Because this step ensures that every bite of your Brown Sugar Sweet Potato Cornbread will be imbued with that delightful sweetness and richness we all adore. The sweet potato acts as a natural sweetener while also providing moisture, making your cornbread incredibly tender. It’s this combination of flavors—the earthy sweetness from the sweet potato paired with the warmth of vanilla—that creates an utterly intoxicating base for what’s to come.
Once you’ve got that mixture looking like a creamy dream, it’s time to bring it all together. Pour this luscious sweet potato concoction right into the bowl containing your dry ingredients. At this point, don’t rush; gently stir it together until most of the flour is incorporated but still leave some lumps. This is crucial because overmixing can lead to dense and tough cornbread—nobody wants that! Instead, aim for a batter that is slightly lumpy yet cohesive; this will give you a beautifully fluffy texture once baked. Trust me on this: the more love you pour into mixing without overdoing it, the more satisfying each mouthful will be!
Step 6: Whisking in Liquid Gold
With our batter now at its perfect consistency, let’s add in the milk—this is where things get even more interesting! Gradually whisk in one cup of whole milk into your mixture. Whole milk is non-negotiable here because it adds richness and depth that low-fat or non-dairy alternatives simply can’t replicate in this context. As you fold it in gently, you’ll notice how the batter transforms into something smooth and silky—it’s almost magical! This step not only hydrates your ingredients but also helps to create a tender crumb structure essential for any great cornbread.
Take a moment to appreciate how inviting your batter looks; this is when I always take a deep breath and inhale those tempting aromas wafting from the mixture—can you smell that? It’s pure comfort waiting to happen! Just remember, don’t go crazy whisking away; we want to keep some texture in there. A good rule of thumb is to stop mixing when no dry flour remains visible but small lumps are still evident; if you see any large pockets of flour—just let them be! They’ll bake out beautifully in the oven.
Step 7: Preparing Your Cast-Iron Skillet
Next up is preparing our beloved cast-iron skillet—a true culinary treasure! If you’ve never baked cornbread in cast iron before, you’re in for an extraordinary treat. Start by placing your skillet on medium heat on the stovetop and adding half a cup of salted butter. As the butter melts, it will begin to bubble and foam; this is where patience comes in again! Let it cook just until it turns golden brown—this “browning” process not only enhances flavor but also gives your cornbread an absolutely divine crust that contrasts beautifully with its soft interior.
This step may seem simple, yet it’s absolutely paramount for achieving that perfect golden crust we all crave! Once browned (think nutty aroma), carefully swirl the melted butter around to coat the bottom and sides of your skillet evenly. Then pour in your ready-to-go batter immediately after—you want it hitting that hot skillet right away so it creates an irresistible sizzle upon contact! This technique is what lends our Brown Sugar Sweet Potato Cornbread its signature crunchy exterior while keeping the inside moist and tender.
Step 8: Baking Your Perfect Cornbread
Now comes perhaps the most thrilling part—baking! Slide that pan into a preheated oven set at 375 degrees Fahrenheit and let those beautiful flavors meld together for about 25 minutes. As your cornbread bakes, you’ll notice how it begins to rise majestically—and trust me, that sight alone will make your heart sing! During baking, you’ll want to keep an eye out for two key visual cues: first, check if the edges pull away slightly from the sides of the pan; second, look for a golden-brown top that’s firm yet springy when pressed gently in the center.
To test for doneness without cutting into this beauty too early (patience pays off!), insert a toothpick or knife into the center—it should come out clean or with just a few moist crumbs clinging to it. If there’s any wet batter on it when you pull it out? Oh honey, pop that back into the oven for another few minutes and check again; underbaking would rob you of all those lovely textures you’ve worked so hard on creating! Once it’s done baking and looks utterly irresistible—golden brown with an aroma wafting through your home—you know you’re just moments away from diving into pure bliss.
Final Touches: The Beauty of Cooling Down
Step 9: Cooling & Serving Your Masterpiece
Once you’ve removed your glorious Brown Sugar Sweet Potato Cornbread from the oven—a moment worthy of celebration—you might be tempted to dig right in. But hold on just a second! I know waiting might feel impossible at this stage when all you can think about is slathering some butter on top and taking that first heavenly bite—but trusting me here will pay off immensely! Allowing your cornbread to cool for about 10-15 minutes not only helps firm up its structure but also enhances those intricate flavors you’ve blended together so lovingly.
As it cools on a wire rack (or simply on top of your stove if you don’t have one), take this moment to contemplate how far you’ve come—from gathering ingredients to creating something truly extraordinary. The anticipation builds as you can still smell those lingering scents wafting through your kitchen like a warm embrace from old friends coming home. When you’re finally ready to slice into this beauty—oh my goodness—the texture should be soft yet sturdy enough to hold its shape while being utterly moist inside!
I promise you’ll find yourself wanting seconds (and maybe thirds) because each bite dances across your palate with layers of flavor that echo both sweetness from brown sugar and earthiness from sweet potatoes—a perfect balance worth celebrating at any meal or occasion! So there you have it—the complete journey through crafting Brown Sugar Sweet Potato Cornbread—a recipe meant not just for sharing but for savoring every moment spent creating delicious memories around food with loved ones. Enjoy every crumb!
Storage and Enjoyment Tips for Your Brown Sugar Sweet Potato Cornbread
Now that you’ve made this heavenly Brown Sugar Sweet Potato Cornbread, it’s time to relish the fruits of your labor! The aroma wafting through your kitchen is simply intoxicating, and I can already picture you serving up slices to eager family and friends. But what happens if you have some leftovers? Fear not! This cornbread is just as delightful the next day, and with a few simple storage tips, you can keep that comforting taste alive for another meal or snack.
Storing Leftover Brown Sugar Sweet Potato Cornbread
To store your leftover Brown Sugar Sweet Potato Cornbread, let it cool completely before wrapping it. I recommend placing it in an airtight container or tightly wrapping individual slices in plastic wrap. This helps seal in moisture while also preventing any unwanted fridge odor from sneaking in. When stored correctly, your cornbread will maintain its deliciousness for about 3 to 4 days in the refrigerator. For an extra touch of freshness, consider placing a slice of bread inside the container; this helps keep your cornbread moist and prevents it from drying out. After a day or two, you might notice that the sweet potato flavor deepens even further, creating a wonderfully rich experience when you take that first bite. To enjoy it again, simply pop it in the microwave for about 10-15 seconds or warm it up gently in a toaster oven until it’s heated through—trust me, there’s nothing quite like that warm, comforting embrace of freshly warmed cornbread!
Freezing Brown Sugar Sweet Potato Cornbread for Later
If you’re looking to save some of that scrumptious goodness for a later date, freezing is absolutely the way to go! To freeze your cornbread properly, start by slicing it into individual portions—this makes thawing so much easier when you’re ready for a treat. Wrap each slice tightly in plastic wrap and then place them in a freezer-safe bag or container. This ensures they stay protected from freezer burn and retain their delicious flavors. You can keep these delightful slices frozen for up to three months without sacrificing quality! When you’re ready to enjoy one (or two), simply remove them from the freezer and let them thaw on the counter for about 30 minutes or so. If you’re feeling impatient like I often am, you can also use the microwave method—just be sure to check on it every 15 seconds until it’s perfectly warmed through! The convenience of having this delicious cornbread at your fingertips is just one more reason why I adore this recipe so much!
Brown Sugar Sweet Potato Cornbread
Indulge in warm Brown Sugar Sweet Potato Cornbread that’s perfect for any meal. Try this delightful recipe today for pure comfort food bliss!
- Prep Time: 15 minutes
- Cook Time: 25 minutes
- Total Time: 40 minutes
- Yield: Approximately 8 servings 1x
- Category: Dessert
- Method: Baking
- Cuisine: American
Ingredients
- 1 1/4 cups self-rising cornmeal
- 1 cup all-purpose flour
- 1 cup mashed sweet potato
- 1/2 cup brown sugar
- 3/4 teaspoon salt
- 1 cup whole milk
- 1/2 cup melted butter
- 2 eggs (lightly beaten)
- 1 teaspoon vanilla extract
- 1 tablespoon molasses
Instructions
- Preheat your oven to 375°F (190°C) and prepare a cast iron skillet by melting butter in it over medium heat until golden brown.
- In a large mixing bowl, combine self-rising cornmeal, all-purpose flour, brown sugar, baking powder, baking soda, and salt.
- In another bowl, mix together mashed sweet potato, eggs, melted butter, milk, vanilla extract, and molasses until smooth.
- Pour the wet ingredients into the dry ingredients and stir gently until just combined; do not overmix.
- Immediately pour the batter into the prepared skillet and bake for about 25 minutes or until golden brown and a toothpick inserted comes out clean.
- Allow to cool for 10-15 minutes before slicing.
Nutrition
- Serving Size: 1 slice (70g)
- Calories: 210
- Sugar: 10g
- Sodium: 200mg
- Fat: 9g
- Saturated Fat: 5g
- Unsaturated Fat: 3g
- Trans Fat: 0g
- Carbohydrates: 30g
- Fiber: 2g
- Protein: 4g
- Cholesterol: 40mg