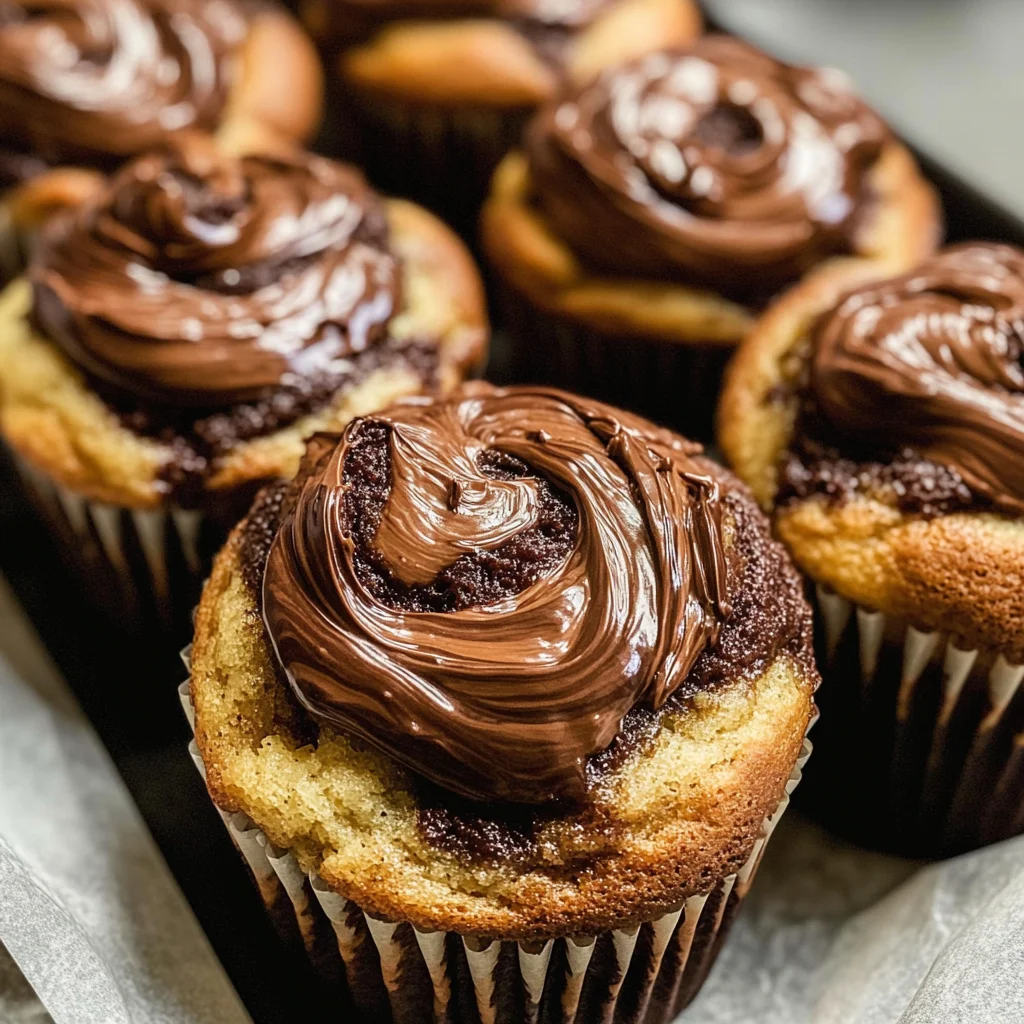
Nutella Swirled Banana Muffins
There’s something utterly enchanting about the aroma of freshly baked muffins wafting through the kitchen, wrapping you in a warm embrace as it mingles with the sweetness of ripe bananas and the rich, creamy allure of Nutella. The experience of making Nutella Swirled Banana Muffins transcends mere baking; it is a heartfelt journey that connects us to our roots while inviting an innovative twist into our lives. Each bite of these muffins promises a symphony of flavors, where the sweet earthiness of banana harmonizes with the luxurious chocolate-hazelnut swirls. It’s more than just food; it’s a celebration, a small joy that brightens even the dullest mornings or adds delight to any occasion.
I’ve always been captivated by how something so simple can evoke such profound satisfaction. These muffins are not just about their ingredients; they embody comfort and creativity, perfect for those moments when you want to indulge without overthinking – whether it’s a quick breakfast before rushing out the door or a cozy afternoon snack shared with friends. Trust me, once you take that first bite of these moist, flavorful wonders, you’ll understand why they quickly become a cherished favorite in your recipe repertoire.
Nutella Swirled Banana Muffins: A Sweet Symphony of Flavor
Let’s dive into this delightful recipe together! Making Nutella Swirled Banana Muffins is not only straightforward but also incredibly rewarding. You will find that every step is infused with love and care, ensuring that each muffin emerges from the oven perfectly golden and swirled with that indulgent hazelnut goodness that we all adore. So grab your apron and let’s embark on this culinary adventure!
Ingredients:
As we embark on this delightful culinary journey together, let’s take a moment to appreciate each ingredient that plays a vital role in creating our Nutella Swirled Banana Muffins. Every component has its purpose and contributes uniquely to the final masterpiece.
- 3 extremely ripe (even brown) bananas, mashed. The star of our show! Ripe bananas are essential for their natural sweetness and moisture content. When bananas begin to brown, their sugars concentrate, resulting in an irresistibly sweet flavor that elevates these muffins to new heights. Plus, using overripe bananas means less added sugar needed later—how brilliant is that? If you’re feeling adventurous or have some leftovers from previous recipes, feel free to freeze those bananas ahead of time; just thaw them before using!
- 6 tablespoons butter, melted. Butter adds richness and depth to our muffins. By melting it first, we ensure it blends seamlessly with other ingredients, creating a tender crumb. The warmth from the melted butter also helps release flavors from our other ingredients—think of it as liquid gold! Trust me on this: using high-quality butter will yield far superior results than margarine or substitutes.
- 2 eggs, room temperature. Eggs contribute structure and stability while helping bind everything together beautifully. Using eggs at room temperature ensures they emulsify more effectively with the batter for an even texture throughout our muffins. If you’ve forgotten to take them out ahead of time, simply place them in warm water for about 10 minutes!
- 3/4 cup nonfat Greek yogurt. This tangy addition keeps our muffins moist while adding protein—a wonderful way to give them some nutritional heft without sacrificing flavor! Greek yogurt also enhances tenderness thanks to its acidity which reacts wonderfully with baking soda (more on that in just a bit). Choose plain varieties for optimal flavor impact!
- 2 teaspoons vanilla extract. This aromatic ingredient is absolutely paramount for infusing warmth and adding complexity to our muffins’ flavor profile! Vanilla is one of those little touches that makes everything taste better; I promise you’ll notice how it elevates even simple recipes like this one.
- 2 cups all-purpose flour (can also substitute out 1/2 cup for 1/2 cup whole wheat flour). Flour provides structure for our muffins as it interacts with other wet ingredients during mixing—the gluten formed gives rise to those fluffy textures we crave! While all-purpose flour works perfectly here, substituting half for whole wheat flour adds nuttiness while increasing fiber content—a fantastic way to enjoy comfort food guilt-free!
- 1 teaspoon baking soda. This leavening agent does magic in creating lift within your muffins! When combined with acidic components like yogurt or banana (both present here), it releases carbon dioxide bubbles which expand during baking—resulting in those beautifully risen treats we’re after!
- 3/4 cup sugar. Sugar does more than sweeten; it helps retain moisture and creates tenderness in baked goods through caramelization during baking—adding subtle complexity too! You can adjust this quantity based on personal preference or experiment with alternatives like coconut sugar if desired.
- 1 teaspoon salt. A crucial yet often overlooked ingredient—it enhances sweetness by providing contrast! Salt brings forth flavors within every bite while balancing out sweetness levels—don’t skip this step!
- 2/3 cup Nutella. Ahh yes—the pièce de résistance! This luscious chocolate-hazelnut spread transforms standard banana muffins into something extraordinary by creating ribbons of indulgence throughout each bite! Melting it slightly before swirling ensures easy incorporation—though I won’t judge if you sneak some straight from the jar too!
Equipment You’ll Need:
Having the right tools makes all the difference when diving into this delightful baking adventure! While these items might not be ingredients, they are essential partners in crafting something truly wonderful.
- Muffin tin (giant or regular). This trusty tool shapes your muffins perfectly while allowing them to rise evenly during baking—crucial for achieving desirable height! If you’re making giant muffins for a brunch gathering or standard-sized ones for snacking throughout the week, both options work beautifully.
- Mixing bowls (large and medium). You’ll need these versatile vessels for combining wet and dry ingredients separately before folding them together—this method allows for thorough mixing without overworking the batter which can lead to tough results.
- Whisk and spatula (or wooden spoon). A whisk will help incorporate air into your wet ingredients efficiently—important when creaming butter or mixing eggs—and a spatula is vital for folding dry ingredients gently without deflating any air bubbles we’ve created along the way!
- Measuring cups and spoons: Precision counts when baking! Using proper measuring tools ensures accuracy in your ratios which ultimately affects texture & taste significantly.
Now that we have covered all our bases regarding ingredients and equipment let’s move forward into making these delectable Nutella Swirled Banana Muffins come alive in your kitchen!
Step 1: Preheat Your Oven & Prepare Your Muffin Cups
First things first—we want our oven at precisely 350ºF because this temperature is optimal for allowing our banana muffins to bake evenly without drying out too quickly; trust me when I say timing matters here! While that’s heating up, go ahead and spray your muffin cups (whether giant or regular) generously with cooking spray—it creates an effortless release after baking so none of your delicious creations get left behind clinging stubbornly inside their molds! Setting up now saves time later when you’re eager to devour these warm treats fresh outta the oven!
Step 2: Combine Wet Ingredients
In a large bowl, start by mashing those ripe bananas until smooth—this should be relatively easy considering their state—but don’t rush this step; truly mashing them well integrates better into the batter yielding moist results throughout each muffin instead of banana lumps here-and-there later on down-the-line! Once mashed adequately combine them with melted butter—it’s important they meld together nicely because melted butter adds richness while enhancing overall flavor profiles through further blending motions as we add additional wet components next: mix in eggs followed by Greek yogurt then finish off by drizzling vanilla extract over everything before stirring thoroughly until fully incorporated—you want every ounce of flavor present in each bite after all!
Step 3: Mix Dry Ingredients Separately
Now comes another essential step: gathering all dry elements including flour(s), baking soda/salt/sugar together within another bowl ensuring uniform distribution across mixtures thereby preventing clumps from forming later during folding stages where incorporating both wet/dry should happen harmoniously rather than chaotically resulting potentially undesirable lumps post-baking… Yikes!! Use either whisk/spatula combo here so no lumps remain visible at end result—I always find taking care at this stage pays enormous dividends later down road when tasting slices fresh outta oven!!
Step 4: Fold Dry Into Wet Mixture
With both bowls prepped up nicely it’s now time fold dry components into previously prepared wet ones slowly yet surely until just combined without overmixing occurring (remember what I mentioned earlier about avoiding toughened textures?). Gently working around edges/scraping bottom areas ensures nothing sticks plus helps achieve lightness necessary beforehand achieving desired end product texture-wise—a fluffy muffin versus dense brick-like entity sounds much more appealing right? Keep an eye on consistency too—it should appear somewhat thick but pourable enough still allowing ease pouring directly into prepared muffin tins waiting patiently nearby… Almost there friends!!
And there we have it—the first steps toward creating these magnificent Nutella Swirled Banana Muffins are set into motion! I’m so excited for you to continue through this process because I know without doubt once completed everyone will absolutely cherish partaking amidst warm bites filled heavenly swirls throughout entire experience… Stay tuned as we delve deeper into melting chocolatey goodness next—it’s going get even better!!
Step 5: Whisking the Wet Ingredients Together
Now that we have our dry ingredients waiting patiently, let’s turn our attention back to the wet ingredients. In a large mixing bowl, take your beautifully mashed bananas—those brown, speckled gems are actually your best friends in this recipe, as they bring an unparalleled sweetness and moistness. Pour in the melted butter; this is like liquid gold for your muffins, enriching every bite with a luscious richness. Next comes the room temperature eggs—trust me when I say that using eggs at room temperature is absolutely paramount to achieving a uniform batter. They incorporate better and help create a fluffier texture, which is precisely what you’re aiming for.
Add in the tangy nonfat Greek yogurt; its creaminess not only adds moisture but also a delightful depth of flavor that will make your muffins sing. Finally, don’t forget about the vanilla extract! This fragrant essence ties everything together, making each muffin taste like a warm hug on a chilly day. Gently stir the mixture until everything is well combined but be careful not to overmix—it’s okay if there are a few lumps from the bananas! This step is essential because overmixing can cause your muffins to turn out dense instead of light and airy. So take your time here; let those beautiful flavors meld together into something truly extraordinary.
Step 6: Combining Dry Ingredients – The Key to Muffin Perfection
Now that we’ve whisked our wet ingredients into a creamy blend of goodness, it’s time to tackle the dry ingredients. In another bowl, measure out two cups of all-purpose flour—feel free to substitute half with whole wheat flour if you’re looking for extra nutrition and a nuttier flavor profile. Add in one teaspoon of baking soda and one teaspoon of salt; these two components are crucial! The baking soda acts as the leavening agent that helps your muffins rise beautifully while keeping them soft and fluffy, while salt enhances the flavors throughout the batter—it’s not just a seasoning; it brings everything together harmoniously.
Pour in three-quarters of a cup of sugar; this sweetener plays a vital role, balancing out the natural earthiness of the bananas and providing that crave-worthy sweetness we all adore in baked goods. At this point, you’ll want to gently fold these dry ingredients into your wet mixture. A rubber spatula or wooden spoon works wonders here—just be careful not to overmix! This step is so important because overworking the batter can lead to gluten development, resulting in tough muffins rather than tender morsels of joy. You want just enough mixing until no dry bits remain visible, creating a batter that’s thick yet pourable—a gorgeous canvas ready for your Nutella swirls.
Step 7: The Nutella Magic – Swirling It In
Ahh, now we arrive at one of my favorite moments—the Nutella! This chocolate-hazelnut spread is like an artist’s brush waiting to add strokes of flavor to our muffins. Before diving into this step, pop your jar of Nutella in the microwave for about 20 seconds; this will soften it up considerably and make it easier to drizzle over our muffin batter. Trust me on this—it makes swirling so much simpler and more effective!
Once you’ve melted it down just enough so it’s pourable but still holds its shape (think thick syrup), it’s time for some fun! Take your prepared muffin tin filled with batter and drizzle about two-thirds of a cup of Nutella across the tops generously—but don’t just dump it all on top! Instead, use a knife or toothpick to gently swirl it into the batter. Here’s where creativity comes into play—think of those beautiful swirls as little rivers running through each muffin. This isn’t merely for looks; these swirls will provide pockets of intense chocolatey goodness that will melt in your mouth with every bite. Just be careful not to mix too vigorously—you want distinct ribbons of Nutella visible throughout rather than fully incorporated chocolate.
Step 8: Baking Your Perfect Muffins – Timing is Everything
With our stunningly swirled muffins ready to go, let’s talk baking—the moment we’ve been eagerly awaiting! Preheat that oven to an inviting 350ºF (about 175ºC). This temperature is ideal as it allows our muffins to rise gently without burning or drying out too quickly—imagine how utterly intoxicating your kitchen will smell during this process! If you’re using giant muffin cups (which I highly recommend if you crave something truly indulgent), place them lovingly in your muffin tin and bake for about 20-25 minutes. For standard-sized muffins, aim for around 15-20 minutes instead.
So how do you know when they’re done? Inserting a knife or toothpick into the center should yield no sticky batter; however, remember that if it comes out clean with just a few crumbs attached—that’s perfectly fine! It indicates they’re beautifully baked but still incredibly moist inside—a crucial balance we strive for. Once they reach that state of perfection, pull them out and allow them to cool in their tins for about 15 minutes before transferring them onto wire racks or simply serving them warm right away if you can’t resist any longer! The patience required during cooling ensures that their structure holds beautifully while allowing those flavors to deepen even further.
Final Touches: Savoring Every Moment
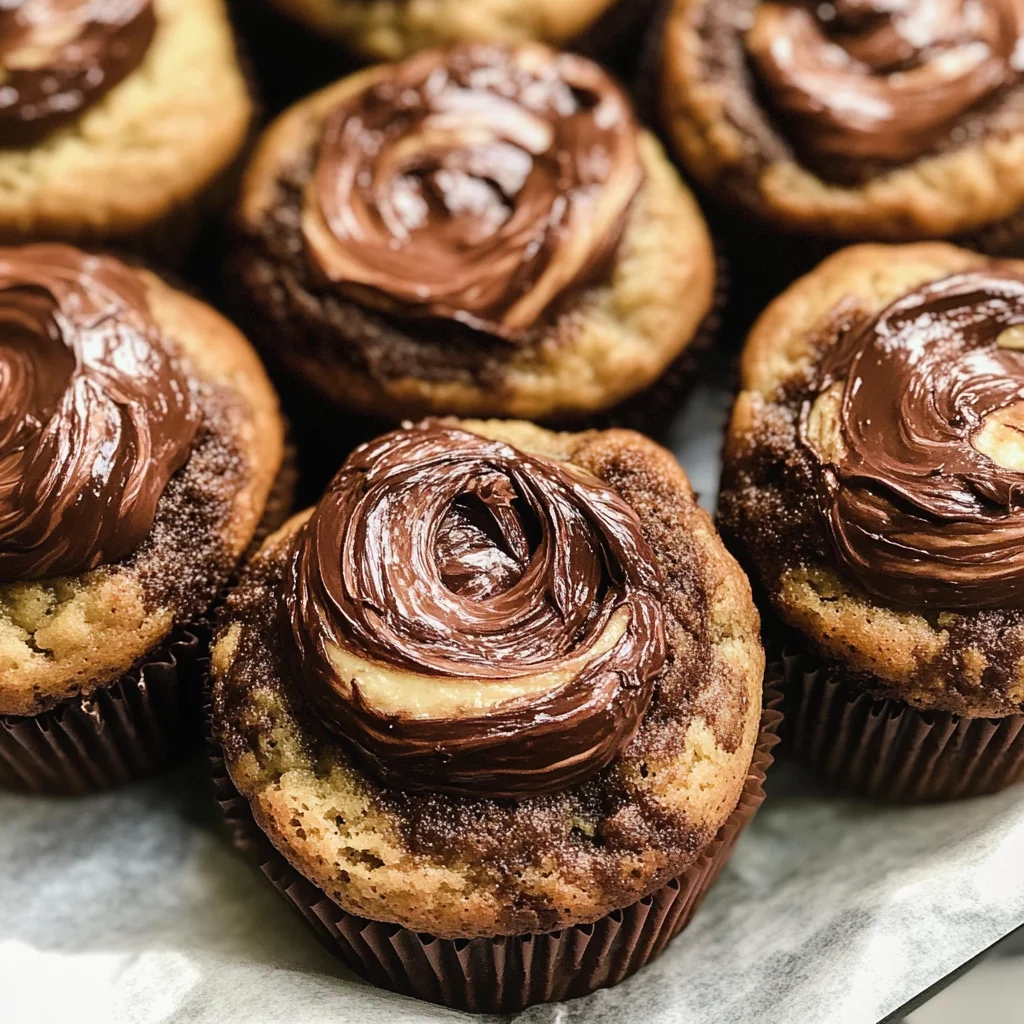
As you stand back admiring those golden-brown Nutella Swirled Banana Muffins cooling on your counter, take a moment to appreciate what you’ve created—a labor of love filled with warmth and flavor that fills both heart and home with joy. Each muffin promises layers upon layers of deliciousness just waiting to be explored. Whether enjoyed fresh from the oven or later paired with afternoon tea or coffee (or perhaps as breakfast on-the-go!), these muffins are sure to become an instant favorite.
When you’re ready to dig in (and trust me—you won’t want to wait too long!), break one open while it’s still warm and watch as molten ribbons of Nutella ooze out—this moment alone is worth every ounce of effort spent creating these bites of bliss. Feel free to share with family and friends or keep them all for yourself (no judgment here!). Either way, you’ll find joy in every single bite because these aren’t just muffins—they’re little pieces of happiness crafted from love and some very special ingredients.
Happy baking!
Storage and Enjoyment Tips for Your Nutella Swirled Banana Muffins
The moment your Nutella Swirled Banana Muffins emerge from the oven, a captivating aroma will envelop your kitchen, making it nearly impossible to resist diving in right away. Trust me, each muffin is a warm, gooey delight just waiting to be savored. But what happens when you have some delightful leftovers? Fear not! These treasures can be stored and enjoyed later, preserving that deliciousness for another day.
Storing Leftover Nutella Swirled Banana Muffins
To keep your muffins fresh and flavorful, it’s best to store them in an airtight container at room temperature. This helps lock in that moist, tender texture that makes every bite so profoundly satisfying. They’ll stay delicious for about 3-4 days—if they last that long! If you happen to have some leftover muffins (a rare feat!), I recommend placing a slice of bread in the container with them; this little trick works wonders in keeping the muffins moist. When you take a bite after a day or two, you’ll find the flavors have melded beautifully, creating an even more intoxicating taste experience. When it’s time to indulge again, just pop them in the microwave for about 15-20 seconds or enjoy them at room temperature—either way, they’re sure to bring joy.
Freezing Nutella Swirled Banana Muffins for Later
If you want to stockpile these beauties for future cravings—or perhaps prep ahead for a busy week—freezing is an absolutely fantastic option! To freeze your muffins properly, allow them to cool completely first. Then individually wrap each muffin in plastic wrap or place them in a freezer-safe bag, squeezing out as much air as possible before sealing. They can be kept frozen for up to three months without losing their delightful flavor and texture! When you’re ready to enjoy one (or two), simply remove them from the freezer and let them thaw at room temperature or pop them straight into the microwave for a quick warming. This is such a huge convenience; imagine having these divine treats ready at your fingertips whenever that sweet craving strikes!
Nutella Swirled Banana Muffins
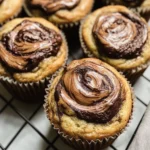
Indulge in the delightful experience of baking Nutella Swirled Banana Muffins, where the sweet fragrance of ripe bananas mingles with rich chocolate-hazelnut swirls. These muffins are not only easy to prepare but also offer a comforting treat perfect for breakfast or a snack. With each bite, you’ll savor the moist texture and enjoy the harmonious blend of flavors that create an unforgettable culinary delight. Imagine pulling these golden treasures from the oven, their inviting aroma beckoning you to take a bite. Ideal for sharing with loved ones or enjoying solo, these muffins will quickly become a staple in your recipe repertoire.
- Prep Time: 15 minutes
- Cook Time: 20 minutes
- Total Time: 35 minutes
- Yield: Approximately 12 muffins 1x
- Category: Breakfast
- Method: Baking
- Cuisine: American
Ingredients
- 3 extremely ripe bananas, mashed
- 6 tablespoons melted butter
- 2 eggs, room temperature
- 3/4 cup nonfat Greek yogurt
- 2 teaspoons vanilla extract
- 2 cups all-purpose flour (or half whole wheat flour)
- 1 teaspoon baking soda
- 3/4 cup sugar
- 1 teaspoon salt
- 2/3 cup Nutella
Instructions
- Preheat your oven to 350ºF and prepare muffin tins with cooking spray.
- In a large mixing bowl, mash bananas until smooth. Stir in melted butter, then add eggs, Greek yogurt, and vanilla extract until combined.
- In another bowl, whisk together flour(s), baking soda, salt, and sugar.
- Gently fold the dry ingredients into the wet mixture until just combined.
- Drizzle warmed Nutella over the batter and swirl gently using a knife.
- Pour into muffin tins and bake for 15-25 minutes (depending on size), until a toothpick comes out clean.
- Allow cooling for 15 minutes before serving.
Nutrition
- Serving Size: 1 muffin (75g)
- Calories: 215
- Sugar: 14g
- Sodium: 200mg
- Fat: 8g
- Saturated Fat: 5g
- Unsaturated Fat: 3g
- Trans Fat: 0g
- Carbohydrates: 34g
- Fiber: 1g
- Protein: 4g
- Cholesterol: 30mg