Butterscotch Crunch Cake
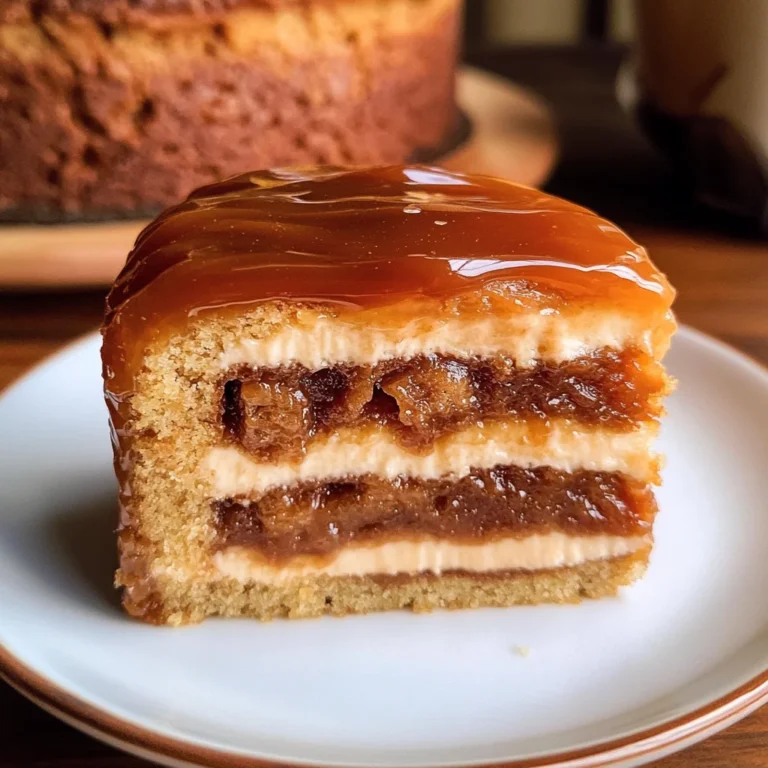
The aroma of baking is a magical thing, isn’t it? It fills the air with warmth and love, wrapping you in a cozy embrace. Whenever I prepare my Butterscotch Crunch Cake, I can’t help but feel a wave of nostalgia wash over me, as if each bite carries with it echoes of laughter and shared moments around the table. This cake is not just a dessert; it’s an experience that brings people together, offering that perfect blend of sweet and salty that dances on your palate. Imagine diving into a slice of this moist cake, where luscious butterscotch melds with a crunchy topping—each forkful is a celebration in itself!
What really captivates me about this recipe is how it bridges the traditional flavors of comfort food with a touch of modern flair. Butterscotch, often overshadowed by its chocolate counterpart, deserves its moment in the spotlight! The way its rich, buttery notes caress your taste buds is truly extraordinary. Plus, the delightful crunch from the topping adds an unexpected twist that elevates this cake to new heights. Whether it’s for a cozy family gathering or a festive celebration, this Butterscotch Crunch Cake is bound to become your new go-to dessert that leaves everyone asking for seconds.
Butterscotch Crunch Cake: A Symphony of Sweetness and Texture
Let’s embark on this delicious journey together! This Butterscotch Crunch Cake combines rich flavors with delightful textures that will have your friends and family raving long after the last crumb has vanished. As we dive into each step, you’ll see how simple ingredients transform into something utterly intoxicating. Trust me; I promise you’ll want to make this cake over and over again!
Ingredients:
As we gather our ingredients for this culinary adventure, remember that each one plays a crucial role in crafting our masterpiece. You’ll see how they work harmoniously together to create not just flavor but also texture and moisture in our cake.
- 2 1/2 cups all-purpose flour. This ingredient serves as the backbone of our cake, providing structure and stability while allowing us to achieve that perfect crumb texture. When measuring flour, spoon it into your cup and level it off rather than scooping directly—this helps avoid packing too much flour into your measurement. If you’re looking for alternatives due to dietary preferences or needs, you could experiment with gluten-free blends or whole wheat flour for added nutty flavor!
- 1 1/2 cups granulated sugar. White granulated sugar adds sweetness and contributes to browning during baking—this caramelization enhances both color and flavor. It’s important to use fresh sugar; old sugar can clump together or lose its sweetness over time. While brown sugar could be tempting for its moisture content, I find that the clean sweetness from granulated sugar allows the butterscotch notes to shine through without overpowering them.
- 1/2 cup unsalted butter, softened (plus another 1/2 cup later for frosting). Butter is key here; using unsalted allows you to control the saltiness of your dish better—a non-negotiable aspect in baking! The softened butter creams beautifully with sugar during mixing, incorporating air into our batter which gives us that light texture we desire. If you forget to take it out ahead of time, simply cut it into small cubes or microwave it briefly at low power until it’s soft but not melted.
- 1 cup butterscotch chips, melted. These little gems are what make this cake sing! Melting them first ensures they integrate smoothly into our batter, lending their rich flavor throughout the cake while creating pockets of gooey goodness when baked. When purchasing butterscotch chips, look for high-quality brands; they have better flavor profiles and melt more evenly.
- 1 cup buttermilk. The tangy richness of buttermilk not only adds moisture but also reacts with baking soda to create that fluffy lift we’re aiming for in our cake. If you’re out of buttermilk or prefer alternatives, you can easily make your own by mixing milk with a tablespoon of vinegar or lemon juice—let it sit for about five minutes before using!
- 3 large eggs, at room temperature. Eggs are vital as they act as binders while adding moisture and richness to our batter. Room temperature eggs blend much more seamlessly than cold ones; simply placing them in warm water for about ten minutes before cracking works wonders if you’ve forgotten to take them out early.
- 2 teaspoons baking powder & 1 teaspoon baking soda. Both are essential leavening agents that help our cake rise beautifully while keeping it airy rather than dense. Baking powder contains both acid and base ingredients; when activated by moisture and heat (like when we bake), it creates carbon dioxide bubbles—hence why we get those lovely fluffy cakes! Baking soda requires acidity (like the buttermilk) to activate—this combination makes everything work together perfectly.
- 1/2 teaspoon salt. Don’t underestimate salt’s role! It enhances all other flavors while balancing sweetness beautifully—it’s absolutely paramount for achieving depth in any baked good.
- 1 teaspoon vanilla extract & another 1/2 teaspoon vanilla extract later on—in frosting form! Vanilla is like the secret handshake among flavors; it rounds everything out and brings harmony to our cake’s profile.
Now let’s talk toppings!
- 3 cups powdered sugar combined with 1/4 cup butterscotch sauce, 2 tablespoons heavy cream, and additional vanilla will come together as an utterly decadent frosting that complements our moist cake perfectly!
- For crunchiness: we’ll need 1/2 cup chopped pecans, which add richness and lovely texture alongside 1/2 cup crushed pretzels for contrast—these bring not just flavor but also an exciting salty bite amidst all that sweetness!
- Finally, we’ll mix in 1/4 cup brown sugar and another 2 tablespoons melted unsalted butter, creating an irresistible topping that’ll crisp up beautifully as it bakes.
With all these ingredients ready to go, I can already feel my excitement building—you’re going to love creating this Butterscotch Crunch Cake!
Equipment You’ll Need:
Having the right tools at hand makes all the difference in turning a simple recipe into an extraordinary creation! While these pieces aren’t technically ingredients, think of them as essential partners on our baking journey—they work behind-the-scenes magic so you can focus on making something wonderful.
- Mixing bowls – A set of various sizes helps manage different stages without causing chaos in your kitchen! Opting for glass or stainless steel makes cleanup easy while ensuring even mixing throughout every batch.
- Electric mixer – This tool saves time during creaming butter and sugar together—as we discussed earlier; aeration is key for achieving lightness in our cake! If you don’t have one handy yet (which I highly recommend investing in!), whisking by hand will still yield results—it might just take some elbow grease!
- Measuring cups and spoons – Accurate measurements are vital when baking—trust me on this one! Having both dry measures (for flour) plus liquid measures (for things like milk) ensures precision each time without guesswork involved.
- Rubber spatula – Perfectly designed for scraping down sides of bowls while ensuring no batter goes wasted—it’s practically indispensable during mixing stages!
As we dive deeper into preparing this delicious Butterscotch Crunch Cake next… get ready because there’s so much joy waiting ahead!
Preparing the Butterscotch Crunch Cake
Step 1: Creaming Together Butter & Sugar
First things first: let’s get started by creaming together your softened unsalted butter (the first half) along with white granulated sugar until they become light-colored and fluffy—a process known affectionately among bakers simply as creaming. This takes about 3–5 minutes using an electric mixer at medium speed; don’t rush this step! You want ample air incorporated into your mixture since it’ll create little pockets within our batter once baked—resulting in tenderness throughout every slice later on!
Pay attention here: if things look grainy instead? That could mean either insufficiently creamed butter or cold temperature on those eggs affecting how smoothly everything comes together; keep blending until smooth bliss reigns supreme before moving forward!
Step 2: Adding Eggs & Vanilla
Once we’ve achieved perfect fluffiness from creaming earlier? It’s time to add those room-temperature eggs one at a time alongside delightful vanilla extract! Incorporating them gradually helps maintain stability whilst enhancing flavor complexity further still—the essence lingers pleasantly upon tasting later too! Mix well after each addition until everything appears blended thoroughly again—this shouldn’t take more than another couple minutes max before proceeding onward once more towards adding dry ingredients next…
Step 3: Merging Dry Ingredients & Buttermilk
Now comes an exciting moment where science meets artistry: combining dry components (that pre-measured flour mixed alongside baking powder/soda/salt) along with creamy richness derived from luscious buttermilk we prepared earlier too! To do so effectively without causing lumps? Gently alternate between portions starting off dry then wet back-to-dry again till visible signs show no streaks remain anywhere left behind—patience here pays dividends ensuring no surprises await us post-baking either way concerning texture achieved finally upon cooling later down road ahead…
Step 4: Integrating Melted Butterscotch Chips
Finally?! Let’s stir those glorious melted butterscotch chips right into mixture gently yet decisively enough so they disperse evenly throughout batter bringing forth heavenly flavors bursting forth soon thereafter once baked properly now too… Watching closely here matters since burning would ruin everything earned painstakingly thus far beyond remedy—we wouldn’t want anything ruining such divine treats now would we? So please allow patience guiding hands whilst folding carefully until homogenous consistency prevails everywhere throughout final product awaiting oven-bound glory soon afterwards…
And there you have it—the first steps towards crafting your very own Butterscotch Crunch Cake full circle leading towards triumph awaiting patiently ahead… More awaits beyond regarding delicious crunchy toppings awaiting preparations shortly thereafter too… Stay tuned dear friend because we’re just getting started here today!
The Sweet Symphony of Baking: Creating Your Butterscotch Crunch Cake
Ah, the magic that happens when you combine simple ingredients with a sprinkle of love! We’re diving into the heart of what makes the Butterscotch Crunch Cake so incredibly special. This cake is not just a dessert; it’s an experience filled with inviting aromas and delightful textures that will have your loved ones asking for seconds—maybe even thirds! So let’s continue our journey in crafting this moist marvel, and I promise you, the end result will be a slice of heaven on earth.
Step 5: Mixing the Batter to Perfection
Now that you have your dry ingredients ready, it’s time to bring everything together in a glorious union. In a large mixing bowl, combine the softened unsalted butter and granulated sugar. Using an electric mixer on medium speed, cream these two together until the mixture is light and fluffy—a process that typically takes about 3-5 minutes. This step is crucial because creaming incorporates air into the batter, which leads to a beautifully risen cake with a tender crumb. You’ll notice it turning pale and expanding in volume; this is exactly what we want!
Once you achieve that fluffy consistency, add in the melted butterscotch chips—make sure they aren’t too hot to avoid cooking your eggs—and mix them thoroughly until combined. Next comes the buttermilk and eggs; crack those room temperature eggs in one at a time (it helps if you whisk them briefly beforehand). Why room temperature? Well, incorporating warmer ingredients ensures even mixing and better emulsification, leading to a uniform texture throughout your cake. Blend everything until just combined; be careful not to overmix here or your cake might turn out dense instead of delightfully airy.
Step 6: Incorporating Dry Ingredients
With your wet mixture ready and waiting, it’s time to introduce our dry ingredients into the party! Gradually sift in your flour, baking powder, baking soda, and salt mixture directly into that luscious batter. I like to do this in three batches—this way, you’re less likely to create flour clouds in your kitchen! As you fold the flour into the wet ingredients using a spatula or wooden spoon, gently cut through the batter while rotating the bowl; this technique helps maintain that all-important airiness we worked so hard for during creaming.
You’ll want to stop mixing as soon as you see no more visible flour streaks; remember, lumps are perfectly fine! Overmixing can lead to gluten formation and result in an undesirable chewy texture. Instead, embrace those little flecks of flour—it adds character to our beautiful creation! Once everything is just combined and looking deliciously smooth, it’s time for some patience again while we prepare for baking.
Step 7: Preparing for Baking Bliss
Before we send our cake off into its warm oven sanctuary, let’s ensure it’s properly prepared for its time under heat! Preheat your oven to 350°F (175°C) while you grease and flour two round cake pans—this step cannot be overstated as it prevents any potential sticking disasters later on. You can also line the bottoms with parchment paper for added insurance; trust me, it’ll save you from any sticky situations when it’s time to flip these beauties out.
Once greased and floured (or lined), pour equal amounts of batter into each pan. Here’s where my excitement really builds—I use a kitchen scale or simply eyeball it by pouring slowly while watching closely for equal heights. This ensures even baking across both layers so they rise beautifully without forming uneven domes. Give each pan a gentle tap on your counter after pouring; this helps release any trapped air bubbles and allows the batter to settle evenly. Now they’re ready for their moment in the spotlight!
Step 8: Baking Your Perfect Butterscotch Crunch Cake
Slide those pans into your preheated oven with care—like sending your kids off on their first day of school! Bake them for about 35-40 minutes but keep an eye on them as ovens can vary significantly. You’ll know they’re done when they start pulling away from the edges slightly and spring back when touched gently in the center—a classic sign of doneness! If you insert a toothpick or cake tester into the center and it comes out clean or with only a few moist crumbs clinging onto it—that’s exactly what we’re looking for!
Once baked to perfection, remove them from the oven and let them cool in their pans for about 10 minutes before transferring them onto wire racks. It’s utterly crucial not to skip this cooling phase because letting them rest too long within their pans may lead to soggy edges—no one wants that! Also, allowing them to cool completely ensures easier frosting application later on.
Final Touches: Frosting Your Butterscotch Crunch Cake
Now we arrive at perhaps my favorite part—frosting our cake! A proper frosting elevates any dessert from good to absolutely extraordinary. In another bowl, beat together softened unsalted butter with powdered sugar until creamy—it should resemble clouds floating through a clear blue sky. Gradually incorporate butterscotch sauce along with heavy cream and vanilla extract while mixing continuously until smooth and spreadable.
What’s particularly special about this frosting is its ability to meld seamlessly with our cake layers beneath it—the rich butterscotch flavor harmonizes beautifully with each bite you take! Don’t forget this is also where we add texture: fold in chopped pecans for nutty crunchiness along with crushed pretzels offering both saltiness and intriguing contrast against sweetness—the result will leave everyone wondering how something could taste so good!
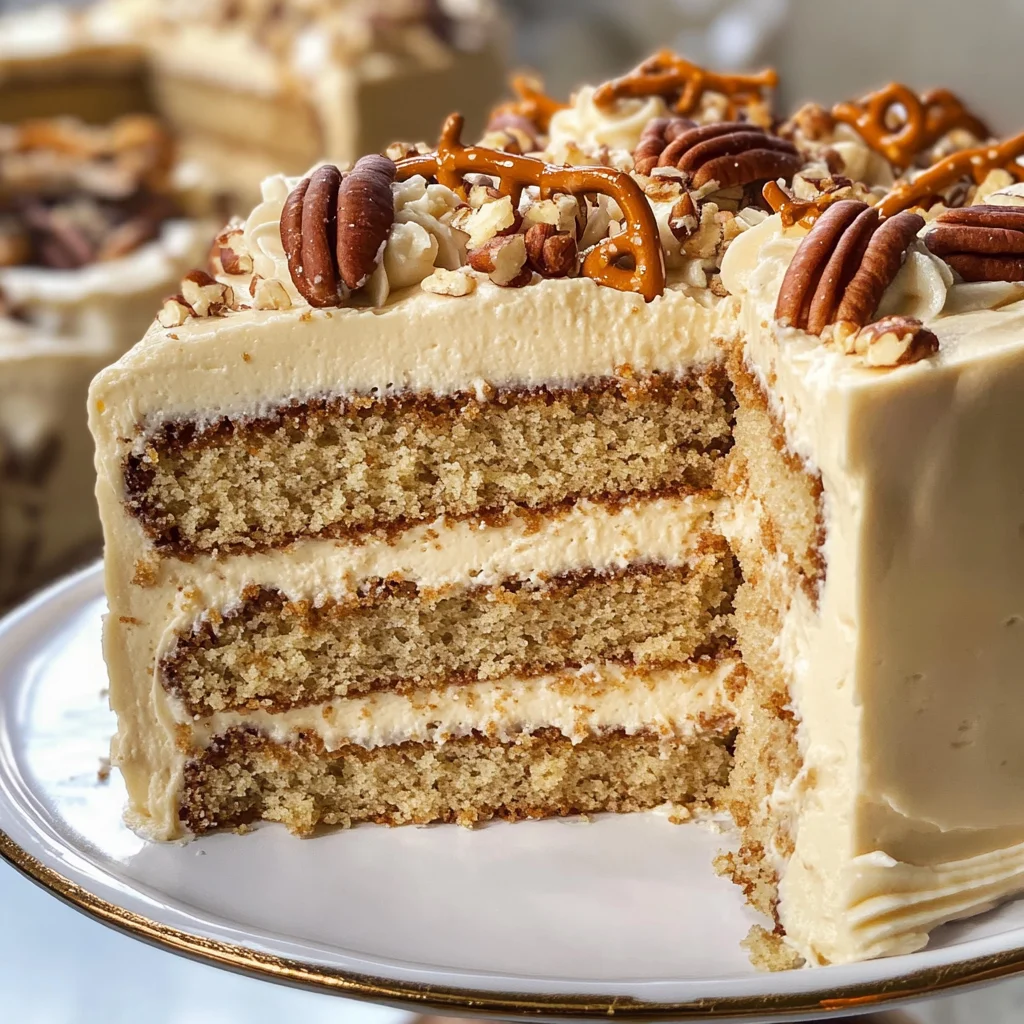
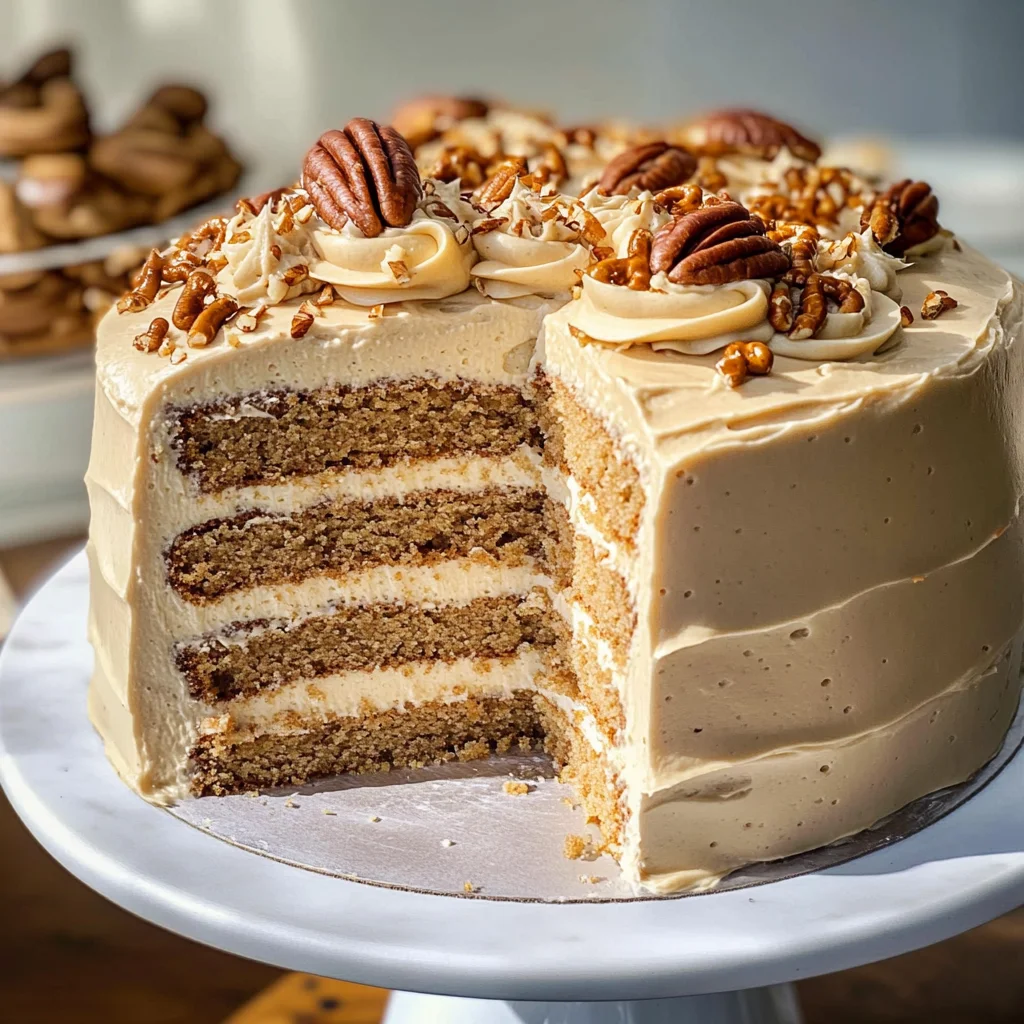
Once you’ve achieved heavenly frosting consistency spread generously between both cooled layers before topping generously over all sides of your cake—a true showstopper indeed! Finally, sprinkle additional pecans or pretzel bits over top if desired—adding visual appeal while also hinting at what lies beneath.
I promise you—the moment you slice through this Butterscotch Crunch Cake, you’ll witness those harmonious layers blending blissfully together like old friends meeting after years apart—a profoundly satisfying experience not only visually but also deliciously aromatic as scents waft through every corner of your home.
And there it is! A stunning centerpiece perfect for any celebration or simply because life deserves sweet moments like these every day. So go ahead—slice yourself a piece (or two!) serve alongside coffee or tea—and revel in every mouthful of this indulgent creation. Enjoy every bite—you’ve earned it!
Storage and Enjoyment Tips for Your Butterscotch Crunch Cake
Now that you’ve crafted this absolutely delightful Butterscotch Crunch Cake, it’s time to dive into the best ways to savor and store it! I can’t tell you how many times I’ve made this cake for gatherings, only to find it disappearing in a flash, but if you happen to have leftovers (which is rare!), let me share some tips on preserving its magnificent flavors. The beauty of this cake is that it remains moist and indulgent even after sitting for a while, so you can enjoy every last crumb without worry.
Storing Leftover Butterscotch Crunch Cake
To keep your leftover Butterscotch Crunch Cake as scrumptious as the moment it came out of the oven, I suggest wrapping it tightly in plastic wrap or placing it in an airtight container. This will help lock in moisture and keep that indulgent texture intact. You can store it at room temperature for about three days, but if you’re like me and want to ensure its longevity, popping it in the refrigerator will extend its freshness to about a week. If you really want to keep that crunchy topping intact—which is absolutely paramount—consider placing a slice of bread inside the container with the cake; trust me, it works wonders! When you take it out after storage, you’ll still experience that symphony of flavors without losing the delightful crunch. For serving, simply allow it to come back to room temperature or warm individual slices slightly in the microwave for about 10-15 seconds. The warm butterscotch goodness will envelop your senses once again!
Freezing Butterscotch Crunch Cake for Later
If you find yourself with more of this delectable cake than you can handle (which is always a wonderful problem!), freezing is an excellent option. To freeze your Butterscotch Crunch Cake properly, first make sure it’s completely cooled down; then wrap individual slices tightly in plastic wrap followed by aluminum foil or place them in a freezer-safe bag. This double protection will prevent freezer burn and keep those flavors locked away safely. You can freeze this cake for up to three months—what a convenience! When you’re ready to indulge again, simply move the slices from the freezer to the refrigerator overnight or pop them directly into your microwave for quick thawing. Imagine being able to pull out a slice of homemade happiness whenever that sweet tooth strikes; it’s just too good not to embrace!
Embrace these storage tips wholeheartedly because they allow you to relish your creation long after baking day. Whether savoring fresh slices or enjoying cakes from the freezer, each bite will remind you of why this Butterscotch Crunch Cake is such a treasured recipe.
Butterscotch Crunch Cake
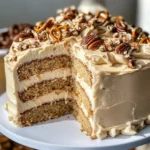
Indulge in the delightful experience of baking with our Butterscotch Crunch Cake, a perfect blend of rich butterscotch flavor and a satisfying crunchy topping. This cake is not just a treat; it’s a celebration of flavors that brings family and friends together, making every occasion memorable. The moist texture, combined with the sweet and salty crunch from crushed pretzels and pecans, creates an irresistible dessert that will have everyone asking for seconds. Ideal for birthdays, gatherings, or just because, this Butterscotch Crunch Cake is sure to become a beloved staple in your baking repertoire.
- Prep Time: 20 minutes
- Cook Time: 40 minutes
- Total Time: 1 hour
- Yield: Approximately 12 servings 1x
- Category: Dessert
- Method: Baking
- Cuisine: American
Ingredients
- 2 1/2 cups all-purpose flour
- 1 1/2 cups granulated sugar
- 1/2 cup unsalted butter, softened
- 1 cup butterscotch chips, melted
- 1 cup buttermilk
- 3 large eggs, at room temperature
- 2 teaspoons baking powder
- 1 teaspoon baking soda
- 1/2 teaspoon salt
- 1 teaspoon vanilla extract
Instructions
- Preheat your oven to 350°F (175°C) and grease two round cake pans.
- In a mixing bowl, cream together the softened butter and sugar until light and fluffy.
- Add in the melted butterscotch chips followed by the eggs one at a time and vanilla extract.
- In another bowl, mix flour, baking powder, baking soda, and salt. Gradually add this dry mixture alternately with the buttermilk to the wet ingredients until combined.
- Pour equal amounts of batter into each prepared pan and bake for 35-40 minutes or until a toothpick comes out clean.
- Allow cakes to cool before frosting with butterscotch sauce mixed with powdered sugar and heavy cream.
Nutrition
- Serving Size: 1 serving
- Calories: 380
- Sugar: 32g
- Sodium: 200mg
- Fat: 16g
- Saturated Fat: 8g
- Unsaturated Fat: 6g
- Trans Fat: 0g
- Carbohydrates: 54g
- Fiber: 1g
- Protein: 5g
- Cholesterol: 55mg