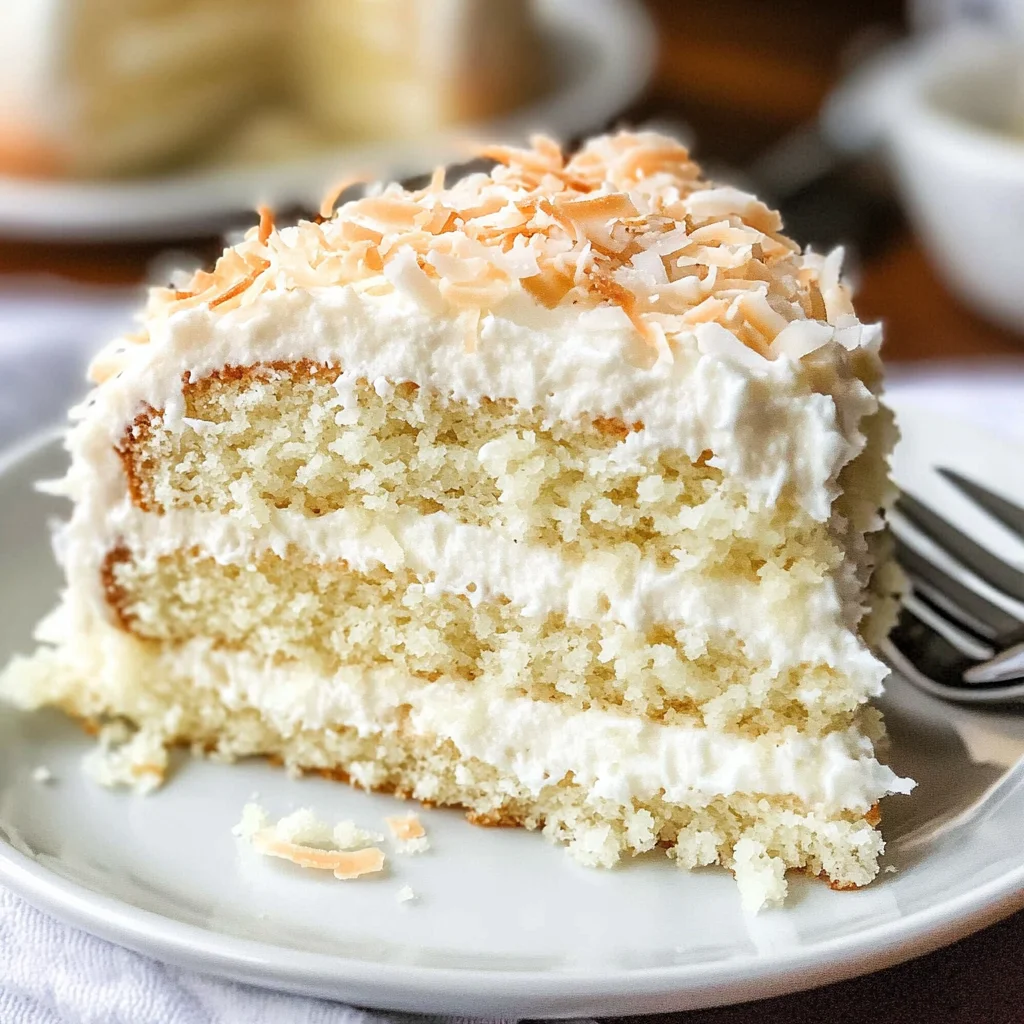
Coconut Cake
There’s something undeniably magical about the aroma of a freshly baked Coconut Cake wafting through the kitchen, isn’t there? It’s an experience that transcends mere sustenance; it’s a revelation that combines the warmth of home with the joy of celebration. This Coconut Cake is not just cake; it’s an invitation to gather around the table, to share stories and laughter, and to create memories that linger long after the last crumb is gone. With each fluffy slice, you’ll find a symphony of flavors—sweet, creamy, and utterly intoxicating—that captivates your senses and warms your heart. Trust me when I say that this cake is more than just food; it’s a heartfelt gesture wrapped in layers of coconut goodness.
As we embark on this culinary adventure together, I want you to feel as though you’re standing beside me in my cozy kitchen, surrounded by familiar sights and sounds. The ingredients are simple, yet they come together in such a beautiful way that it feels like magic. From the rich notes of coconut extract to the delightful crunch of shredded coconut sprinkled on top, each element plays its part in crafting a dessert that’s perfect for birthdays, holidays, or any occasion where you want to spread joy. Let’s dive into this recipe—it’s easier than you think, and I promise that your friends and family will be begging for seconds!
Coconut Cake: A Slice of Paradise
Welcome to the world of homemade Coconut Cake! This recipe is designed for anyone who dreams of indulging in a slice of paradise without compromising on flavor or texture. Whether you’re celebrating a special occasion or simply treating yourself (and who doesn’t deserve that?), this cake promises to deliver fluffy layers infused with rich coconut flavor and topped with luscious cream cheese frosting. Let’s get started!
Ingredients:
As we prepare to make this Coconut Cake, let’s take a moment to appreciate each ingredient that will help us create this delightful treat. Each one has its own role to play in crafting that perfect slice.
- 1 cup salted butter (softened; 227g). Softened butter is crucial for creaming properly and achieving the lightness we desire in our Coconut Cake. The salt enhances flavor while also balancing sweetness, which is absolutely paramount for any dessert. Make sure your butter is at room temperature—this means it should yield slightly when pressed but not melt. If you can find European-style butter, go for it! It has a higher fat content that will give your cake an even richer taste.
- ¼ cup vegetable oil. This liquid gold adds moisture while keeping the cake tender and fluffy throughout its baking journey. Oil integrates seamlessly into batters compared to solid fats like butter; it helps create an incredibly soft crumb while retaining moisture effectively during baking. You can use canola or sunflower oil if vegetable oil isn’t handy—both work beautifully!
- 1¾ cups granulated sugar (350g). Sugar does much more than just sweeten; it contributes to the texture and color of our cake too! When sugar is creamed with butter, it creates air pockets essential for leavening during baking. This process results in that beautiful rise we all love! Be sure to use fine granulated sugar so it dissolves effortlessly into your batter.
- 2 large eggs (room temperature) & 4 egg whites (room temperature). Eggs serve as binders here but also contribute richness and moisture to our cake’s structure. Using room temperature eggs allows them to incorporate better into the batter—this step ensures even mixing and promotes proper leavening during baking. The egg whites provide lightness without adding extra fat from yolks.
- 1 teaspoon vanilla extract & 1 teaspoon coconut extract. These two extracts are what elevate our Coconut Cake from ordinary to extraordinary! Vanilla provides depth while enhancing other flavors, but coconut extract truly shines here—it intensifies that delightful tropical essence we crave in every bite. Look for high-quality extracts for maximum impact; they can make all the difference.
- 3 cups cake flour (375g). This flour type has lower protein content compared to all-purpose flour, leading us toward a tender crumb—exactly what we’re going for! It’s important not to confuse cake flour with self-rising flour; we want control over our leavening agents here.
- 1 Tablespoon baking powder & ½ teaspoon salt. Baking powder acts as our leavening agent—it’s crucial because it reacts with moisture and heat during baking, helping our cake rise beautifully! The salt balances sweetness; skip it at your own peril—it’s essential for flavor enhancement.
- 1 cup coconut milk & 1 cup shredded sweetened coconut. Coconut milk brings richness and moisture into our batter while infusing every bite with delectable flavor—don’t skimp on quality here! Look for full-fat options if possible; they lend creaminess without being overly heavy. Shredded sweetened coconut adds texture and reinforces that lovely coconut profile throughout.
- 1 (8-ounce) package cream cheese (softened) & 1 cup salted butter (softened) for frosting purposes. Cream cheese brings tanginess against sweetness while creating a luscious frosting texture you’ll adore—a true match made in heaven with rich salted butter! Both should be softened adequately to ensure smooth blending without lumps.
- 5 cups powdered sugar & 2 tablespoons coconut milk (or heavy cream, only as needed) for adjusting consistency during frosting prep contributes sweetness while ensuring we achieve the right spreadable texture without compromising richness.
- 3 cups shredded sweetened coconut (for decorating) rounds out our masterpiece beautifully—it adds visual appeal while enhancing flavor as well!
Equipment You’ll Need:
Before we dive into making this delicious creation, let’s talk about some essential tools that will make your baking experience smoother and more enjoyable! Having the right equipment can significantly enhance your efficiency and success rate in creating something wonderful together.
- Mixing bowls – A sturdy set of mixing bowls is vital for preparing both batter and frosting efficiently without creating messes everywhere! Choose glass or stainless steel options since they’re durable and easy to clean up afterwards.
- Electric mixer – While whisking manually can work fine if you’re feeling ambitious or nostalgic about elbow grease workouts, using an electric mixer makes creaming butter so much easier—and trust me on this one: it’ll save you time!
- Rubber spatula – A flexible rubber spatula helps scrape down sides of bowls effectively ensuring no ingredients are left behind—avoiding wastefulness is key when making something so precious!
- 9-inch round cake pans – These specific sizes ensure uniform baking across layers—all pieces should fit neatly together once stacked! Greasing them well prevents sticking later on too—a detail worth taking seriously!
- Cooling rack – Once out of the oven comes cooling time—using cooling racks allows airflow underneath cakes speeding up cooling times while preventing sogginess from trapped steam underneath pans.
Now that we’ve gathered these fantastic ingredients and equipment essentials let’s get started creating our luscious Coconut Cake step by step!
Preparing the Coconut Cake
Step 1: Creaming Butter and Sugar
In a large mixing bowl, combine your softened salted butter with granulated sugar using an electric mixer on medium speed until light and fluffy—a process known as creaming which typically takes about 3–5 minutes depending on how warm your kitchen is! This step creates tiny air pockets within the mixture leading toward those wonderfully fluffy textures we crave in baked goods like cakes—it’s absolutely vital! You’ll know you’ve achieved success when you see a pale yellow color change along with increased volume within your bowl.
Step 2: Adding Eggs
Once you’ve reached peak fluffiness with your creamed mixture, it’s time to add those room-temperature eggs one at a time—mixing thoroughly between additions before moving onto next! Why do we do this? Each egg introduces moisture along with proteins necessary for structure development during baking—their gradual incorporation ensures even distribution throughout batter ensuring consistent results across layers later on too!
Step 3: Incorporating Dry Ingredients
In another bowl whisk together cake flour along with baking powder and salt until well combined—this prevents uneven distribution when added into wet ingredients later down line ensuring no lumps form once everything gets mixed together again afterward! Gradually alternate adding dry mixture followed by coconut milk into creamed mixture beating gently until just combined after each addition—overmixing here could lead towards denser cakes instead so remember: gentle folds are key!
Step 4: Folding in Shredded Coconut
Finally comes time for folding shredded sweetened coconut directly into batter using rubber spatula—you want evenly distributed shreds across mixture promoting lovely texture throughout finished product without losing any airiness gained earlier during creaming stage either—it may feel tempting but resist urge towards vigorous stirring now instead embrace gentleness here promoting harmonious blend between all components involved seamlessly!
Stay tuned—we’re getting closer every minute toward enjoying slices filled heavenly flavors waiting ahead…
Creating Your Coconut Cake Masterpiece
Step 5: Whisking the Dry Ingredients – The Foundation of Fluffiness
Now that you have your butter mixture beautifully whipped and ready, it’s time to shift our focus to the dry ingredients. In a separate bowl, measure out three cups of cake flour—this is crucial because using cake flour instead of all-purpose flour lends a tender crumb that melts in your mouth. To the flour, add one tablespoon of baking powder and half a teaspoon of salt. The baking powder is your leavening agent; it’s what makes this Coconut Cake rise to fluffy perfection. The salt may seem counterintuitive in a dessert, but it enhances all the flavors and balances the sweetness—trust me, it’s non-negotiable!
Gently whisk these dry ingredients together until thoroughly combined, which should take about a minute or so. This step is more than just mixing; it’s about aerating the flour and ensuring that the baking powder is evenly distributed throughout the mixture, which prevents any bitter bites from concentrated pockets of leavening agent. Set this aside while we move on to incorporating our wet ingredients into the star of this recipe—our luscious coconut milk.
Step 6: Combining Wet Ingredients – A Symphony of Flavors
In a large mixing bowl, pour in one cup of coconut milk alongside that gorgeous butter-sugar mixture. Add in the two large eggs and four egg whites—make sure they’re at room temperature for optimal emulsification. Room-temperature ingredients blend more smoothly into the batter, creating a uniform texture and helping your cake rise evenly. It’s like giving your cake an extra boost towards perfection! Then, incorporate one teaspoon each of vanilla extract and coconut extract. I promise you, these extracts are what make this cake truly extraordinary; they infuse every bite with an intoxicating aroma that transports you straight to a tropical paradise.
Using your mixer on medium speed, blend these ingredients until they are just combined—about 1-2 minutes should do. Watch closely as the batter transforms from separate components into a cohesive liquid gold! Be careful not to overmix; otherwise, you risk activating too much gluten in the flour, leading to a denser cake—a texture we absolutely want to avoid for our Coconut Cake.
Step 7: The Magical Merge – Wet Meets Dry
Now comes one of my favorite moments—the merge! Gradually add your dry ingredients into the wet mixture while mixing on low speed. This technique is vital as it allows you to control how well everything comes together without overworking the batter. You want to mix just until you see no more streaks of flour—about 30 seconds should suffice. At this point, fold in one cup of shredded sweetened coconut with a spatula or wooden spoon until uniformly distributed throughout the batter.
Why fold? This gentle motion keeps air bubbles intact, contributing to that light and airy texture we’re all after. If you notice any lumps after combining everything—don’t panic! A few lumps are perfectly normal and won’t hinder your final product; they’ll bake out beautifully during cooking. Once everything looks harmonious and well-mixed but not overworked, it’s time for one last look before we head into baking territory!
Step 8: Pouring into Pans – The Calm Before the Bake
Before pouring your batter into prepared cake pans (two 9-inch round pans greased and lined with parchment), take a moment to appreciate how far you’ve come! This isn’t just any Coconut Cake; you’ve crafted something that will surely become a cherished addition to your special occasions. Divide the batter evenly between both pans—you can use a kitchen scale for precision if you’re feeling particular about even layers or simply eyeball it if you’re going for that homey feel!
Smooth out the top gently with an offset spatula or back of a spoon—this step ensures even rising during baking so that you won’t have any domed tops later on. Now it’s time for baking magic! Place your pans in an oven preheated to 350°F (175°C) and allow them to bake for about 25-30 minutes. You’ll know they’re done when they spring back lightly when touched in the center or when a toothpick inserted comes out clean—but watch closely! Ovens can vary wildly, so don’t hesitate to rotate your pans halfway through if needed for even cooking.
Conclusion:
As we wrap up our culinary journey through this enchanting Coconut Cake recipe, I can’t help but feel an overwhelming sense of excitement for you! I hope my enthusiasm has rubbed off on you because creating this cake is not just about baking; it’s about crafting memories filled with love and warmth. Every fluffy bite is a testament to the harmonious combination of shredded coconut mingling with rich coconut milk and butter—a symphony of flavors that elevate this dessert beyond ordinary cakes.
Why should you make this Coconut Cake? Well, let me tell you—it’s not only a feast for your taste buds but also an incredible experience in the kitchen. The joy stems from watching your ingredients transform into something utterly intoxicating as they bake into golden perfection. Picture yourself pulling it from the oven—the aroma wafting through your home—and imagining how thrilled your friends and family will be when they taste this delightful creation. It’s perfect for birthdays, holidays, or just those moments when you crave something sweet!
For serving suggestions, imagine savoring one with a cup of freshly brewed coffee on a lazy afternoon—what an indulgent treat! Or perhaps pair it with fresh tropical fruits like pineapple or mango; their vibrant sweetness complements the coconut beautifully! For a truly decadent experience, consider layering whipped cream on top when serving; it’ll take things up another notch and delight everyone around the table with its creamy contrast.
Feeling adventurous? This recipe is wonderfully adaptable—think about adding lime zest for a zesty twist or folding in some crushed pineapple for extra moistness and flavor depth! You could even experiment with different types of frosting if cream cheese isn’t quite your style; why not try whipped coconut cream instead? The possibilities are endless! So gather your ingredients, embrace that spirit of creativity, and dive into making this Coconut Cake today. I can’t wait for you to share your experiences—let’s connect over our love for baking!
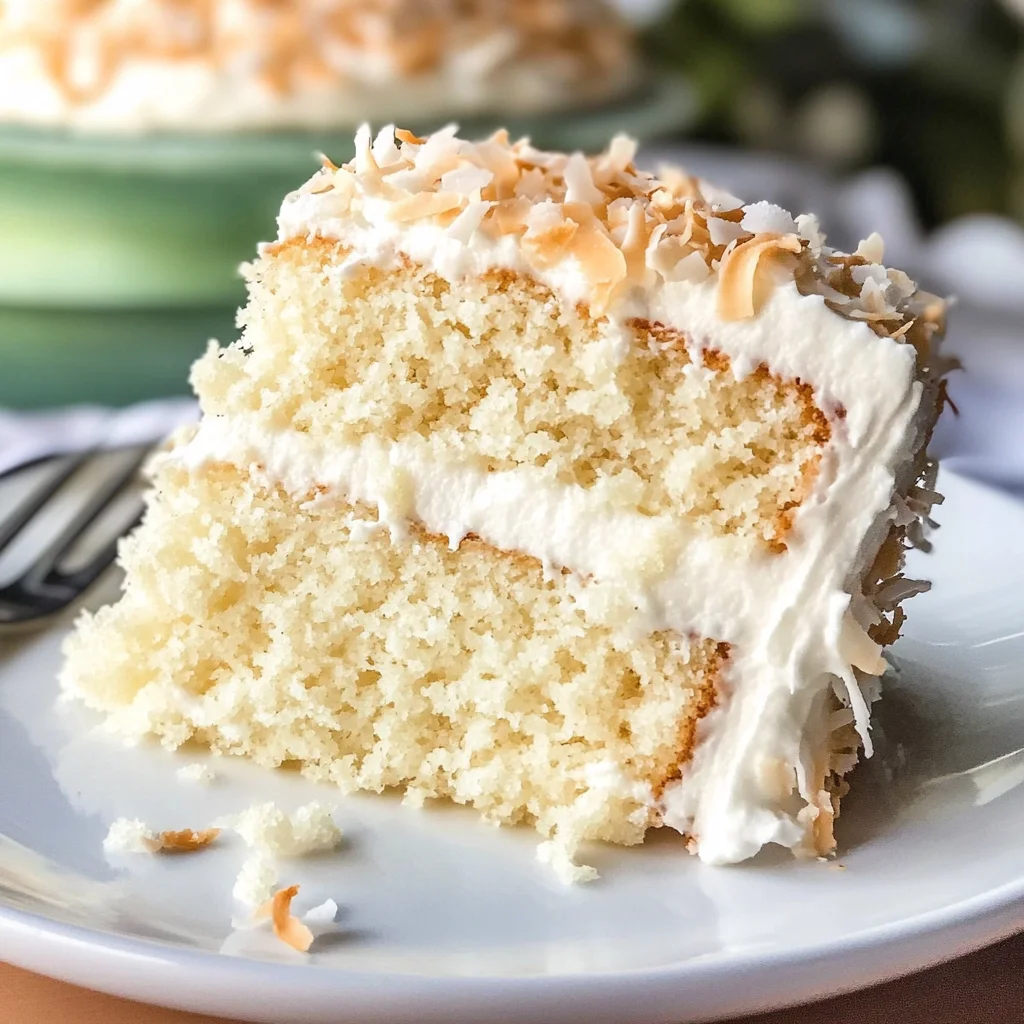
Coconut Cake
Indulge in the delightful experience of homemade Coconut Cake—a tropical treat that brings joy to any gathering. Each slice reveals a moist, fluffy texture infused with rich coconut flavor, adorned with luscious cream cheese frosting and a sprinkle of sweetened shredded coconut. This cake is perfect for birthdays, celebrations, or simply as a sweet escape on a cozy afternoon. With its inviting aroma and beautiful presentation, this Coconut Cake will surely become a favorite among friends and family. Get ready to create delicious memories with every bite!
- Prep Time: 20 minutes
- Cook Time: 30 minutes
- Total Time: 50 minutes
- Yield: Approximately 12 servings 1x
- Category: Dessert
- Method: Baking
- Cuisine: Tropical
Ingredients
- 1 cup salted butter (softened)
- ¼ cup vegetable oil
- 1¾ cups granulated sugar
- 2 large eggs (room temperature)
- 4 egg whites (room temperature)
- 1 teaspoon vanilla extract
- 1 teaspoon coconut extract
- 3 cups cake flour
- 1 tablespoon baking powder
- ½ teaspoon salt
- 1 cup coconut milk
- 2 cups shredded sweetened coconut (divided)
- For frosting: 8 ounces cream cheese (softened)
- 1 cup salted butter (softened)
- 5 cups powdered sugar
- Coconut milk as needed
Instructions
- Preheat your oven to 350°F (175°C). Grease and line two 9-inch round cake pans.
- In a mixing bowl, cream together softened butter and granulated sugar until light and fluffy. Add eggs one at a time, mixing well after each addition.
- In a separate bowl, whisk together cake flour, baking powder, and salt.
- Gradually alternate adding dry ingredients and coconut milk to the creamed mixture until just combined.
- Fold in shredded coconut gently.
- Divide the batter between prepared pans and smooth tops. Bake for 25-30 minutes; cakes should spring back when touched.
- Cool cakes in pans for about 15 minutes before transferring them to wire racks to cool completely.
- In a new bowl, beat softened cream cheese and salted butter until creamy.
- Gradually add powdered sugar until fully incorporated; adjust consistency with coconut milk if needed.
- Frost cooled cake layers generously and coat the sides with remaining shredded coconut.
Nutrition
- Serving Size: 1 slice (105g)
- Calories: 450
- Sugar: 45g
- Sodium: 320mg
- Fat: 22g
- Saturated Fat: 12g
- Unsaturated Fat: 8g
- Trans Fat: 0g
- Carbohydrates: 58g
- Fiber: <1g
- Protein: 4g
- Cholesterol: 80mg