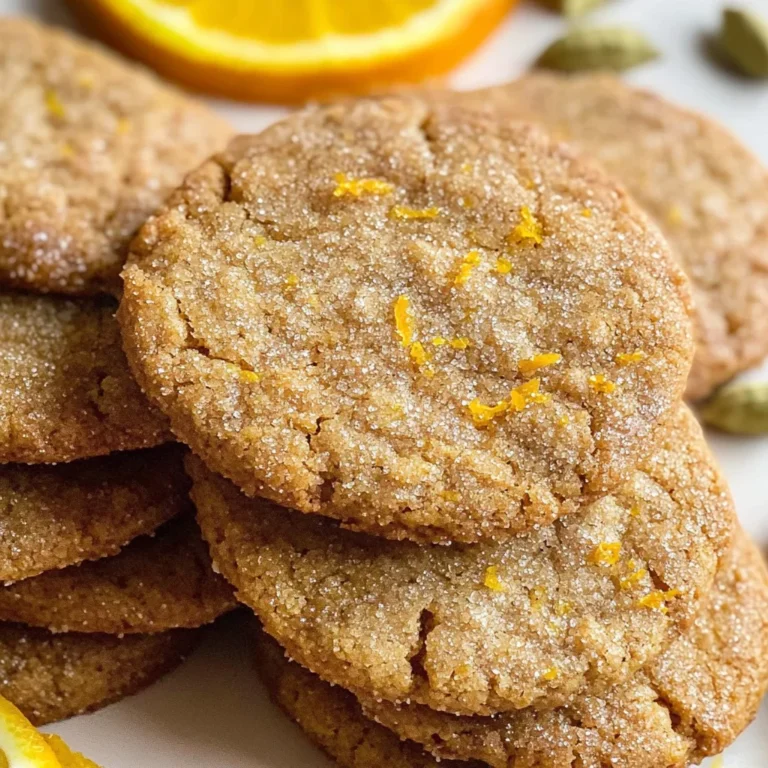
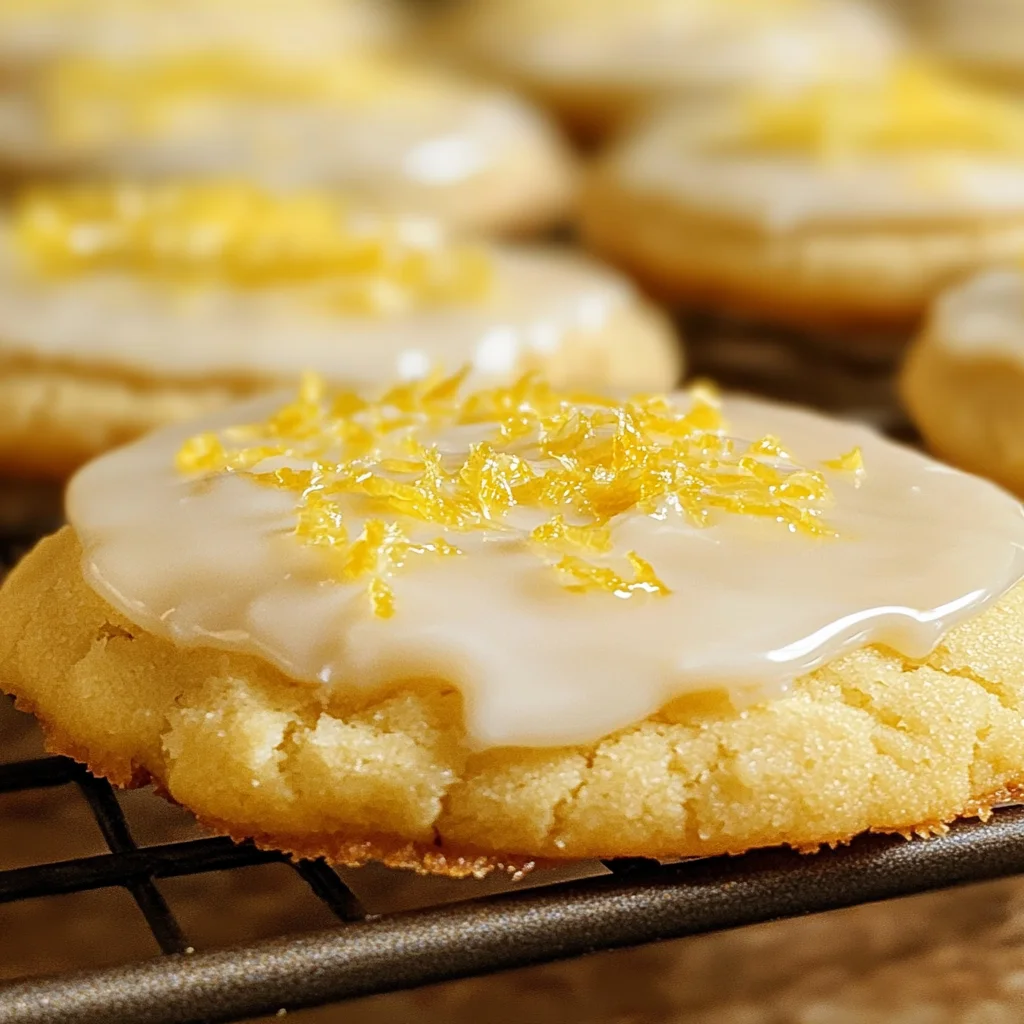
Glazed Lemon Cookies
There’s something truly magical about baked goods that carry the essence of sunshine in every bite, and today, I’m thrilled to share my beloved recipe for Glazed Lemon Cookies. These cookies are not just a sweet treat; they are an experience, a celebration of bright, zesty lemons that transport you to a sun-soaked afternoon, perhaps with a gentle breeze wafting through your kitchen. Picture this: soft, buttery cookies kissed with the tangy brightness of fresh lemon zest and topped off with a luscious glaze that sparkles like morning dew. You take one bite, and it’s as if spring has burst into your mouth. Trust me when I say, these Glazed Lemon Cookies will become a cherished staple in your home.
I’ve always been captivated by the idea that food can evoke memories and emotions. Each time I make these cookies, I’m reminded of afternoons spent baking with friends and family, where laughter mingles with the scent of citrus wafting through the air. There’s a beautiful contrast in this recipe between the rich butteriness of the cookie dough and the bright tartness of lemon that makes each cookie utterly irresistible. Not only are they perfect for satisfying your sweet tooth, but they also make for delightful gifts or treats at gatherings. So whether you’re celebrating a special occasion or simply craving something sweet, these cookies are sure to brighten your day.
Glazed Lemon Cookies: A Sweet Burst of Citrus Bliss
Welcome to the world of Glazed Lemon Cookies! This recipe is simple yet incredibly rewarding, making it perfect for both novice bakers and seasoned pros alike. With just a handful of ingredients and minimal fuss—no chilling required—you can whip up these delightful cookies in less than half an hour. Let’s embark on this culinary adventure together!
Ingredients:
As we venture into creating our Glazed Lemon Cookies, let’s take a moment to appreciate each ingredient that plays an integral role in crafting these little bites of happiness.
- 2 ¼ cups (286 grams) all-purpose flour: This is the foundation of our cookies! All-purpose flour provides structure while ensuring our cookies remain soft and tender. When measuring flour, it’s important to spoon it into the measuring cup rather than scooping directly from the bag—this prevents packing too much flour into your measurement, which can lead to dry cookies. If you’re looking for alternatives due to dietary restrictions or preferences, you could consider using a gluten-free all-purpose blend; however, I recommend one specifically designed for baking to ensure texture remains light.
- 1/2 teaspoon baking powder: This leavening agent is absolutely paramount in achieving those perfectly puffy cookies! Baking powder helps create lift and lightness during baking. It’s essential to ensure it’s fresh—if you’re ever unsure about its potency, simply mix a teaspoon with warm water; if it bubbles vigorously, you’re good to go!
- 1/2 teaspoon fine sea salt: Salt is crucial in our cookie journey as it enhances all other flavors present in our dough. It might seem counterintuitive to add salt to something sweet, but trust me on this—it balances sweetness while adding depth to flavor profiles. Always opt for fine sea salt as it dissolves more easily compared to coarse salts.
- 2 sticks (227 grams) unsalted butter (at cool room temperature): Butter is what brings richness and that melt-in-your-mouth texture we crave in baked goods. Using unsalted butter allows us more control over the final taste since we can adjust our own salt levels according to preference. Make sure your butter is at room temperature; this is crucial because if it’s too cold, it won’t cream well with sugar—a step that creates air pockets necessary for lightness—and if it’s too warm or melted, you’ll end up with flat cookies.
- 3/4 cup (150 grams) granulated sugar: This ingredient not only sweetens our cookies but also contributes significantly to their texture by aiding in creaming with butter. Granulated sugar helps create those lovely crispy edges while keeping centers soft—an absolute dream! When selecting sugar, always look for high-quality granulated options; cheaper brands can sometimes yield unpredictable results.
- 2 tablespoons lemon zest (from about 3 medium lemons): Ahh! The star ingredient! Fresh lemon zest adds intense flavor without any bitterness often associated with lemon juice alone. When zesting lemons, make sure you only grate the outer yellow skin—this contains oils that give off aromatic properties that will infuse into our dough beautifully. Avoid grating down into the white pith as it’s quite bitter.
- 1 large egg (at cool room temperature): Eggs act as both binding agents and moisture providers in cookie recipes. An egg at room temperature emulsifies better with other ingredients leading to smoother dough consistency and uniform texture once baked. If you forget to take your egg out ahead of time, simply place it in warm water for about 10 minutes!
- 1 ½ cups (189 grams) powdered sugar (sifted): This sugar provides sweetness without weighing down our glaze—it dissolves easily into liquid forms which means we get that silky finish on top of each cookie! Sifting ensures there are no lumps which could disrupt the smoothness we desire in our glaze; plus it makes mixing easier!
- 2 to 4 tablespoons fresh lemon juice: This is where we bring another layer of exquisite citrus flavor into play! The brightness from fresh lemon juice enhances not just flavor but also balances sweetness effectively within our glaze—creating an utterly intoxicating finish on top of those warm cookies straight outta the oven!
- Additional lemon zest (to garnish if desired): A sprinkle of extra zest before serving elevates visual appeal while reinforcing delicious citrus notes across every bite—it’s completely optional but oh-so-rewarding!
Equipment You’ll Need:
Before diving into baking these glorious Glazed Lemon Cookies, let’s gather our tools! Having the right equipment makes all the difference—not only does it streamline your process but it also enhances your overall baking experience.
- Mixing bowls – A set of various sizes will allow you flexibility depending on what task you’re tackling—from whisking dry ingredients like flour or sugar blends to mixing wet components such as butter or eggs together seamlessly without mess!
- Electric mixer with paddle attachment – While there may be times when hand stirring suffices especially for smaller batches; using an electric mixer guarantees even creaming which promotes consistent texture throughout all cookies ensuring success every single time!
- Parchment paper – Lining your baking sheets prevents sticking while allowing easy transfer post-baking—think about how wonderful it feels when removing hot cookies effortlessly without crumbs clinging behind!
- Medium spring-loaded cookie scoop – Investing in one truly changes game when portioning out uniform-sized dough balls ensuring they bake evenly resulting in beautifully shaped final products—no more guesswork needed here!
As we embark on preparing these Glazed Lemon Cookies together step-by-step next time around; remember patience pays off generously during each phase bringing forth culinary delights worth savoring long after they’ve cooled down…Stay tuned for more on how we’ll create these heavenly treats from scratch filled with love & joy!
Step 5: Forming the Cookies into Perfect Shapes
Now that your dough has come together beautifully, it’s time to turn those lovely ingredients into cookies! Using a medium spring-loaded cookie scoop, you’ll want to drop balls of dough that are about 1.5 tablespoons in size onto your prepared baking sheets. Why use a scoop? It ensures uniformity—each cookie will bake evenly, giving you that perfect golden edge and soft, chewy center we all crave. As you place the dough on the baking sheet, make sure to leave about 2 inches between each ball; this allows them room to spread as they bake.
Once all your dough is scooped out, roll each ball gently between your palms—this not only shapes them nicely but also helps eliminate any cracks on the surface. Trust me, those smooth surfaces will create a stunning cookie once baked! After forming the balls, press them down gently with your palm until they’re about 1/3 inch thick. This step is utterly crucial because it not only affects how they spread in the oven but also influences the texture. You want them to be just thick enough to remain chewy and soft inside while achieving that delightful slight crispness at the edges.
Step 6: The Magical Baking Process
With everything prepped and ready to go, it’s time for the oven magic! Pop your baking sheets into a preheated oven set at 350°F (175°C) and let those cookies work their charm for about 12-14 minutes. This isn’t just any ordinary baking; it’s where science meets art! As they bake, pay attention to how the aroma fills your kitchen—it’s utterly intoxicating and signals that something wonderful is on its way. You’ll notice the cookies puff up slightly and begin to turn a light golden brown around the edges.
But here’s a little secret: don’t wait for them to look fully cooked when you take them out! They should still have a slightly soft center when you remove them from the oven; they’ll continue to firm up as they cool on the baking sheet. This delicate balance is absolutely paramount for achieving that perfect soft texture we desire in our Glazed Lemon Cookies. If you see too much color developing or if they look overly baked, you’ve ventured into crunchy territory—definitely not what we want here!
Step 7: Cooling Down – The Essential Resting Phase
Once those glorious cookies are out of the oven, resist any temptation to dig right in! Place them on the baking sheet for about 5 minutes; this resting phase is essential for letting them set properly. If you transfer them too soon, there’s a risk of breaking or crumbling—nobody wants that! During this time, you can almost feel their warmth radiating through the air; it’s like they’re whispering promises of sweet lemony delight for later.
After five minutes have passed—though I know it feels like an eternity—gently transfer the cookies onto cooling racks using a spatula. If you don’t have cooling racks handy (which I highly recommend investing in!), simply place them on a plate or another flat surface. Allowing them to cool completely is important because it lets all those textures solidify perfectly; warm cookies can sometimes lose their shape when glazed later on.
Step 8: Preparing The Sweet Lemon Glaze
Now comes one of my favorite parts—the glaze! It’s what truly elevates these Glazed Lemon Cookies from delightful snacks to extraordinary treats that will have everyone raving about your baking skills! In a mixing bowl, sift 1½ cups of powdered sugar—that fluffiness is crucial as it prevents lumps—and gradually add fresh lemon juice, starting with just two tablespoons. Use a whisk for this; it creates an airy consistency that makes drizzling so much easier!
Here’s where patience plays its part again: mix until smooth and glossy. If it’s too thick (which can happen depending on how juicy your lemons are), add more lemon juice little by little until you reach that perfect drizzle-able consistency—it should flow easily off your whisk but still hold its shape beautifully when drizzled onto each cookie. This glaze adds an extra layer of flavor and moisture that truly brings out those bright citrus notes we all love so much in lemon desserts.
Final Touches: Drizzling Your Way to Perfection
Step 9: Glazing Your Masterpiece
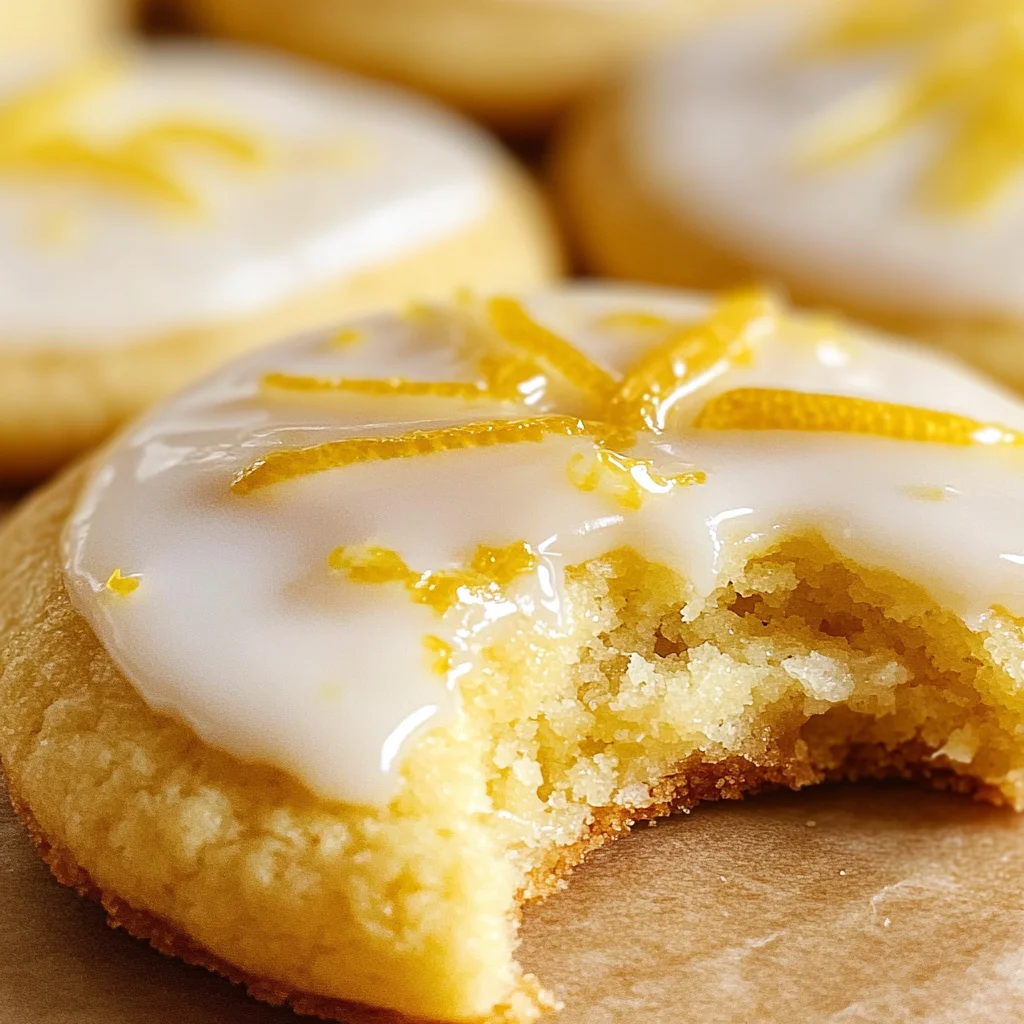
Once your cookies have cooled completely and your glaze has reached perfection, it’s time for the grand finale! Using a spoon or even a piping bag if you’re feeling fancy, drizzle that luscious lemon glaze over each cookie with abandon—it should cascade down like liquid gold! Don’t rush; take your time here because this step transforms simple cookies into something visually stunning and utterly irresistible.
If you’re keen for an extra touch of zestiness (and let’s be honest, who wouldn’t be?), sprinkle some additional lemon zest over each glazed cookie while they’re still wet—this adds both flavor and visual appeal that will make everyone’s mouth water at first glance. Trust me on this one; it’s non-negotiable if you want every bite to burst with tangy goodness!
Let those glazed beauties sit for just a few moments until the glaze sets slightly before serving (if you can resist!). And remember, these Glazed Lemon Cookies are not just desserts; they’re an experience—a celebration of flavors wrapped up in each delightful bite! So gather your friends and family around, share stories over tea or coffee while indulging in these citrusy delights, and bask in the joy you’ve created with your own two hands. Enjoy every moment—you’ve earned it!
Storage and Enjoyment Tips for Your Glazed Lemon Cookies
Now that you’ve created a batch of these utterly intoxicating Glazed Lemon Cookies, it’s time to share the joy of enjoying them! Whether you’re savoring them on your own or planning to share with friends and family, knowing how to preserve their freshness will ensure every bite remains as delightful as the first. Let’s dive into some handy storage tips so you can bask in the glory of your baking triumph!
Storing Leftover Glazed Lemon Cookies
To keep your Glazed Lemon Cookies fresh and delicious, you’ll want to store them in an airtight container. A simple plastic or glass container works wonders—just make sure it’s completely sealed to keep out any unwanted moisture or air. If you have leftover cookies (which I find hard to believe!), they can be stored at room temperature for about 3 to 4 days. Pro tip: for an extra layer of freshness, consider placing a slice of bread in the container with your cookies; this little trick helps maintain humidity levels and keeps your cookies soft and tender. Even after a few days, these lemony delights will retain their incredible flavor, with that luscious glaze still shimmering like liquid gold. If you’re feeling fancy when serving, a quick zap in the microwave for about 10 seconds can bring back that fresh-baked warmth, making them truly irresistible.
Freezing Glazed Lemon Cookies for Later
If you’re like me and love batch baking, freezing these cookies is a fantastic option! To freeze your Glazed Lemon Cookies properly, allow them to cool completely after baking. Then, place them in a single layer on a baking sheet and pop them in the freezer until solid—this prevents them from sticking together. Once frozen, transfer the cookies to an airtight container or a freezer-safe bag, where they can stay good for up to three months. When you’re ready to enjoy one (or three), simply let them thaw at room temperature or warm them gently in the oven for that freshly baked experience again. The convenience of having these tangy treats on hand is absolutely marvelous—it’s like having little bursts of sunshine waiting for you whenever you need a pick-me-up!
Glazed Lemon Cookies

Experience bliss with our Glazed Lemon Cookies—soft, buttery delights topped with zesty glaze. Bake today and treat yourself!
- Prep Time: 15 minutes
- Cook Time: 14 minutes
- Total Time: 29 minutes
- Yield: Approximately 24 cookies 1x
- Category: Dessert
- Method: Baking
- Cuisine: American
Ingredients
- 2 ¼ cups all-purpose flour
- ½ teaspoon baking powder
- ½ teaspoon fine sea salt
- 2 sticks unsalted butter, softened
- ¾ cup granulated sugar
- 2 tablespoons lemon zest
- 1 large egg
- 1 ½ cups powdered sugar
- 2 to 4 tablespoons fresh lemon juice
Instructions
- Preheat the oven to 350°F (175°C). Line baking sheets with parchment paper.
- In a bowl, whisk together flour, baking powder, and salt.
- In another bowl, cream the butter and granulated sugar until light and fluffy. Add lemon zest and egg; mix well.
- Gradually add dry ingredients to wet ingredients until combined.
- Use a medium scoop to drop dough onto prepared sheets, spacing them about 2 inches apart.
- Gently flatten each ball to about ⅓ inch thick.
- Bake for 12-14 minutes until edges are lightly golden but centers remain soft.
- Cool on the baking sheet for 5 minutes before transferring to cooling racks.
- For the glaze, mix powdered sugar with lemon juice until smooth; drizzle over cooled cookies.
Nutrition
- Serving Size: 1 serving
- Calories: 150
- Sugar: 9g
- Sodium: 75mg
- Fat: 7g
- Saturated Fat: 4g
- Unsaturated Fat: 2g
- Trans Fat: 0g
- Carbohydrates: 21g
- Fiber: <1g
- Protein: <1g
- Cholesterol: 20mg