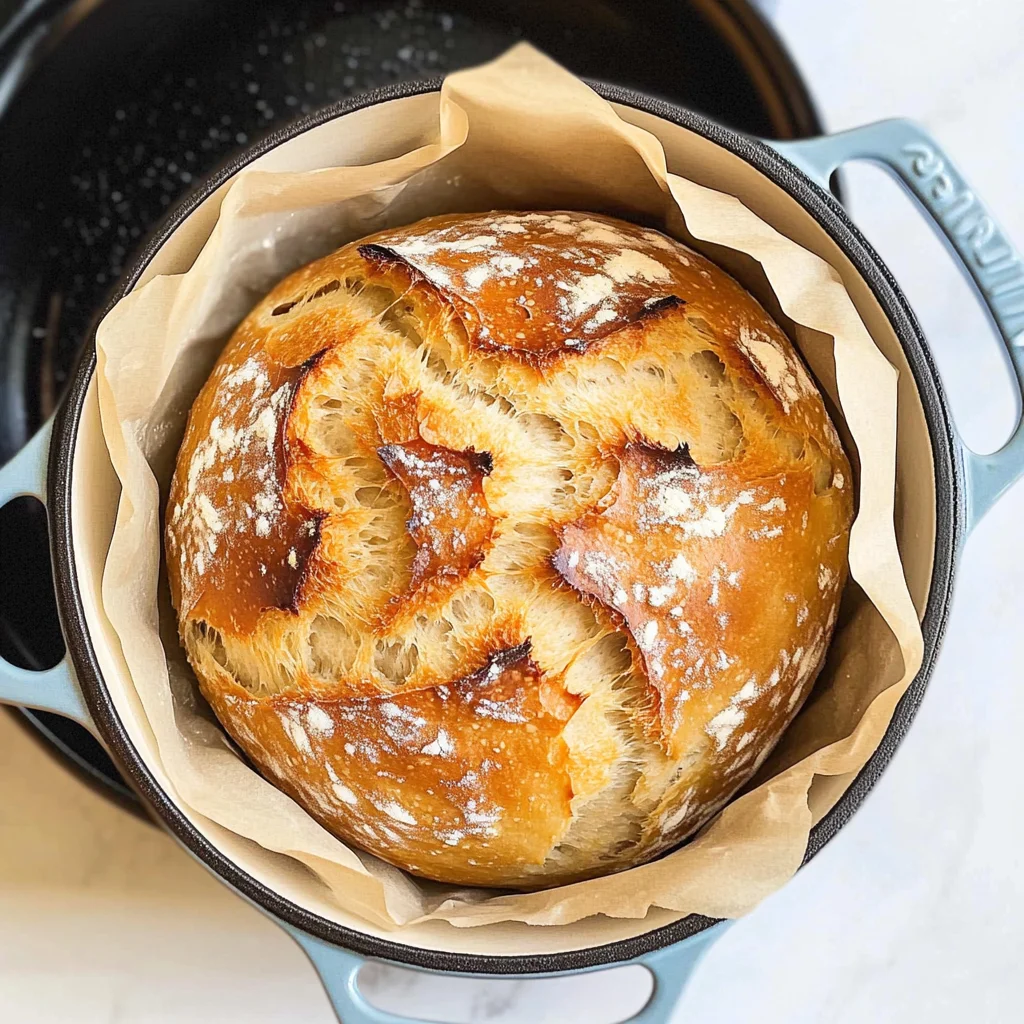
EASY DUTCH OVEN NO KNEAD BREAD
There’s something utterly magical about the aroma of freshly baked bread wafting through your home, isn’t there? It’s a sensory experience that can transport you back to your grandmother’s kitchen or a bustling Parisian bakery. With each loaf comes not just nourishment but a profound sense of comfort and connection. That’s why I’m thrilled to share with you my cherished recipe for EASY DUTCH OVEN NO KNEAD BREAD. This simple yet transformative recipe has become a staple in my home, bridging the gap between traditional baking methods and our fast-paced lives. It’s the kind of bread that, when you pull it from the oven, will have everyone gathering around, drawn in by its golden crust and inviting warmth.
What makes this bread truly special is its remarkable ease and versatility. You don’t need to be a seasoned baker or possess fancy equipment; all you need is time, patience, and a little bit of love. The beauty of no-knead bread lies in its simplicity—mixing ingredients without any strenuous kneading allows the yeast to do its magic over time, resulting in an airy, flavorful loaf that boasts a crust so crunchy you’ll find it hard to resist tearing off bits as it cools. As you embark on this culinary journey with me, I promise you’ll discover how deeply satisfying it is to create something from scratch that nourishes both body and soul.
EASY DUTCH OVEN NO KNEAD BREAD: A Bread Lover’s Dream
Let’s dive into this delightful baking adventure together! This recipe will guide you step-by-step towards creating a loaf that not only looks impressive but tastes like it’s been crafted in an artisanal bakery. Picture yourself pulling this beautiful creation from the oven, and let me assure you: every bite will be worth the wait!
Ingredients:
As we gather our ingredients, think of them as the building blocks of your masterpiece. Every element plays a crucial role in achieving that perfect loaf of EASY DUTCH OVEN NO KNEAD BREAD.
- 3 cups all-purpose flour: This is your canvas—the foundation upon which our bread will rise. All-purpose flour offers the right balance of protein and starch needed for structure while allowing for a chewy texture without being too dense. When selecting flour, look for brands that are unbleached and preferably organic; they tend to have better flavor profiles. If you’re feeling adventurous or need a gluten-free alternative, consider using almond or coconut flour mixed with some xanthan gum to mimic gluten’s properties.
- 2 tsp active dry yeast: This tiny powerhouse is what brings our dough to life! Active dry yeast needs warmth and moisture to activate, so ensure your water isn’t too hot—around 105°F is ideal. Yeast not only helps the dough rise but also imparts those wonderful complex flavors we associate with homemade bread. If you’re fresh out of active dry yeast, feel free to substitute with instant yeast at the same measurement; just remember that it doesn’t require proofing!
- 1 ½ tsp sea salt: Salt enhances flavor and controls fermentation speed in our dough, making it absolutely pivotal in our recipe. Using sea salt adds minerals that can enhance flavor even further compared to regular table salt. Make sure you’re using coarse sea salt rather than fine salt; it dissolves more evenly throughout the dough without overpowering it.
- 1 ½ cups warm water (105°F): Water is often overlooked but is as vital as any other ingredient! It activates the yeast and hydrates the flour, turning them into a cohesive dough. Use filtered water if possible because chlorine found in tap water can inhibit yeast growth; we want our little yeast friends thriving!
Now that we’ve gathered our essential ingredients for this heartwarming bread recipe, let’s talk about setting ourselves up for success by ensuring we have the right tools.
Equipment You’ll Need:
Having the right tools makes all the difference in creating your beautiful loaf of EASY DUTCH OVEN NO KNEAD BREAD. While these may not be ingredients, they are indispensable partners on this baking journey.
- Large mixing bowl: A sturdy mixing bowl provides ample space for combining your ingredients without any mess—trust me; no one enjoys cleaning up spilled flour! Opt for glass or ceramic bowls as they maintain temperature well during rising.
- Dutch oven: This is where all the magic happens! A heavy cast iron Dutch oven retains heat exceptionally well, creating an environment similar to professional steam ovens that crisp up your crust beautifully while keeping the interior moist. If you don’t own one yet (you should!), any oven-safe pot with a tight-fitting lid will work in a pinch.
- Plastic wrap and moistened kitchen towel: These simple items help keep your dough covered while it rises, preventing it from drying out. The plastic wrap traps moisture while promoting warmth—both essential for successful fermentation!
With our ingredients assembled and essential tools ready at hand, let’s roll up our sleeves and get started on creating something truly extraordinary!
Step 1: Combine Ingredients with Love
In a large mixing bowl—your vessel for creativity—combine those three cups of all-purpose flour with two teaspoons of active dry yeast and one-and-a-half teaspoons of sea salt. Stir gently with a wooden spoon or spatula until everything is nicely blended together. It’s important that these dry ingredients are thoroughly mixed because uneven distribution could lead to pockets of saltiness or insufficient yeast activation later on! Trust me—this step sets the stage for an evenly risen loaf full of flavor.
Step 2: Add Warm Water
Now comes one of my favorite parts—pouring in one-and-a-half cups of warm water! As you do this, watch how those dry elements come alive; they’ll begin clumping together into a shaggy ball of dough before your eyes! Aim for consistency here—it should be sticky but cohesive enough to hold its shape when gathered together. Resist the urge to overmix; we’re embracing rusticity here! Once everything seems incorporated (it doesn’t have to be perfectly smooth), cover your bowl loosely with plastic wrap followed by a damp kitchen towel—a cozy blanket for our budding dough!
Step 3: Let It Rise
Here’s where patience truly pays off! Allow your covered bowl containing this magical mixture to rest undisturbed in a draft-free area for 18 to 24 hours—yes, really! I know waiting can be tough, but trust me on this one: letting it sit gives time for fermentation magic to happen as wild yeasts develop flavors while causing air bubbles within that will ultimately create an airy crumb structure once baked! When you check back after this period has elapsed (and oh boy—you’ll want to), expect a glorious bubbly surface transforming what was once just flour into something extraordinary!
Step 4: Preheat Your Oven & Prepare Dough
Once you’ve given ample time for fermentation (and yes—you deserve some self-care during this downtime!), preheat your oven to 450°F (232°C) while also placing your Dutch oven inside as it heats up—this step is absolutely paramount! Preheating ensures an optimal crunchiness on crust formation since that initial high heat creates steam when your dough hits the hot surface—a baker’s secret weapon! While waiting patiently again (I promise it’ll be worth it), turn your rested dough out onto a floured surface—prepare yourself as it releases those intoxicating aromas—and gently gather it into a ball without kneading aggressively; treat her kindly!
As we draw closer towards enjoying our delicious creation from scratch together—a warm loaf bursting forth from its Dutch oven cocoon—I can almost hear those crusty sounds calling out… Keep following along and let’s bake up some unforgettable memories next!
Stay tuned for more steps where we’ll place our beautiful dough into its preheated home and bring forth delightful results soon enough!
Step 5: Preheat and Prepare the Dutch Oven for Baking
Now, let’s talk about one of the most crucial steps in our EASY DUTCH OVEN NO KNEAD BREAD journey—preheating your oven along with that glorious Dutch oven. Why is this so important, you ask? Well, when you place your dough into a blazing hot Dutch oven, you’re creating an environment that mimics a traditional steam-injected bakery oven. This method is absolutely paramount for achieving that coveted crunchy crust that contrasts beautifully with the soft, airy interior of the bread. So, go ahead and crank your oven up to 450°F (232°C). While the oven warms up, slide your empty Dutch oven inside to preheat as well. This might take about 30 minutes, but trust me on this: letting it heat thoroughly will pay off in spades.
During this time, you can take a moment to marvel at your dough. After its long slumber of 18 to 24 hours, it should have transformed into something magical—bubbly and puffy with a slightly sticky texture. You’ll notice those beautiful air pockets forming; this is all thanks to the fermentation process initiated by our active dry yeast. Remember, patience is key here! Don’t rush this step because the longer rise allows complex flavors to develop within the dough. The aroma wafting from the bowl will have you dreaming of fresh bread and cozy afternoons!
Step 6: Shape Your Dough with Gentle Hands
Once your Dutch oven has reached optimal temperature and your dough has risen luxuriously, it’s time for shaping! Lightly dust a clean surface with flour—it acts like a magic carpet for your dough. Gently turn out your dough onto this floured surface; don’t be alarmed if it seems a bit sticky—that’s perfectly normal and part of what makes this bread so delightfully chewy. Here’s where you’ll want to embrace gentleness; using too much force can deflate those lovely air bubbles we’ve worked so hard to create.
Using floured hands, carefully gather the edges of the dough toward the center, tucking them under as you form a rough ball. It doesn’t need to be perfect—this is no beauty contest! Just ensure it holds its shape somewhat as it rests for a moment before heading into that hot Dutch oven. What’s happening here is known as “shaping,” which helps tighten the gluten structure without extensive kneading. This small but significant action will contribute to an even rise during baking—so don’t skip it!
Step 7: Transfer with Care
Now comes the moment we’ve all been waiting for—the transfer of our beautifully shaped dough into that preheated Dutch oven! Carefully remove the hot pot from your oven (don’t forget those trusty kitchen mitts!), and take a deep breath as you admire its searing heat—this is where magic happens! Lightly sprinkle some flour or cornmeal at the bottom of the pot to prevent sticking; think of it like giving your bread a soft landing pad.
With great care (and maybe even some drama), gently place your shaped dough into the center of the hot Dutch oven. If you want to get fancy—and who doesn’t?—you can score the top of the loaf with a sharp knife or razor blade to create an artistic design or simply allow steam to escape during baking. This little detail not only gives it character but also influences how beautifully your bread rises in those first few minutes in the oven. You’ll hear sizzling as it meets that intense heat—it’s music to any baker’s ears!
Step 8: Bake Like You Mean It!
Now we enter one of my favorite phases: baking! Cover your Dutch oven with its lid and slide it back into that hot embrace of your preheated oven. We’re starting off by baking covered for 30 minutes; trust me when I say this step creates an intensely steamy environment that will help lift our loaf sky-high while locking in moisture—the result will be so profoundly satisfying when you slice into it later.
After half an hour has elapsed, it’s time for some exciting changes! Carefully remove the lid (watch out for that hot steam—it’ll want to greet you!) and allow your bread to bake uncovered for another 15 minutes. This is where we coax out that glorious golden-brown crust we dream about; without this step, you’d miss out on that gorgeous caramelization that adds depth and flavor—a truly extraordinary transformation just waiting to happen!
Keep an eye on it during these last moments—look for that stunning golden hue developing across its surface and listen closely for a slight crackling sound as it bakes; these are good signs! To check if it’s done, give it a gentle tap on the bottom—the hollow sound means it’s ready! Once baked to perfection, remove your masterpiece from the oven and let it cool on a wire rack before slicing into it; I can hardly describe how intoxicating that smell will be wafting through your home.
Conclusion:
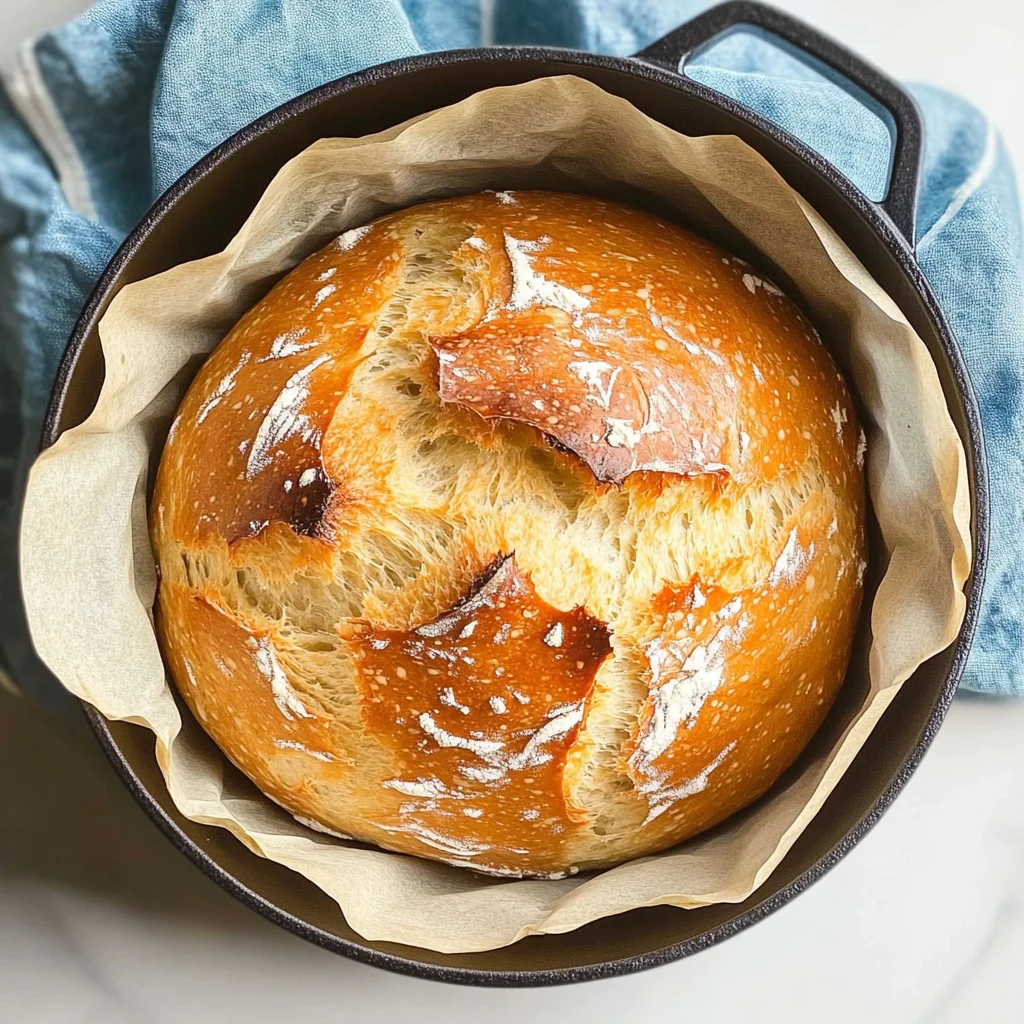
As we wrap up this delightful journey through making EASY DUTCH OVEN NO KNEAD BREAD, I hope you’re as excited as I am about creating this beautiful masterpiece in your own kitchen! It’s truly incredible how such simple ingredients – flour, water, yeast, and salt – combine to create something so extraordinary. The crunchy golden crust gives way to an airy yet hearty interior that makes every bite feel like a warm hug. I genuinely believe that once you’ve tasted this bread fresh out of the oven, you’ll find it hard not to bake it again and again.
This recipe is not just about taste; it’s about connection—both with our kitchens and with those we share meals with. Whether you’re enjoying it for breakfast slathered in creamy avocado or serving it alongside a hearty soup for dinner, this bread shines on any occasion. Imagine pulling that steaming loaf from the oven while friends gather around the table; everyone will be enchanted by its rustic charm and intoxicating aroma. It’s moments like these that create lasting memories.
When thinking about what pairs beautifully with this soulful loaf, just let your imagination run wild! Picture savoring one slice topped with fragrant olive oil and sea salt as an appetizer before pasta night or perhaps indulging in some butter and jam alongside your morning coffee for an utterly blissful experience. For an afternoon pick-me-up after a busy day, consider enjoying some toasted slices with fresh herb cream cheese or even transforming them into mouthwatering bruschetta piled high with ripe tomatoes—it’s pure magic!
Feeling adventurous? This recipe is wonderfully adaptable! Consider mixing in herbs like rosemary or thyme right into the dough for an aromatic twist or folding in sun-dried tomatoes or olives for a Mediterranean flair that elevates this already fantastic bread into something truly special. You could also explore using whole wheat flour instead of all-purpose flour if you’re looking for something heartier and more nutritious! Whatever path you choose, I encourage you to embrace your creativity—share your experiences with me when you try these variations because I’d love nothing more than connecting over our shared love of baking!
EASY DUTCH OVEN NO KNEAD BREAD

There’s nothing quite like the aroma of freshly baked bread filling your home, and with this EASY DUTCH OVEN NO KNEAD BREAD recipe, you can bring that magic to your kitchen without any fuss. This simple artisan-style bread requires minimal effort and no kneading, making it perfect for both novice bakers and seasoned pros. The result? A beautifully crusty loaf with an airy interior that’s ideal for sandwiches, toast, or simply enjoying with olive oil. With just a few key ingredients and some patience, you’ll be pulling a golden-brown masterpiece from your oven in no time. Let’s embark on this delightful baking adventure together!
- Prep Time: 15 minutes
- Cook Time: 45 minutes
- Total Time: 1 hour
- Yield: Approximately 12 servings 1x
- Category: Bread
- Method: Baking
- Cuisine: American
Ingredients
- 3 cups all-purpose flour
- 2 tsp active dry yeast
- 1 ½ tsp sea salt
- 1 ½ cups warm water (105°F)
Instructions
- In a large mixing bowl, combine flour, yeast, and salt. Stir until evenly mixed.
- Gradually add warm water to the dry ingredients, mixing gently until a shaggy dough forms.
- Cover the bowl loosely with plastic wrap and a damp kitchen towel. Let it rise in a warm spot for 18-24 hours.
- Preheat your oven to 450°F (232°C) along with a Dutch oven inside for about 30 minutes.
- Gently turn the risen dough onto a floured surface and shape it into a ball.
- Carefully place the shaped dough into the hot Dutch oven, score the top if desired, and cover.
- Bake covered for 30 minutes, then remove the lid and bake uncovered for an additional 15 minutes until golden brown.
- Allow cooling on a wire rack before slicing.
Nutrition
- Serving Size: 1 serving
- Calories: 150
- Sugar: 0g
- Sodium: 160mg
- Fat: 0.5g
- Saturated Fat: 0g
- Unsaturated Fat: 0g
- Trans Fat: 0g
- Carbohydrates: 31g
- Fiber: 1g
- Protein: 4g
- Cholesterol: 0mg