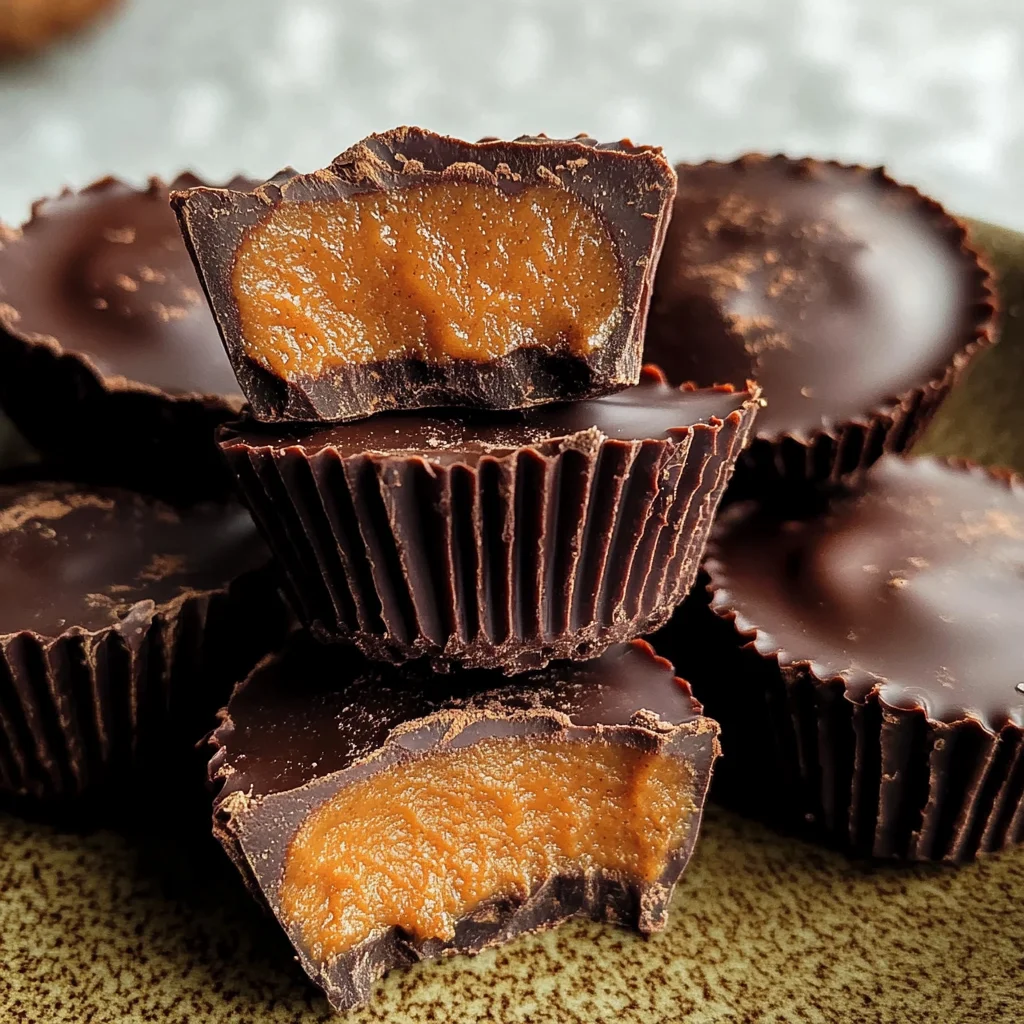
Chocolate Pumpkin Butter Cups
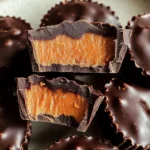
If you’re looking for a delightful treat that brings the flavors of fall right to your kitchen, you’ll love these Chocolate Pumpkin Butter Cups! These little gems are not only fun to make but also a fantastic way to celebrate the season. With a creamy pumpkin spice filling nestled between layers of rich dark chocolate, each bite is a blissful experience. What makes this recipe even more special is its versatility—perfect for busy weeknights, family gatherings, or just because you deserve something sweet!
These Chocolate Pumpkin Butter Cups are great for sharing or enjoying all by yourself. Plus, they are lower in sugar and completely dairy-free, making them a healthier indulgence that everyone can enjoy.
Why You’ll Love This Recipe
- Quick to prepare: With just 10 minutes of prep time, you can whip up these treats in no time.
- Family-friendly fun: Kids will love helping out in the kitchen and savoring the delicious flavors.
- Make-ahead convenience: Prepare these cups in advance and store them for an easy snack whenever you need it.
- Deliciously healthy: Indulge without the guilt—these treats strike the perfect balance between sweet and wholesome.
- Perfect for any occasion: Whether it’s a holiday gathering or movie night at home, these cups fit right in!
Ingredients You’ll Need
To create these delightful Chocolate Pumpkin Butter Cups, you’ll need some simple and wholesome ingredients that are easy to find. Let’s gather what you need:
For the Filling
- 1/2 Cup Pumpkin Puree
- 1/3 Cup Almond Butter (Any nut butter will work! You can also use Sunbutter.)
- 2 Tablespoons Honey (You can also swap for maple syrup.)
- 2 Teaspoons Pumpkin Spice
For the Chocolate Coating
- 1 Cup Chocolate Chips
- 1 Tablespoon Coconut Oil
Variations
This recipe is wonderfully flexible, so feel free to get creative! Here are some fun variations you might try:
- Change the nut butter: Use peanut butter or cashew butter for a different flavor profile.
- Add some crunch: Toss in chopped nuts or seeds into the filling for added texture.
- Switch up the spices: Experiment with cinnamon or vanilla extract if pumpkin spice isn’t your thing.
- Make it festive: Top with sprinkles or a drizzle of white chocolate for special occasions!
How to Make Chocolate Pumpkin Butter Cups
Step 1: Prepare the Filling
Start by combining your pumpkin puree, almond butter, honey, and pumpkin spice in a mixing bowl. This step is crucial as it creates that creamy, spiced filling we all crave. Mix until smooth and well combined; you want every bite to be bursting with flavor!
Step 2: Melt the Chocolate
In a microwave-safe bowl, combine the chocolate chips and coconut oil. Microwave in short bursts of 30 seconds, stirring in between until fully melted. The coconut oil helps achieve that shiny finish and makes the chocolate easier to work with.
Step 3: Assemble the Cups
Line a mini muffin tin with paper liners. Pour a small amount of melted chocolate into each liner—just enough to cover the bottom. Then add a spoonful of your pumpkin filling on top of that. Finally, pour more melted chocolate over each cup to seal everything in. This layering creates that irresistible combination!
Step 4: Chill and Enjoy
Place your muffin tin in the fridge for about two hours until they are set firm. This waiting period allows all those delicious flavors to meld together beautifully. Once firm, pop them out of their liners and get ready to savor every bite!
Now you have your very own batch of Chocolate Pumpkin Butter Cups ready to share—or keep all to yourself! Enjoy this treat as a sweet reminder of cozy days ahead!
Pro Tips for Making Chocolate Pumpkin Butter Cups
These delightful treats are easy to whip up, but a few pro tips will ensure they turn out perfectly every time!
- Use room temperature ingredients: Bringing your pumpkin puree and almond butter to room temperature can help them blend more smoothly, creating a creamier filling that’s easier to work with.
- Melt chocolate gently: When melting your chocolate chips, do so using a double boiler or in short bursts in the microwave. This prevents overheating and helps achieve that silky-smooth texture that coats the pumpkin filling beautifully.
- Chill between layers: Allowing the first layer of chocolate to set in the fridge before adding the pumpkin filling helps keep the layers distinct and prevents any mixing. This ensures each bite has that perfect balance of chocolate and pumpkin.
- Experiment with flavors: Don’t hesitate to add your favorite spices or extracts (such as vanilla or nutmeg) to the pumpkin filling for an extra flavor twist. It’s all about making this treat your own!
- Store properly: Keep your Chocolate Pumpkin Butter Cups in an airtight container in the refrigerator. They stay fresh longer this way and are perfect for grabbing on-the-go!
How to Serve Chocolate Pumpkin Butter Cups
Presenting these Chocolate Pumpkin Butter Cups can turn them into a standout dessert for any occasion! Here are some creative ideas to make them shine.
Garnishes
- Cocoa powder dusting: Lightly dusting the tops of your cups with cocoa powder adds an elegant touch while enhancing the chocolate flavor.
- Chopped nuts: Sprinkling some chopped pecans or walnuts on top before they set gives a nice crunch and additional health benefits.
Side Dishes
- Apple Slices with Almond Butter: Crisp apple slices paired with almond butter complement the flavors of your cups and provide a refreshing crunch.
- Carrot Sticks with Hummus: This crunchy snack adds a nutritious element to your dessert table while balancing out sweetness with savory goodness.
- Sweet Potato Fries: The natural sweetness of baked sweet potato fries pairs wonderfully with the spiced notes of pumpkin, making them a fun side option.
- Coconut Yogurt Parfait: Layer coconut yogurt with granola and fresh fruits for a light and creamy accompaniment that enhances the overall dessert experience.
Enjoy creating these festive treats, and watch as they become a favorite among friends and family!
Make Ahead and Storage
These Chocolate Pumpkin Butter Cups are perfect for meal prep, allowing you to enjoy a delicious treat any time of the week. With their simple ingredients and quick assembly, you can whip up a batch and store them for later indulgence.
Storing Leftovers
- Keep your Chocolate Pumpkin Butter Cups in an airtight container.
- Store them in the refrigerator for up to one week.
- For best taste and texture, allow them to sit at room temperature for a few minutes before enjoying.
Freezing
- Individually wrap each butter cup in plastic wrap or place them in a freezer-safe bag.
- They can be frozen for up to three months.
- When ready to enjoy, let them thaw in the fridge overnight or at room temperature for about 30 minutes.
Reheating
- These treats are best enjoyed chilled or at room temperature; however, if you prefer them slightly warm:
- Microwave on low power in 10-second intervals until just warmed through.
- Avoid overheating to maintain the chocolate’s smooth texture.
FAQs
Have some questions about making these delightful Chocolate Pumpkin Butter Cups? Let’s clarify a few common ones!
Can I use other nut butters instead of almond butter for Chocolate Pumpkin Butter Cups?
Absolutely! Feel free to use any nut butter of your choice, such as cashew or peanut butter. Sunbutter is also a great alternative if you’re avoiding nuts altogether.
How can I ensure my Chocolate Pumpkin Butter Cups set properly?
To achieve perfectly set cups, make sure your chocolate is tempered correctly. Additionally, chilling them thoroughly in the refrigerator will help solidify the layers nicely.
Are Chocolate Pumpkin Butter Cups gluten-free?
Yes! All the ingredients used in this recipe are naturally gluten-free, so you can enjoy these treats without any worries.
Can I substitute honey with something else when making Chocolate Pumpkin Butter Cups?
You can easily swap honey for maple syrup or agave nectar if you prefer a vegan option. Both alternatives will yield delicious results!
Final Thoughts
I hope you find joy in making these delightful Chocolate Pumpkin Butter Cups! They’re not only festive and fun but also healthier than traditional candies. Whether you’re sharing with friends or indulging on your own, I’m sure you’ll love every bite. Happy cooking, and I can’t wait for you to try this recipe!
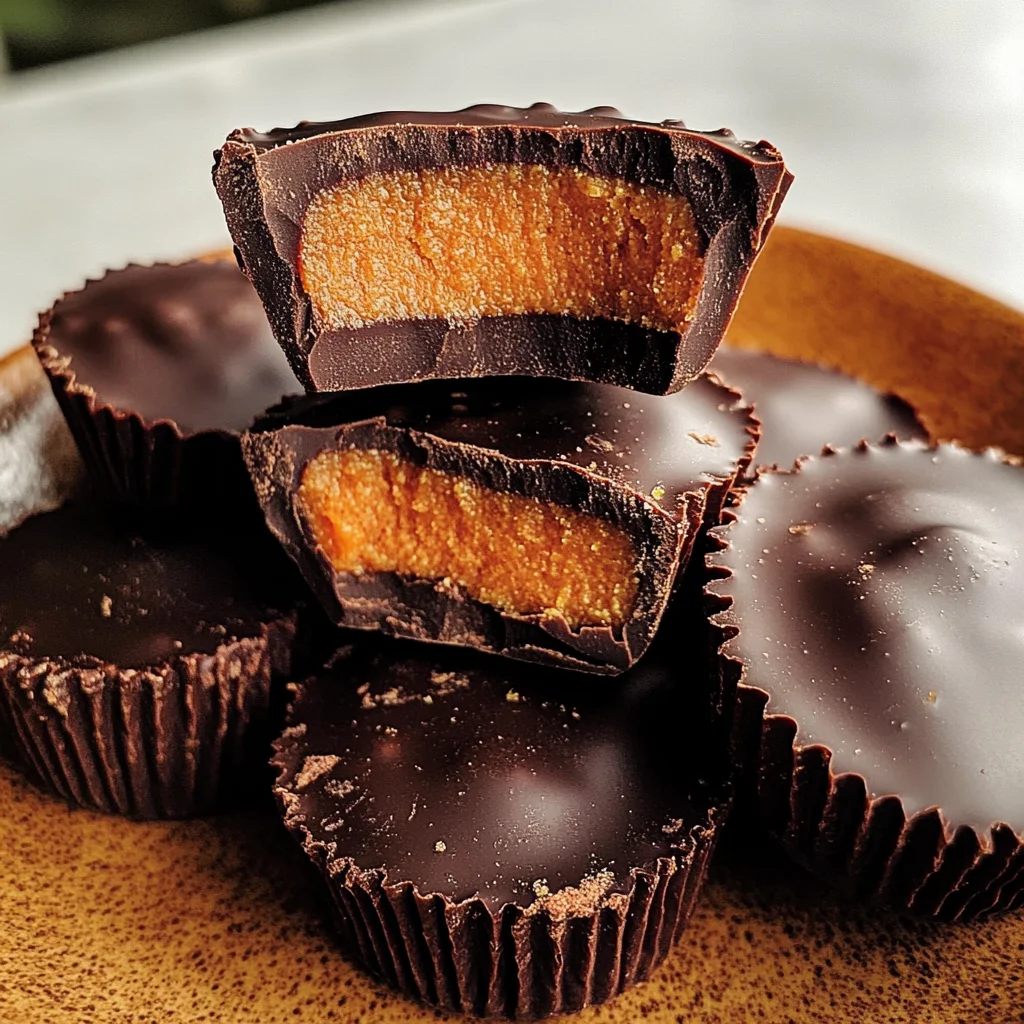
Chocolate Pumpkin Butter Cups
Indulge in the cozy flavors of fall with these delightful Chocolate Pumpkin Butter Cups! Each bite features a creamy pumpkin spice filling nestled between rich layers of dark chocolate, making them a perfect treat for any occasion. These bites are not only easy to make but also lower in sugar and completely dairy-free, allowing everyone to enjoy a guilt-free indulgence. Whether you’re preparing for family gatherings or simply treating yourself, these tasty cups are sure to become a seasonal favorite.
- Prep Time: 10 minutes
- Cook Time: 0 minutes
- Total Time: 10 minutes
- Yield: Approximately 12 servings 1x
- Category: Dessert
- Method: No-bake
- Cuisine: American
Ingredients
- 1/2 cup pumpkin puree
- 1/3 cup almond butter (or any nut butter)
- 2 tablespoons honey (or maple syrup)
- 2 teaspoons pumpkin spice
- 1 cup chocolate chips
- 1 tablespoon coconut oil
Instructions
- In a mixing bowl, combine pumpkin puree, almond butter, honey, and pumpkin spice. Mix until smooth.
- In a microwave-safe bowl, melt chocolate chips and coconut oil together in short bursts until fully melted and smooth.
- Line a mini muffin tin with paper liners. Pour melted chocolate into each liner to cover the bottom. Add a spoonful of pumpkin filling on top, then seal with more melted chocolate.
- Chill in the refrigerator for about two hours until firm. Once set, pop them out of the liners and enjoy!
Nutrition
- Serving Size: 1 serving
- Calories: 130
- Sugar: 7g
- Sodium: 15mg
- Fat: 9g
- Saturated Fat: 5g
- Unsaturated Fat: 4g
- Trans Fat: 0g
- Carbohydrates: 11g
- Fiber: 2g
- Protein: 2g
- Cholesterol: 0mg