Valentine’s Day Sugar Cookie Fudge Recipe
There’s something truly magical about creating sweet treats that evoke joy, warmth, and connection. As I stand in my kitchen, surrounded by the fragrant scent of melting white chocolate and sprinkles dancing in the air, I am reminded of why I cherish recipes like this Valentine’s Day Sugar Cookie Fudge. It transcends mere confection; it’s a heartfelt expression of love—a celebration of togetherness wrapped up in creamy, sugary bliss. The moment you take that first bite, the world fades away, leaving only the delightful symphony of flavors that fills your senses with happiness. This fudge is not just a treat; it’s an experience, a memory waiting to unfold with every delicious morsel.
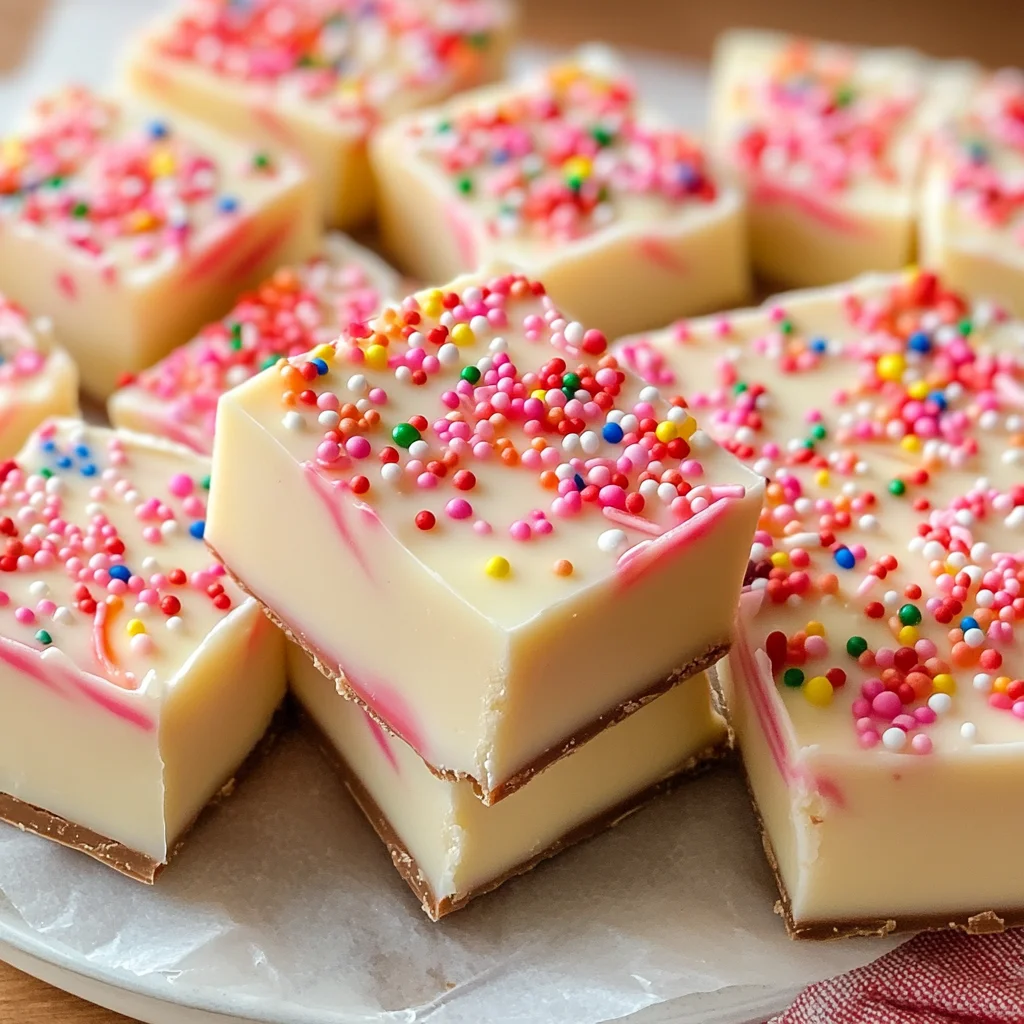
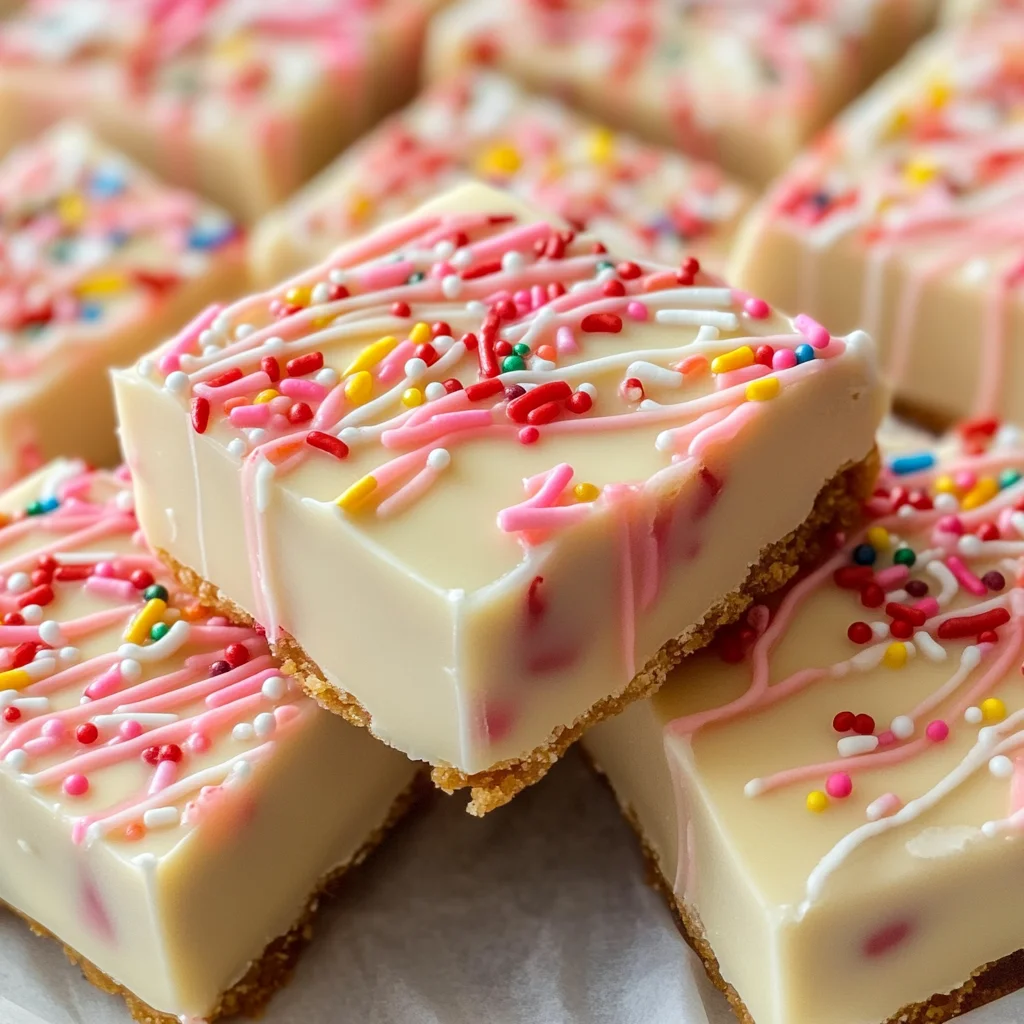
What makes this recipe so special? It’s not just the delightful combination of white chocolate and sugar cookie flavors—it’s how easy it is to make and share with loved ones. Imagine crafting this fudge as a surprise gift for friends or family on Valentine’s Day, or perhaps as a sweet indulgence for yourself while snuggling up to watch your favorite rom-com. Each piece is adorned with colorful holiday sprinkles that add a playful touch, making it perfect for any occasion where love and sweetness are in the air. Trust me when I say that preparing this fudge will create not only delicious treats but also cherished memories in your kitchen.
Valentine’s Day Sugar Cookie Fudge Recipe: Sweet Surrender in Every Bite
Get ready to embark on a delightful culinary journey as we whip up this scrumptious Valentine’s Day Sugar Cookie Fudge! This easy no-bake recipe brings together the richness of white chocolate with the nostalgic flavor of sugar cookies—all without any fuss! It’s perfect for sharing (or keeping all to yourself), and I promise it’ll become a staple in your dessert repertoire.
Ingredients:
As we gather our ingredients, think of this as assembling the building blocks for something truly wonderful. Each component plays its part beautifully, contributing to the overall magic of our fudge.
- 3 cups white chocolate chips: This is the star ingredient! White chocolate chips melt into velvety goodness, providing both sweetness and creaminess that forms the base of our fudge. Look for high-quality chips—brands like Guittard or Ghirardelli offer rich flavors without any waxy aftertaste. If you’re feeling adventurous, you can even use chopped white chocolate bars instead of chips for an even silkier texture!
- 1 cup sugar cookie mix: I used Betty Crocker’s mix for its consistent results and nostalgic flavor profile reminiscent of freshly baked cookies. This adds an irresistible taste while also acting as a thickening agent—trust me, it gives our fudge that delightful cookie dough essence! You could also use homemade sugar cookie dough if you’re up for it; just ensure it’s well-chilled before mixing.
- 1 can (14 ounces) sweetened condensed milk: A key player in achieving that creamy consistency! It binds everything together while adding luscious sweetness that’s utterly intoxicating. When shopping, choose full-fat condensed milk; it enhances creaminess without compromising flavor.
- 1 tablespoon unsalted butter: Butter is non-negotiable here; it contributes richness and helps achieve that smooth texture we desire in our fudge. Be sure to use unsalted butter so you can control the saltiness in your final product—this allows the sweetness to shine through without competing flavors.
- 1 teaspoon pure vanilla extract: Vanilla isn’t just an afterthought; it’s essential! It elevates the overall flavor profile with its warm notes and beautifully rounds out the sweetness. Always opt for pure vanilla extract over imitation because you’ll notice a significant difference in depth and aroma!
- 1/2 cup holiday sprinkles (divided): Sprinkles add joy—and who doesn’t love a pop of color? They bring festive cheer to our fudge while also adding slight crunch to each bite. You can use any type you love—heart-shaped sprinkles would be perfect for Valentine’s Day!
- 3-4 ounces almond bark or white chocolate: For drizzling on top, almond bark offers ease and a glossy finish that looks beautiful! It melts easily and hardens quickly, creating an appealing contrast against our creamy fudge base. If you prefer more white chocolate flavor, feel free to substitute an equal amount of good-quality white chocolate bars.
Equipment You’ll Need:
You know what they say about having the right tools—it makes all the difference! While these items might not be edible ingredients themselves, they are essential partners in bringing our delicious creation to life.
- Double boiler: This is crucial for melting our white chocolate gently without scorching it. If you don’t have one at home, you can easily improvise by placing a heat-safe bowl over a pot filled with simmering water—just ensure no water touches the bowl!
- 9×9-inch baking dish: A square baking dish provides ample space for our fudge to set evenly. Lining it with parchment paper ensures easy removal later—trust me; you’ll thank yourself when it’s time to cut those beautiful squares!
- Silicone spatula: Perfect for stirring and scraping down sides during cooking—ensure all ingredients are well incorporated! A silicone spatula also allows you to easily spread the fudge into your dish without damaging its surface.
- Microwave-safe bowl: We’ll need this later when melting almond bark or additional white chocolate for drizzling. Ensure your bowl is large enough so there’s room for easy stirring!
Now that we’ve gathered everything we need let’s dive into making this delectable Valentine’s Day Sugar Cookie Fudge Recipe—the kind of recipe that invites laughter and love into your kitchen!
Step 1: Melting Magic
Begin by setting up your double boiler—a method designed specifically for gentle heating. In your medium-sized saucepan over simmering water (not boiling!), combine those luscious white chocolate chips along with our sugary companion—the sugar cookie mix—and sweetened condensed milk along with butter. Stir continuously as these ingredients gradually melt together into a silky pool of liquid gold. The key here is patience; keep stirring until everything becomes smooth and cohesive—about 5-7 minutes should do it! You’ll know it’s ready when there are zero lumps left behind—a beautiful canvas waiting to be transformed into something extraordinary.
Step 2: Infusing Flavor
Once you’ve achieved that glossy texture (don’t rush this step!), remove your saucepan from heat but keep it on top of the double boiler so things stay warm while you add some soul to your mixture—your pure vanilla extract along with half of those cheerful holiday sprinkles goes in next! Stir vigorously; watch as those sprinkles intermingle like confetti at a celebration while oh-so-delightful aromas waft through your kitchen. This moment is absolutely paramount because now we’re infusing all those incredible flavors together before pouring them into our prepared dish.
Step 3: Pouring Perfection
Next comes one of my favorite parts—the transfer! Line your 9×9-inch baking dish with parchment paper (make sure there are some overhangs) and give it a quick spray with cooking spray—you want everything sliding out easily later on! Carefully pour your melted fudge mixture into this lined dish; take your time smoothing out every corner using your trusty spatula—you want it even so every piece has equal delightfulness waiting inside! As you do this, feel free to press down lightly; this helps eliminate any air pockets which could lead to an uneven texture once cooled.
Step 4: Sprinkle It Up!
The fun continues as we finish off by pressing those remaining holiday sprinkles onto the top layer—it’s like giving each piece its own little crown! Once decorated beautifully like jewels set within creamy treasure, place your baking dish carefully into the refrigerator where patience reigns supreme for about 2-3 hours (or until firm). Why chill? Chilling allows all those flavors meld together while solidifying beautifully—trust me; skipping this step will leave you disappointed when attempting cuts too early!
I can’t wait to share more steps with you soon as we get closer towards enjoying this charming creation together—but hold tight until then because trust me when I say each bite will be nothing short of magical once we complete everything!
Step 5: Creating the Fudge Base – The Heart of Your Delight
Now that you’ve got your luscious mixture ready, it’s time to transfer it into a prepared baking dish. For this step, grab your trusty 9×9-inch baking dish and line it with parchment paper. I always recommend giving the parchment a light spray with cooking spray. This is absolutely paramount because it ensures that your fudge will easily lift out of the pan once it’s set, saving you from any potential heartbreak when you try to cut those perfect squares later on. You can also use a silicone baking dish if you have one; just know that it will make removal an absolute breeze!
Next, gently pour your warm fudge mixture into the lined baking dish. With a spatula or the back of a spoon, spread the fudge evenly across the bottom of the pan. Trust me on this: take your time here, as a well-smoothed top creates an inviting surface for those adorable holiday sprinkles we’re about to add. As you smooth the fudge, let yourself enjoy the rich aroma wafting up—this sweet scent is just a hint of what’s to come. Once you’re satisfied with how it looks, sprinkle those remaining colorful holiday sprinkles generously over the top, pressing them in lightly so they adhere to your fudge. This little touch not only adds visual flair but also an extra crunch that complements the smoothness of the fudge beautifully.
Step 6: Chilling – The Magic Transformation
Ah, now comes my favorite part—the chilling process! It may seem like just waiting around, but don’t rush this step; patience is crucial here. By chilling the fudge in your refrigerator for 2-3 hours (or longer if you can resist!), you allow all those delicious flavors to meld together while setting up beautifully. This isn’t just about making sure it’s firm enough to slice; it’s about letting those sweet notes deepen and create a truly extraordinary treat.
As your fudge chills, I encourage you to take a moment and imagine how that initial bite will taste—sweet yet comforting, with just enough texture from those sprinkles. When you check on it after two hours, look for a firm surface when you gently press down with your finger—it should feel set yet slightly soft underneath; this indicates that it’s ready for slicing. If it feels too loose, give it another hour or so—trust me; it’s worth waiting for perfection!
Step 7: Cutting Your Fudge – An Artful Process
Once you’ve patiently allowed your fudge to chill and transform into that creamy goodness we’ve been dreaming about, it’s time for one of my favorite parts—cutting into our creation! Carefully lift the parchment paper out of the baking dish; oh, doesn’t that feel rewarding? Place it onto a sturdy cutting board for safety and precision. Using a sharp knife (a warm knife works wonders here—just run it under hot water and wipe dry before cutting), slice your fudge into squares or rectangles as desired.
As you cut through that silky texture, listen for that satisfying sound! Each piece should be firm yet slightly chewy—a perfect balance that speaks volumes about how well you’ve executed this recipe. If some edges crumble a bit—that’s completely normal! Embrace those imperfections as they often taste even better than they look! Remember to wipe your knife between cuts to ensure clean edges; this makes each piece visually appealing and keeps things tidy.
Step 8: The Finishing Touch – Drizzling Elegance
Now comes one of the most delightful steps in our Valentine’s Day Sugar Cookie Fudge Recipe—adding that final flourish with melted almond bark or additional white chocolate! Melt your almond bark using a microwave-safe bowl in 30-second increments to avoid scorching; stirring between each increment is essential here since chocolate has its temperamental moments. Once melted and smooth (it should pour like liquid gold), transfer this heavenly concoction into a zippered bag or simply use a fork if you’re feeling rustic.
Snip off a tiny corner of the bag and drizzle love over each piece of fudge in gentle swirls or zigzags—however your heart desires! I promise you; this is where things get truly magical—the white chocolate drizzle hardens slightly upon cooling and adds not only flavor but an aesthetic appeal that makes these treats look professionally crafted! Plus, who could resist that extra layer of sweetness? Allow everything to cool completely at room temperature before serving—this helps bring out all those delicate flavors even more.
With each step taken care of and every detail lovingly executed, you’re now ready to share this delightfully sweet creation with friends and family! Whether it’s at a festive gathering or simply as an everyday treat, this Valentine’s Day Sugar Cookie Fudge Recipe is bound to stir joy and sweet sentiments alike! Enjoy every decadent bite—you’ve earned it!
Storage and Enjoyment Tips for Your Valentine’s Day Sugar Cookie Fudge Recipe
Now that your delightful Valentine’s Day Sugar Cookie Fudge is ready to be savored, it’s time to talk about how to keep this sweet treasure fresh for longer. Believe me, there’s nothing quite like enjoying a piece of this creamy, decadent fudge days after you’ve made it, perhaps while cozying up with a cup of tea or as a surprise treat for guests. But first, let’s dive into the best ways to store it so that every bite remains as heavenly as the first!
Storing Leftover Valentine’s Day Sugar Cookie Fudge Recipe
To properly store your luscious fudge, I recommend placing it in an airtight container; this is absolutely crucial for maintaining its soft texture and mouthwatering flavor. You can use a glass or plastic container, just make sure it’s sealed tightly to ward off any unwanted moisture or odors from your fridge. If you follow these steps, you’ll find that it keeps beautifully in the refrigerator for about two weeks. Here’s a little pro tip: placing a slice of bread inside the container can help retain moisture and freshness—seriously, it’s like magic! Even after storage, the fudge will taste divine; those rich flavors meld together even more beautifully over time. When you’re ready to indulge again, simply cut off a piece and enjoy it cold or let it sit out for a few minutes to soften slightly.
Freezing Your Valentine’s Day Sugar Cookie Fudge for Later
If you find yourself with extra fudge or simply want to prepare ahead for those special occasions, freezing is an excellent option! To freeze your fudge properly, wrap each piece tightly in plastic wrap or aluminum foil before placing them into a freezer-safe bag or container. This helps protect against freezer burn and keeps your fudge tasting fresh and delightful. When stored well, your fudge can last up to three months in the freezer! When it’s time to enjoy again, take out the desired amount and let it thaw in the fridge overnight or at room temperature for a few hours. This approach not only makes serving effortless but also allows you to have this treat on hand whenever you want something sweet without any hassle. Isn’t that just fantastic?
With these storage tips in your back pocket, you’ll ensure that your Valentine’s Day Sugar Cookie Fudge remains an irresistible indulgence no matter when you choose to enjoy it!
Valentine’s Day Sugar Cookie Fudge

Indulge in the sweet magic of this Valentine’s Day Sugar Cookie Fudge, a delightful treat that combines the creamy texture of white chocolate with the nostalgic flavor of sugar cookies. This no-bake recipe is perfect for sharing with loved ones or enjoying as a personal indulgence while cozying up with your favorite film. Each piece is adorned with vibrant holiday sprinkles, elevating the experience to a celebration of joy and togetherness. Easy to make and utterly delicious, this fudge is destined to become a cherished addition to your dessert repertoire.
- Prep Time: 20 minutes
- Cook Time: None
- Total Time: 0 hours
- Yield: About 16 servings 1x
- Category: Dessert
- Method: No-Bake
- Cuisine: American
Ingredients
- 3 cups white chocolate chips
- 1 cup sugar cookie mix
- 1 can (14 ounces) sweetened condensed milk
- 1 tablespoon unsalted butter
- 1 teaspoon pure vanilla extract
- 1/2 cup holiday sprinkles (divided)
- 3–4 ounces almond bark or additional white chocolate
Instructions
- Set up a double boiler and melt the white chocolate chips, sugar cookie mix, sweetened condensed milk, and butter together over simmering water. Stir continuously for about 5-7 minutes until smooth.
- Remove from heat and stir in vanilla extract and half of the holiday sprinkles.
- Line a 9×9-inch baking dish with parchment paper and lightly spray it with cooking spray. Pour in the fudge mixture, smoothing it out evenly.
- Press the remaining sprinkles into the top of the fudge before placing it in the refrigerator to chill for 2-3 hours or until firm.
- Once set, cut into squares and drizzle melted almond bark or additional white chocolate on top for an elegant finish.
Nutrition
- Serving Size: 1 serving
- Calories: 170
- Sugar: 18g
- Sodium: 45mg
- Fat: 9g
- Saturated Fat: 5g
- Unsaturated Fat: 4g
- Trans Fat: 0g
- Carbohydrates: 22g
- Fiber: 0g
- Protein: 1g
- Cholesterol: 15mg