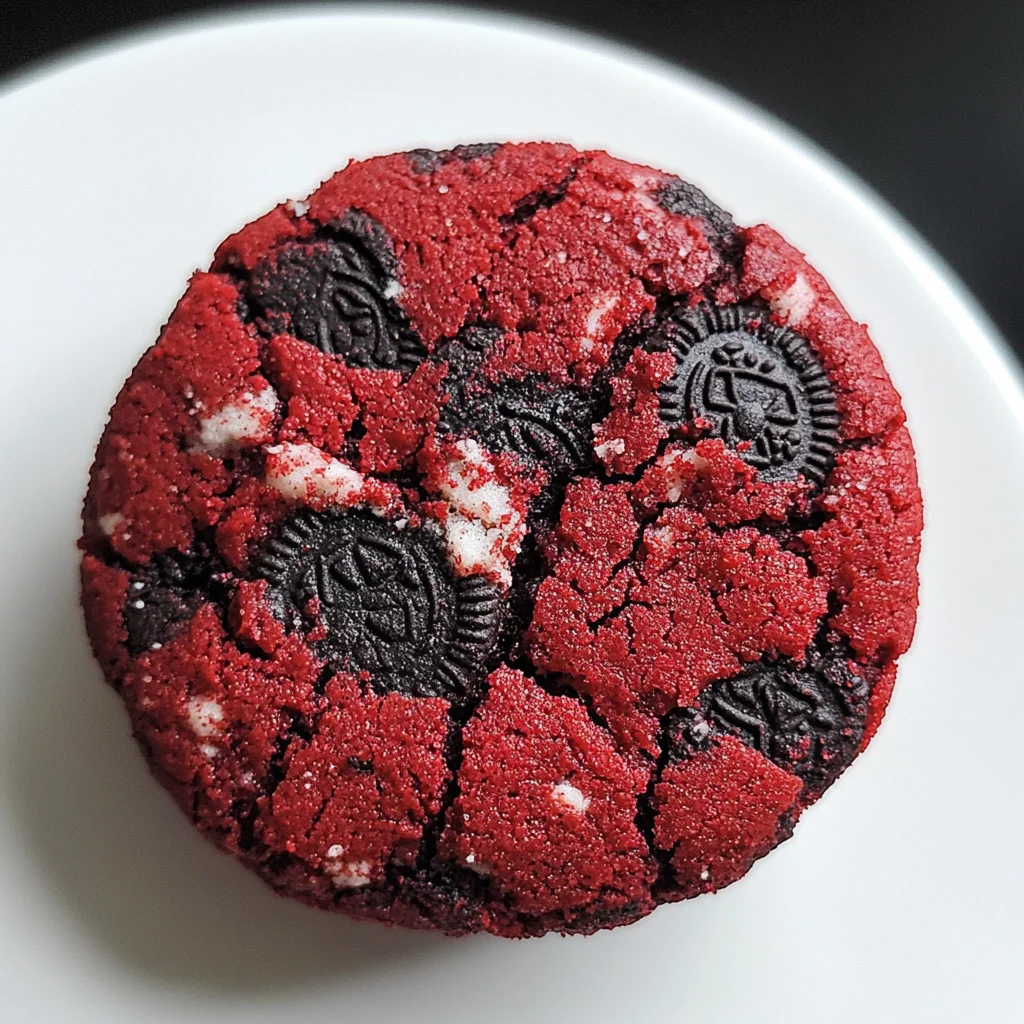
Stranger Things Red Velvet Cookies
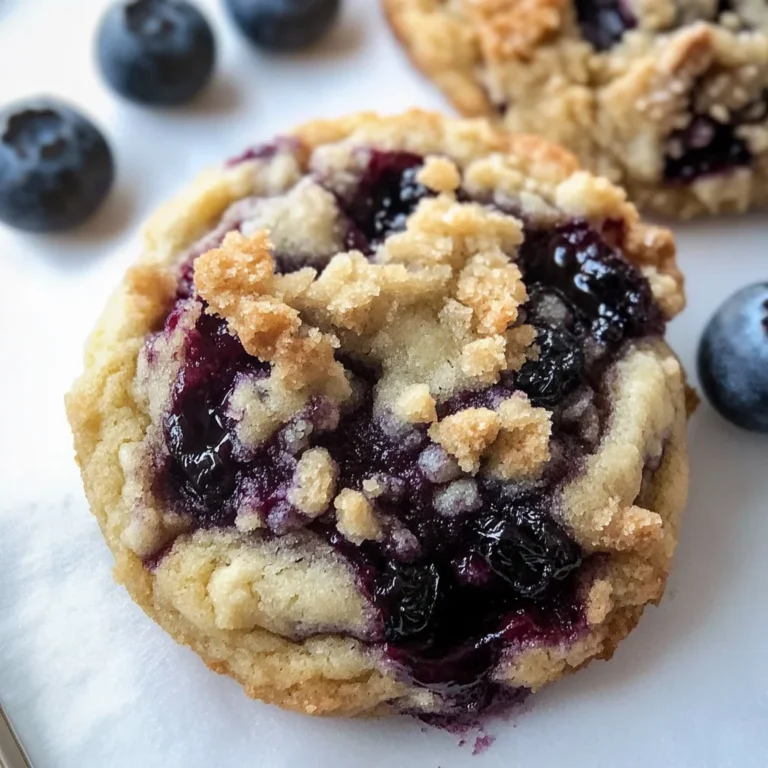
If you’re looking for a fun and delicious treat to spice up your next gathering, you have to try these Stranger Things Red Velvet Cookies! Inspired by the iconic Netflix series, these cookies not only taste amazing but also look like they’ve come straight from the Upside Down. They’re perfect for movie nights, family gatherings, or even just a cozy evening at home. The vibrant red color and scrumptious flavor make them a standout dessert that everyone will love!
These cookies are not just visually appealing; they also pack a delightful chocolatey flavor with every bite. Plus, they’re super easy to whip up, making them a go-to recipe when you need something sweet in a pinch. So grab your mixing bowl and let’s dive into this delectable cookie adventure!
Why You’ll Love This Recipe
- Quick to Prepare: With just a few simple steps, you can have these cookies ready in no time.
- Family-Friendly Fun: Kids and adults alike will enjoy both making and munching on these vibrant treats.
- Make Ahead Convenience: Dough can be prepped in advance, so you can bake fresh cookies whenever the mood strikes!
- Unique Presentation: The Upside Down design adds flair, making them perfect for themed parties or gatherings.
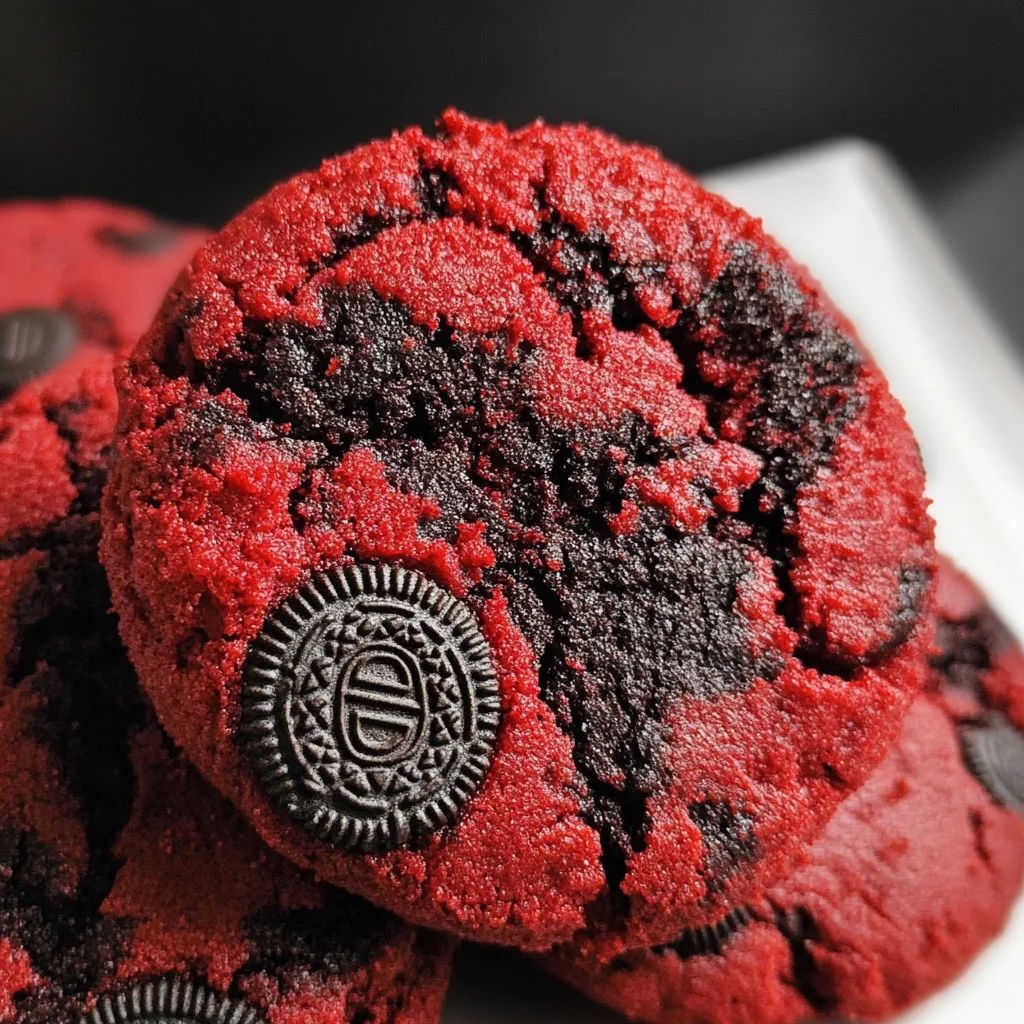
- Deliciously Decadent Flavor: Rich red velvet combined with crunchy Oreo pieces creates an irresistible treat.
Ingredients You’ll Need
You’ll find that the ingredients for these Stranger Things Red Velvet Cookies are simple and wholesome. Gather these essentials to create your own batch of these delightful treats!
- 1 cup COLD unsalted butter (cubed)
- 1½ cups granulated white sugar
- 2 large eggs
- 1 tsp vanilla extract
- 2 tsp red liquid food coloring
- 1/4 cup unsweetened cocoa powder
- 1 tsp baking soda
- 1 tsp cornstarch
- 1/2 tsp salt
- 1 cup cake flour
- 1¾ cups all-purpose flour
- 2 cups crushed Oreo Cookies (cream removed)
Variations
One of the best things about this cookie recipe is its flexibility! You can easily adapt it to suit different tastes or dietary needs. Here are some fun variations to try:
- Add Nuts: For a crunchy texture, mix in some chopped walnuts or pecans.
- Change the Color: Swap out the red food coloring for another color to match other themes or holidays.
- Mix in Chocolate Chips: Add semi-sweet or white chocolate chips for an extra indulgent twist.
- Use Different Sandwich Cookies: Experiment with other sandwich cookie flavors like chocolate mint or peanut butter for unique tastes.
How to Make Stranger Things Red Velvet Cookies
Step 1: Preheat Your Oven
Start by preheating your oven to 410° F (210° C). A hot oven is key for achieving those perfectly baked cookies that are crisp on the outside and soft inside.
Step 2: Cream Together Butter and Sugar
In the bowl of your stand mixer, combine the cubed cold butter and granulated sugar. Mix on low speed for about one minute until they start blending together. Increasing the speed to high for another minute helps incorporate air into the mixture, which is essential for fluffy cookies.
Step 3: Add Eggs and Vanilla
Add in the eggs one at a time, ensuring each egg is completely mixed before adding the next. Follow this with the vanilla extract. This step enriches your dough with flavor while also adding moisture.
Step 4: Incorporate Color and Cocoa
Next, pour in the red food coloring and unsweetened cocoa powder. Mixing on low ensures that everything is evenly incorporated without splattering any of that vibrant color around your kitchen!
Step 5: Combine Dry Ingredients
In another medium-sized bowl, whisk together cake flour, all-purpose flour, baking soda, cornstarch, and salt until well combined. This step helps distribute the leavening agents evenly throughout the dough.
Step 6: Mix Dry Ingredients into Wet Mixture
Slowly add your dry ingredients into the wet mixture in batches. Be sure to scrape down the sides of your mixing bowl so everything is thoroughly combined. This keeps your cookie dough consistent and ensures no dry spots remain.
Step 7: Chill Your Dough
Cover your mixing bowl with plastic wrap or a clean kitchen towel and refrigerate it uncovered for about 20 minutes. Chilling helps firm up the dough so that it holds its shape while baking.
Step 8: Prepare Crushed Oreos
While waiting for your dough to chill, place crushed Oreos into a medium-sized bowl. This will be what makes our cookies look like they came straight from an alternate dimension!
Step 9: Measure Out Cookie Dough Balls
Using a digital cooking scale or simply your hands, measure out approximately 3.5 oz of dough per cookie ball. Form each piece into a nice round ball that will bake beautifully.
Step 10: Roll in Crushed Oreos
Take each dough ball and roll it into the bowl of crushed Oreos. Press lightly so that those tasty bits stick well to each cookie—this gives them their signature look!
Step 11: Bake Your Cookies
Place each cookie dough ball about three inches apart on a parchment-lined baking tray. Bake on the center rack of your oven for about 10-11 minutes until they’re just set but still soft in the middle.
Step 12: Cool Before Enjoying
Once baked, remove them from the oven and let them cool on the tray for a few minutes before transferring them onto wire racks to cool completely. This cooling time helps them firm up even more so they don’t fall apart when you take a bite!
And there you have it—your very own batch of Stranger Things Red Velvet Cookies! Perfectly spooky and utterly delicious! Enjoy sharing (or hoarding) these treats as you binge-watch your favorite series!
Pro Tips for Making Stranger Things Red Velvet Cookies
Baking these delicious cookies can be a breeze with just a few handy tips!
- Use cold butter: Starting with cold, cubed butter helps achieve a perfect texture that keeps the cookies from spreading too much while baking.
- Chill the dough: Refrigerating the dough for at least 20 minutes firms it up, leading to thicker and chewier cookies that hold their shape beautifully.
- Measure accurately: For consistent cookie sizes, consider using a digital cooking scale to portion your dough. This ensures even baking and makes them look professionally made!
- Don’t skip the parchment paper: Lining your baking tray with parchment paper prevents sticking and makes for easy cleanup, plus it helps the cookies bake evenly without burning on the bottom.
- Store properly: Keep any leftover cookies in an airtight container at room temperature to maintain their freshness and soft texture for several days.
How to Serve Stranger Things Red Velvet Cookies
These enchanting cookies are not just delicious; they’re also a fun treat for any occasion! Whether you’re hosting a movie night or treating friends to a game session, here’s how to make them shine.
Garnishes
- Powdered sugar dusting: Lightly sprinkle powdered sugar over the cooled cookies for a delicate touch that adds visual appeal.
- Chocolate drizzle: A quick drizzle of melted dark chocolate can enhance flavor and give your cookies an elegant finish.
Side Dishes
- Vanilla ice cream: Pair these cookies with a scoop of creamy vanilla ice cream for a delightful contrast of temperatures and textures.
- Fresh fruit salad: A refreshing side of mixed berries or tropical fruits provides brightness and balances the richness of the cookies.
- Milk or plant-based milk: Serve alongside a glass of cold milk (or almond/cashew milk) to complement the sweetness perfectly as you dunk these treats!
With these tips and serving suggestions, your Stranger Things Red Velvet Cookies are sure to impress everyone and bring some magical vibes to your gatherings!
Make Ahead and Storage
These Stranger Things Red Velvet Cookies are perfect for meal prep! You can whip up a batch ahead of time, making them ideal for parties or satisfying those late-night cravings. Here’s how to store and freeze them effectively:
Storing Leftovers
- Store the cooled cookies in an airtight container at room temperature.
- They will stay fresh for up to 5 days.
- For longer-lasting freshness, consider refrigerating them.
Freezing
- To freeze, ensure the cookies are completely cooled.
- Place them in a single layer on a baking sheet and freeze until solid.
- Once frozen, transfer the cookies to a freezer-safe bag or container, separating layers with parchment paper.
- They can be frozen for up to 3 months.
Reheating
- To enjoy your cookies warm, preheat your oven to 350°F (175°C).
- Place the cookies on a baking sheet and heat for about 5-7 minutes until warmed through.
- Alternatively, you can use a microwave; heat each cookie for about 10-15 seconds.
FAQs
If you have questions about these delicious cookies, you’re not alone! Here are some common inquiries:
Can I make Stranger Things Red Velvet Cookies gluten-free?
Absolutely! Substitute all-purpose flour with a gluten-free blend that measures cup-for-cup. This way, everyone can enjoy these amazing treats!
How long do Stranger Things Red Velvet Cookies last?
When stored properly in an airtight container at room temperature, these cookies will stay fresh for up to 5 days. Enjoy them while they last!
Can I use different colors instead of red food coloring?
Yes! While the iconic red color is part of the fun, feel free to experiment with other colors to match your theme or mood.
What makes these cookies so special?
The combination of rich cocoa flavor, creamy Oreo coating, and vibrant color makes these Stranger Things Red Velvet Cookies not just delicious but visually stunning too!
Final Thoughts
I hope you’re as excited to bake these Stranger Things Red Velvet Cookies as I am! They’re perfect for any gathering or just as a sweet treat while binge-watching your favorite show. Enjoy every moment of making these delightful cookies — it’s all about bringing joy into your kitchen. Happy baking!
Stranger Things Red Velvet Cookies

If you’re ready to elevate your dessert game, these Stranger Things Red Velvet Cookies are the perfect treat for your next gathering. Inspired by the beloved Netflix series, these cookies feature a vibrant red hue and a delicious cocoa flavor that will leave everyone asking for more. Easy to make and visually stunning, they are ideal for any occasion—be it movie nights, family celebrations, or cozy evenings at home. With a delightful crunch from crushed cookies on the outside and a soft center, these treats are sure to impress!
- Prep Time: 20 minutes
- Cook Time: 11 minutes
- Total Time: 31 minutes
- Yield: Approximately 24 cookies 1x
- Category: Dessert
- Method: Baking
- Cuisine: American
Ingredients
- 1 cup cold unsalted butter (cubed)
- 1½ cups granulated white sugar
- 2 large eggs
- 1 tsp vanilla extract
- 2 tsp red liquid food coloring
- ¼ cup unsweetened cocoa powder
- 1 tsp baking soda
- 1 tsp cornstarch
- ½ tsp salt
- 1 cup cake flour
- 1¾ cups all-purpose flour
- 2 cups crushed Oreo cookies (cream removed)
Instructions
- Preheat your oven to 410°F (210°C).
- In a stand mixer, cream together cold butter and sugar on low speed until blended; then increase speed to high for one minute.
- Add eggs one at a time and vanilla extract, mixing until well combined.
- Incorporate red food coloring and cocoa powder on low speed.
- In another bowl, whisk together cake flour, all-purpose flour, baking soda, cornstarch, and salt.
- Gradually mix dry ingredients into the wet mixture until fully combined.
- Chill the dough for about 20 minutes in the refrigerator.
- Roll cookie dough into balls (about 3.5 oz each) and coat with crushed Oreo cookies.
- Place on a parchment-lined baking tray three inches apart and bake for 10-11 minutes.
- Cool on wire racks before serving.
Nutrition
- Serving Size: 1 cookie (45g)
- Calories: 210
- Sugar: 12g
- Sodium: 120mg
- Fat: 9g
- Saturated Fat: 5g
- Unsaturated Fat: 4g
- Trans Fat: 0g
- Carbohydrates: 30g
- Fiber: 1g
- Protein: 2g
- Cholesterol: 30mg