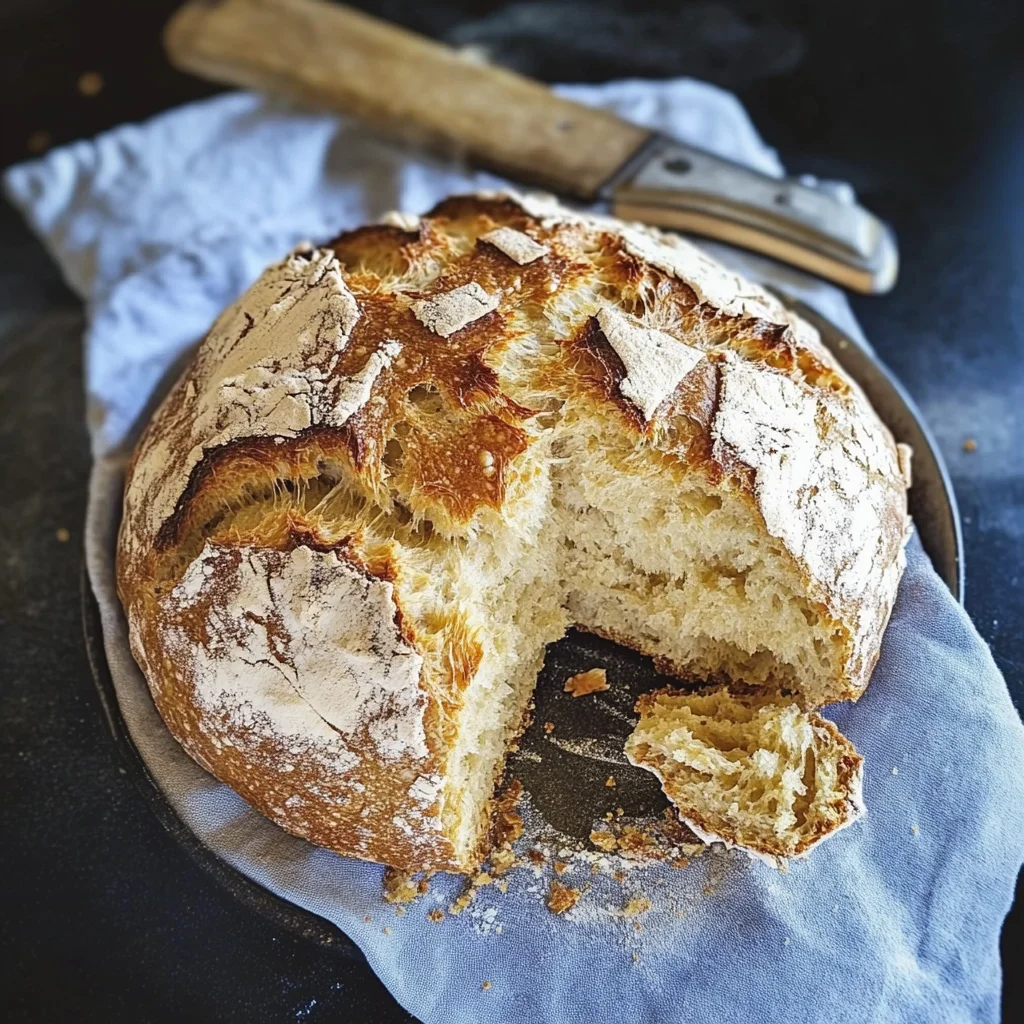
St. Patrick’s Day Irish Soda Bread
There’s something utterly captivating about the experience of baking bread, isn’t there? The way flour transforms into a dough, the intoxicating aroma that wafts through your kitchen as it bakes—it’s a symphony of senses that brings warmth to the heart and soul. Today, I’m thrilled to share with you my cherished recipe for St. Patrick’s Day Irish Soda Bread. This isn’t just any bread; it’s a bridge between generations, embodying tradition while inviting us to innovate in our own kitchens. The crunch of the crust, the soft crumb inside—each bite is a reminder of the beauty in simplicity. When you take that first slice, slather on some butter, and let it melt into those warm crevices, I promise you’ll feel like you’ve transported yourself straight to a cozy Irish café.
Now, what makes this Irish Soda Bread truly remarkable isn’t just its delightful flavor; it’s also its rich history and cultural significance. Originating from Ireland, soda bread was born out of necessity—simple ingredients that came together in a stunningly delicious way. Traditionally made with just flour, baking soda, and buttermilk, this bread doesn’t require yeast or lengthy rising times. Instead, it relies on the magic of baking soda reacting with acidic buttermilk to create a light and airy loaf. Perfect for celebrating St. Patrick’s Day or enjoying any day of the week, this bread pairs beautifully with soups or stews and is an absolute joy at breakfast with jam or honey.
St. Patrick’s Day Irish Soda Bread: A Slice of Tradition
Get ready to embark on this delightful culinary journey! Baking Irish Soda Bread is as easy as it is rewarding—it’s quick enough to whip up on a whim yet special enough for those cherished occasions when family gathers around the table. By following these steps closely and using quality ingredients, you’ll create a loaf that’s not only delicious but also embodies all the love and care you put into it.
Ingredients:
As we gather our ingredients for this St. Patrick’s Day Irish Soda Bread, each one plays a critical role in creating that perfect loaf we all crave. Let’s dive into what you’ll need!
- 3⅔ cups all-purpose flour: The foundation of any good bread begins with flour, and all-purpose flour strikes that perfect balance between structure and tenderness in our soda bread. When selecting your flour, look for one that’s finely milled; this helps achieve that ideal texture without being too dense. If you’re feeling adventurous or looking for something gluten-free, alternatives like almond or oat flour can be used, though they may require adjustments in liquid amounts since they absorb moisture differently.
- 1 tsp baking soda: This ingredient is essential—it serves as our leavening agent instead of yeast! Baking soda reacts with the acidity in our buttermilk to create carbon dioxide bubbles that give our bread its lovely rise and lightness. Make sure your baking soda is fresh; if it’s been sitting around too long, it might not provide that necessary lift.
- 1¾ cups buttermilk: Ah yes, buttermilk—the liquid gold of baking! It not only contributes moisture but also enhances flavor and tenderness due to its acidity. If you don’t have buttermilk on hand (and trust me—I’ve been there), you can easily make your own by adding a tablespoon of lemon juice or vinegar to regular milk and letting it sit for about 5 minutes until it thickens slightly.
- 1 tsp kosher or sea salt: Salt is crucial here—not just for flavor but also because it strengthens the gluten structure in our dough while balancing out sweetness from other ingredients. Always opt for kosher or sea salt rather than table salt if possible—the larger grains dissolve more slowly and distribute better throughout your dough.
Equipment You’ll Need:
Having the right tools at your disposal will make this process not only smoother but also much more enjoyable! While they aren’t technically “ingredients,” these pieces of equipment are your trusted companions on this baking adventure.
- Large mixing bowl: A sturdy mixing bowl is essential for bringing everything together without spilling over—trust me; no one wants a flour explosion! Choose one that has enough capacity to handle mixing without causing a mess.
- Wooden spoon: This classic tool isn’t just nostalgic; it’s perfect for gently combining ingredients without overworking the dough. The wooden material helps prevent sticking while allowing you to mix thoroughly without adding extra air into the mixture.
- Parchment paper: A simple yet invaluable tool! Lining your baking sheet prevents sticking and ensures an easy transfer from oven to cooling rack later on—plus, cleanup becomes a breeze.
- Baking sheet: A flat surface allows even heat distribution during baking so every inch of your bread gets that golden-brown crust we all adore. Opt for one made from heavy-duty metal which prevents warping under high temperatures.
Preparing the St. Patrick’s Day Irish Soda Bread
Step 1: Preheat Your Oven and Prepare Your Baking Sheet
Before we dive into mixing our ingredients (and trust me—you’ll want everything ready when it’s time!), preheat your oven to 425°F (220°C). This step is absolutely paramount because having a hot oven ensures your bread rises quickly once it’s placed inside—creating that beautiful crust while maintaining softness within. While waiting for the oven to warm up—a process that builds excitement—line your baking sheet with parchment paper so you’re fully prepared once your dough comes together.
Step 2: Combine Dry Ingredients
In your large mixing bowl, combine the all-purpose flour with baking soda and salt by whisking them together gently until evenly distributed—this ensures every bite has balanced flavor throughout! I encourage you not to rush this step; taking just an extra moment here will ensure success later on in achieving an evenly risen loaf. Once combined well enough to see no visible lumps remains within dry mix—you’ve set yourself up beautifully!
Step 3: Create Your Dough
Next comes one of my favorite parts: making that well in dry mixture where we’ll pour our buttermilk! Gently push aside some dry ingredients with your spoon until there’s enough space left at center resembling small crater—it feels almost magical when you think about how simple elements become something greater than themselves once combined together! As you pour in buttermilk (your secret ingredient), resist stirring immediately; instead allow liquid slowly seep into surrounding area before mixing gently until dough forms—a soft consistency should emerge after lightly kneading by hand if needed afterwards—don’t overwork though!
Step 4: Knead Lightly
Once you’ve mixed until combined—and I mean gently—we’re going back onto floured surface now where magic happens! Transfer dough onto lightly floured countertop (or another clean surface) where we’ll give it just 3–4 gentle kneads max before shaping into round disk about 1–2 inches thick—that’s right folks no need for laborious kneading here! Why avoid excessive handling? Overworking leads tight gluten strands which result tough texture instead fluffy goodness we strive towards achieving each time we bake together…
This recipe is more than just instructions; it’s an invitation into my kitchen filled with warmth and love for sharing food experiences—we’re crafting memories alongside deliciousness! So stay tuned as we continue through this delightful process…
Step 5: Kneading the Dough to Perfection
Now that we’ve created a lovely well in our dry ingredients and introduced the buttermilk, it’s time to mix everything together. I can’t stress enough how important this step is: you want to treat your dough gently. Using a wooden spoon, begin by slowly folding the flour into the buttermilk, allowing it to absorb the liquid gradually. This careful incorporation is crucial because it helps develop just enough gluten without overworking the dough. If you were to beat it too vigorously, you’d wind up with a tough loaf instead of the tender and crumbly texture we’re aiming for. So, trust me on this—be gentle!
Once you see that a soft dough is starting to form, it’s time to get in there with your hands. Lightly knead the dough for about three to four turns on a lightly floured surface; we want just enough movement to bring it together without making it tough. At this stage, the dough should feel slightly wet but not sticky—almost like a soft pillow ready for baking! If it sticks too much, sprinkle just a pinch more flour as needed; however, be cautious not to add too much or you’ll compromise that delightful texture. Remember, this process is all about balance and intuition; listen to your dough!
Step 6: Shaping Your Dough into a Beautiful Round
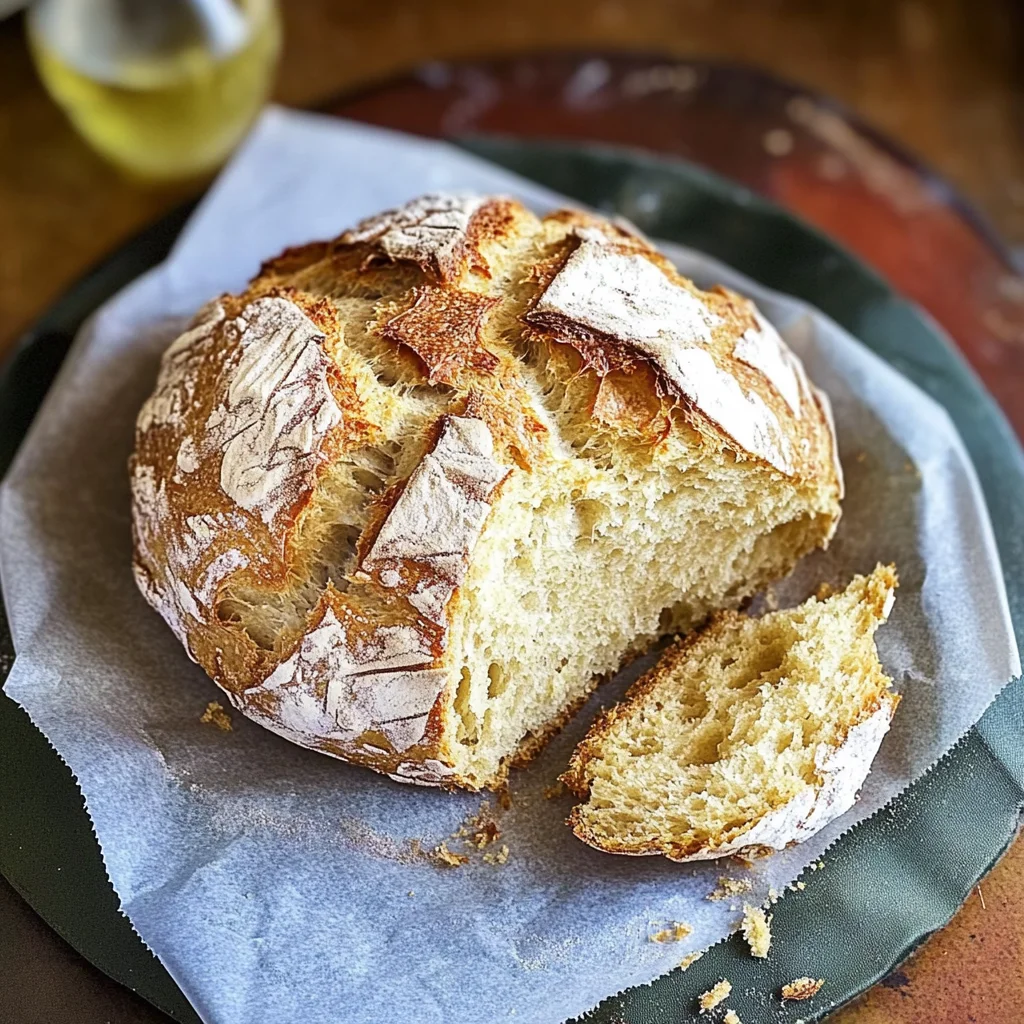
With our dough perfectly mixed and kneaded, now comes one of my favorite parts—shaping! Transfer your lovingly crafted dough onto a well-floured surface and flatten it gently using your hands until it’s about 1-2 inches thick. Aim for that rustic look; after all, this isn’t meant to be an Instagram model but rather a hearty loaf that embodies comfort and tradition! As you shape, think of every touch as adding character; each loaf bears its own unique signature.
The reason behind shaping it into a round is multi-faceted—it allows for even baking while also creating those delightful crusty edges we all adore. Plus, let’s be honest: there’s something enchanting about pulling out a round loaf from the oven—it feels so inviting! Don’t worry if it doesn’t look perfect; remember that every loaf tells its own story. The irregularities add charm! Once shaped, place your round lovingly onto the prepared baking sheet where it will soon meet its golden destiny.
Step 7: Scoring – The Signature Move
Now we arrive at a transformative moment in our baking journey: scoring the top of our loaf with a deep cross from edge to edge. Grab your sharp knife or razor blade—this isn’t just for show; this step is absolutely paramount for proper baking. Scoring allows steam to escape during cooking, which not only prevents unsightly cracks but also creates those beautiful fissures that lend character to your bread’s crust. Think of it as giving your bread space to breathe and expand beautifully in the oven.
When scoring, aim for about half an inch deep—you want those marks to be visible but not so deep that they compromise the structure of your loaf. While doing this, take a moment to appreciate the journey your ingredients have taken from simple flour and buttermilk into this artistic creation before you! Trust me when I say that those little cuts will open up beautifully during baking, leading to an airy interior while keeping that crust perfectly crunchy.
Step 8: Baking Your Perfect St. Patrick’s Day Irish Soda Bread
With everything prepped—the oven preheated like a warm embrace at 425°F (220°C) and our loaf lovingly scored—it’s time for the magic of transformation through baking! Carefully slide your baking sheet into the oven and set a timer for 25-30 minutes. As your bread bakes, take in that utterly intoxicating aroma wafting through your kitchen; you’ll know something special is happening right before your eyes!
Keep an eye on how things are progressing around the 25-minute mark—this is where visual cues become essential. You’re looking for that golden-brown color forming on top—a sign that things are cooking beautifully beneath the surface as well! The ultimate test? Give the bottom of your loaf a gentle tap with your finger—if it sounds hollow like an echoing drumbeat, congratulations! It’s done and ready to delight everyone who crosses its path. If not quite there yet, don’t worry; pop it back in for another few minutes while keeping watch—baking times can vary depending on oven quirks!
Conclusion:
As we wrap up our delicious journey through making St. Patrick’s Day Irish Soda Bread together, I can’t help but feel a wave of excitement bubbling up inside me! This recipe is not just about combining ingredients; it’s about creating memories, sharing laughter around the table, and savoring each moment with loved ones. The beauty lies in its simplicity—the balance of wholesome ingredients creates a flavor that is both rustic and refined. With each bite, you’ll experience that perfect harmony between the tender crumb and crunchy crust—a truly extraordinary experience that I hope fills your heart with joy just as it does mine.
So why should you absolutely try making this bread? It’s not only about taste; it’s about the joy of baking something from scratch that anyone can master—even if you’re new to cooking! Picture yourself pulling this glorious loaf from your oven—the aroma wafting through your kitchen will draw everyone near like moths to a flame. Whether you’re hosting a festive gathering for St. Patrick’s Day or simply enjoying a cozy night in with family, this bread shines on any occasion. Each slice offers comfort that transcends ordinary meals; it’s perfect alongside hearty soups or even slathered with jam for breakfast!
Imagine savoring one warm slice with a pat of creamy butter melting into its surface—what bliss! For an afternoon pick-me-up, pair it with a cup of steaming tea while watching raindrops dance against your windowpane. And if you’re looking for something decadent after dinner? I highly recommend serving it alongside rich chocolate desserts or warming spiced apple cider—it’s sheer perfection!
Feeling adventurous? This recipe is wonderfully adaptable too! You can infuse it with herbs like rosemary or thyme for an aromatic twist or add sun-dried tomatoes and olives for an Italian flair—trust me on this one; every variation adds its own unique charm while still allowing the soul of traditional soda bread to shine through beautifully. So go ahead—experiment with flavors that speak to your heart! I invite you to try this recipe out, share your experiences with me, and let’s celebrate our love for cooking together!
St. Patrick’s Day Irish Soda Bread
St. Patrick’s Day Irish Soda Bread is a heartwarming treat that captures the essence of cozy gatherings and cherished traditions. This delightful bread requires minimal ingredients and no yeast, making it a quick and satisfying project for bakers of all levels. The combination of all-purpose flour, baking soda, and buttermilk creates a tender crumb and a beautifully golden crust that’s perfect for slathering with butter or serving alongside your favorite soups and stews. Whether you’re celebrating St. Patrick’s Day or simply in need of a comforting homemade bread, this recipe is sure to become a beloved staple in your kitchen.
- Prep Time: 10 minutes
- Cook Time: 30 minutes
- Total Time: 40 minutes
- Yield: Serves approximately 12 slices 1x
- Category: Dinner
- Method: Baking
- Cuisine: Irish
Ingredients
- 3⅔ cups all-purpose flour
- 1 tsp baking soda
- 1¾ cups buttermilk
- 1 tsp kosher or sea salt
Instructions
- Preheat oven to 425°F (220°C) and line a baking sheet with parchment paper.
- In a large mixing bowl, whisk together flour, baking soda, and salt until evenly combined.
- Create a well in the center of the dry mixture and pour in the buttermilk; gently mix until a soft dough forms.
- Transfer dough to a lightly floured surface and knead gently for 3-4 turns until just combined.
- Shape the dough into a round disk about 1-2 inches thick and place on the prepared baking sheet.
- Score the top with a deep cross using a sharp knife to allow steam to escape.
- Bake for 25-30 minutes or until golden brown and sounds hollow when tapped on the bottom.
Nutrition
- Serving Size: 1 slice (approximately 50g)
- Calories: 120
- Sugar: 0g
- Sodium: 200mg
- Fat: 0g
- Saturated Fat: 0g
- Unsaturated Fat: 0g
- Trans Fat: 0g
- Carbohydrates: 24g
- Fiber: 1g
- Protein: 3g
- Cholesterol: 0mg