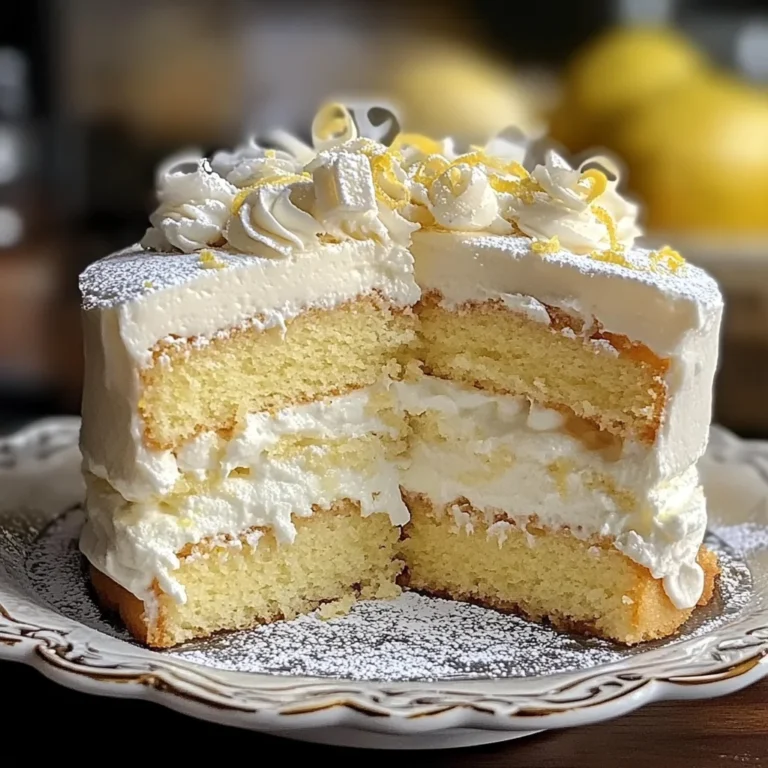
Salted Caramel Cake
There’s something truly magical about a cake that marries the rich, buttery sweetness of caramel with the soft fluffiness of vanilla cake. It’s like a warm hug on a plate, each slice revealing layers of moist cake filled with that golden liquid gold—homemade salted caramel. When I first tried making this Salted Caramel Cake, it felt like I was stepping into a world where sweet and salty danced in perfect harmony, creating an experience that goes far beyond just dessert. You see, it’s not merely about satisfying a sweet tooth; this cake embodies celebration, comfort, and the joy of sharing something special with loved ones. Every bite is profound and utterly satisfying, a reminder that sometimes the simplest ingredients can create something truly extraordinary.
Baking this Salted Caramel Cake is more than just following steps; it’s about embracing the process and letting your senses guide you. The way the sugar transforms into caramel is almost hypnotic—the tantalizing aroma filling your kitchen as you whisk together the components to create the buttercream is nothing short of euphoric. This cake is perfect for birthdays, anniversaries, or even just a cozy Sunday afternoon when you crave something indulgent yet simple to make. So roll up your sleeves, grab your mixing bowls, and let’s embark on this delicious journey together!
Salted Caramel Cake: A Sweet Symphony of Flavors
I am absolutely thrilled to share this recipe with you! This Salted Caramel Cake has become a beloved favorite among my friends and family, and I can’t wait for you to experience it too. With its delectable layers of moist vanilla cake generously slathered with homemade salted caramel and topped with an airy salted caramel buttercream, every forkful transports you to dessert heaven. Trust me when I say that once you taste this cake, it will be hard to go back to any ordinary dessert again!
Ingredients:
As we dive into our culinary adventure, let’s take a moment to appreciate each ingredient that makes this Salted Caramel Cake sing. Each component plays an essential role in crafting those unforgettable flavors and textures.
- 140 g granulated sugar. This humble ingredient serves as the backbone of our homemade salted caramel. When combined with water over heat, it melts down to create that beautiful amber hue we all know and love. Remember to choose quality sugar; it might seem trivial, but using pure granulated sugar without additives ensures a smooth caramel without any unwanted flavors.
- 1 1/2 tbsp water. At first glance, this may seem like an insignificant addition; however, it’s vital for achieving the right consistency in our caramel sauce by controlling how quickly the sugar melts. This step helps prevent burning—trust me on this one!
- 40 g butter. Butter is crucial because it enriches our caramel with its creamy goodness while also helping in achieving that silky texture we yearn for in every mouthful. Use unsalted butter for better control over the saltiness of your final product—it really does make a difference!
- 150 g heavy cream. Here’s where things get deliciously indulgent! Heavy cream adds richness and depth to the caramel sauce—without it, you’d end up with something more akin to candy than sauce! Make sure it’s at room temperature before adding it into your hot mixture; otherwise, you’ll risk seizing up that lovely caramel.
- big pinch of salt. Salt enhances flavors; it’s absolutely paramount here! Just a touch brings out all those beautiful notes of sweetness in our cake and buttercream while giving us that wonderful “salted” aspect we’re after.
- 340 g all-purpose flour. The foundation of our vanilla cake! Flour provides structure and stability while allowing us to achieve that fluffy crumb we’re aiming for. Opt for unbleached flour if possible; it’s less processed and often yields better results in baking.
- 2 tbsp cornstarch. Adding cornstarch seems like an extra step but trust me—it’s non-negotiable if you’re after that soft texture! Cornstarch helps keep our cake tender by creating a lighter crumb through its ability to absorb moisture effectively.
- 3/4 tsp baking powder & 3/4 tsp baking soda (together). These are our leavening agents—they work hand in hand to give rise to our cake! Baking powder reacts immediately upon mixing wet ingredients while baking soda kicks in when exposed to acidity (like sour cream), ensuring we achieve maximum lift.
- 3/4 tsp salt. Just another pinch here enhances flavor throughout the entire cake while balancing sweetness beautifully—a little goes a long way!
- 180 g butter (room temperature). We want our butter soft but not melted—this is crucial for creaming properly which gives us lightness in our batter! Creaming incorporates air into the mix resulting in fluffier layers once baked.
- 300 g granulated sugar (again!). More sugar means more sweetness—and who doesn’t love sweet? This also contributes texture during creaming; together they create an incredibly luscious base for your cake.
- 4 large eggs (room temperature). Eggs provide moisture as well as act as binding agents holding everything together beautifully while contributing richness too! Room temperature eggs blend more easily into batters so don’t skip letting them sit out before use.
- 240 g sour cream (14-18%) (room temperature). Sour cream elevates flavor bringing tanginess alongside moisture—important for keeping every slice decadently moist without falling flat!
- 60 g vegetable oil (e.g., canola oil). Oil creates tenderness within baked goods due its liquid state—allowing cakes like ours not only stay moist longer but also gives them softness.
- 2 tsp vanilla extract. You’ll want quality vanilla extract here; its aromatic essence enriches both flavor profiles dramatically making every bite feel special!
- 400 g butter (room temperature) (for frosting). Just as before; room temperature is key when making buttercream so we can whip up velvety peaks effortlessly!
- 660 g powdered sugar (sifted). Powdered sugar ensures smoothness without any grittiness—absolutely paramount if we want a silky-smooth finish on top of our masterpiece!
- 2 tsp vanilla extract (again!). More flavor enhancement coming through—we want consistency here because who doesn’t love vanilla?
- 2–3 tbsp caramel (preferably homemade). Drizzling some extra caramel into your frosting takes things over-the-top deliciously decadent; don’t be shy about adding enough until desired flavor hits just right!
Equipment You’ll Need:
Before diving into making this gorgeous cake together, let’s ensure we have all the right tools at hand! Having these essentials ready will help streamline the process so we can focus on what truly matters—the joy of baking!
- Mixing bowls – A set of mixing bowls in various sizes will be invaluable during both preparation stages and assembly later on! Opt for glass or stainless steel since they’re durable and easy-to-clean options that won’t retain flavors between uses.
- Measuring cups & spoons – Precision is key when baking; accurate measurements lead directly towards success! Invest in good-quality measuring tools—this small investment pays off big time during recipe execution!
- Whisk or electric mixer – For whipping egg whites or creaming butter/sugar mixtures effectively—both methods yield different textures but either works wonderfully depending on personal preference! If using an electric mixer don’t forget those paddle attachments—they really speed things along smoothly…
- Rubber spatula & offset spatula – Essential tools for scraping down sides ensuring no stubborn bits get left behind while mixing batters or spreading frosting evenly across layers later on!
Now that we’ve gathered everything needed let’s plunge headfirst into preparing this blissful Salted Caramel Cake together!
Step 1: Creating Liquid Gold
The journey begins by making our rich salted caramel sauce—a true showstopper element for both filling layers and frosting itself! In a medium saucepan over medium heat combine 140g granulated sugar with 1½ tbsp water stirring occasionally until dissolved completely—a clear solution forms before bubbling takes place signifying transformation ahead! You’ll want patience here—don’t rush stirring too much since excessive agitation may cause crystallization ruining all efforts made thus far… Keep watching closely until beautiful amber color emerges which usually takes around 6–8 minutes depending upon stove settings—but remember: each stove behaves differently so trust those visual cues instead! While continuing heat allow mixture reach desired shade then remove from flame carefully add 40g cold unsalted butter followed swiftly by slowly pouring in 150g heavy cream mixed gently till fully incorporated—be cautious steam rises sharply at first contact hence why patience pays off immensely during these steps… Lastly sprinkle generous pinch salt allowing flavors blend harmoniously before transferring contents into bowl letting cool completely while we prepare other components ahead next…
Step 2: Mixing Dry Ingredients
Now let’s shift focus onto combining dry elements together—a crucial step towards achieving ideal batter consistency later on! In separate large mixing bowl sift together 340g all-purpose flour alongside measured cornstarch baking powder baking soda plus remaining salt; whisk thoroughly ensuring even distribution among particles preventing any clumps forming—all critical factors impacting final texture outcome upon baking time… This process known as “sifting” not only incorporates air improving lightness yet prevents lumps forming within batter yielding delightful results overall—you’ll thank yourself later when slicing through those airy layers comes easier than expected…
Step 3: Creaming Butter & Sugar
With dry ingredients ready let’s unite them with creamy goodness from previously softened room-temperature butter alongside measured granulated sugar—we’re now entering territory where magic happens once again via creaming technique employed here… Grab stand mixer fitted paddle attachment or handheld whisk beating until mixture turns light pale fluffy resembling clouds atop mountain peaks roughly taking around five minutes total time frame… This stage introduces air bubbles essential leading towards lofty rise desired during bake cycle ahead hence why don’t rush this stage—it sets foundation establishing structure vital throughout entire project undertaken today producing ultimate satisfaction thereafter…
Step 4: Incorporating Eggs & Sour Cream
Once creamed well add four large room-temperature eggs individually one at time blending thoroughly between additions ensuring proper emulsification occurs yielding silky batter consistency afterwards… Next fold-in sour cream seamlessly integrating moisture component elevating richness whilst enhancing flavor profile significantly further deepening complexity involved within final creation produced today overall—it melds nicely within previous elements encouraging balance throughout entire equation represented beautifully amidst flavors experienced upon tasting… Add remaining measured vegetable oil along side last splash vanilla extract amalgamating completely incorporating newfound pleasure rushing forth urging excitement resultant anticipation built since starting point earlier thus far…
Let’s take this opportunity now together explore remaining steps culminating creation process leading toward assembling showcasing finished masterpiece awaiting presentation shortly thereafter…
Continuing with Your Salted Caramel Cake Journey
Ah, my friend, we are getting so close to creating a truly extraordinary Salted Caramel Cake. The anticipation is palpable, and I can already imagine the sweet aromas wafting through your kitchen as we dive deeper into this delicious adventure. Let’s take our time, savor each step, and ensure that every layer of this cake is absolutely perfect!
Step 5: Crafting the Divine Salted Caramel
Now comes one of the most exciting parts of our recipe: making the salted caramel! Begin by measuring out 140 grams of granulated sugar and adding it to a medium saucepan along with 1 ½ tablespoons of water. This combination is crucial; the water helps to dissolve the sugar evenly as it heats, preventing any clumping or burning. Place the saucepan over medium heat and allow it to come to a gentle boil without stirring—yes, I know it’s tempting, but trust me on this! You can gently swirl the pan occasionally to ensure even cooking. As the mixture heats up, keep an eye on it; you want to achieve a beautiful amber color which usually takes about 5-7 minutes.
Once you see that gorgeous amber hue emerging, carefully remove the pan from heat (don’t burn yourself!) and add 40 grams of butter, swirling gently until it melts completely into that liquid gold. Now, here’s where it gets truly magical: slowly pour in 150 grams of heavy cream while whisking continuously. The mixture will bubble up vigorously—this is normal! Just be cautious not to get splattered. Stir in a generous pinch of salt to elevate those flavors beautifully. Allow your salted caramel to cool for at least 20 minutes before using it in your cake; this resting period is vital as it allows the flavors to meld together and thickens slightly for easier layering later on.
Step 6: Preparing Your Cake Batter – A Symphony of Flavors
With your caramel cooling wonderfully, let’s turn our attention back to crafting that moist vanilla cake batter, which will be the canvas for our salted caramel masterpiece. In a large mixing bowl, combine 340 grams of all-purpose flour with 2 tablespoons of cornstarch, ¾ teaspoon baking powder, ¾ teaspoon baking soda, and ¾ teaspoon salt. The cornstarch here plays an essential role in tenderizing our cake by giving it that fluffy texture we all crave; it’s like a little secret ingredient that works wonders! Whisk these dry ingredients together until they are well mixed and set aside.
In another bowl—a big mixing bowl this time—cream together 180 grams of softened butter (at room temperature) with 300 grams of granulated sugar until it becomes light and fluffy. This step is absolutely paramount because incorporating air into the butter helps create a lovely rise in your cake during baking. You should see your mixture start turning pale; this typically takes about 4-5 minutes using an electric mixer on medium speed. Afterward, add in your four large eggs one at a time, ensuring each egg is fully incorporated before adding the next—this will help emulsify everything beautifully.
Now you’ll want to mix in 240 grams of sour cream (also at room temperature), 60 grams of vegetable oil, and 2 teaspoons of vanilla extract until just combined. Why sour cream? It lends moisture and richness while balancing out sweetness! Gently fold in your dry ingredients in three additions; this folding technique keeps your batter light and airy—don’t rush through this step! Once everything is just combined (a few small lumps are okay), you’re ready for baking!
Step 7: Baking Your Perfect Layers
Preheat your oven to 350°F (175°C) while you prepare two round 9-inch cake pans by greasing them generously with butter or lining them with parchment paper—trust me when I say that nothing ruins a cake quite like sticking! Divide your luscious batter evenly between both pans; I love using a kitchen scale here for accuracy—it ensures both layers bake evenly without any surprises later on.
Pop those pans into your preheated oven and set a timer for about 20-25 minutes. But don’t just wander off—this is where knowing your oven’s quirks comes into play! Keep an eye on them around the 20-minute mark; you’ll know they’re done when they’re golden brown on top and a toothpick inserted into the center comes out clean or with just a few moist crumbs attached. It’s essential not to overbake them as they’ll continue cooking slightly once removed from the oven due to residual heat.
Once they’re baked perfectly, remove them from the oven and let them cool in the pans for about 10 minutes before transferring them onto wire racks to cool completely. Cooling properly is so important because if you frost too soon, the warmth will melt that beautiful salted caramel buttercream we’re making next!
Step 8: Creating Your Silky Salted Caramel Buttercream
While those cake layers cool down nicely, let’s whip up some heavenly salted caramel buttercream that will take this dessert over-the-top! In a large mixing bowl or stand mixer fitted with a paddle attachment, beat 400 grams of softened butter on medium speed until creamy and fluffy—this usually takes about 4-5 minutes. Next comes my favorite part: gradually add in 660 grams of powdered sugar, one cup at a time while mixing on low speed until it’s fully incorporated. This method helps avoid sugar clouds all over your kitchen!
Once all that sugary goodness has been added, increase your mixer speed slightly and pour in about 2-3 tablespoons of cooled salted caramel, along with another splash of vanilla extract (about 2 teaspoons). Continue beating until everything is smooth and silky—this frosting should feel like pure indulgence! If it seems too thick for spreading blissfully on your cakes, don’t hesitate to add a tiny splash of cream or milk until you reach that perfect consistency where it’s spreadable yet holds its shape beautifully.
Let’s take a moment here: taste that frosting! This step brings sheer joy as you balance flavors according to personal preference—add more caramel if you’re feeling adventurous or more salt if you’re craving that delightful contrast between sweet and savory!
Final Touches
Now we’ve arrived at one of my favorite moments—the assembly! With those glorious layers cooled completely, we can bring everything together for an unforgettable experience.
Step 9: Layering Your Cake – A Showstopper Unfolds
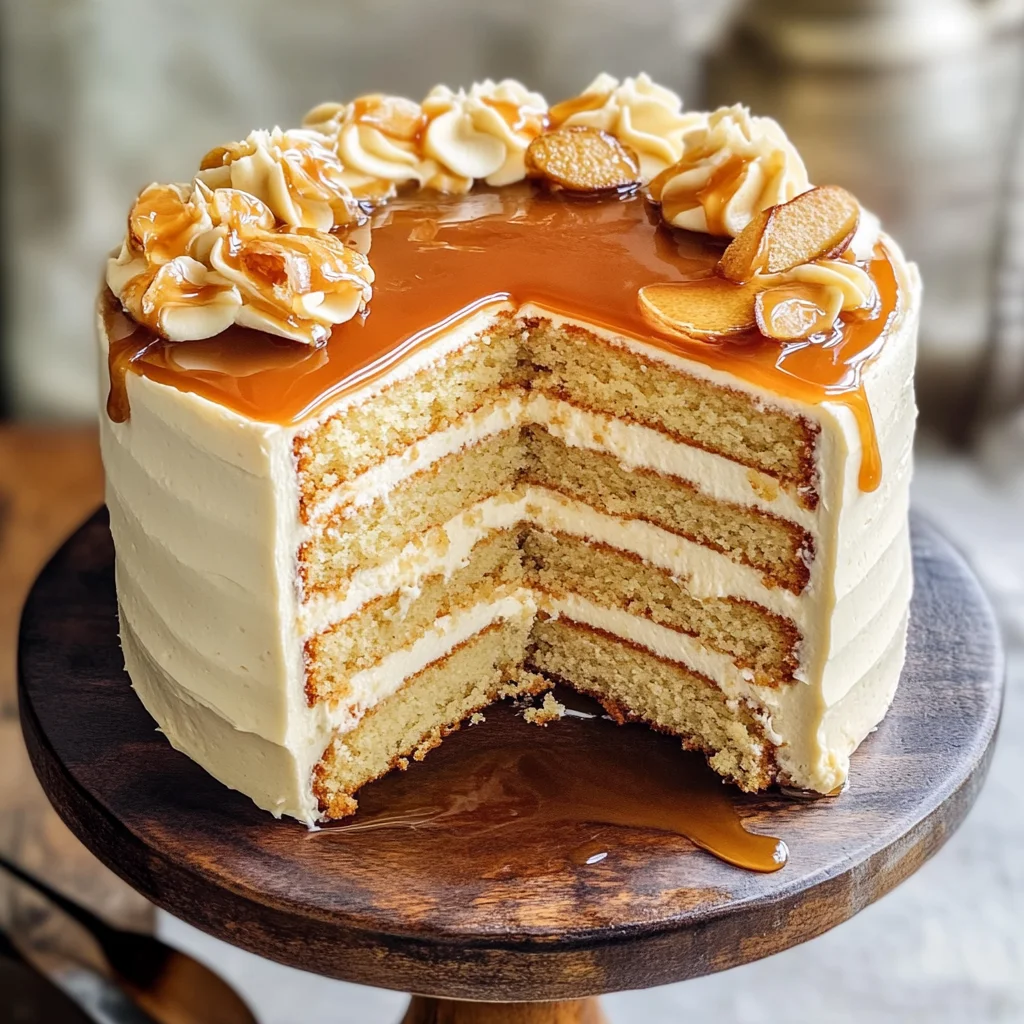
Place one layer of cake onto your serving platter or cake stand (oh yes!). Generously spread a layer of salted caramel buttercream across its surface—think lusciousness here; don’t skimp out! Next comes our sumptuous layer of homemade salted caramel drizzle right over that buttercream—the combination is nothing short of intoxicating! Gently place the second layer atop this treasure trove we’ve created so far.
Now it’s time for some serious frosting action; cover the top and sides generously with more salted caramel buttercream—you want every bite enveloped in this creamy delight! Use an offset spatula or even your trusty kitchen knife for those smooth edges—it’s okay if it doesn’t look perfect; every imperfection tells its own story!
Feel free to garnish with any extra drizzles of salted caramel or even some sea salt flakes sprinkled artfully on top—the finishing touch always elevates presentation from good to downright extraordinary!
Step 10: Enjoying Your Creation
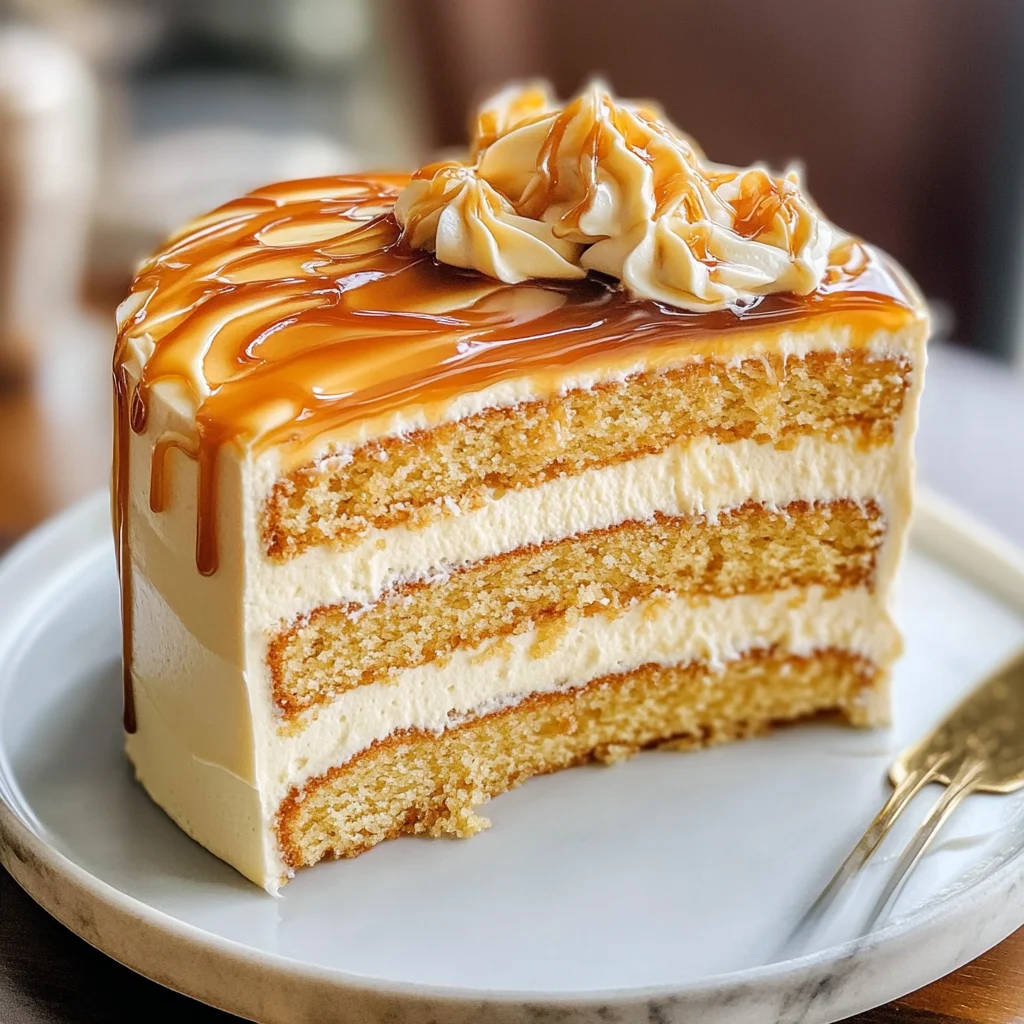
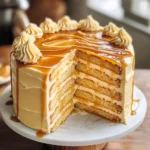
As you slice into this stunning Salted Caramel Cake, notice how each layer reveals itself—a moist vanilla cake surrounded by heavenly salted caramel buttercream interspersed with rich ribbons of irresistible salted caramel sauce. I promise you this dessert will evoke smiles around your table as everyone savors each bite filled with love and care.
Trust me when I say there’s nothing like sharing homemade treats made from scratch—they carry warmth within their layers that store beautiful memories waiting to be created around laughter-filled gatherings. So go ahead—indulge yourself guilt-free because life is too short not to enjoy moments like these!
Now gather friends or family around as you serve up slices adorned with whipped cream or fresh fruit if desired—and watch their faces light up with joy at this dessert paradise you’ve crafted lovingly from start to finish! Enjoy every bite—you’ve earned it!
Storage and Enjoyment Tips for Your Salted Caramel Cake
Oh, what a joy it is to finally slice into your beautifully crafted Salted Caramel Cake! As you gaze at the luscious layers of moist vanilla cake intertwined with that decadent salted caramel and smooth buttercream, I promise you, it’s nearly impossible not to feel a wave of satisfaction. But just in case you find yourself with any leftovers—which is truly a rarity—let’s talk about how to keep this cake fresh and delightful for as long as possible, so every bite remains as heavenly as the first.
Storing Leftover Salted Caramel Cake
To preserve the magic of your Salted Caramel Cake, storage is key. I recommend placing any leftover slices in an airtight container; this prevents your cake from drying out and keeps those flavors rich and vibrant. For best results, store it in the refrigerator where it will stay fresh for up to five days. Now, here’s a little tip that I absolutely adore: if you want to maintain that moistness, slip a slice of bread into the container with your cake. The bread absorbs excess moisture while keeping your cake soft and delicious! After a day or two, don’t be surprised if you find that the flavors have melded together even more beautifully, creating an utterly intoxicating taste experience. When it comes time to enjoy those leftover slices, simply let them come to room temperature before serving; trust me on this—you’ll want each bite to melt in your mouth just like when it was freshly made.
Freezing Salted Caramel Cake for Later
Now, if you’re thinking ahead and want to freeze some of that glorious Salted Caramel Cake, you’re making a fantastic choice! To freeze properly, wrap individual slices tightly in plastic wrap followed by aluminum foil or place them in a freezer-safe container. This double layer helps protect against freezer burn while locking in all that sweet goodness. Your cake can be stored frozen for up to three months without losing its charm! When you’re ready for a slice of heaven again, simply pull out what you need and let it thaw overnight in the fridge or leave it out at room temperature for about an hour—this ensures that all those delightful flavors are back in full swing when you take that first bite. The convenience of having an amazing dessert at your fingertips whenever the craving strikes is absolutely paramount!
Salted Caramel Cake
Indulge in the decadent flavors of our Salted Caramel Cake, a delightful dessert that perfectly balances rich, buttery sweetness with the lightness of a fluffy vanilla cake. This showstopper features layers of moist vanilla sponge filled with homemade salted caramel and topped with a creamy salted caramel buttercream, creating an unforgettable experience for your taste buds. Perfect for birthdays, anniversaries, or cozy gatherings, this cake embodies celebration and comfort. Each bite is a reminder that simple ingredients can come together to create something extraordinary. Roll up your sleeves and embark on this delicious journey—your friends and family will be left craving more!
- Prep Time: 30 minutes
- Cook Time: 25 minutes
- Total Time: 55 minutes
- Yield: Serves approximately 12 1x
- Category: Dessert
- Method: Baking
- Cuisine: American
Ingredients
- 140 g granulated sugar
- 1 1/2 tbsp water
- 40 g unsalted butter
- 150 g heavy cream
- big pinch of salt
- 340 g all-purpose flour
- 2 tbsp cornstarch
- 3/4 tsp baking powder
- 3/4 tsp baking soda
- 3/4 tsp salt
- 180 g unsalted butter (room temperature)
- 300 g granulated sugar
- 4 large eggs (room temperature)
- 240 g sour cream (14-18%) (room temperature)
- 60 g vegetable oil
- 2 tsp vanilla extract
- 400 g unsalted butter (room temperature) (for frosting)
- 660 g powdered sugar (sifted)
- 2 tsp vanilla extract (again)
- 2–3 tbsp homemade caramel
Instructions
- Make the salted caramel: In a saucepan, combine 140g granulated sugar and 1½ tbsp water. Heat until dissolved and golden brown. Remove from heat; add 40g butter, then slowly whisk in 150g heavy cream and a pinch of salt. Let cool.
- Preheat oven to 350°F (175°C). Grease two 9-inch round cake pans.
- In one bowl, sift together flour, cornstarch, baking powder, baking soda, and salt.
- In another bowl, cream 180g butter and 300g sugar until fluffy. Add eggs one at a time; mix in sour cream, vegetable oil, and vanilla extract.
- Gradually incorporate dry ingredients into wet mixture until combined.
- Divide batter between prepared pans; bake for 20–25 minutes or until a toothpick comes out clean. Allow to cool completely.
- Prepare the buttercream by beating 400g softened butter until creamy; gradually add sifted powdered sugar and salted caramel until smooth.
- Assemble the cake by layering with buttercream and salted caramel between layers and frosting the outside generously.
Nutrition
- Serving Size: 1 slice (120g)
- Calories: 460
- Sugar: 48g
- Sodium: 210mg
- Fat: 22g
- Saturated Fat: 14g
- Unsaturated Fat: 6g
- Trans Fat: 0g
- Carbohydrates: 61g
- Fiber: 0g
- Protein: 5g
- Cholesterol: 90mg