Robin Egg Easter Bark
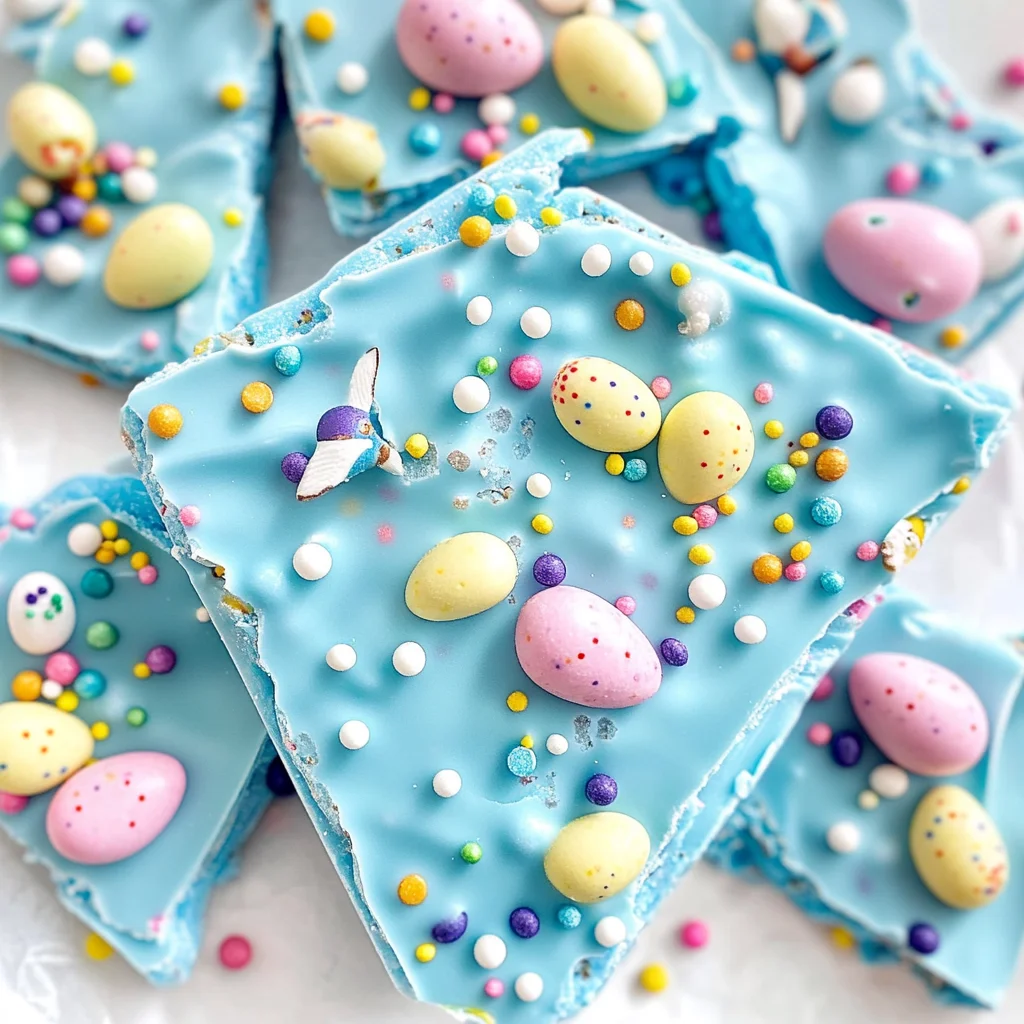
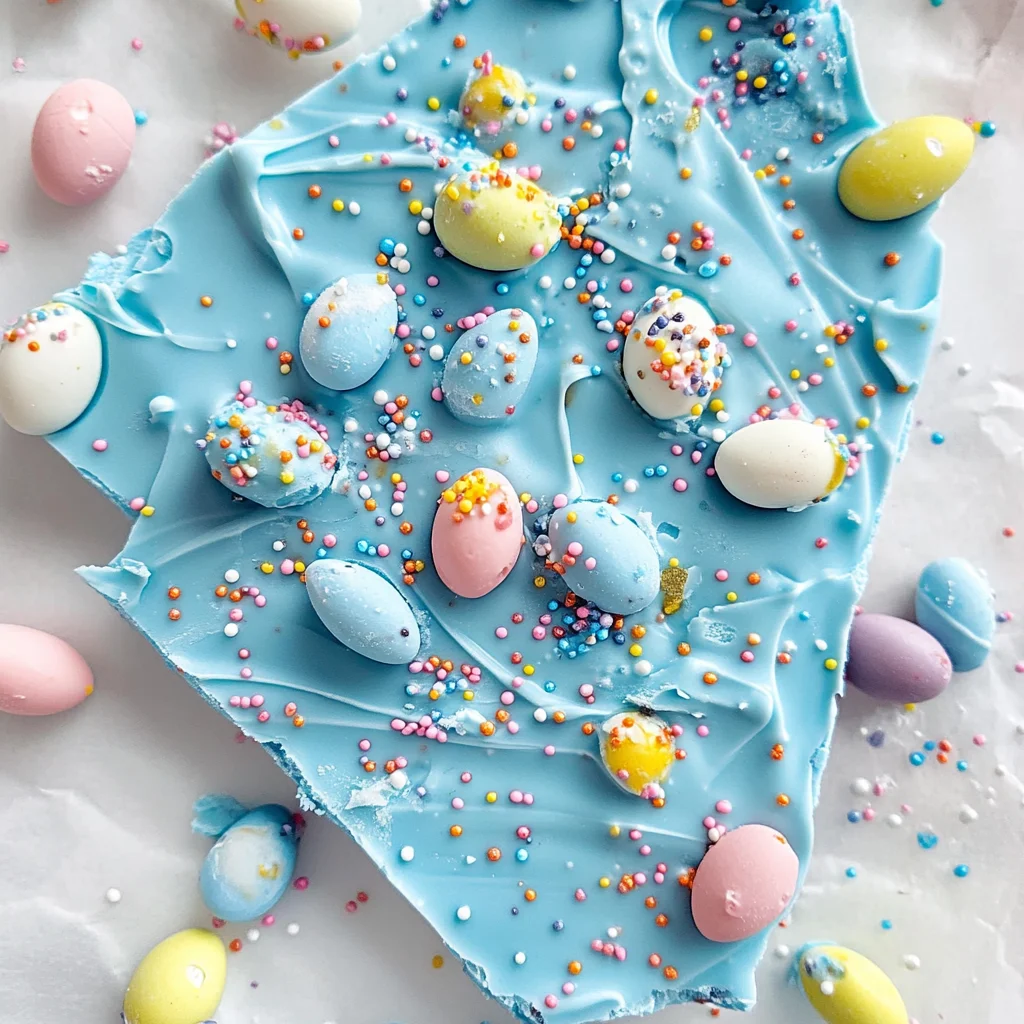
There’s something truly magical about the arrival of spring, isn’t there? It’s a season that stirs up feelings of renewal and joy, bringing us closer to nature’s vibrant colors and fresh scents. And what better way to celebrate this enchanting time than with a delightful treat that captures the essence of Easter? Today, I’m thrilled to share with you my cherished recipe for Robin Egg Easter Bark. This isn’t just any dessert; it’s a beautiful creation, a celebration of color and flavor that will have your loved ones swooning. Imagine breaking into a piece of this stunning blue bark, with its smooth chocolate foundation dotted with cheerful candy eggs and festive sprinkles. Each bite is an explosion of sweetness, evoking memories of joyful moments spent with family during the holiday.
As someone who has always been captivated by the art of baking, I promise you that making this Robin Egg Easter Bark is not only simple but also profoundly satisfying. The beauty lies in its effortless preparation and the radiant look it brings to your Easter table or any spring gathering. Plus, it carries a deeper significance—it’s a symbol of creativity and love shared among friends and family during this special time of year. Whether you’re preparing for an Easter brunch, having friends over for a casual get-together, or simply looking to indulge in something sweet while welcoming the new season, this recipe is sure to be a showstopper!
Robin Egg Easter Bark: A Sweet Celebration of Spring
Now that we’re all warmed up and excited about our creation, let’s dive into the world of our Robin Egg Easter Bark! This no-bake treat is as easy as it is beautiful—perfect for both experienced bakers and those just starting out on their culinary journey. Trust me when I say that you’ll want to keep this recipe close at hand; it’s bound to become a staple in your springtime repertoire.
Ingredients:
Embarking on this culinary adventure requires just a handful of ingredients that come together in harmony to create something truly special. Let’s explore each one so you can understand their importance in crafting your delightful bark.
- 2 lbs. of Baby Blue Melting Chocolate: This gorgeous shade captures the spirit of spring and makes your bark visually stunning! Baby blue melting chocolate not only adds color but also contributes a creamy sweetness that balances perfectly with the crunchiness of the candy toppings. When choosing melting chocolate, opt for high-quality brands that promise smooth melting without any graininess—a texture that’s absolutely paramount for our bark’s success.
- Robin Egg Candy: These charming little candies are the stars atop our bark! Their mottled colors mimic real robin eggs and add delightful pops of sweetness along with a satisfying crunch. You can usually find these around Easter time or in specialty stores throughout spring; they’re worth seeking out for their whimsical charm! If you can’t find them, consider substituting with other colorful chocolate-covered candies—just keep it fun and festive!
- Easter Sprinkles: Sprinkles are like confetti for desserts—they bring joy and celebration wherever they go! The variety available is endless, from pastel jimmies to glittery nonpareils; choose ones that resonate with your idea of springtime festivity. They provide not only visual appeal but also add texture to each bite—making every piece feel like a mini celebration!
- 2 tablespoons of Cocoa Powder: This ingredient may seem small but is crucial for adding depth and richness to our bark’s overall flavor profile. By mixing cocoa powder with water later on, we create a paint-like mixture that enhances our finished product’s visual appeal while introducing subtle chocolate notes without overwhelming sweetness.
- Water: Just enough to transform our cocoa powder into an artistic wash! Water acts as the medium here; it’s essential for achieving that perfect consistency we need when flicking onto the bark. Don’t worry about using too much—just aim for something paint-like in texture.
- Basting Brush: While it might not be an ingredient per se, this tool is vital for applying our cocoa mix artfully across the surface of the chocolate bark. A basting brush allows us to create beautiful splatters or strokes, giving each piece its unique character and charm.
Equipment You’ll Need:
Having the right tools makes all the difference in creating something wonderful in the kitchen—the right equipment can turn an ordinary task into an extraordinary experience! Here’s what you’ll need:
- Double Boiler or Microwave: Either option works beautifully for melting chocolate gently. A double boiler helps control heat more effectively by allowing steam to melt chocolate gradually without scorching it—a non-negotiable step if you want silky-smooth results! Alternatively, if using a microwave, do so in short intervals (15-30 seconds) while stirring frequently until fully melted; patience here will yield excellent results.
- Baking Sheet: A sturdy baking sheet lined with parchment paper serves as our canvas where we’ll pour out luscious melted chocolate. Parchment paper prevents sticking and makes cleanup effortless—trust me; future you will be grateful!
- Spatula or Offset Spatula: This handy tool will help us spread our melted chocolate evenly across the baking sheet before adding toppings. An offset spatula gives you better control over spreading without disturbing your parchment layer underneath.
Now that we’ve covered all our bases let’s move on to the most exciting part—making our Robin Egg Easter Bark!
Step 1: Melt Your Chocolate Masterpiece
Begin by melting down your baby blue chocolate using either a double boiler or microwave method—choose whichever feels most comfortable for you! If you’re using a double boiler (which I adore), fill the bottom pot with water before placing your top pot filled with chocolate above it. Heat slowly over medium-low heat while stirring gently until it’s liquid gold! If opting for microwaving instead, remember those short bursts—I can’t stress enough how important it is to avoid overheating! The goal here is smoothness; you’ll know it’s ready when it’s glossy without any lumps left behind.
Step 2: Create Your Beautiful Canvas
Once your exquisite blue chocolate has reached silky perfection, pour it onto your prepared baking sheet lined with parchment paper. Here comes the fun part—using your spatula (or offset spatula), spread it evenly across the sheet until you achieve an even thickness throughout; don’t rush this step! Take pride in creating your canvas; remember that every inch matters when assembling this delightful treat later on.
Step 3: Add Colorful Toppings
Now comes my favorite moment—the decoration phase! Gently sprinkle robin egg candy over your melted chocolate canvas followed by generous pinches of vibrant Easter sprinkles scattered all around like confetti celebrating springtime joyfulness! Picture how lovely they’ll look against that stunning baby blue backdrop—it’s pure artistry at work! Give yourself permission to get creative here—there’s no wrong way to adorn this treat as long as it’s festive!
Step 4: Chill Out!
After decorating blissfully comes another essential step—allowing everything to cool down properly so we can break apart our masterpiece later on easily. Pop your decorated baking sheet into the freezer for about 10 minutes; during this time, take deep breaths while dreaming about how delicious each piece will be once finished! Remember—the cooling process solidifies those flavors while ensuring everything stays intact when broken apart later on.
With these steps completed successfully thus far—you’re already well on your way toward enjoying deliciously crafted Robin Egg Easter Bark filled with love & creativity at its heart! We’ll continue exploring more intricate steps together next time as we finish preparing our delightful treat just in time for sharing memories around tables filled laughter & joy during celebrations ahead… Stay tuned!
Step 5: The Art of Cocoa Painting
Now comes the fun part that elevates your Robin Egg Easter Bark from delightful to downright stunning! After chilling your beautiful blue chocolate in the freezer for about ten minutes—just enough time to set but not so long that it becomes rock hard—you’ll want to prepare for a creative flourish. Take two tablespoons of cocoa powder and place it into a small bowl, then add water slowly, whisking as you go until the mixture reaches a paint-like consistency. This step is crucial because you want it thin enough to flick elegantly onto the surface of your bark without clumping. Trust me when I say this will create visual intrigue, giving your dessert a rustic charm reminiscent of springtime.
As you create this cocoa splash, consider how each flick will add depth and texture, making every bite not only delicious but also a feast for the eyes. The contrast of the deep brown against the pastel blue is simply breathtaking! It’s essential to have patience here; take your time with this step and let your inner artist shine through. Use a basting brush—its flexible bristles are perfect for achieving that splatter effect. You can also practice on a piece of parchment if you’re feeling nervous about getting the technique just right. A word of caution: be mindful not to oversaturate any one area; aim for an even distribution across the bark for an appealing finish.
Step 6: Flicking Joy into Existence
With your cocoa mixture ready, it’s time to channel your creativity! Dip the basting brush into your cocoa paint and then, holding it over your chilled chocolate surface, gently flick it with your fingers or tap it against another utensil. This whimsical flicking action creates tiny speckles that mimic the natural beauty found in nature during springtime—like raindrops or delicate flowers peeking through fresh snow. Don’t rush this step; enjoy the process as you transform what was once just melted chocolate into an enchanting canvas ready for indulgence.
You’ll notice that as those cocoa droplets land upon the surface, they create a striking contrast against that vibrant baby blue—an utterly intoxicating sight that makes my heart skip a beat every time I see it! It’s this attention to detail that transforms an ordinary sweet treat into something truly extraordinary. As you work, keep an eye on how much cocoa you’re applying; you want enough for visual appeal but not so much that it overwhelms the sweetness of the chocolate beneath. This balance is paramount because we want every bite to deliver harmony in flavors while still being visually captivating.
Step 7: Breaking Free – The Sweet Release
Once you’ve finished painting your masterpiece with cocoa, it’s time for yet another round of anticipation! Gently lift your baking sheet from the freezer after allowing those splatters to set for about five minutes. At this point, you’ll be tempted to dive right in, but hold on just a moment longer! The secret lies in how we break up our bark—this is where joy truly meets satisfaction. Using your hands or a sharp knife, carefully crack or cut the chilled chocolate into irregular pieces resembling shards rather than uniform squares.
This breaking process is essential because it allows each piece to showcase different aspects of its toppings—some may have more robin eggs while others feature generous sprinkles. Picture yourself offering these gorgeous pieces on a platter; each one tells its own story with its unique combination of colors and textures! And don’t worry if some pieces break larger than others; that’s part of their charm! The beauty lies in their imperfections—a reminder that nature isn’t uniform and that perfection is often found in unexpected places.
Step 8: Indulge & Share – The Sweet Finale
Now comes the moment we’ve all been waiting for—the grand reveal of our Robin Egg Easter Bark! Take a deep breath and admire how beautifully everything has come together—the vibrant colors, delightful textures, and enticing aroma wafting through your kitchen are all rewards for your patience and creativity throughout this process. It’s absolutely paramount at this point to gather family or friends around—you’ll want them by your side when it’s time to enjoy these treats together!
To serve, merely arrange those gorgeous bark pieces on a decorative plate or platter; feel free to sprinkle additional Easter-themed decorations around them if you’re feeling festive. This final touch amplifies their visual allure and makes them irresistible centerpiece treats for any gathering or celebration. And when it’s time to indulge, allow yourself to savor every bite—experience how smooth, creamy chocolate mingles with crunchy candy shells and delightful sprinkles. It’s not just dessert; it’s an experience filled with joy and nostalgia that brings everyone together.
As you share these moments over slices of Robin Egg Easter Bark with loved ones—perhaps reminiscing about childhood Easters or simply enjoying laughter—you’ll find that food has an incredible way of weaving bonds between us all. So go ahead and create this magic in your kitchen; I promise you won’t regret it!
Storage and Enjoyment Tips for Your Robin Egg Easter Bark
Now that you’ve crafted this breathtaking Robin Egg Easter Bark, it’s time to bask in the glory of your delicious creation! This dessert is not only a feast for the eyes but also a treat that can bring joy long after its initial unveiling. As you gather your loved ones around the kitchen, the sweet aroma of chocolate lingers in the air, beckoning everyone to indulge. But what if there are leftovers? Fear not! Let’s talk about how to keep this delightful treat fresh and enjoyable for days to come.
Storing Leftover Robin Egg Easter Bark
To preserve your beautiful Robin Egg Easter Bark, store it in an airtight container, ideally one lined with parchment paper to prevent sticking. The magic of chocolate means that when stored properly, it can stay fresh for up to two weeks—though I doubt it will last that long! To maintain its crisp texture and vibrant colors, keep it in a cool, dry place away from direct sunlight. A little pro tip from my kitchen: if you happen to have any leftover bread slices, toss one into the container. This non-negotiable trick helps absorb moisture and keeps your bark perfectly crunchy! Even after a few days, you’ll find that the flavors meld beautifully, creating an even more profound taste experience as the chocolate settles into its surroundings. When you’re ready to enjoy again, simply break off a piece and let it warm slightly at room temperature—it’s like unearthing hidden treasure!
Freezing Robin Egg Easter Bark for Later
If you’re looking to save some of your delightful creation for a later date (which I wholeheartedly encourage!), freezing is absolutely a fantastic option. Just ensure that your bark is completely cooled and set before wrapping it securely in plastic wrap or foil, then place it inside an airtight freezer bag—this will help prevent freezer burn. Properly stored, your lovely bark can last for up to three months in the freezer! When you’re ready to indulge again, simply remove a piece from the freezer and let it thaw in the refrigerator or at room temperature for about 30 minutes—trust me; this gentle thawing process preserves all those enchanting flavors and textures. Not only does freezing make meal prep easier during busy times, but it also allows you to have a whimsical treat on hand whenever you need a little sweet pick-me-up!
Robin Egg Easter Bark
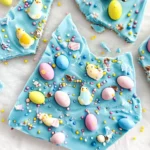
Robin Egg Easter Bark is a delightful no-bake dessert that captures the essence of spring with its vibrant blue chocolate base and colorful toppings. This festive treat combines smooth baby blue melting chocolate, crunchy robin egg candies, and cheerful sprinkles to create a visually stunning bark perfect for any celebration. Whether you’re hosting an Easter brunch or simply indulging in something sweet, this easy recipe offers a fun and engaging way to celebrate the season with family and friends. Each piece is not only a feast for the eyes but also delivers a satisfying crunch with every bite. Get ready to spread joy and creativity with this charming treat!
- Prep Time: 20 minutes
- Cook Time: 10 minutes
- Total Time: 30 minutes
- Yield: Approximately 16 servings 1x
- Category: Dessert
- Method: No-bake
- Cuisine: American
Ingredients
- 2 lbs. baby blue melting chocolate
- Robin egg candy
- Easter sprinkles
- 2 tablespoons cocoa powder
- Water
Instructions
- Melt the baby blue melting chocolate using a double boiler or microwave until smooth.
- Pour the melted chocolate onto a parchment-lined baking sheet and spread evenly.
- Sprinkle robin egg candy and Easter sprinkles on top while the chocolate is still warm.
- Chill in the freezer for about 10 minutes to set.
- In a small bowl, mix cocoa powder with water until it reaches a paint-like consistency.
- Using a basting brush, flick the cocoa mixture over the chilled bark for added decoration.
- Remove from freezer, break into pieces, and enjoy!
Nutrition
- Serving Size: 1 serving
- Calories: 190
- Sugar: 15g
- Sodium: 20mg
- Fat: 10g
- Saturated Fat: 6g
- Unsaturated Fat: 4g
- Trans Fat: 0g
- Carbohydrates: 24g
- Fiber: 1g
- Protein: 2g
- Cholesterol: 0mg