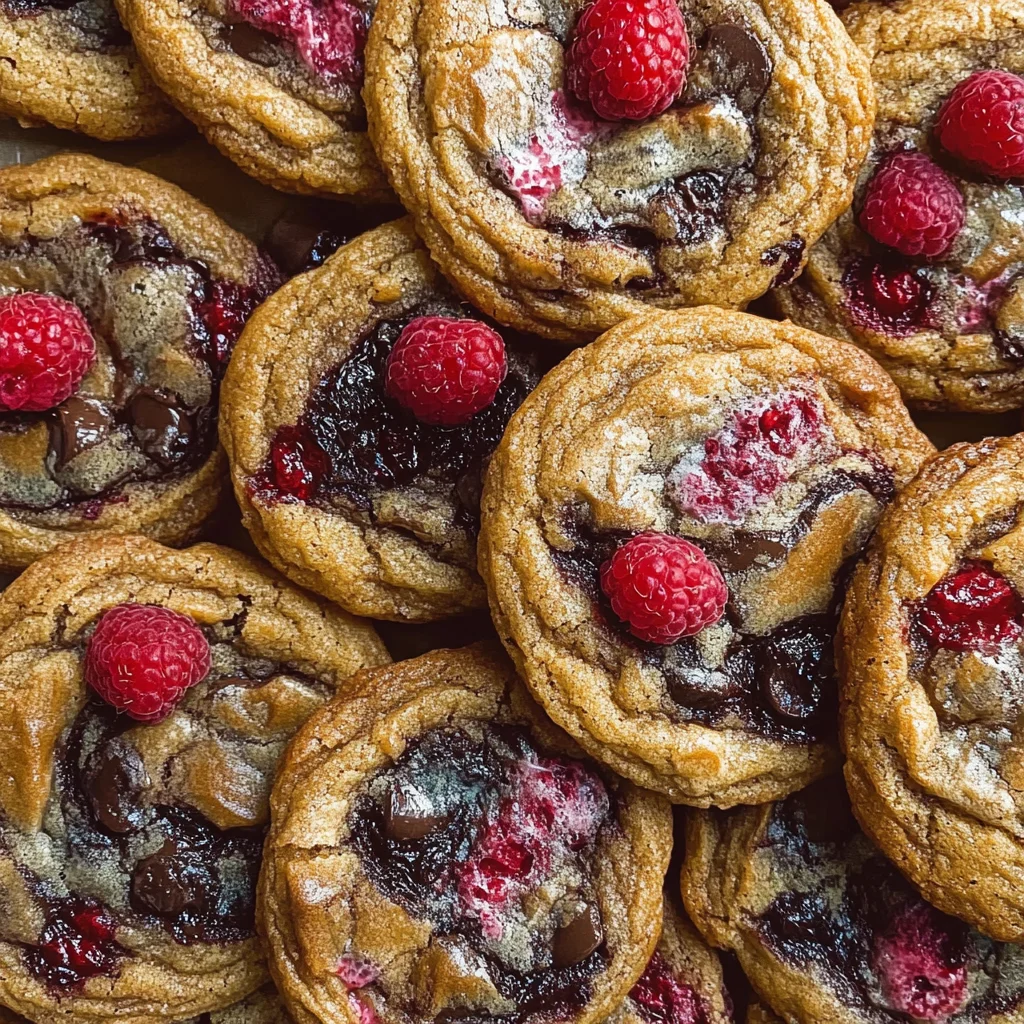
Raspberry Chocolate Chip Cookies
There’s a certain magic that happens when you mix rich dark chocolate with the vibrant tang of juicy raspberries. It’s a combination that feels both indulgent and refreshing, like a little party in your mouth. These Raspberry Chocolate Chip Cookies are not just any cookies; they are an experience, a delightful balance of flavors that dance together in perfect harmony. As you take your first bite, the soft and chewy texture envelops you, while the melty pools of chocolate intermingle with the bright bursts of raspberry, creating an utterly intoxicating sensation that’s hard to resist. I promise you, once you make these cookies, they will become a beloved staple in your kitchen—each bite is profoundly satisfying and reminiscent of cherished family gatherings.
What makes this recipe even more exciting is its simplicity—no chilling required! That means you can whip up a batch of these cookies on a whim, whether for an impromptu gathering or simply as a treat for yourself after a long day. The blend of sweet and slightly tart raspberries with decadent dark chocolate chunks creates an irresistible allure that appeals to both kids and adults alike. Each time I bake these cookies, it feels like I’m sharing a piece of joy with everyone around me. Trust me on this; your friends and family will be begging for the recipe!
Raspberry Chocolate Chip Cookies: A Sweet Symphony of Flavor
Now that I’ve set the stage for this delectable delight, let’s dive into the heart of the matter—baking these gorgeous Raspberry Chocolate Chip Cookies. Each ingredient plays a pivotal role in crafting that perfect cookie experience, so let’s take some time to appreciate what we’ll be using.
Ingredients:
Before we embark on this delicious journey together, let’s gather our ingredients. Each one is essential in achieving the harmonious flavors and textures we’re aiming for in our Raspberry Chocolate Chip Cookies.
- 1/2 cup unsalted butter (melted and cooled). This is crucial because butter is our fat source here, providing moisture and richness to the cookies. Melting it allows for easier mixing and contributes to that soft texture we all crave. Just make sure it’s cooled sufficiently to avoid cooking the egg when mixed in—this step helps maintain the right consistency without making your dough too greasy.
- 1/4 cup white granulated sugar. This sugar not only sweetens our cookies but also helps create that lovely crispy edge we’re after. Granulated sugar dissolves quickly into our wet ingredients, ensuring an even sweetness throughout each bite. It’s important to use this type rather than brown sugar alone because it contributes to a lighter texture.
- 3/4 cup light brown sugar. Here comes the magic! Brown sugar adds moisture and depth of flavor thanks to its molasses content, creating those beautifully chewy centers we love in cookies. When combined with white sugar, it offers a delightful contrast—resulting in cookies that are both crispy on the outside and soft within.
- 1 large egg (room temperature). Eggs serve as our binding agent; they help hold everything together while providing structure to our dough. Using room temperature eggs ensures they incorporate smoothly into the mixture without clumping or cooling down your melted butter too much.
- 1 tsp vanilla bean paste. Oh my goodness, vanilla bean paste is like liquid gold! It infuses our cookies with an enchanting aroma and flavor profile that’s simply unmatched compared to regular vanilla extract. The specks of vanilla seeds add visual appeal too—a little luxury that elevates these cookies from ordinary to extraordinary.
- 1 1/2 cups all-purpose flour (spooned and leveled). Flour is foundational in baking; it provides structure and stability to our cookies while absorbing moisture during baking. Spoon it lightly into your measuring cup instead of scooping directly from the bag—this prevents compacting it too much, which can lead to dense cookies instead of light ones.
- 1/2 tsp baking soda & 1/2 tsp baking powder. Both are important leavening agents; baking soda promotes spread while adding chewiness, whereas baking powder gives lift ensuring our cookies don’t turn out flat as pancakes! Together they create balance—a truly vital element for achieving cookie perfection.
- 1/2 tsp kosher salt. Salt enhances flavors across all dishes by balancing sweetness and heightening those magical chocolatey notes! In desserts like these cookies, it’s absolutely paramount—it brings out the best in every other ingredient.
- 1 cup dark chocolate chunks. Oh boy! Dark chocolate brings richness and decadence into every cookie bite; it melts beautifully while providing contrasting textures against soft cookie dough. Look for high-quality chocolate bars rather than chips—they’ll melt better and impart more intense flavor.
- 1/2 cup frozen raspberries. Finally, we have those luscious frozen raspberries bursting with sweet-tart juiciness! They provide that signature pop of color while adding freshness to our otherwise decadent cookie base—make sure not to overmix them into the dough; we want those beautiful streaks!
Equipment You’ll Need:
Having the right tools at your disposal makes all the difference when creating something wonderful in the kitchen! While they may not be ingredients, these essential partners help streamline our process for perfect results every time.
- Mixing bowls – Invest in sturdy mixing bowls; I recommend having both large ones for combining wet ingredients together as well as medium-sized ones for dry ingredients separately before merging them together later on! Glass bowls are great since they’re microwave-safe for melting butter too!
- Whisk – A good whisk is vital for incorporating air into our mixture as well as ensuring everything blends seamlessly together without lumps or clumps—trust me on this one!
- Rubber spatula – This versatile tool helps scrape down sides efficiently while folding delicate ingredients like raspberries without damaging them—an absolute must-have!
- Ice cream scoop (2 oz) – Using an ice cream scoop ensures uniformity among each cookie’s size leading them all bake consistently at once—not just visually appealing but aesthetically pleasing too!
- Parchment paper or silicone baking mat – Lining your cookie sheets prevents sticking while promoting even baking—a non-negotiable step if you want easy removal later without losing half your precious creations!
Now that we’re equipped with knowledge about our ingredients and tools let’s roll up our sleeves—the fun part begins next!
Step 1: Melting Butter – Where Flavor Begins
The first step in creating these delectable Raspberry Chocolate Chip Cookies involves melting your unsalted butter gently until it’s completely liquid but not boiling hot—this could take just a couple of minutes if using a microwave or about five minutes on low heat if you’re opting for stovetop melting method instead! Allow it enough time afterward (around 20 minutes) so that it cools slightly before proceeding further since adding hot butter directly would cook any eggs involved—a disaster no one wants during cookie-making endeavors!
Step 2: Whisking Together Sugars
Once your butter has cooled sufficiently (and smells heavenly!), grab yourself a large mixing bowl where you’ll combine both granulated sugar along with brown sugar until fully blended together into what resembles paste-like consistency after whisking vigorously between two-three minutes max—this process known as creaming creates air pockets essential for creating fluffy-textured baked goods later down line!
Step 3: Adding Egg & Vanilla Bean Paste
Next up comes adding room temperature egg followed closely behind by luscious vanilla bean paste straight into bowl containing sugary buttery goodness already established earlier on—taking care here by stirring gently until everything appears unified yet smooth throughout should yield fantastic results ahead when mixed properly ensuring balanced flavors distributed evenly through batter once formed entirely later down track ahead!
Step 4: Mixing Dry Ingredients
In another separate bowl now whisk all-purpose flour alongside baking powder/baking soda/salt thoroughly until combined evenly before slowly incorporating dry mix gradually into wet blend made previously—it might seem tedious but trust me here—it’s critical not rush this step because over-mixing could lead inevitably towards tough-textured cookie rather than delightfully tender ones desired overall ultimately affecting taste greatly so take care doing this patiently letting flour absorb moisture naturally during blending process over several rounds till just incorporated without lumps remaining visible anywhere!
As we continue down this delicious path towards cookie perfection together, remember each step holds significance beyond mere instructions—they’re invitations welcoming us closer towards experiencing pure joy through every bite enjoyed later on… Stay tuned for more steps coming next where we’ll fold delicious chunks alongside vibrant berries straight into dough before shaping them up cozily ready bake off shortly thereafter!
Step 5: The Art of Scooping Dough with Precision
Now that your cookie dough is a harmonious blend of flavors, it’s time to form those delightful little mounds that will soon transform into the best Raspberry Chocolate Chip Cookies you’ve ever tasted. Using a 2 oz ice cream scoop, which I absolutely adore for its perfect portioning capabilities, gently scoop out the dough. Imagine the way the cold, creamy texture of the dough feels as you pull it from the bowl, each scoop revealing those luscious chunks of chocolate nestled amongst the vibrant raspberries. This step is crucial because uniformity in size ensures even baking; we want every cookie to be golden and soft in the center while slightly crisp on the edges.
Place six of these perfect cookie dough balls onto a parchment-lined baking sheet, ensuring they are spaced about two inches apart. This spacing is non-negotiable because as these cookies bake, they will spread out beautifully, creating that signature chewy texture we all crave. Now, take a moment to admire your handiwork; this step might seem simple, but it sets the stage for what’s to come. Trust me on this one — a little attention to detail now means you’re just moments away from cookie bliss!
Step 6: Preheating – Setting the Stage for Baking Bliss
With your cookie dough ready and waiting, it’s time to turn our attention to preheating the oven to 350°F (175°C). Why is preheating so vital? Think of your oven as a stage where our cookies are about to perform their magic. If you place them in an oven that isn’t hot enough, they won’t rise properly or develop that enticing golden color we all love. A fully preheated oven creates an immediate environment that seals in moisture and promotes that delightful chewy texture while allowing those chocolate chunks to melt into pools of liquid gold.
As your oven warms up, take this opportunity to clean up your workspace — a tidy kitchen is as satisfying as those cookies themselves! Once the oven reaches temperature, gently slide your baking sheet inside and set a timer for 12-13 minutes. Keep an eye on them during those last few minutes; you’ll want to look for golden brown edges while leaving just a hint of softness in the center. That contrast is what makes these cookies utterly intoxicating!
Step 7: Reshaping Perfection – The Cookie Cutter Technique
As soon as your cookies emerge from the oven with their enticing aroma wafting through your kitchen, get ready for one of my favorite techniques — reshaping! While they are still warm and malleable, take a round cookie cutter that’s slightly larger than your baked cookies and place it over each one. Gently swirl it in a circular motion around the edges. Why do this? It’s all about aesthetics! This simple trick transforms those slightly misshapen beauties into perfectly round masterpieces worthy of any dessert table.
This technique also helps ensure even distribution of heat throughout the cookie as they cool down; they will set perfectly without becoming too hard or dry. Remember to act quickly but gently; once they cool down too much, you’ll lose this chance for that coveted shape! So don’t rush — enjoy this moment where you can literally sculpt your creations before they fully set.
Step 8: Cooling – The Final Countdown
After reshaping those gorgeous cookies, let them cool on the baking sheet for about five minutes before transferring them to a wire rack. Why cooling on the baking sheet first? This step allows them to firm up slightly while still retaining warmth and moisture within. If you move them too early, you risk breaking them apart — no one wants crumbled cookies when we’re aiming for perfection!
Once five minutes have passed (take this time to breathe deeply and appreciate how delicious your kitchen smells), carefully transfer each cookie onto a wire rack using a spatula. The wire rack serves an essential purpose by allowing air circulation around all sides of the cookie, preventing any sogginess from forming on the bottom. You’ll want these cookies completely cool before diving in because patience truly pays off here; it allows all those flavors — rich dark chocolate mingling with bright tangy raspberry — to marry beautifully into every bite.
Conclusion:
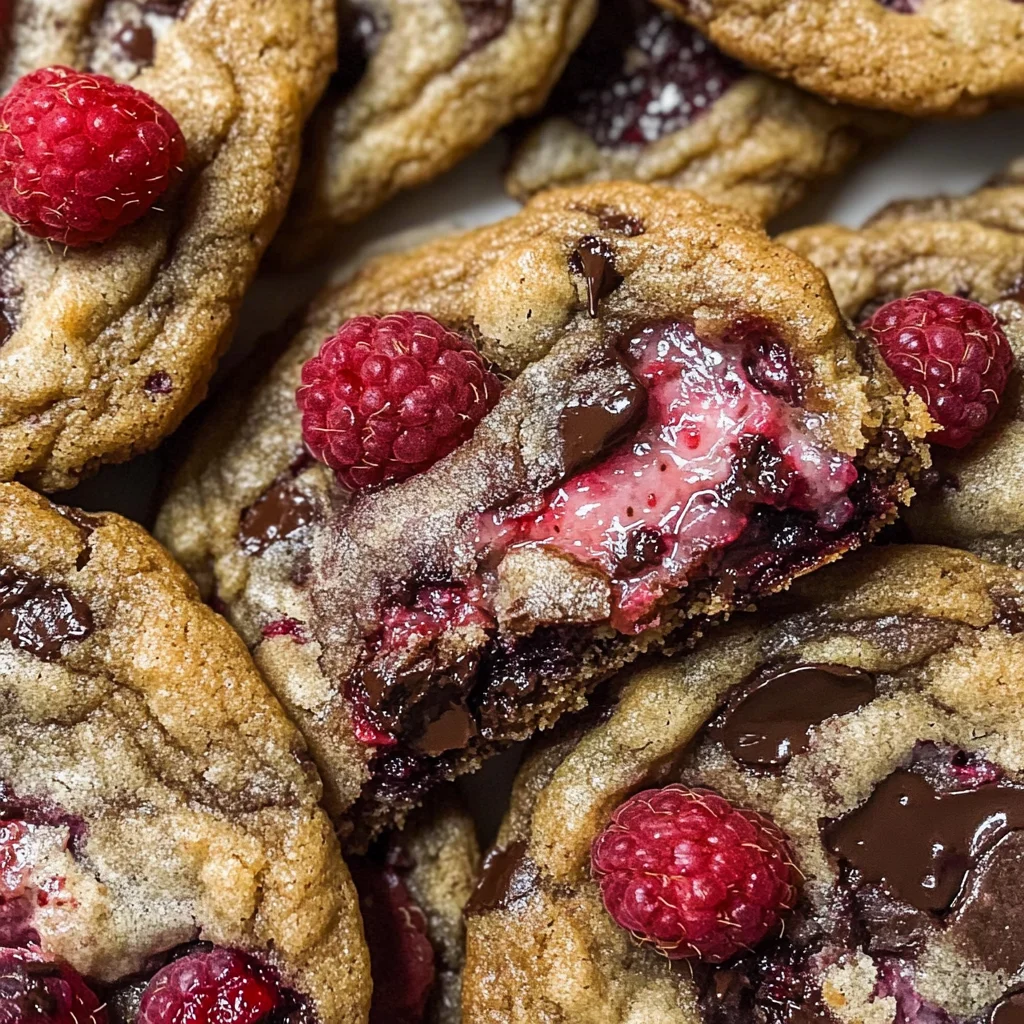
As we reach the end of our journey through this delightful recipe for Raspberry Chocolate Chip Cookies, I can’t help but feel an overwhelming sense of excitement! It’s been such a pleasure sharing this experience with you—one that truly celebrates the harmonious union of rich dark chocolate and vibrant raspberries. The textural contrast between the soft, chewy cookie and the bursts of juicy fruit creates what I can only describe as a symphony of flavors that elevates these treats beyond ordinary cookies. Trust me when I say that each bite is profoundly satisfying; it’s like biting into happiness itself!
This recipe is an absolute must-try not just because of its incredible taste but also due to the sheer joy it brings while making it. It’s perfect for any occasion—from cozy afternoons spent at home, where every moment feels special, to festive gatherings where you want to impress friends and family alike with something truly extraordinary. Picture this: pulling these golden-brown delights from the oven, their edges perfectly crisp yet yielding under your touch—a visual feast that invites everyone into your kitchen.
Imagine savoring one alongside a steaming cup of coffee or tea; it’s heavenly! For an afternoon pick-me-up, pair one with creamy vanilla ice cream—it transforms into an indulgent dessert experience like no other. Or perhaps enjoy one crumbled over yogurt for breakfast—a wonderful twist on traditional morning fare! The versatility here is endless, letting you explore various pairings based on whatever mood strikes.
Feeling adventurous? This recipe is wonderfully adaptable; throw in some chopped nuts or swap out the raspberries for strawberries or even cherries! You could mix in white chocolate chips instead of dark chocolate if you’re in the mood for something sweeter—the possibilities are boundless! I encourage you to dive into this recipe enthusiastically—experiment freely and make it your own! Share your creations with friends and family; nothing sparks joy quite like connecting over food made with love.
Raspberry Chocolate Chip Cookies
Indulge in the delightful harmony of flavors with our Raspberry Chocolate Chip Cookies. These soft, chewy cookies are a perfect blend of rich dark chocolate and vibrant raspberries, creating a truly irresistible treat. With a simple no-chill recipe, you can whip up a batch in no time—ideal for gatherings or a sweet moment to enjoy by yourself. Each bite offers a satisfying contrast between the decadent chocolate and the bright bursts of raspberry, making these cookies not just delicious but also memorable. Whether you serve them warm or store them for later, they promise to bring joy with every mouthful.
- Prep Time: 15 minutes
- Cook Time: 13 minutes
- Total Time: 28 minutes
- Yield: Approximately 12 cookies 1x
- Category: Dessert
- Method: Baking
- Cuisine: American
Ingredients
- 1/2 cup unsalted butter (melted and cooled)
- 1/4 cup white granulated sugar
- 3/4 cup light brown sugar
- 1 large egg (room temperature)
- 1 tsp vanilla bean paste
- 1 1/2 cups all-purpose flour
- 1/2 tsp baking soda
- 1/2 tsp baking powder
- 1/2 tsp kosher salt
- 1 cup dark chocolate chunks
- 1/2 cup frozen raspberries
Instructions
- Preheat your oven to 350°F (175°C).
- In a large bowl, whisk together the melted butter, granulated sugar, and brown sugar until smooth.
- Add the egg and vanilla bean paste; mix until combined.
- In another bowl, whisk together the flour, baking soda, baking powder, and salt.
- Gradually add the dry ingredients to the wet ingredients, mixing just until combined.
- Fold in the dark chocolate chunks and frozen raspberries gently to avoid breaking them.
- Scoop out dough using an ice cream scoop onto parchment-lined baking sheets, spacing them about two inches apart.
- Bake for 12-13 minutes or until golden brown around the edges but still soft in the center.
- Let cool on the baking sheet for five minutes before transferring to a wire rack.
Nutrition
- Serving Size: 1 cookie (50g)
- Calories: 210
- Sugar: 14g
- Sodium: 90mg
- Fat: 10g
- Saturated Fat: 6g
- Unsaturated Fat: 3g
- Trans Fat: 0g
- Carbohydrates: 28g
- Fiber: 1g
- Protein: 3g
- Cholesterol: 30mg