Raspberry Almond Snowball Cookies Delightful Easy Recipe
There’s something truly magical about the act of baking, isn’t there? It’s more than just mixing flour and sugar; it’s a delightful dance that evokes cherished memories and ignites our senses. Imagine the warm scent of butter and almonds wafting through your home, a gentle reminder of cozy afternoons spent in the kitchen with loved ones. This is precisely what you can expect when making these Raspberry Almond Snowball Cookies Delightful Easy Recipe. Each bite offers a symphony of flavors — the buttery richness melting away to reveal a luscious surprise of raspberry jam at its heart. These cookies are not only perfect for holiday gatherings but also for any moment that calls for sweetness, love, and a touch of nostalgia.
As I share this recipe with you, I can’t help but think of how these cookies bridge generations, blending tradition with innovation. The delicate balance of ground almonds and raspberry jam creates a treat that feels both luxurious and comforting. Trust me when I say they’re absolutely irresistible! Whether you’re celebrating a holiday or simply indulging in an afternoon treat, these snowball cookies will surely bring joy to anyone who takes a bite. So let’s roll up our sleeves and dive into this delightful culinary adventure together!
Raspberry Almond Snowball Cookies Delightful Easy Recipe: Heavenly Bites of Joy
These Raspberry Almond Snowball Cookies are easy to make and utterly delightful! They are melt-in-your-mouth treats that you’ll want to savor with every crumb. Perfect for sharing—if you can bear to part with them!
Ingredients:
As we embark on this culinary journey together, let’s talk about the essential ingredients that will transform simple elements into something truly extraordinary. Each ingredient plays a vital role in creating the deliciousness that defines our cookies.
- 1 cup (2 sticks or 226g) unsalted butter, softened to room temperature. This is crucial for achieving that light, airy texture we crave in our Raspberry Almond Snowball Cookies Delightful Easy Recipe. If your butter is too cold, it won’t cream effectively; if it’s melted, your cookies will spread too much during baking. Opt for high-quality butter — European-style butter with its higher fat content can elevate your cookies to new heights of deliciousness.
- 1/2 cup powdered sugar, plus more for coating. This finely milled sugar not only sweetens our dough but also lends a delicate texture that contributes to the melt-in-your-mouth experience. Powders dissolve quickly into the batter without adding grittiness, which is why we use it here instead of granulated sugar. Plus, rolling the finished cookies in powdered sugar gives them that beautiful snowy finish which is utterly charming!
- 1 teaspoon vanilla extract. Vanilla is often referred to as the soul of baked goods because it enhances other flavors beautifully and adds warmth to our cookie dough. Make sure you use pure vanilla extract—it’s worth it! The fragrant aroma will envelop your kitchen while baking and create an irresistible allure.
- 2 1/4 cups all-purpose flour. Flour provides structure and stability to our cookies while allowing them to maintain their soft texture. It’s essential not to over-measure your flour; using too much can lead to dry cookies! Gently spoon your flour into the measuring cup and level it off without packing it down for perfect results.
- 1 cup finely ground almonds. Ground almonds add richness and a wonderful nutty flavor that complements the raspberry jam perfectly. They contribute moisture too, ensuring our cookies remain tender rather than dry or crumbly. You can buy almond flour or grind whole almonds yourself; just be careful not to over-process them into almond butter!
- 1/4 teaspoon salt. Salt may seem like an afterthought in dessert recipes, but it plays an absolutely paramount role by balancing sweetness and enhancing flavor complexity. A pinch brings out the best in all ingredients involved—trust me on this one!
- 1/2 cup seedless raspberry jam. Ahh, the star ingredient! The jewel-like filling bursts forth with fruity goodness as you take your first bite—this is what makes these snowball cookies so special! Choose high-quality jam for deep flavor; if you’re feeling adventurous, homemade berry preserves would be an exquisite alternative as well.
Equipment You’ll Need:
Having the right tools makes all the difference when baking — they are essential partners in creating something wonderful together! Let’s gather what you’ll need before we dive into baking bliss.
- Mixing bowls – Ideally one large bowl and one medium bowl will do nicely. A sturdy mixing bowl helps combine ingredients effortlessly without spilling over—a crucial factor when working with cookie dough.
- Hand mixer or stand mixer – Either will work wonders here! A mixer helps achieve that fluffy butter-sugar mixture we desire without exhausting yourself whisking by hand.
- Measuring cups & spoons – Precision matters in baking! Accurate measurements ensure consistency across batches; investing in good-quality measuring tools pays off every time you bake.
- Baking sheet lined with parchment paper – This prevents sticking and promotes even browning during baking! Parchment paper makes cleanup easy too—who doesn’t love minimal mess?
- Wire rack – Essential for cooling your cookies evenly after they bake so they don’t become soggy on one side! Letting them cool completely allows their flavors to develop fully before taking that first heavenly bite.
Now that we have everything assembled let’s jump into creating these scrumptious treats!
Step 1: Prepping Your Oven & Baking Sheet
First things first — preheat that oven to 350°F (175°C). This step ensures your cookies bake evenly throughout their journey from dough to deliciousness! While waiting for the oven’s warmth to envelop your kitchen, line a baking sheet with parchment paper (this non-stick hero will prevent any unwanted surprises later). It’s tempting to skip this step if you’re eager to start rolling out dough, but trust me—it’s absolutely critical if you want perfectly formed cookie rounds without any sticky aftermath.
Step 2: Creaming Butter & Sugar
Once your oven is preheated like a cozy hug on a winter day, grab your large mixing bowl and combine those sticks of softened unsalted butter along with half a cup of powdered sugar using either a hand mixer or stand mixer fitted with paddle attachment (I promise you’ll appreciate this tool!). Cream them together until light and fluffy—this process known as creaming incorporates air into the mixture resulting in tender cookies rather than dense bricks! Expect about 3–5 minutes at medium speed; watch closely as it transforms from shiny yellow gooeyness into pale clouds of buttery goodness—this visual cue indicates success!
Step 3: Adding Vanilla Bliss
Next up comes our teaspoon of vanilla extract — pour it lovingly into your creamy concoction while still beating gently until combined seamlessly (think about how aromatic notes fill up every corner). This addition elevates flavors beautifully by adding depth while remaining subtly present on each taste bud—a true testament that good things come from simple ingredients when treated kindly!
Step 4: Mixing Dry Ingredients
Now let’s turn our attention toward those dry elements waiting patiently in their separate bowl—the all-purpose flour mixed alongside finely ground almonds (which should be like sandy powder) plus just enough salt sprinkled within this duo creates harmony among textures later on within baked morsels themselves! Whisk together thoroughly until no lumps remain visible; then gradually add this combination into wet ingredients previously prepared while mixing slowly at low speed—don’t rush this step!
By ensuring thorough incorporation without over-mixing (which could yield tough results), you’re setting yourself up for cookie perfection down below where flavors intertwine harmoniously throughout each little ball destined for greatness ahead…
Stay tuned as we continue unfolding more steps towards achieving those divine Raspberry Almond Snowball Cookies Delightful Easy Recipe together!
Preparing Your Delightful Raspberry Almond Snowball Cookies
Let’s dive right into the heart of this delightful raspberry almond snowball cookies recipe, shall we? Here, each step is infused with warmth and purpose, leading you closer to those melt-in-your-mouth treats that are bound to steal the show at any gathering or cozy afternoon at home.
Step 5: Combining Dry Ingredients – The Foundation of Flavor
Now that we’ve creamed the butter and sugar together into a light and fluffy cloud, it’s time to incorporate the dry ingredients. In a separate bowl, whisk together 2 1/4 cups of all-purpose flour, 1 cup of finely ground almonds, and 1/4 teaspoon of salt. This whisking is not just a formality; it’s crucial for ensuring that your cookies have a uniform texture. By aerating the flour and mixing in the salt evenly, you’re setting the stage for a well-balanced dough that won’t have pockets of saltiness or dense clumps. When you mix in the ground almonds, you’re adding a delightful nutty richness that will enhance both the flavor and texture of your cookies. Trust me on this—this blend brings about a symphony of flavors that dance beautifully against the bright tartness of the raspberry jam.
Once you’ve whisked these ingredients together, gradually fold them into your creamed butter mixture. Take your time here; don’t rush this step! You want to mix until just combined—overmixing can lead to tough cookies, which is absolutely non-negotiable if you’re looking for those tender bites we all adore. As you work in the flour mixture, you’ll see it slowly come together into a soft dough, one that feels comforting and ready for its journey into cookie bliss.
Step 6: Shaping Your Cookies – A Personal Touch
Ah, now comes one of my favorite parts—shaping these delightful morsels! With clean hands dusted lightly in flour (to prevent sticking), take about a tablespoon of dough and roll it into a smooth ball. This moment is where your creativity shines! Gently press an indentation in the center using your thumb or a small spoon—this space will cradle our luscious raspberry jam. I can almost hear the excitement building as you prepare to fill these little gems with something utterly intoxicating!
Now here’s where patience pays off: take 1/4 teaspoon of seedless raspberry jam and spoon it into that lovely indentation you created. Make sure not to overfill; you want just enough to burst forth with flavor without spilling over when baking. Once filled, pinch the edges of the dough together gently but firmly to seal in that vibrant jammy treasure. Then roll it back into a ball; this ensures that every bite will be an explosion of sweet raspberry flavor encased in buttery almond goodness. This step is vital because it creates those wonderful pockets of flavor that make each cookie so special.
Step 7: Baking Perfection – Timing is Everything
With your cookies shaped and ready for their big moment, let’s talk about baking! Place them on your prepared baking sheet with enough space between each cookie—they need room to spread just slightly as they bake! Now preheat your oven to 350°F (175°C) if you haven’t already; this temperature is ideal for achieving that perfect golden hue while keeping them soft inside.
Bake these beauties for about 10-12 minutes. Keep an eye on them during those final minutes—the goal here is just until they are lightly golden on the bottom while still maintaining their pale tops. If you notice they’re browning too quickly on top but remain pale underneath, simply rotate your baking sheet halfway through cooking; oven hot spots can be sneaky little devils! Remember, every oven is different; don’t hesitate to adjust cooking times as needed based on what you’re observing inside your oven window. The smell wafting through your kitchen at this point will be utterly divine—a warm embrace promising sweet rewards.
Step 8: Cooling Down – The Sweet Anticipation
As soon as those wondrous cookies emerge from the oven—and trust me, they will look like little puffs of joy—allow them to cool slightly on the baking sheet for about five minutes. This resting period is pivotal! It gives them time to firm up slightly before being transferred to a wire rack for complete cooling. If you try moving them too soon, they might crumble apart instead of holding their delightful shape.
Once they’ve settled on the baking sheet and are cool enough to handle without burning your fingers (I promise it’s worth waiting!), transfer them carefully onto a wire rack using a spatula. Letting them cool completely allows their flavors to meld beautifully—this step is often overlooked but holds immense significance in achieving that profound satisfaction when you finally taste one!
Final Touches: Rolling in Sweetness
Step 9: The Sweet Coating – Pure Joy
After allowing your cookies to cool completely (the anticipation builds!), it’s time for one last flourish before indulging—you guessed it: rolling in powdered sugar! Pour some powdered sugar into a shallow bowl and gently roll each cookie until entirely coated—don’t be shy here! The sugar adds not only sweetness but also transforms each cookie into an enchanting snowball-like treat that’s visually irresistible.
Depending on how much sweetness you desire (and trust me—you may want more!), feel free to double-coat by letting them rest for just a moment before rolling again in powdered sugar once more—it creates an even thicker layer of sugary bliss around those delightful almond-raspberry treasures! This final touch elevates them from merely delicious to truly extraordinary.
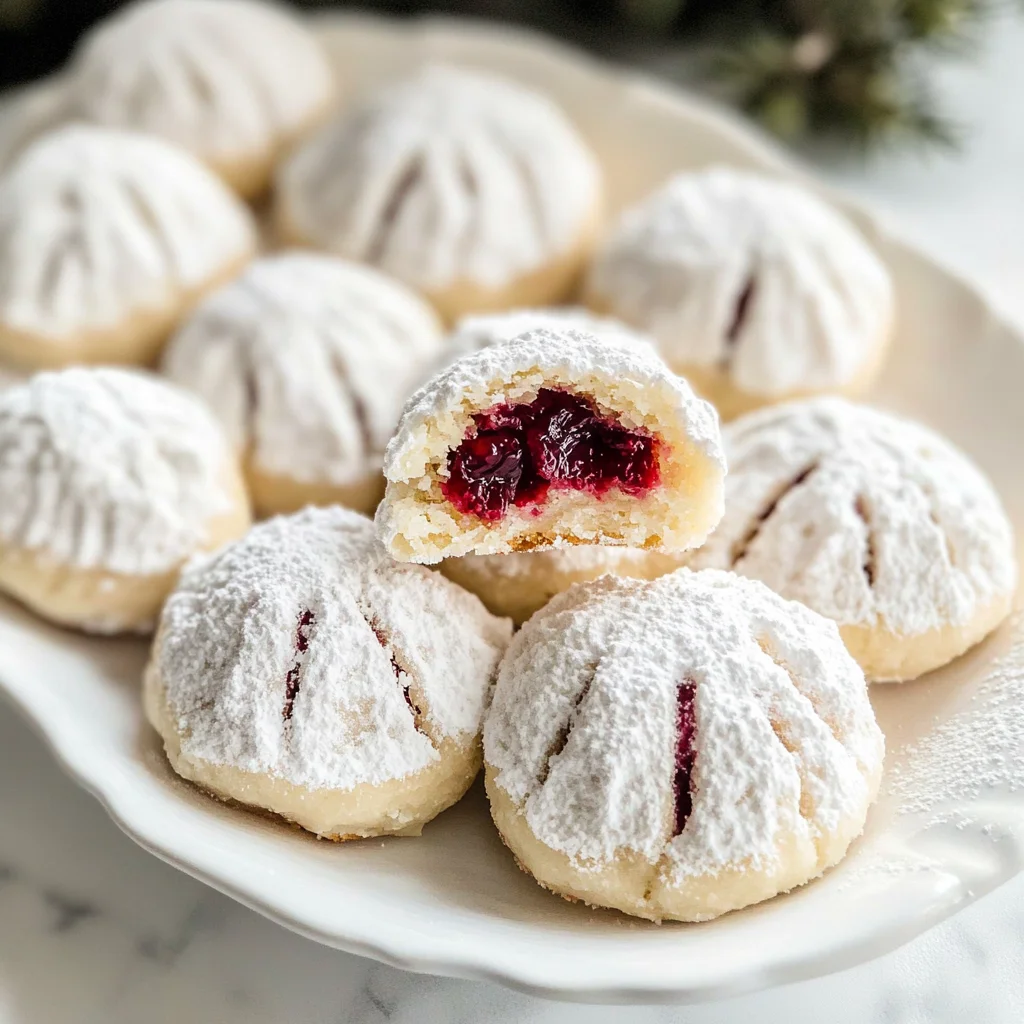
And there you have it—your Raspberry Almond Snowball Cookies are ready! Each bite holds layers of flavor—the creamy almond base paired with tangy raspberry jam wrapped up in sweet clouds of powdered sugar create what I can only describe as pure joy in cookie form! Whether shared with loved ones during holidays or savored solo with a cup of tea, I promise these delightful gems will bring warmth and happiness wherever they go. Enjoy every crumb!
Storage and Enjoyment Tips for Your Raspberry Almond Snowball Cookies Delightful Easy Recipe
Now that you’ve baked these delightful little gems, it’s time to savor the fruits of your labor! The aroma of buttery goodness mingled with the sweet-tart raspberry jam lingers in the air, and I can almost taste the melt-in-your-mouth texture just thinking about it. These cookies are not only a treat for your palate but also a wonderful gift to share with loved ones or enjoy during cozy moments at home. But what if you have some leftovers? Fear not! I’ve got you covered with all the tips you need to keep those cookies fresh and tasty.
Storing Leftover Raspberry Almond Snowball Cookies Delightful Easy Recipe
To keep your Raspberry Almond Snowball Cookies as delightful as the day they were baked, store them in an airtight container at room temperature. This is absolutely paramount because it helps maintain that soft, tender texture we love so much. If stored properly, these cookies will last for about a week—though I promise you they’ll likely be devoured long before that! For an extra trick to keep them moist, consider adding a slice of bread to the container; it’s amazing how that little slice can work wonders by keeping the air moisture levels just right. When you take a bite after a few days, the flavors meld beautifully, creating an even richer experience than when they were fresh out of the oven. And if you’re feeling indulgent, you can warm them slightly in the microwave for about 10 seconds before enjoying—a perfect way to bring back that fresh-baked warmth!
Freezing Raspberry Almond Snowball Cookies Delightful Easy Recipe for Later
What if you want to enjoy these delightful cookies even longer? Freezing is a fantastic option! To freeze them properly, place your cooled cookies in a single layer on a baking sheet and pop them into the freezer for about an hour. Once they’re firm, transfer them into an airtight container or freezer bag, separating layers with parchment paper to avoid sticking. They will stay deliciously preserved for up to three months! The beauty of freezing is that it gives you quick access to a sweet treat whenever the craving strikes—just pull out however many you desire and let them thaw at room temperature or warm them gently in the oven for that freshly baked feel again. Trust me on this: having a stash of these cookies in your freezer makes last-minute gatherings or cozy nights in feel all the more special!
CATEGORY_NAME
Raspberry Almond Snowball Cookies Delightful Easy Recipe

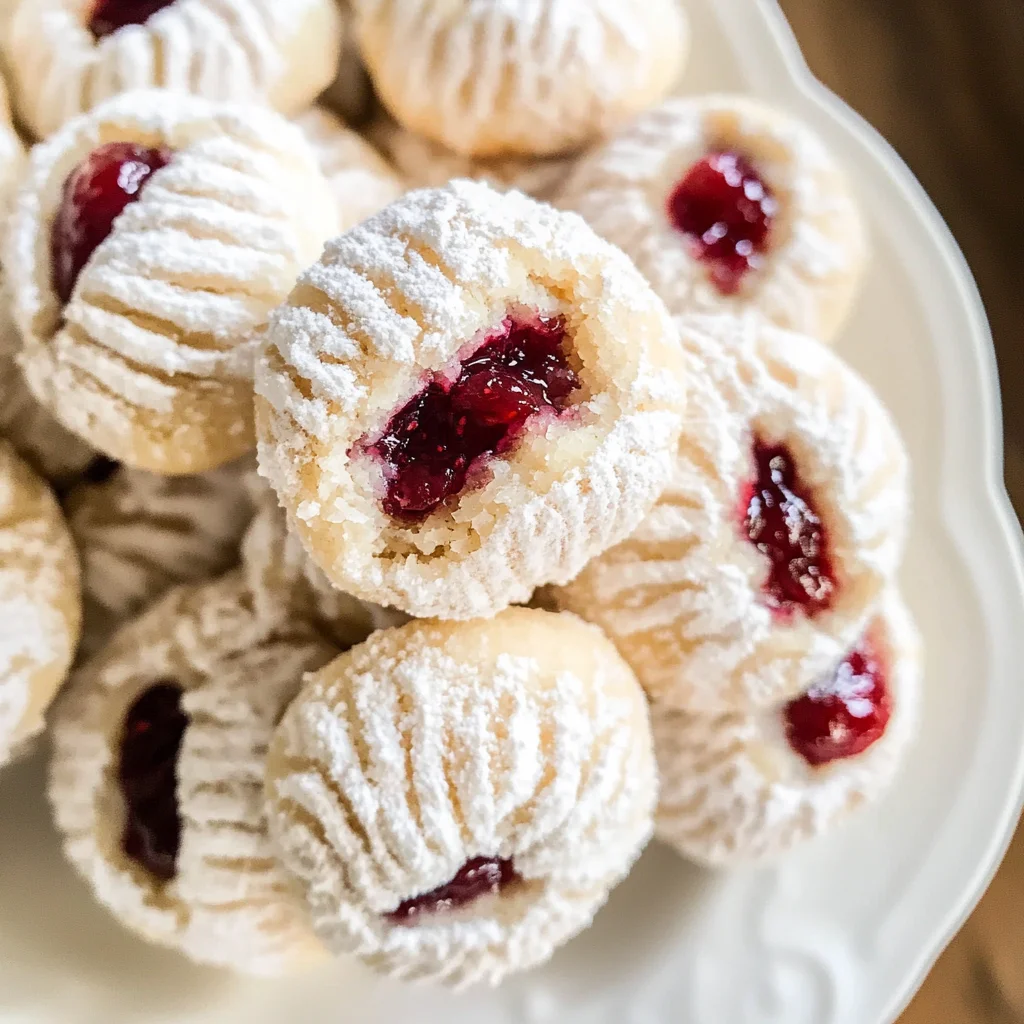
Experience the joy of baking with Raspberry Almond Snowball Cookies, a delightful treat that combines the rich flavor of ground almonds with a luscious raspberry jam center. These melt-in-your-mouth cookies are not just visually appealing, dusted in powdered sugar like fresh snow, but they also deliver a sweet and nutty taste that evokes warmth and nostalgia. Perfect for holiday gatherings or an afternoon indulgence, this easy recipe bridges tradition with modern flair, making it a must-try for both seasoned bakers and novices alike. Roll up your sleeves and enjoy creating these heavenly bites that promise to bring smiles to everyone who tastes them!
- Prep Time: 20 minutes
- Cook Time: 12 minutes
- Total Time: 32 minutes
- Yield: Approximately 24 cookies 1x
- Category: Dessert
- Method: Baking
- Cuisine: Traditional
Ingredients
- 1 cup unsalted butter, softened
- 1/2 cup powdered sugar, plus extra for coating
- 1 teaspoon vanilla extract
- 2 1/4 cups all-purpose flour
- 1 cup finely ground almonds
- 1/4 teaspoon salt
- 1/2 cup seedless raspberry jam
Instructions
- Preheat oven to 350°F (175°C) and line a baking sheet with parchment paper.
- In a large bowl, cream softened butter and powdered sugar until light and fluffy.
- Mix in vanilla extract.
- In another bowl, whisk together flour, ground almonds, and salt.
- Gradually fold dry ingredients into the creamed mixture until combined.
- Roll tablespoon-sized dough into balls; create an indentation in the center for jam.
- Fill each indentation with raspberry jam and reshape into balls.
- Bake for 10-12 minutes or until lightly golden on the bottom.
- Let cool slightly before rolling in powdered sugar.
Nutrition
- Serving Size: 1 serving
- Calories: 100
- Sugar: 6g
- Sodium: 45mg
- Fat: 7g
- Saturated Fat: 4g
- Unsaturated Fat: 3g
- Trans Fat: 0g
- Carbohydrates: 9g
- Fiber: 0.5g
- Protein: 1g
- Cholesterol: 15mg