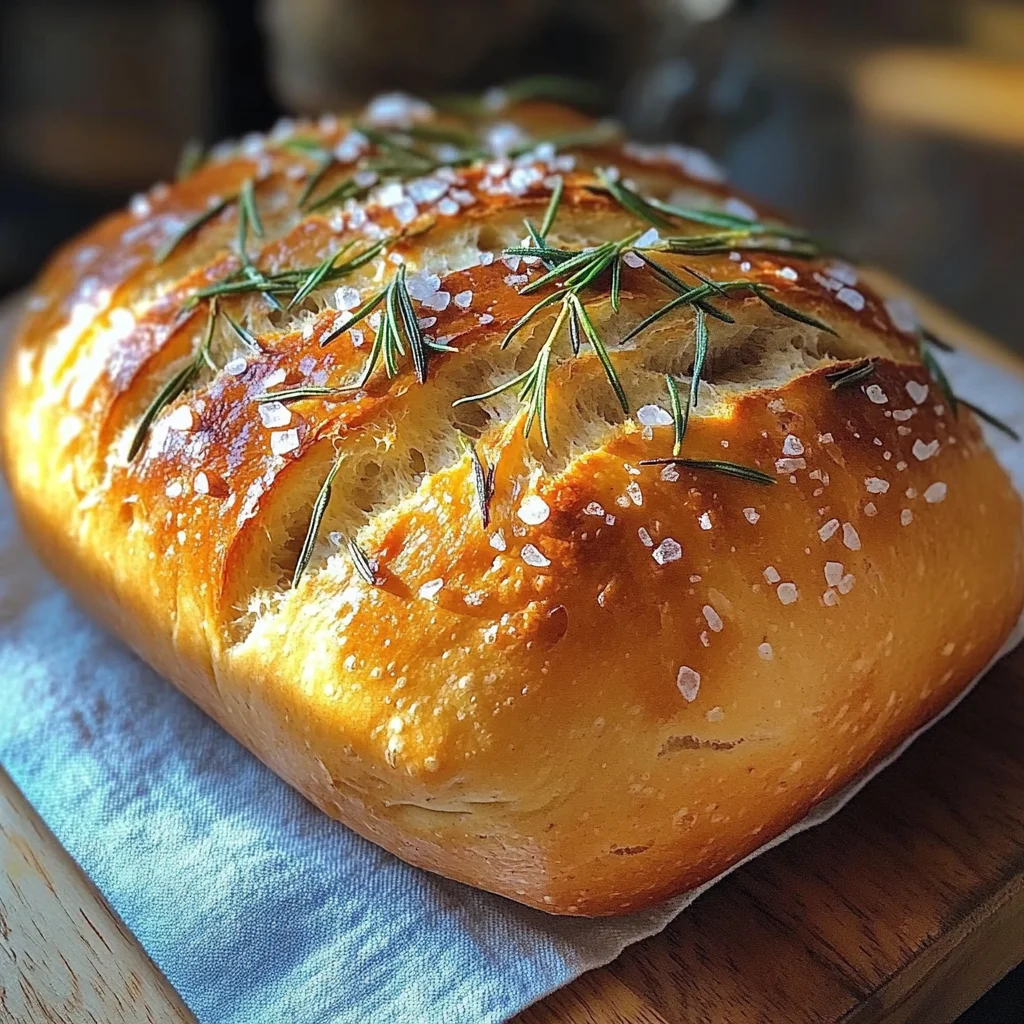
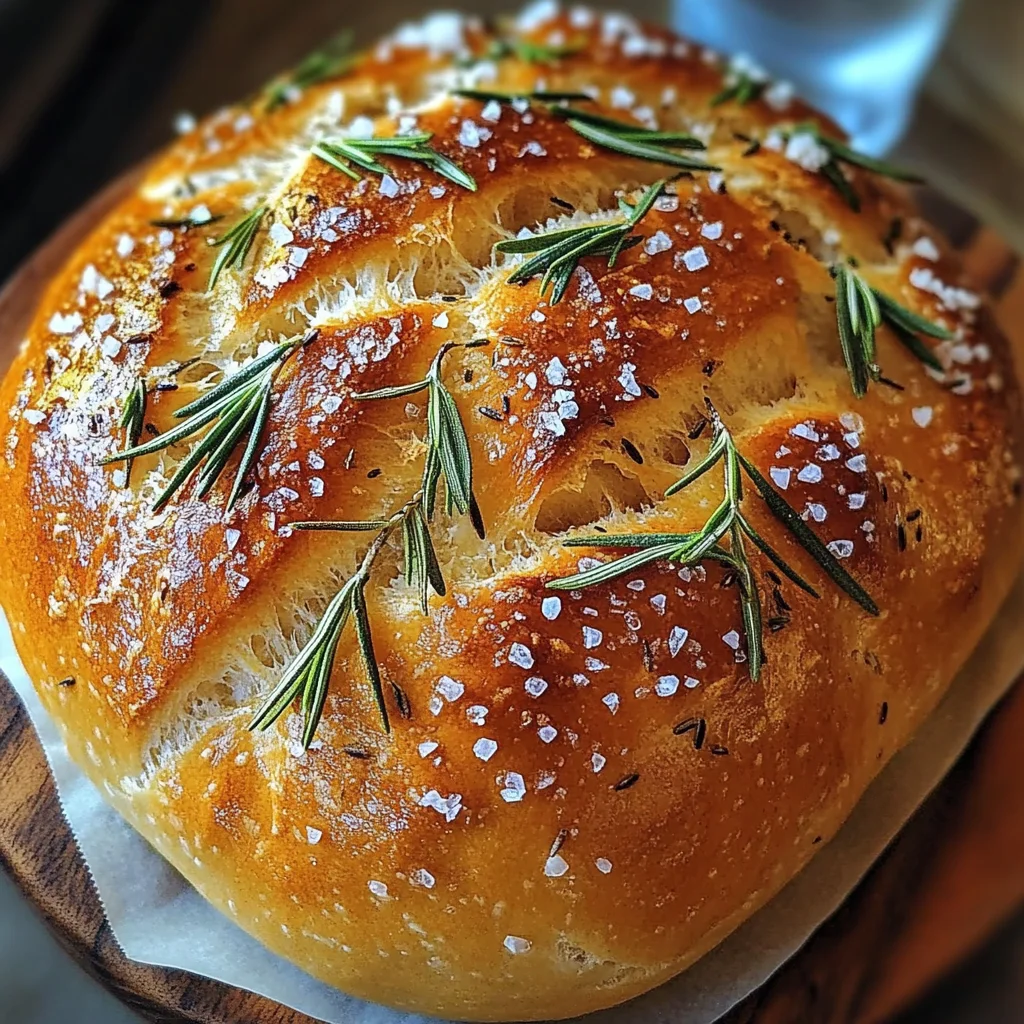
No-Knead Rosemary Sea Salt Bread – So Easy!
There’s something truly magical about baking bread, isn’t there? The very act of transforming simple ingredients into a warm, crusty loaf feels like a dance between tradition and innovation, a bond that connects us to generations past. This No-Knead Rosemary Sea Salt Bread – So Easy! isn’t just a recipe; it’s an experience that fills your kitchen with the intoxicating aroma of rosemary mingling with the warmth of baked dough. As you prepare to embark on this culinary adventure, imagine the rustic charm of gathering around the table, breaking off pieces of freshly baked bread, and sharing stories with loved ones. Each bite is not only delicious but carries with it the profound satisfaction of having created something wholesome from scratch.
I’ve always been captivated by recipes that are both simple and extraordinary, and this one fits the bill perfectly. It brings together the earthy notes of rosemary and the delightful crunch of sea salt, creating a symphony of flavors that dances on your palate. Trust me when I say that this bread will become a staple in your home. Whether you’re serving it alongside a hearty soup or enjoying it on its own with a drizzle of olive oil, every moment spent savoring this bread is pure bliss. So roll up your sleeves and let’s get started on this delightful journey!
No-Knead Rosemary Sea Salt Bread – So Easy!: A Slice of Heaven Awaits
Welcome to the world of easy bread-making! This No-Knead Rosemary Sea Salt Bread – So Easy! will make you feel like an artisan baker without requiring hours of labor or specialized skills. It’s perfect for weeknight meals or when you need a quick comfort food fix. Imagine pulling a golden-brown loaf from the oven, its crust crackling as it cools. This is not just any bread; it’s a moment of joy captured in dough!
Ingredients:
As we set out on this flavorful journey, let’s explore our ingredients. Each component plays an indispensable role in crafting this extraordinary loaf.
- 3 cups (360g) all-purpose flour. This is the backbone of our bread, giving it structure and chewiness while allowing it to rise beautifully during baking. When selecting flour, look for high-quality brands that provide consistent results; they usually have better protein content which contributes to gluten formation—essential for achieving that airy texture we all love in bread.
- 1 ½ teaspoons salt. Here lies the magic! Salt not only enhances flavor but also controls yeast activity during fermentation. Opt for coarse sea salt for added texture and bursts of flavor in every bite; it beautifully contrasts with the softness of the bread.
- 1 teaspoon dried rosemary. Ahh, rosemary—the herb that brings warmth and an aromatic touch to our loaf! Dried rosemary releases its essential oils during baking, infusing the bread with its fragrant essence. If you can find fresh rosemary, use it instead; just chop finely to release those vibrant flavors even more effectively.
- ½ teaspoon instant yeast. Instant yeast is your best friend here; it’s quick-acting and doesn’t require proofing! It helps create those lovely air pockets within your bread while allowing for flexibility in timing—perfect for busy schedules! Just remember to store any leftover yeast in a cool, dry place for future baking adventures.
- 1 ½ cups (355ml) warm water (about 110°F or 43°C). Water is crucial as it hydrates our flour and activates the yeast—this step is absolutely paramount! Warm water helps dissolve the yeast quickly ensuring an even rise throughout your dough without being too hot to kill those precious living organisms.
Equipment You’ll Need:
Before we dive into creating this delightful loaf, let’s talk about some essential equipment that will make our baking experience seamless and enjoyable. Having these tools at hand makes all the difference!
- Large mixing bowl: This will be your canvas where all ingredients come together harmoniously. Choose one that’s large enough to allow for mixing without making a mess; glass or stainless steel bowls work wonderfully since they’re easy to clean and won’t retain odors.
- Wooden spoon or spatula: A sturdy wooden spoon or silicone spatula is ideal for combining ingredients without overworking them—remember, we want minimal handling here! These tools help maintain that delicate structure we aim for in no-knead bread.
- Plastic wrap or kitchen towel: Covering your dough while it rises keeps moisture in and prevents forming a crust on top—trust me; this step ensures you achieve maximum fluffiness in your finished product!
- Baking dish (like a Dutch oven): Using a heavy pot like a Dutch oven traps steam during baking which creates a crispy crust while keeping the inside tender and fluffy—a non-negotiable element for successful artisan-style loaves!
Preparing the No-Knead Rosemary Sea Salt Bread – So Easy!
Step 1: Mixing It All Together
Begin by combining your dry ingredients in that large mixing bowl—start with the flour, salt, dried rosemary, and instant yeast. Use your wooden spoon or spatula to gently stir them together until well blended; you’ll see how beautifully they come together like old friends reuniting after years apart! This step ensures even distribution of flavors throughout your dough—a crucial part if we want every slice bursting with herbaceous goodness.
Next, pour in your warm water slowly while stirring continuously until everything comes together into one cohesive mass—a shaggy ball that may seem rough around the edges yet filled with promise! Don’t rush this step; take time to scrape down any flour clinging stubbornly to the sides of your bowl because each grain matters in achieving perfect texture later on.
Step 2: Letting It Rise
Once combined into a rough dough, cover your bowl tightly with plastic wrap or place a damp kitchen towel over it—this keeps our little dough baby cozy while it rises! Set aside in a warm spot free from drafts for about 12 to 18 hours (yes—you read right!). During this time, magic happens as fermentation occurs—watch as bubbles form beneath its surface signaling active yeast working hard at turning this mixture into something extraordinary!
What makes this resting period so special? Well, it’s during these hours that flavor develops deeply within our dough—the longer fermentation allows complex aromas to emerge—and trust me when I say there’s nothing quite like breaking open fresh bread infused with rich undertones!
Step 3: Shaping Your Dough
After resting overnight (or most likely while you dreamt sweet dreams), gently uncover your dough—it should appear puffed up and dotted with bubbles as evidence of its successful rise! Lightly flour your work surface before tipping out that beautiful blob onto it—don’t worry if it’s sticky; that’s part of its charm! Using floured hands or a bench scraper if needed (no shame here!), fold over edges toward center forming an imperfect round shape—it doesn’t have to be perfect because rustic charm is exactly what we’re after!
Now comes another moment worth celebrating: cover once again using either plastic wrap or towel then let rest another hour whilst preheating your oven along with Dutch oven inside—it’s crucial we create steam right from start which will aid rising further plus give us that crusty exterior everyone adores!
Step 4: Baking Time!
With preheated oven ready at last (around 450°F/232°C), carefully remove hot Dutch oven from heat source using pot holders—it’ll be sizzling hot like liquid gold waiting patiently just for us! Gently drop shaped dough inside—you can sprinkle additional sea salt atop if desired before placing lid back on securely sealing all those tantalizing aromas within!
Bake covered initially for about thirty minutes then remove lid allowing crust to brown beautifully uncovered for remaining fifteen minutes—the sound you’ll hear as it bakes will have you anxiously anticipating what lies ahead! Keep close watch near end so color doesn’t veer too dark but rather golden brown glistening invitingly under warm light radiating from oven door…
And there you have it—the journey towards making No-Knead Rosemary Sea Salt Bread – So Easy! has begun marvelously well… Now go ahead indulge senses further by savoring each slice fresh outta oven paired simply olive oil drizzled atop—or maybe some homemade hummus spreading joy across dinner table tonight?
Let’s continue exploring these steps together until our masterpiece is complete…
Delicious No-Knead Rosemary Sea Salt Bread – So Easy!
Step 5: Let It Rise – The Magic of Fermentation
Now that you’ve mixed together your ingredients and created a beautiful, shaggy dough, it’s time to let the magic happen! This is where patience becomes your best friend. Cover your bowl with a clean kitchen towel or plastic wrap, and let it rest at room temperature for about 12 to 18 hours. Yes, I know it feels like an eternity, but trust me on this! During this resting period, the yeast will work its wonders, slowly fermenting and developing those incredible flavors that will make each bite of the bread taste utterly divine.
The dough will transform from a dense mass into a bubbly, airy mixture that has doubled in size. You’ll know it’s ready when you see a plethora of little bubbles on the surface—this is a delightful sign that your dough is alive and thriving. Don’t rush this step; it’s absolutely paramount! The long fermentation not only enhances the flavor but also improves the texture of your bread, making it chewy and satisfying. If you’re short on time, I encourage you to plan ahead and mix this in the evening so it can rise overnight. You’ll wake up to the intoxicating aroma of freshly baked bread lingering in the air!
Step 6: Shape It – Creating Structure
Once your dough has risen beautifully, it’s now time to shape it into a round loaf that’s ready for baking—the final transformation! Dust your work surface with a bit of flour to prevent any sticking, and gently turn out the dough onto this prepared surface. Be mindful here; we want to preserve all those lovely bubbles you’ve cultivated during fermentation. Using floured hands, fold the edges of the dough towards the center—this technique is called “pre-shaping.”
Let it rest for about 15 minutes after shaping; this short pause allows the gluten to relax, making it easier to form into its final shape without tearing. After this brief intermission, flip the dough seam-side down and gently shape it into a tighter ball by pulling its edges towards the center while rotating it in small circles with your hands. At this point, you should feel that beautiful elasticity; if it’s too loose or sticky, don’t worry—just add a bit more flour to your hands or work surface as needed. Remember, achieving that perfect balance between stickiness and dryness is crucial for creating a lovely crust later on!
Step 7: Second Rise – The Importance of Patience
With your beautifully shaped loaf now resting on parchment paper or inside a well-floured proofing basket (also known as a banneton), cover it once again with a towel or lightly greased plastic wrap to keep moisture in. Allow it to rise for another 1-2 hours until it’s puffed up and feels light when poked gently with your finger—a gentle reminder that we are waiting for another round of fermentation magic!
This second rise not only helps build structure but also gives those flavors an extra boost as they develop further. Watch closely during this phase; if you touch it lightly and it springs back slowly but leaves an indention, you’re right on track! If you find yourself waiting longer than two hours due to cooler temperatures or humidity levels in your kitchen—don’t fret; just be mindful and patient! This step is non-negotiable if you’re aiming for that perfect airy crumb structure.
Step 8: Preheat Your Oven – Setting Up for Success
Now comes the exhilarating part—the moment we’ve all been waiting for! Preheat your oven to a scorching 450°F (232°C) about 30 minutes before you’re ready to bake. This critical step ensures that when our beloved loaf hits that hot surface, it’ll start cooking immediately—creating that crusty exterior we adore while keeping all those precious flavors locked inside.
While your oven heats up, consider placing a Dutch oven (or any heavy pot with a lid) inside—it’s essential for creating steam during baking which works wonders for crust development. Steam traps moisture around your bread as it bakes, leading to an exquisitely crispy crust that’s simply irresistible! When everything’s hot enough (you should feel heat radiating if you open the oven door), carefully remove the pot using oven mitts—trust me on this one—and lift off the lid while trying not to let out too much heat.
Step 9: Bake It – A Transformative Experience
With great care and excitement bubbling within you, gently transfer your risen dough into the preheated pot using parchment paper like handles—this makes it easier without deflating all those lovely bubbles you’ve worked hard for! Cover with the lid and place back into that searing oven before letting out an audible sigh of joy—you’re almost there! Bake covered for about 30 minutes until you see hints of golden brown peeking through.
After those tantalizing minutes have passed, remove the lid cautiously; watch out for steam—it’s like unveiling a hidden treasure! Continue baking uncovered for an additional 10-15 minutes until your loaf turns into an enchanting shade of deep golden brown and emits an irresistible aroma—it will smell like pure bliss wafting through your kitchen! To test doneness, tap the bottom of the loaf—it should sound hollow; this is music to any baker’s ears! Once done, take it out carefully and allow it to cool on a wire rack before slicing into its warm embrace—a moment worth savoring.
Conclusion:
As we reach the end of our culinary adventure with this No-Knead Rosemary Sea Salt Bread – So Easy!, I can’t help but feel giddy about all we’ve explored together. From mixing those simple ingredients into a dough that transforms beautifully during its resting period to watching the magic happen as it bakes into a golden-brown loaf—every step is infused with love and anticipation. What makes this recipe truly special isn’t just its simplicity or its incredible flavor profile; it’s how it brings people together around the table, creating moments filled with laughter and conversation over warm slices fresh from the oven.
Now, why should you absolutely try making this bread? It goes beyond mere taste; it’s about the joy that comes from crafting something wonderful with your own hands. You don’t need any advanced skills here; just a little patience and enthusiasm will do wonders! Picture yourself pulling this rustic loaf from your oven as friends gather around, drawn by its intoxicating aroma—the smiles alone are worth every minute spent baking it! Whether it’s served at dinner parties or enjoyed during cozy family breakfasts slathered with your favorite spread, this bread shines in every setting.
Imagine savoring one slice topped with creamy avocado and sprinkled chili flakes for breakfast or pairing another with hearty vegetable soup on a chilly evening—each bite transports you into an experience that’s both comforting and exhilarating. For an afternoon pick-me-up, serve thick slices alongside artisan cheeses and fresh fruits—it transforms into an elegant charcuterie board that’ll impress anyone lucky enough to share it with you. And don’t forget how lovely it would be at brunch gatherings where everyone gathers around for good food and great company!
Feeling adventurous? This recipe is wonderfully adaptable! You could try adding different herbs like thyme or oregano for unique flavor variations or experiment by incorporating sun-dried tomatoes or olives into the mix for bursts of flavor that will elevate each bite even further. If you’d like to take things sweet instead of savory, imagine folding in some dried cranberries or chopped nuts—what an extraordinary twist on this classic loaf! So go ahead—embrace creativity in your kitchen! I invite you not only to make this No-Knead Rosemary Sea Salt Bread – So Easy!, but also to share your experiences and variations with me—I’d love nothing more than to hear how you’ve made this recipe your own!
No-Knead Rosemary Sea Salt Bread – So Easy!

No-Knead Rosemary Sea Salt Bread – So Easy! is a delightful blend of simplicity and flavor that transforms basic ingredients into an irresistible loaf. Imagine the warm aroma of rosemary wafting through your kitchen as this crusty, golden-brown bread bakes to perfection.
- Prep Time: 15 minutes
- Cook Time: 45 minutes
- Total Time: 1 hour
- Yield: Approximately 12 servings 1x
- Category: Bread
- Method: Baking
- Cuisine: Italian
Ingredients
- 3 cups (360g) all-purpose flour
- 1 ½ teaspoons coarse sea salt
- 1 teaspoon dried rosemary
- ½ teaspoon instant yeast
- 1 ½ cups (355ml) warm water
Instructions
- In a large mixing bowl, combine the flour, salt, rosemary, and instant yeast.
- Gradually pour in the warm water while stirring until a shaggy dough forms.
- Cover the bowl with plastic wrap or a damp towel and let it rise at room temperature for 12 to 18 hours.
- Lightly flour your work surface and turn out the dough, shaping it gently into a round loaf.
- Place the shaped dough on parchment paper or in a floured proofing basket, cover it again, and let it rise for another hour.
- Preheat your oven to 450°F (232°C) with a Dutch oven inside.
- Carefully transfer the dough into the hot Dutch oven, cover with the lid, and bake for 30 minutes.
- Remove the lid and bake uncovered for an additional 10-15 minutes until golden brown.
Nutrition
- Serving Size: 1 serving
- Calories: 160
- Sugar: 0g
- Sodium: 200mg
- Fat: 0.5g
- Saturated Fat: 0g
- Unsaturated Fat: 0.5g
- Trans Fat: 0g
- Carbohydrates: 34g
- Fiber: 1g
- Protein: 4g
- Cholesterol: 0mg