No Bake Grinch Pie
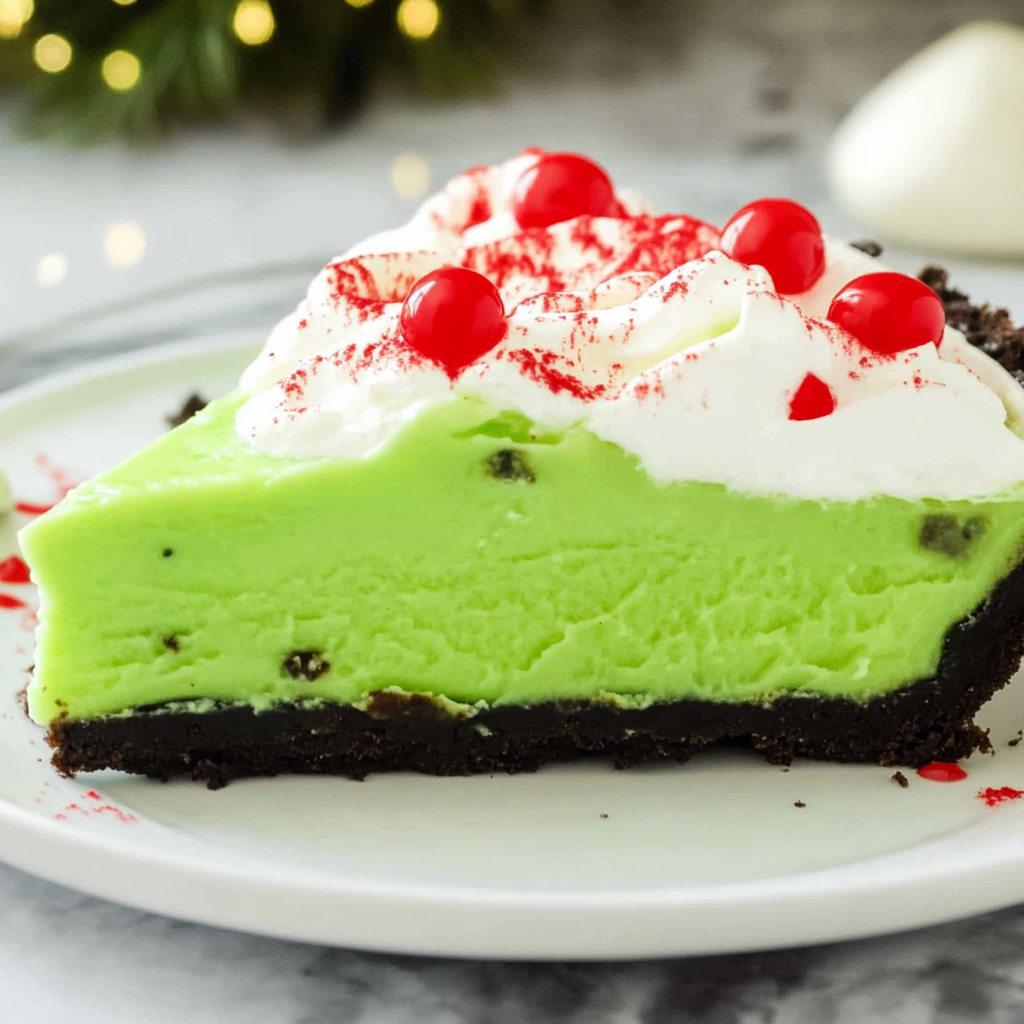
If you’re looking for a festive treat that’s as easy to make as it is delightful to eat, then you’ve stumbled upon a real gem: the No Bake Grinch Pie! This cheerful dessert is perfect for the holiday season. It combines the creamy goodness of white chocolate pudding with a fun splash of color. Trust me, every time you serve it, you’ll feel your heart grow three sizes with each joyful bite!
What makes this pie even more special is its effortless preparation. Busy weeknights or family gatherings? No problem! This pie requires just a few simple steps and keeps well in the fridge, making it an ideal choice for any occasion.
Why You’ll Love This Recipe
- Super Easy: With just a few ingredients and no baking required, anyone can whip this up in minutes.
- Family-Friendly Fun: Kids will love helping out with the sprinkles, making it a great bonding activity.
- Make-Ahead Delight: Prepare this pie a day in advance and let it chill until party time.
- Deliciously Festive: The combination of flavors and colors makes this pie not just tasty but also visually stunning!
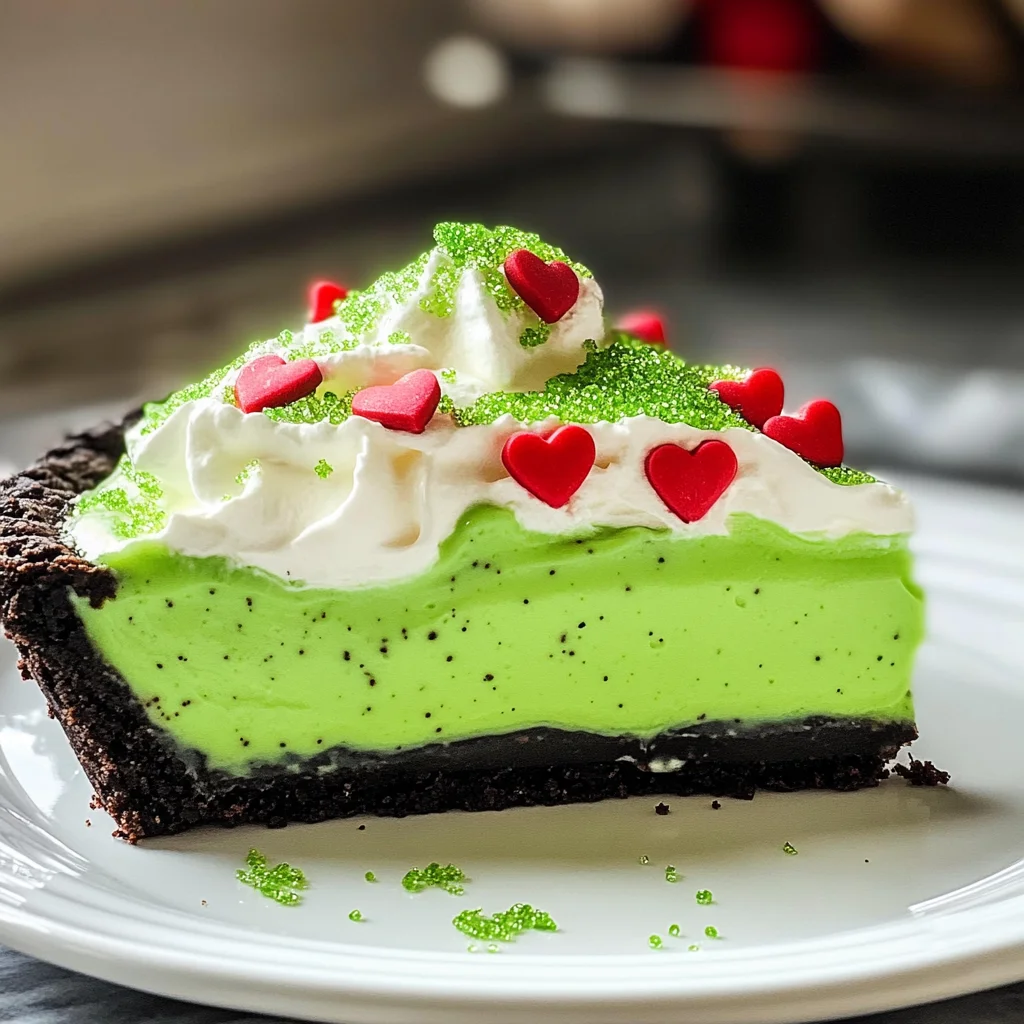
- Heartwarming Presentation: The vibrant green and red decorations give it that perfect holiday spirit.
Ingredients You’ll Need
For this No Bake Grinch Pie, you’ll need some simple and wholesome ingredients. They come together beautifully to create a dessert that’s both fun and delicious!
For the Pie
- 1 Oreo pie crust
- 1 box white chocolate pudding (3.9 oz)
- 2 Cups 2% milk (Make sure it is cold)
- 1/2 container Cool-Whip
For the Decorations
- 2-3 drops neon green gel food coloring
- 1-2 drops green food coloring
- 1/2 cup green sanding sugar
- 1/2 cup mini red heart sprinkles
- 1/2 cup large red heart sprinkles
Variations
This recipe is wonderfully flexible, allowing you to put your own spin on it! Here are some fun ideas to customize your No Bake Grinch Pie:
- Add Flavoring: Mix in some peppermint extract for a refreshing twist that screams holiday cheer!
- Switch Up the Toppings: Try using different colored sprinkles or edible glitter to match your party theme.
- Use Different Puddings: Experiment with vanilla or chocolate pudding instead of white chocolate for a different flavor profile.
- Make It Healthier: Substitute Cool-Whip with whipped coconut cream for a lighter version without sacrificing creaminess.
How to Make No Bake Grinch Pie
Step 1: Prepare the Pudding
Start by preparing your pudding according to the package directions. In a mixing bowl, beat together the pudding mix, cold milk, and food coloring until it thickens into soft peaks. This step is crucial because it creates that deliciously creamy texture we all love!
Step 2: Fill the Crust
Once your pudding is ready, scoop it into the Oreo pie crust and spread it evenly. Take your time here; an even layer ensures every slice has that perfect balance of flavors.
Step 3: Chill Out
Now it’s time for some patience! Refrigerate your pie for about 3 hours. This setting time allows the pudding to firm up nicely so that each slice holds its shape when served.
Step 4: Top It Off
After chilling, remove your pie from the fridge. Spread the Cool-Whip generously over the top. This fluffy layer is like a little cloud of happiness on your pie!
Step 5: Get Festive
Now comes the fun part! Sprinkle on green sanding sugar and mini red heart sprinkles. Feel free to get creative—this is where you can really make your pie shine!
Step 6: Serve with Love
Before serving, add a single large red heart sprinkle on each slice. Not only does this look adorable, but it also adds an extra touch of holiday cheer!
Step 7: Enjoy!
Slice up your No Bake Grinch Pie and watch as everyone delights in this festive treat. Share stories, laughter, and lots of love while enjoying each delicious bite!
Pro Tips for Making No Bake Grinch Pie
Making this delightful No Bake Grinch Pie is a breeze, and with these pro tips, you’ll have a show-stopping dessert that everyone will love!
- Use cold milk: Starting with cold milk helps the pudding set faster and achieve that creamy texture we all crave. It makes for a smoother filling that’s oh-so-delicious!
- Don’t skip the chilling time: Allowing the pie to chill for at least 3 hours is crucial. This helps the pudding firm up properly, ensuring each slice holds its shape when served.
- Customize your colors: Feel free to adjust the amount of green food coloring based on your preference! A little goes a long way, so add drops gradually until you achieve your desired shade of Grinch green.
- Be generous with sprinkles: Sprinkles aren’t just for decoration; they add fun color and texture! Layering both mini and large heart sprinkles creates a visually appealing contrast that will charm your guests.
- Let it thaw slightly before serving: If the pie has been in the fridge for an extended period, let it sit out for about 10-15 minutes before slicing. This makes cutting easier and enhances the overall texture.
How to Serve No Bake Grinch Pie
Serving your No Bake Grinch Pie can be just as fun as making it! Here are some ideas to present this festive treat beautifully.
Garnishes
- Whipped cream clouds: Add dollops of whipped cream on top of each slice for an extra touch of creaminess and visual appeal.
- Mint leaves: Fresh mint leaves can add a pop of color and a refreshing aroma that complements the sweet flavors.
- Chocolate shavings: For chocolate lovers, sprinkle some chocolate shavings over the top for a decadent finish that elevates this already delightful dessert.
Side Dishes
- Fruit salad: A light fruit salad with seasonal fruits like strawberries, blueberries, and kiwi brings brightness to your dessert spread while balancing out the sweetness.
- Cheese platter: An assortment of cheeses can provide a savory contrast to the sweetness of the pie. Include mild options like brie or gouda along with some crackers for an elegant touch.
- Hot cocoa: Warm up some hot cocoa topped with marshmallows or whipped cream. It’s comforting and pairs perfectly with the chilled pie for a delightful holiday experience.
- Veggie platter: Crunchy veggies like carrots, celery, and bell peppers served with hummus or ranch dip offer a fresh bite that complements the richness of the pie.
Now you’re all set to impress family and friends with your stunning No Bake Grinch Pie! Enjoy every festive moment together!
Make Ahead and Storage
This No Bake Grinch Pie is a fantastic dessert option for meal prep, making it easy to have a festive treat ready for any occasion. You can prepare it ahead of time and store it in the refrigerator or even freeze it for later enjoyment!
Storing Leftovers
- Store any leftover pie in an airtight container in the refrigerator.
- It will keep well for up to 3 days.
- If you notice any condensation, gently dab the top with a paper towel before serving.
Freezing
- While it’s best to enjoy this pie fresh, you can freeze it if needed.
- Wrap the pie tightly with plastic wrap and then aluminum foil to prevent freezer burn.
- To thaw, place it in the refrigerator overnight before serving.
Reheating
- This pie is intended to be served cold, so there’s no need to reheat!
- Simply slice and serve straight from the fridge for the best texture.
FAQs
Here are some common questions about making this delightful dessert.
Can I make No Bake Grinch Pie in advance?
Absolutely! This pie is perfect for making ahead of time. You can prepare it a day or two prior to your gathering and keep it refrigerated until you’re ready to serve.
What can I use instead of Cool-Whip in No Bake Grinch Pie?
If you prefer not to use Cool-Whip, you can substitute with homemade whipped cream made from heavy whipping cream sweetened with a little sugar. Just whip until soft peaks form, and gently fold it into your pudding mixture.
Is No Bake Grinch Pie suitable for kids?
Yes! This festive pie is not only fun but also kid-friendly. The bright colors and sweet flavors are sure to delight children of all ages.
How should I decorate my No Bake Grinch Pie?
Get creative! Use additional sprinkles, edible glitter, or even fruit like kiwi slices to add a personal touch that matches your holiday theme.
Can I change the color of my No Bake Grinch Pie?
Certainly! While green is traditional for this themed dessert, feel free to experiment with different food coloring shades or even create a rainbow version using various colors!
Final Thoughts
I hope you find joy in making this No Bake Grinch Pie! It’s such a delightful dessert that brings holiday cheer with every bite. The creamy white chocolate pudding paired with colorful toppings makes it a showstopper at any gathering. Enjoy creating this festive treat, and don’t forget to share your delicious results – I’d love to hear how yours turns out!
No Bake Grinch Pie

Indulge in the festive spirit with this delightful No Bake Grinch Pie! This easy-to-make dessert features a creamy white chocolate pudding filling that’s as cheerful as it is delicious. With vibrant green and red decorations, this pie is perfect for holiday gatherings and family celebrations. The best part? You don’t need an oven to whip up this treat, making it a stress-free addition to your festivities. Plus, it can be prepared ahead of time and stored in the fridge, ensuring you have more time to enjoy with loved ones. Serve this colorful pie at your next holiday party and watch as smiles light up the room!
- Prep Time: 15 minutes
- Cook Time: 0 minutes
- Total Time: 15 minutes
- Yield: Serves approximately 8 slices 1x
- Category: Dessert
- Method: No Bake
- Cuisine: American
Ingredients
- 1 Oreo pie crust
- 1 box white chocolate pudding (3.9 oz)
- 2 Cups 2% milk (Make sure it is cold)
- 1/2 container Cool-Whip
- 2–3 drops neon green gel food coloring
- 1–2 drops green food coloring
- 1/2 cup green sanding sugar
- 1/2 cup mini red heart sprinkles
- 1/2 cup large red heart sprinkles
Instructions
- Prepare the pudding by mixing the pudding mix, cold milk, and food coloring in a bowl until thickened.
- Spoon the pudding into the Oreo pie crust evenly.
- Refrigerate for about 3 hours to allow it to set.
- After chilling, spread Cool-Whip over the top of the pie.
- Decorate with green sanding sugar and red heart sprinkles.
- Optionally, add a large red heart sprinkle on each slice before serving.
Nutrition
- Serving Size: 1 serving
- Calories: 280
- Sugar: 22g
- Sodium: 150mg
- Fat: 14g
- Saturated Fat: 8g
- Unsaturated Fat: 4g
- Trans Fat: 0g
- Carbohydrates: 36g
- Fiber: 1g
- Protein: 3g
- Cholesterol: 15mg