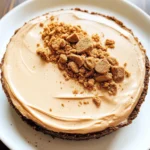
No Bake Cookie Butter Cheesecake
There’s something profoundly magical about dessert, isn’t there? It’s more than just a sweet ending to a meal; it’s an experience that wraps you in warmth and nostalgia, evoking memories of family gatherings, laughter shared over a table laden with treats, and the comforting smell of something wondrous baking in the oven. Today, I am absolutely delighted to share with you my treasured recipe for a No Bake Cookie Butter Cheesecake. This luscious creation is not just a dish; it’s a celebration of indulgence, simplicity, and all the joy that comes from sharing good food with those we love. As the silky layers meld together, they create an intoxicating symphony of flavors that will transport your senses to a place of creamy bliss. Trust me when I say this cheesecake is dangerously delicious!
Imagine cutting into this delicate masterpiece, where each slice reveals a velvety filling that reflects your own love for cooking—a harmonious blend of rich cookie butter and smooth cream cheese, all supported by the lightest whipped cream. The beauty of this No Bake Cookie Butter Cheesecake lies not only in its delectable taste but also in its effortless preparation; it’s perfect for those moments when you want to impress without the fuss of baking! Whether it’s for a special occasion or just a cozy night at home, this dessert is sure to become a cherished favorite in your culinary repertoire.
No Bake Cookie Butter Cheesecake: A Creamy Delight Without the Oven
Now that we’ve set the stage for this delightful dessert, let’s dive right into making our No Bake Cookie Butter Cheesecake. With just four key ingredients and no need for an oven, you’ll find it’s both quick to prepare and immensely satisfying to enjoy. So gather your supplies, because we’re about to embark on a sweet journey that I promise will leave your taste buds dancing!
Ingredients:
As we begin our culinary adventure together, I can’t stress enough how each ingredient plays its part in crafting the magic of this cheesecake. Let’s take a moment to appreciate what we’re working with:
- 1 cup heavy cream (cold). The heavy cream serves as the backbone of our cheesecake’s luxurious texture—think of it as liquid gold! When whipped properly, it transforms into airy clouds that add volume and lightness to our filling. Always use cold heavy cream for the best results; it whips up faster and holds its shape beautifully. If you’re looking for alternatives due to dietary preferences or availability issues, consider using coconut cream as an excellent dairy-free substitute.
- 1½ cups powdered sugar. This ingredient is essential not only for sweetness but also for achieving that silky-smooth consistency we crave in desserts like our No Bake Cookie Butter Cheesecake. The fine texture of powdered sugar dissolves effortlessly when mixed with other ingredients, preventing any graininess from spoiling our creamy dream. If you prefer less sweetness or are watching your sugar intake, feel free to adjust this amount according to your taste.
- 1 cup cookie butter. Ahh, cookie butter—the star of our show! This delightful spread brings an irresistible flavor profile reminiscent of warm spices and caramelized cookies straight from childhood memories. Its creamy texture helps bind our filling while imparting an extraordinary depth that makes every bite utterly intoxicating. You can find cookie butter at most grocery stores or online; if you’re feeling adventurous and want to try making your own at home, there are plenty of recipes available!
- 8 ounces cream cheese (softened). Cream cheese adds that rich tanginess which perfectly balances out the sweetness from both the sugar and cookie butter. Make sure it’s softened before mixing so that it combines seamlessly into our filling—cold cream cheese can lead to an unappealing lumpy texture! If you’d like a lighter option without sacrificing flavor, consider using low-fat cream cheese instead.
- 1 pie crust. While you can opt for store-bought crusts for convenience (such as graham cracker or Oreo), making your own crust can bring even more love into this dessert! A homemade crust allows you full control over flavors—think about adding crushed nuts or spices to make it uniquely yours! Regardless of which route you choose, remember that this crust forms the foundation upon which all our luscious layers rest.
Equipment You’ll Need:
Having the right tools in your kitchen makes all the difference between an enjoyable experience and feeling overwhelmed. These essential partners will help us create something wonderful together:
- Mixing Bowl – A sturdy mixing bowl is vital as it provides ample space for whipping the heavy cream without splashing everywhere! Choose one that’s large enough—perhaps even glass so you can admire all those beautiful layers forming as we mix.
- Stand Mixer or Hand Whisk – While I adore using my stand mixer fitted with the whisk attachment (it does much of the hard work for you!), a hand whisk works just fine if you’re feeling spirited and ready for some arm workout! Either way, this tool is crucial for whipping air into our heavy cream until soft peaks form—a step we can’t skip!
- Spatula – An essential tool for folding ingredients gently together without deflating all that lovely air we’ve worked hard to whip into our cream! Opt for one made from silicone or rubber so you can scrape every last bit from your mixing bowl.
- Pie Dish – Your pie dish cradles this masterpiece beautifully as it sets in the fridge! Choose one that’s deep enough to allow generous slices while showcasing those stunning layers once sliced.
Now that we have everything we need laid out before us—let’s jump into preparing this No Bake Cookie Butter Cheesecake!
Step 1: Whipping Up Creamy Clouds
Begin by pouring your chilled heavy cream into your mixing bowl (or stand mixer). Start beating on low speed until small bubbles form. Gradually increase the speed until soft peaks begin to emerge—this process is so exciting because you’ll see the transformation happen right before your eyes! Soft peaks mean that when you lift your whisk out of the mixture, gentle waves form but ultimately fall back into themselves rather than standing tall like stiff peaks would do. This lightness is what we’re aiming for—it ensures our cheesecake won’t be dense but rather airy and fluffy.
Step 2: Sweetening Things Up
Once you’ve achieved those delightful soft peaks, it’s time to introduce sweetness! Slowly add powdered sugar—about half a cup at a time—to avoid creating clouds of sugar dust throughout your kitchen (trust me; I’ve been there!). Continue mixing at low speed until fully incorporated after each addition; this gradual approach helps maintain that precious volume we’ve built up in our cream.
Step 3: Marrying Flavors
Now comes one of my favorite parts—adding cookie butter and softened cream cheese! Gently fold these two ingredients into your whipped mixture on medium-low speed until everything combines smoothly with no lumps remaining—a process known as creaming. This intimate dance between flavors creates depth within each bite while keeping things wonderfully creamy!
Step 4: Filling Our Crust
Using a spatula (your trusty sidekick), scoop every last bit of this glorious batter into your prepared pie crust—don’t rush through this part because every dollop deserves its moment! Spread evenly across the base using gentle motions so as not to deflate any air pockets we’ve created during mixing—this step is crucial because it’s responsible for ensuring each slice retains its lovely structure once chilled.
As we continue through these steps towards creating something truly extraordinary together—the excitement builds within me knowing how much joy awaits us at serving time! Don’t forget: patience is key here; allowing ample chilling time will elevate both flavor and texture beyond what words can describe.
Stay tuned as we move towards garnishing options next—and trust me—you won’t want to miss out on those finishing touches that’ll make everything pop even more vibrantly!
Creating Your Dream No Bake Cookie Butter Cheesecake
Step 5: Pouring in the Magic
Once you’ve achieved that perfectly whipped cream, it’s time to incorporate the real stars of our show: the cookie butter and softened cream cheese. This step is where the magic truly happens, as these two ingredients come together to create an utterly intoxicating filling that will have your taste buds dancing with joy. You’ll want to take your time here, gently folding them into your whipped cream mixture. Begin by adding the softened cream cheese—make sure it’s at room temperature to prevent any lumps from forming. The smoothness of the cream cheese is absolutely paramount to achieving that velvety texture we’re after.
With your mixer set to medium-low speed, blend in the cookie butter next; trust me when I say this is where everything gets fun! The warm, sweet aroma of cookie butter wafting through your kitchen is simply divine. As you mix, watch for that beautiful combination turning into a creamy dream; you should see a unified color and texture—no streaks or lumps allowed! If you notice any stubborn bits of cream cheese refusing to blend in, feel free to stop and scrape down the sides of the bowl with a spatula, giving everything a good stir until it’s just right. This step is crucial because a smooth filling means every bite will be blissfully delightful.
Step 6: The Art of Filling
Now that you have this sumptuous filling ready and waiting, it’s time for the most exciting part: transferring it into your pie crust! Grab a spatula, and let’s get to work smoothing this heavenly mixture into the crust with love and care. Start by spooning dollops of your cheesecake filling into the center of the pie crust. You’ll want to spread it out evenly without rushing; think of this as creating a canvas for your dessert masterpiece. Gently coax the filling towards the edges, ensuring it fills every nook and cranny of that crust—this is where those flavors can fully meld together.
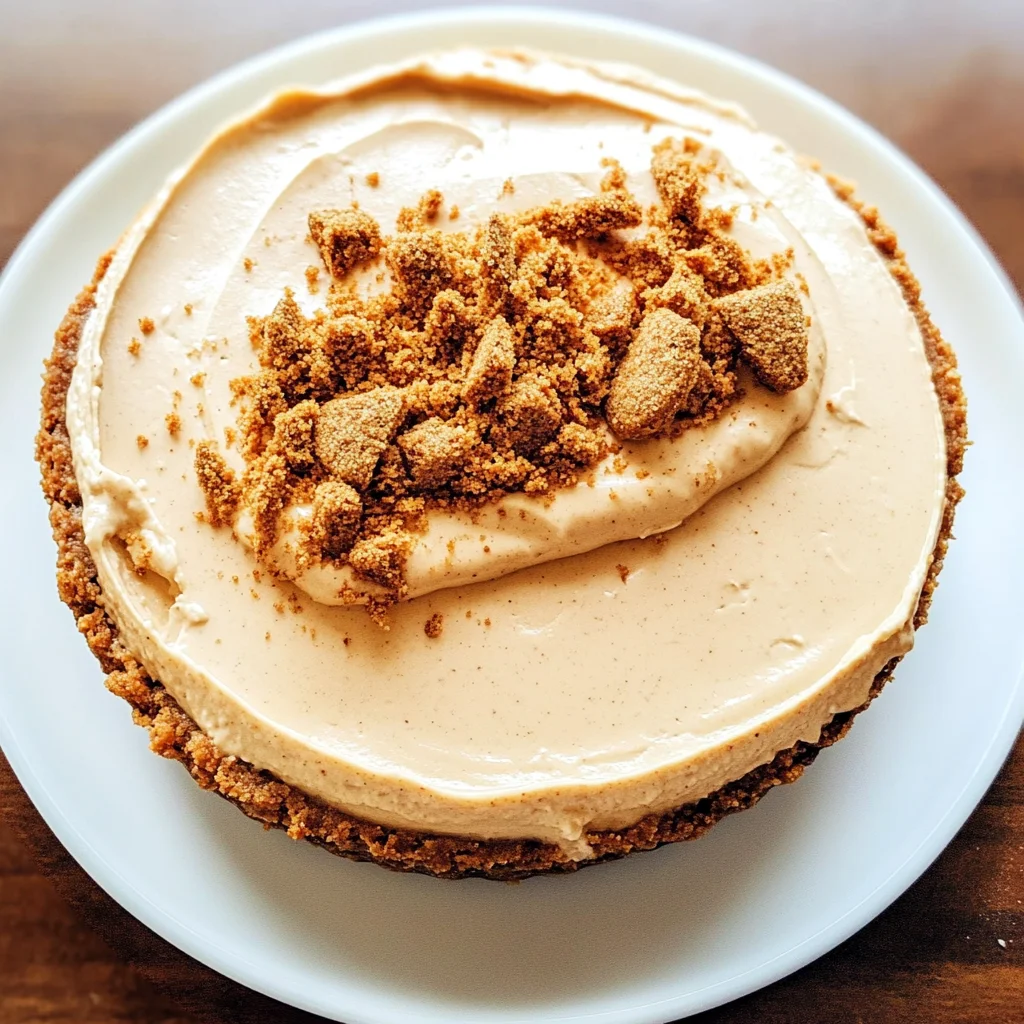
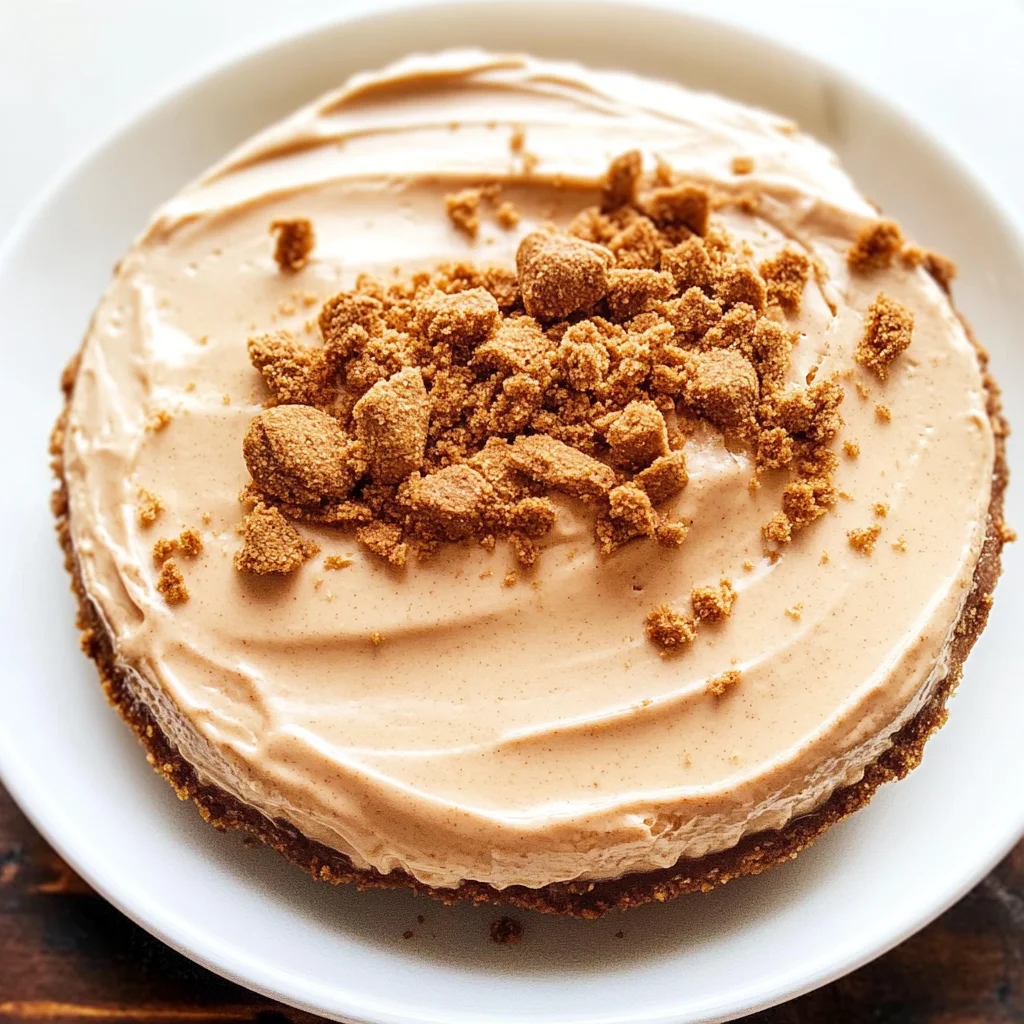
As you smooth out the top, don’t forget that little flourish at the end! If you’ve got some crushed Speculoos cookies on hand (which I wholeheartedly recommend), sprinkle them over the top before refrigerating. Not only does it add an extra textural element, but it also gives your cheesecake a beautiful presentation that will wow anyone who lays eyes on it! Remember, this step isn’t just about aesthetics; it’s about enhancing every bite with that crunchy sweetness which pairs so wonderfully with our creamy filling.
Step 7: The Chilling Process – Patience Pays Off
Now comes perhaps one of the hardest parts—waiting! After you’ve filled and smoothed out your cheesecake mixture in its crust, cover it generously with plastic wrap or foil. Place it in your refrigerator for at least two hours—though if you’re feeling particularly indulgent, letting it chill overnight will yield even better results. Why chill? Well, my friend, chilling allows all those scrumptious flavors to meld together beautifully while firming up our cheesecake filling into a luscious sliceable delight.
During this chilling period, keep in mind that patience is essential; I promise you’ll want to dive right in as soon as possible because of how mouthwatering this dessert looks! However, trust me on this—the longer you wait (up to 24 hours), the more intense and harmonious those flavors become. You’ll know it’s ready when it’s set but still has a slight jiggle in the middle—that’s how you know you’ve achieved cheesecake perfection!
Step 8: The Grand Reveal
Finally, after what feels like an eternity (but really isn’t too long), it’s time for the moment we’ve all been waiting for: serving up slices of your magnificent no bake cookie butter cheesecake! Carefully remove the plastic wrap or foil; take a moment to admire how beautifully it has set—smooth and creamy with enticing hints of cookie goodness peeking through. Using a sharp knife—a hot one works wonders—slice through without hesitation; wiping down your knife between cuts ensures clean edges for those perfect pieces.
When you’re ready to serve each slice, consider adding fresh whipped cream or even more crushed Speculoos cookies as garnishes—these touches elevate your dessert from delicious to utterly extraordinary! And believe me when I say that each bite offers an explosion of flavors—the richness from cookie butter enveloped in clouds of whipped cream combined with that satisfying crunch from the crust creates a symphony that will linger on your palate long after you’ve finished eating.
Final Touches on Your No Bake Cookie Butter Cheesecake
This no bake cookie butter cheesecake is not just another dessert; it’s an experience meant to be shared with friends and family alike. With each slice shared around a table filled with laughter and stories, you’ll find yourself savoring not just its rich flavor but also those precious moments spent together. So go ahead—take pride in what you’ve created here! I promise you this recipe will become one of those beloved treasures cherished by everyone who takes a bite. Enjoy every moment leading up to serving—and remember, there’s always room for one more slice!
Storage and Enjoyment Tips for Your No Bake Cookie Butter Cheesecake
Now that you’ve whipped up this decadently creamy No Bake Cookie Butter Cheesecake, it’s time to revel in the rich, velvety goodness that awaits you. I can practically see the smiles on your friends’ faces as they take their first bite! But what if there are leftovers? Well, my friend, you’re in luck because this delightful dessert keeps beautifully, allowing you to enjoy its sweet embrace even days later. Just think about savoring a slice of that luscious cheesecake while curling up with a good book or sharing a piece with someone special—it’s pure bliss!
Storing Leftover No Bake Cookie Butter Cheesecake
To keep your No Bake Cookie Butter Cheesecake fresh and fabulous, storing it properly is essential. I recommend placing any leftovers in an airtight container; this will help maintain that perfect creamy texture and prevent any pesky odors from seeping in from the fridge. Ideally, your cheesecake should be enjoyed within 3 to 5 days of making it; however, trust me when I say it tastes just as delicious after a few days in the refrigerator. If you notice it starting to dry out or lose its charm, try placing a slice of bread in the container—this nifty trick keeps moisture levels balanced and helps retain that silky smoothness! The flavors continue to meld beautifully over time, making each bite an utterly intoxicating experience. When you’re ready for another slice, simply scoop it out and let it sit at room temperature for a few minutes before diving back into its creamy goodness.
Freezing Cookie Butter Cheesecake for Later
If you find yourself with more cheesecake than you can handle (and who could blame you!), freezing is a fantastic option. To freeze your No Bake Cookie Butter Cheesecake properly, wrap individual slices tightly in plastic wrap or aluminum foil and place them in a freezer-safe bag or container. This way, you’ll avoid freezer burn and preserve all that dreamy flavor. It can last frozen for up to 2 months—talk about convenience! When you’re ready to indulge again, simply transfer a slice to the refrigerator overnight to thaw or let it sit at room temperature for about 30 minutes. The beauty of freezing is that it allows you to enjoy this divine dessert whenever the craving strikes without needing to whip up another batch from scratch—how wonderful is that?
No Bake Cookie Butter Cheesecake
Indulge in the creamy, dreamy world of No Bake Cookie Butter Cheesecake—a dessert that requires no oven and only a few simple ingredients! This delightful treat brings together the rich flavor of cookie butter with a velvety cream cheese filling, all nestled in a crumbly crust. Perfect for any occasion, whether it’s a family gathering or a cozy night at home, this cheesecake is sure to impress everyone at your table. With its effortless preparation and luxurious taste, you’ll find it hard to resist going back for seconds (or thirds!).
- Prep Time: 20 minutes
- Cook Time: 0 minutes
- Total Time: 20 minutes
- Yield: Serves approximately 8 slices 1x
- Category: Dessert
- Method: No Bake
- Cuisine: American
Ingredients
- 1 cup heavy cream (cold), or coconut cream for dairy-free
- 1½ cups powdered sugar
- 1 cup cookie butter
- 8 ounces cream cheese (softened)
- 1 pie crust (store-bought or homemade)
Instructions
- In a mixing bowl, whip the cold heavy cream until soft peaks form.
- Gradually add powdered sugar while continuing to whip.
- Gently fold in softened cream cheese and cookie butter until smooth.
- Spoon the mixture into the pie crust and spread evenly.
- Chill in the refrigerator for at least two hours before serving.
Nutrition
- Serving Size: 1 slice
- Calories: 360
- Sugar: 29g
- Sodium: 170mg
- Fat: 29g
- Saturated Fat: 17g
- Unsaturated Fat: 10g
- Trans Fat: 0g
- Carbohydrates: 28g
- Fiber: 0g
- Protein: 4g
- Cholesterol: 55mg