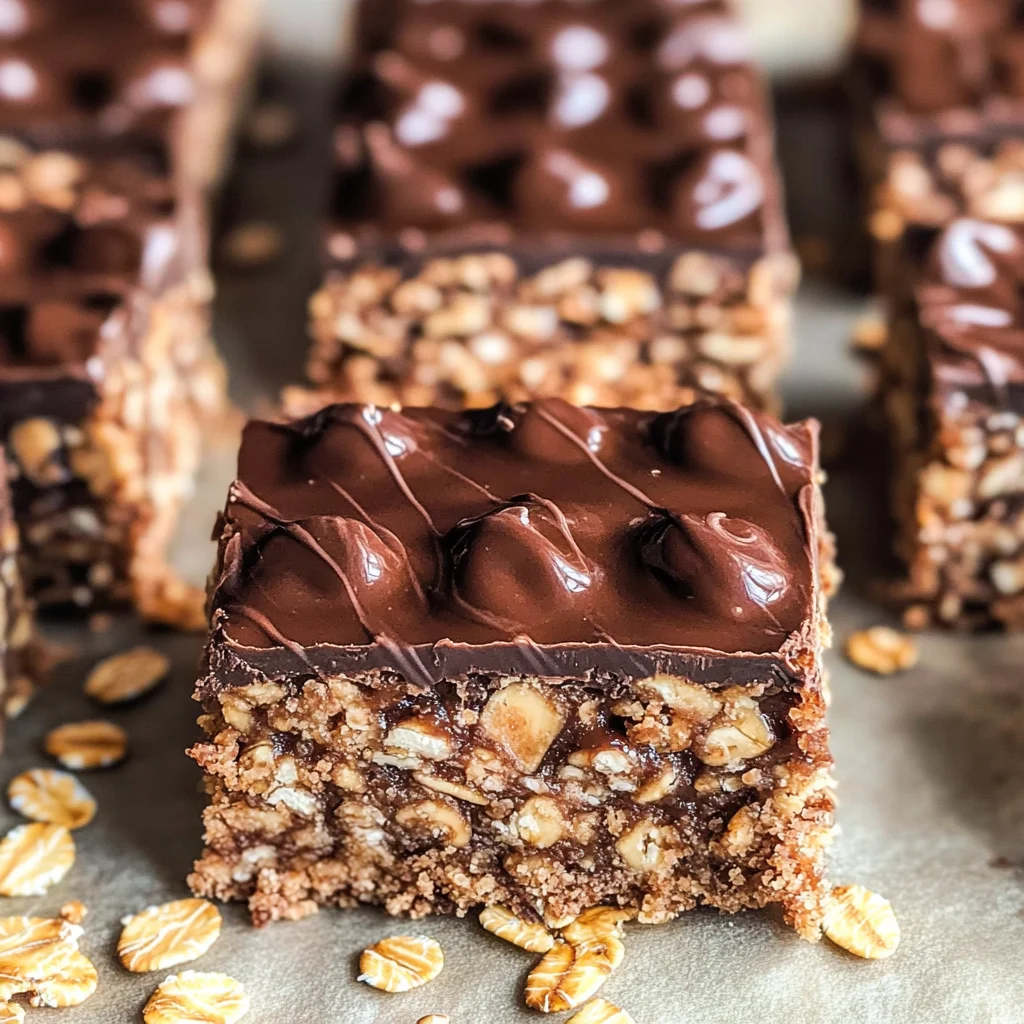
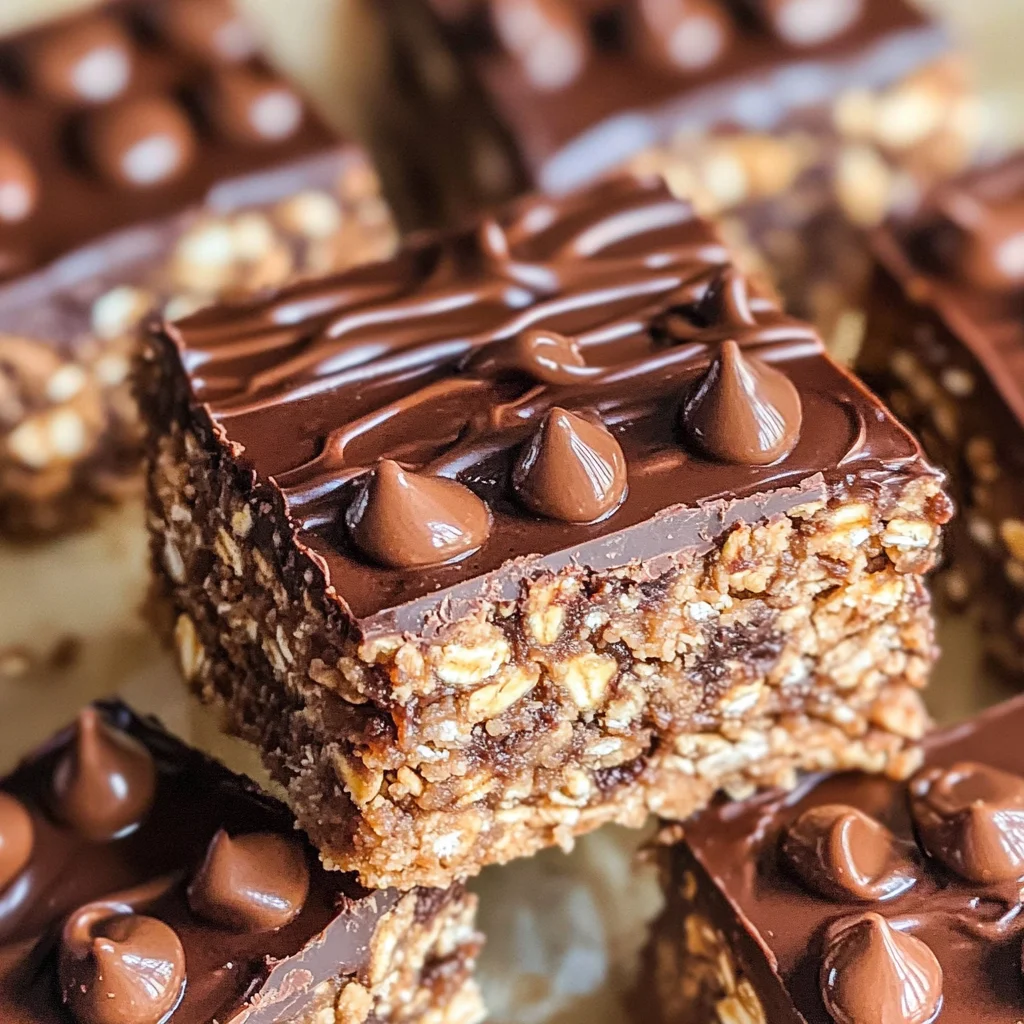
No Bake Chocolate Oatmeal Bars
There’s something truly magical about the way a simple combination of ingredients can transform into a beloved treat that brings smiles and warmth to our hearts. When I think about my childhood, I can’t help but recall the joy of creating delicious No Bake Chocolate Oatmeal Bars with my family. The aroma of melting chocolate mingling with the nutty fragrance of oats was like a warm hug, wrapping around us as we gathered in the kitchen. These bars are not merely snacks; they are a bridge between generations, infusing every bite with nostalgia and love, reminding us that sometimes the simplest recipes become the dearest to our hearts. With each layer harmonizing beautifully, this is truly an experience worth savoring—one that I am thrilled to share with you today.
Now, you might be wondering what makes these No Bake Chocolate Oatmeal Bars so special. It’s not just their delightful taste; it’s the ease and simplicity of preparation that makes them a go-to recipe for any occasion. Whether you’re hosting friends for a cozy movie night or looking for a quick dessert to satisfy your sweet tooth, these bars check all the boxes. Plus, they require no baking—just melt, mix, and chill! I promise you, once you take that first bite of creamy chocolate layered over wholesome oats and peanut butter goodness, you’ll understand why they are cherished by all who try them.
No Bake Chocolate Oatmeal Bars: A Sweet Symphony of Simplicity
Let me take you on this delightful culinary journey where we create these scrumptious No Bake Chocolate Oatmeal Bars together. As we embark on this adventure, know that every step is infused with care and intention, ensuring you achieve the most delectable outcome possible.
Ingredients:
As we gather our ingredients for these glorious bars, think of each item as a vital note in our sweet symphony. Each ingredient contributes its unique voice to create harmony in flavor and texture.
- 1 cup (2 sticks or 226g) unsalted butter. This is crucial for binding the ingredients while lending a rich creaminess to our bars. When melted, it transforms into liquid gold that melds beautifully with brown sugar and oats. Ensure your butter is at room temperature before melting; this will help it blend seamlessly with the other components without clumping.
- 1/2 cup brown sugar (packed). The depth of flavor from brown sugar is absolutely paramount here; its molasses content adds moisture and a hint of caramel sweetness that elevates our bars from ordinary to extraordinary. Make sure to pack it tightly into your measuring cup so you get that rich flavor without compromising texture.
- 1 teaspoon vanilla extract. This simple addition works wonders in enhancing flavors—it’s like adding a warm embrace to your bars! Look for pure vanilla extract rather than imitation for the best possible taste; it provides an aromatic quality that intertwines perfectly with chocolate and oats.
- 3 cups rolled oats. Rolled oats offer a hearty texture and are essential for achieving that satisfying chew in our No Bake Chocolate Oatmeal Bars. They absorb moisture wonderfully while providing fiber and nutrients—a perfect balance of healthfulness amidst indulgence! Be sure to use old-fashioned rolled oats; quick oats can lead to overly mushy results.
- 1 cup semisweet or dark chocolate chips. Chocolate isn’t just an ingredient; it’s a mood-lifter! Choose high-quality chocolate chips for an utterly intoxicating richness that melts beautifully when combined with peanut butter. If you’re feeling adventurous, try mixing in some dark chocolate chips for a deeper flavor profile!
- 1/2 cup peanut butter. Here comes another star player! Peanut butter adds creaminess and nuttiness that’s simply irresistible against the backdrop of sweet chocolate and hearty oats. Opt for natural peanut butter without added sugars or oils; it will blend smoother and provide an authentic taste experience.
Equipment You’ll Need:
Before we dive into making these delightful bars, let’s talk about the tools you’ll need—these essential partners will make your cooking experience smoother and more enjoyable!
- 8-inch or 9-inch square baking dish – This dish serves as your canvas where layers come together to form beautiful bars! Lining it with parchment paper allows for easy removal once set; trust me on this one—it’s non-negotiable if you want perfectly shaped squares.
- Large saucepan – A sturdy saucepan is key for melting butter and combining ingredients evenly over medium heat without burning anything—nobody wants scorched sugar ruining their masterpiece!
- Microwave-safe bowl – For melting chocolate chips and peanut butter together quickly without fussing over stovetops! Ensure it’s large enough to accommodate both ingredients comfortably since they’ll need space when melted.
- Spatula or wooden spoon – You’ll want something sturdy yet flexible to mix everything well while transferring layers into your baking dish smoothly—this tool will be your best friend throughout this process!
Now that we’ve gathered everything we need—let’s roll up our sleeves and start preparing those amazing No Bake Chocolate Oatmeal Bars!
Step 1: Prepare Your Baking Dish
First things first: let’s set ourselves up for success by preparing our baking dish! Take an 8-inch or 9-inch square baking dish (or even a larger one if you prefer thinner bars) and line it with parchment paper. This step may seem simple but trust me when I say it’s absolutely crucial—it allows us to lift out those luscious bars later without any sticky mess left behind! Make sure the parchment hangs over the edges slightly so you can easily pull them out once they’re set. If there’s one thing I always emphasize here, it’s patience; don’t rush this step because it sets the stage for success down the line!
Step 2: Melt Butter and Brown Sugar
In your large saucepan over medium heat, add one cup of unsalted butter along with half a cup of packed brown sugar—watch as they transform together into a glorious mixture! Stir gently until the butter melts completely and blends seamlessly with sugar until dissolved; you’ll notice how their textures begin to unify beautifully after just moments on heat! This process helps create that luscious base layer which holds everything else together like glue—it’s truly magical! Once you see small bubbles forming at the edges (a sign it’s heating nicely), remove from heat promptly before moving on to add vanilla extract—a splash here enhances flavors significantly!
Step 3: Mix in Rolled Oats
Now onto adding those rolled oats—measure out three cups carefully before folding them into your buttery mixture gently yet thoroughly using either spatula or spoon mentioned earlier! This incorporation is important because it ensures each oat gets coated evenly while absorbing sweetness from brown sugar—and believe me when I say this creates harmony within each bite you’ll soon enjoy! Cook over low heat just long enough (about three to four minutes) until everything feels well-blended but watch closely: If left too long on heat during this step could lead us towards dryness instead—but don’t fret too much as we’ll still salvage if needed later on!
Step 4: Layering Begins
Once you’ve achieved that perfect oat-to-butter balance (and yes—the smell wafting through should be heavenly!), pour half of this heavenly oat mixture directly into prepared baking dish using spatula again—you’ll want an even layer pressed down firmly yet gently since this acts as our crust base layer! Aim for uniformity here because consistency matters greatly when stacking layers later—don’t worry if it’s not perfect though; we’re aiming more towards delicious than “Instagram-ready” right now anyway! Set aside remaining oat mixture because soon enough it’ll top off another layer… But first: let’s make some seriously indulgent filling next!
Step 5: Melt Peanut Butter & Chocolate Chips Together
To craft our filling now comes one of my favorite steps—melting peanut butter along with chocolate chips until smooth bliss awaits us all! Grab yourself a microwave-safe bowl then measure half cup peanut butter alongside one full cup semisweet or dark chocolate chips—we’re talking lusciousness here folks… Now microwave in short bursts (15 seconds at first) stirring between each interval until both elements meld harmoniously together—this part should take no longer than minute total depending on wattage strength but keep an eye out so nothing burns away during process because trust me—you want every drop possible poured onto crust below later!
Step 6: Pour Filling Over Crust
Once melted filling reaches glossy perfection—the moment has finally arrived where magic happens as we drizzle all sweetness over crust laid earlier—it’s practically calling out “pour me!” Spread evenly across entire surface being careful not disturb crust beneath too much—I know it might be tempting but resist urge here since we really want those distinct layers showcasing themselves flawlessly soon after setting hour(s) later!
Conclusion:
As we wrap up our delightful journey through making these No Bake Chocolate Oatmeal Bars together, I hope you can feel my excitement radiating through these words! From the moment those ingredients come together in your saucepan until you finally take that first bite, every step is filled with warmth and love—a reflection of what makes cooking so profoundly satisfying. The combination of creamy peanut butter with rich chocolate chips layered amidst crunchy oats creates a symphony of flavors that truly elevates this treat beyond anything ordinary. I promise you; once you’ve tasted these bars, they’ll become a cherished staple in your home!
Why is this recipe such a must-try? Well, beyond their irresistible taste and texture, making these bars is a joyful experience in itself—no complicated techniques here! Whether you whip them up as an afternoon snack for yourself or present them at gatherings with friends and family, they are sure to spark smiles all around. Picture pulling these out from the fridge on game day or during movie night—everyone will be reaching for seconds! The sheer delight painted across their faces when they taste just how deliciously satisfying these bars are will fill your heart with joy.
Pairing possibilities are endless—imagine savoring one alongside a steaming cup of coffee or tea; the warmth perfectly complements the chilled bars while enhancing those luscious chocolate notes. For an afternoon pick-me-up, serve one next to some fresh fruit; the tartness beautifully cuts through the sweetness and adds a refreshing contrast that’s simply divine! And if you’re feeling adventurous on dessert night? Crumble one over some vanilla almond milk yogurt for an extra crunch factor—you won’t regret it!
Feeling adventurous? This recipe is wonderfully adaptable! If you want to switch things up, consider adding some chopped nuts for added crunch or swapping out peanut butter for almond butter if that’s more your style; both variations offer unique twists that are equally delicious! You could even fold in dried fruits like cranberries or apricots for bursts of sweetness throughout each bite! Whatever path you choose, I wholeheartedly invite you to try crafting these bars and share your experience with me—I can’t wait to hear how they turn out!
No Bake Chocolate Oatmeal Bars
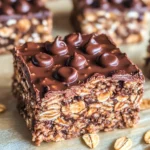
Indulge in the delightful world of No Bake Chocolate Oatmeal Bars, where simplicity meets scrumptiousness! These bars are a perfect blend of creamy peanut butter, rich chocolate, and hearty rolled oats, making them an ideal treat for any occasion. They come together effortlessly without the need for baking—just melt, mix, and chill! Each bite offers a satisfying chew and a burst of flavors that delights both children and adults alike. Whether you’re looking for a quick snack or a sweet dessert to share with friends, these bars are sure to impress. Plus, they store well in the refrigerator or freezer, making them a convenient option for busy days.
- Prep Time: 15 minutes
- Cook Time: None
- Total Time: 0 hours
- Yield: Approximately 12 servings 1x
- Category: Dessert
- Method: No Bake
- Cuisine: American
Ingredients
- 1 cup unsalted butter
- 1/2 cup brown sugar (packed)
- 1 teaspoon vanilla extract
- 3 cups rolled oats
- 1 cup semisweet or dark chocolate chips
- 1/2 cup peanut butter
Instructions
- Prepare an 8-inch or 9-inch square baking dish by lining it with parchment paper.
- In a large saucepan over medium heat, melt the butter and brown sugar together until fully combined. Stir in vanilla extract.
- Fold in rolled oats until evenly coated and heated through (about 3-4 minutes).
- In a separate microwave-safe bowl, combine peanut butter and chocolate chips; melt in short intervals until smooth.
- Pour half of the oat mixture into the prepared dish as the base layer. Add the melted peanut butter-chocolate mixture on top, spreading it evenly.
- Sprinkle the remaining oat mixture over the filling, pressing down gently.
- Drizzle any leftover chocolate-peanut butter mix on top and refrigerate for at least 2-3 hours before slicing.
Nutrition
- Serving Size: 1 serving
- Calories: 190
- Sugar: 10g
- Sodium: 80mg
- Fat: 11g
- Saturated Fat: 5g
- Unsaturated Fat: 6g
- Trans Fat: 0g
- Carbohydrates: 20g
- Fiber: 2g
- Protein: 3g
- Cholesterol: 30mg