Ina Garten Chocolate Fudge Cake Recipe
There’s something undeniably magical about baking a cake, isn’t there? It’s not just the act of combining flour, sugar, and eggs—it’s the way those simple ingredients transform into something utterly divine. The aroma that fills your kitchen as it bakes is like a warm hug on a cold day, wrapping you in comfort and nostalgia. When I think of celebrations or cozy gatherings with friends, my mind immediately wanders to Ina Garten’s Chocolate Fudge Cake Recipe—a symphony of rich chocolate flavors and an indulgent ganache frosting that feels like a love letter to dessert lovers everywhere. Each bite is moist, decadent, and profoundly satisfying; it’s as if the cake whispers sweet secrets to your soul, making every occasion feel special.
I remember the first time I made this cake; it was for my best friend’s birthday. As I stood in my kitchen, whisking together the dry ingredients, I felt a sense of connection not just to my friend but to all the moments we had shared over cake and laughter. This recipe isn’t merely about satisfying a sweet tooth; it’s about creating memories that linger long after the last crumb has been devoured. Whether it’s a birthday celebration or simply an afternoon treat while sipping tea, this cake elevates any moment into a cherished experience. Trust me when I say that every slice will have your loved ones asking for seconds—and maybe even thirds!
Ina Garten Chocolate Fudge Cake Recipe: A Decadent Delight for Any Occasion
Welcome to the world of rich chocolate decadence! In this recipe, we’re bringing together simple ingredients to create something truly extraordinary: Ina Garten’s Chocolate Fudge Cake. This cake is perfect for any occasion—birthdays, anniversaries, or even just because you deserve a sweet treat after a long week. With its layers of moist chocolate goodness and velvety ganache frosting, every slice is a reminder that life should be savored slowly.
Ingredients:
Let’s embark on this delicious culinary journey together! Each ingredient plays an essential role in crafting this delightful cake that will surely impress everyone who gets to taste it.
- 1 ¾ cups all-purpose flour: This flour is the backbone of our cake. It provides structure and stability to our chocolate creation while still allowing it to remain tender and moist. When choosing all-purpose flour, look for brands that have a balanced protein content—this will ensure your cake rises beautifully without becoming too heavy or dense.
- 2 cups sugar: Sweetness is crucial here! Sugar not only adds sweetness but also contributes to the moisture of the cake by helping to retain water during baking. Granulated sugar works perfectly in this recipe because it dissolves easily into the batter, ensuring every bite is deliciously sweet without any graininess.
- ¾ cup cocoa powder: Ah, cocoa powder—the heart and soul of our chocolate flavor! Cocoa adds depth and richness while balancing out the sweetness from the sugar. Opt for high-quality unsweetened cocoa powder for an intense chocolate experience; trust me when I say it makes a significant difference in flavor.
- 2 tsp baking soda: This leavening agent is absolutely paramount for achieving that perfect rise in our cake. Baking soda reacts with acidic ingredients like buttermilk (which we’ll use later) to produce carbon dioxide bubbles that help lift your batter as it bakes. Without sufficient leavening agents, you might end up with a dense chocolate brick instead of a fluffy masterpiece!
- 1 tsp baking powder: While baking soda does most of the heavy lifting in this recipe, adding baking powder gives our cake an extra boost for that light texture we all crave. Think of it as backup support; they work hand-in-hand to ensure our cake rises perfectly.
- 1 tsp salt: Salt enhances flavors—it’s like magic dust! Just a pinch goes a long way in elevating our chocolate notes and balancing sweetness. It may seem small, but skipping salt can lead to an imbalanced flavor profile where sweetness overwhelms everything else.
- 1 cup buttermilk: Buttermilk adds moisture and tanginess that creates tenderness in baked goods—a secret weapon if you will! The acidity in buttermilk interacts wonderfully with baking soda to enhance leavening and yields an incredibly soft crumb texture that melts in your mouth.
- ½ cup vegetable oil: Oil contributes moisture without weighing down the cake like butter might do at times; it keeps our fudge cake delectably moist for days! Vegetable oil also helps create a tender crumb because it coats flour proteins more effectively than solid fats can.
- 2 eggs: Eggs are crucial for binding ingredients together; they provide structure through their proteins while also enriching flavor and adding moisture. Be sure they’re at room temperature before you mix them into your batter—this helps them incorporate more smoothly!
- 2 tsp vanilla extract: Vanilla extract enhances all other flavors present within our cake—it’s like adding sunshine! Choose pure vanilla extract over imitation for deeper complexity; trust me on this one!
- 1 cup hot coffee: Coffee intensifies chocolate flavors beautifully—don’t worry; your cake won’t taste like coffee! The heat from hot coffee helps dissolve cocoa powder seamlessly into our batter while also adding depth to its flavor profile.
- 8 oz semisweet or bittersweet chocolate, chopped: This luscious chocolate forms the base of our ganache frosting—use high-quality chocolate bars here as they melt beautifully! The richness from either semisweet or bittersweet varieties adds profound decadence once poured over our cooled cakes.
- 1 cup heavy cream: Heavy cream is responsible for creating smooth ganache; its high fat content ensures richness without curdling during heating processes. Always use fresh cream at room temperature—this ensures proper emulsification when combined with melted chocolate.
- 2 tbsp butter: Butter adds sheen and richness while helping our ganache achieve its silky texture. Use unsalted butter so you can control how much salt enters your final product—this allows you complete mastery over flavors!
- 1 tsp vanilla extract (for ganache): Just like before, vanilla adds depth here too! It rounds off any bitterness from dark chocolates used while enhancing overall flavor profiles within each bite.
Equipment You’ll Need:
Now that we’ve gathered all these wonderful ingredients, let’s talk about some essential tools you’ll need along the way! Having the right equipment makes cooking easier—and trust me; no one wants unnecessary stress when whipping up something delightful like this!
- Two 9-inch round cake pans – These pans are perfect for creating those beautiful layers we adore so much about cakes! Ensure they’re well-greased beforehand so your cakes release easily once baked—nobody wants their masterpiece stuck inside a pan!
- Mixing bowls (various sizes) – You’ll want several mixing bowls around—one large enough for dry ingredients like flour and another smaller one for wet components such as eggs or buttermilk mixtures. Using separate bowls prevents messes when combining everything later on!
- Whisk & spatula – A sturdy whisk works wonders when blending dry components together thoroughly while ensuring no lumps linger behind once combined with wet mixtures too! And don’t forget about spatulas—they’re fantastic at scraping down sides during mixing processes ensuring nothing goes wasted!
- Cooling rack – Allowing baked goods ample time cooling off prevents sogginess on bottoms caused by condensation buildup otherwise trapped within non-breathable surfaces (like plates). A wire cooling rack ensures even airflow surrounding baked cakes leading up crunchy crusts outside yet soft interiors inside!
Preparing the Ina Garten Chocolate Fudge Cake Recipe
Step 1: Preheat Your Oven & Prepare Your Pans
Before diving into mixing those delightful ingredients together, let’s set ourselves up for success by preheating our oven to 350°F (175°C). Preheating is crucial because it allows consistent heat distribution throughout baking time—ensuring everything cooks evenly from start until finish without any surprises lurking inside later on! Next comes greasing two 9-inch round pans with cooking spray or butter followed by lining them with parchment paper circles cut precisely fitting their bases (trust me; doing this step saves countless headaches later!).
Step 2: Whisk Together Dry Ingredients
In one of those lovely large mixing bowls we mentioned earlier, let’s combine 1¾ cups all-purpose flour alongside 2 cups sugar mixed harmoniously with ¾ cup cocoa powder along with 2 teaspoons baking soda sprinkled generously atop everything followed closely by adding 1 teaspoon salt right after blending them gently until completely incorporated throughout their depths below surface level too! Remember—the key here lies within whisking thoroughly allowing air incorporation enhancing fluffiness down road ahead!
Step 3: Mix Wet Ingredients Separately
Now grab another medium-sized mixing bowl where we’ll combine wet elements starting off by pouring exactly one full cup worth chilled buttermilk next followed suit by half-cup pouring vegetable oil alongside two room-temperature eggs cracking open perpendicularly across edges measuring precisely two teaspoons pure vanilla extract added afterward giving us aromatic essence elevating whole experience altogether hereafter stirring gently but steadily until mixture reaches uniform consistency devoid lumps remaining behind anywhere visible thereafter slowing transition towards next stage ahead soon enough…
Step 4: Combine Wet & Dry Mixtures Carefully
Once both mixtures have reached their desired states individually let us now unite them gracefully forming one cohesive unit full flavorful promise awaiting completion ahead soon enough… Pour entire contents from wet bowl directly into dry bowl ensuring none left behind feeling neglected then gently fold using spatula scraping edges continuously incorporating everything smoothly avoiding aggressive motions which might deflate air bubbles formed earlier instead aiming towards gentle folding motions only hereafter finally introducing hot brewed coffee (remember—this magic elixir intensifies chocolaty richness upon blending perfectly!) stirring softly until fully integrated giving rise wondrous aroma filling air around us enveloped warmth created through lovely combination happening before eyes right now…
Stay tuned as we continue unfolding layers upon layers leading towards blissful indulgence none shall resist upon tasting final creation shortly arriving ahead…
Step 5: Prepare to Bake the Heart of the Cake
Now that your batter is ready, it’s time for a moment of magic! Carefully divide the luscious chocolate batter evenly between the two prepared 9-inch cake pans. This step may seem simple, but ensuring an even distribution is crucial for balanced baking, allowing both layers to rise harmoniously. Remember, we want them to be equal in height so they stack beautifully when assembled. As you pour the batter, take a moment to appreciate the deep, rich color; it’s truly a testament to the cocoa and coffee working together in perfect harmony.
Once you’ve poured the batter into the pans, gently tap them against your countertop—just a couple of taps will do! This helps release any air bubbles that might have formed during mixing and creates a smoother texture in your cake. Now it’s time to place these beauties into your preheated oven. Bake for about 30 to 35 minutes, but keep an eye on them! Every oven has its quirks, so around the 30-minute mark, check for doneness by inserting a toothpick into the center of each cake. If it comes out clean or with just a few moist crumbs clinging to it (but no wet batter), you’re golden! Don’t rush this step; patience is key here because overbaking can lead to a dry cake, which would be a tragedy given how moist and decadent we want this chocolate fudge cake to be.
Step 6: Cooling Down – The Patience Game
Once your cakes are perfectly baked and have filled your kitchen with that intoxicating aroma of chocolate bliss, it’s time to let them cool. This cooling period is absolutely paramount; as tempting as it may be (trust me, I know!), do not try to remove them from their pans immediately. Let them rest in their pans on a wire rack for about 10 minutes—this allows them to firm up slightly and makes removing them easier without risking crumbling. After this initial resting period, gently run a knife around the edges of each pan to loosen any spots that might have stuck just a bit.
Carefully flip each pan upside down onto your wire rack and give it a gentle tap; if all went well, your cakes should slide out effortlessly! Allow them to cool completely at room temperature before frosting—this is crucial because applying ganache over warm cake can cause it to melt or slide off rather than sit beautifully atop your layers. You’ll know they are ready when they feel firm yet springy when pressed lightly with your finger—a true test of readiness!
Step 7: Creating Your Decadent Ganache
Now comes one of my favorite moments—the ganache! Picture this: glossy, smooth chocolate that glistens like liquid gold. To make this utterly intoxicating frosting, begin by heating one cup of heavy cream in a small saucepan over medium heat. You’re looking for just boiling bubbles around the edges—don’t let it boil vigorously as that can scorch the cream! Once you see those little bubbles forming, pour the hot cream over your chopped semisweet or bittersweet chocolate in a heatproof bowl. This is where the magic starts; let it sit undisturbed for about two minutes.
During this resting phase, what’s happening is pure alchemy—the heat from the cream melts the chocolate perfectly without seizing it up or making it grainy. After two minutes have passed (and trust me on this timing—it’s non-negotiable!), add in two tablespoons of butter and another teaspoon of vanilla extract for depth and flavor that will elevate your ganache from simply good to absolutely extraordinary. Now grab a whisk or spatula and stir gently until everything melds into an incredibly smooth mixture with no lumps in sight—you’ll know you’ve got it right when that glossy sheen reveals itself! Allow your ganache to cool at room temperature until you reach spreading consistency; this can take about 15-20 minutes depending on room temperature.
Step 8: Frosting – The Final Flourish
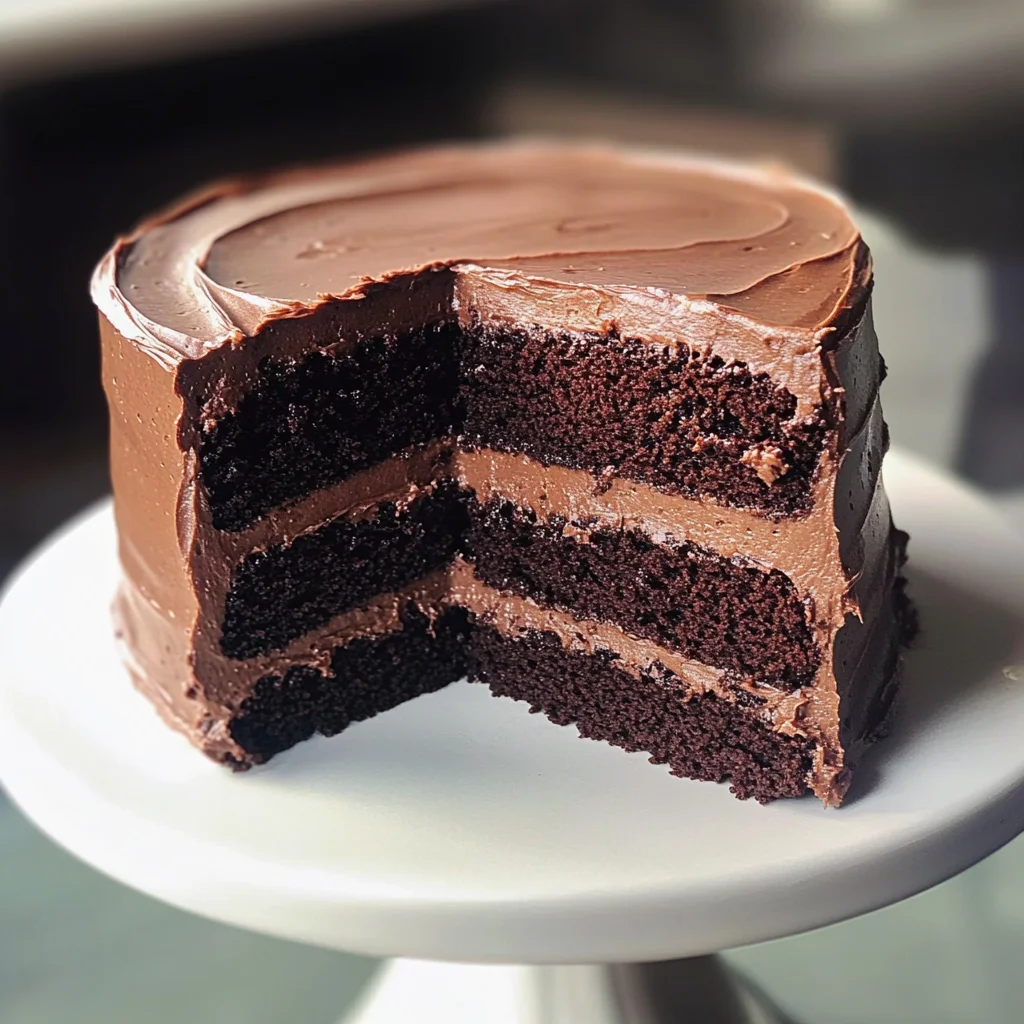
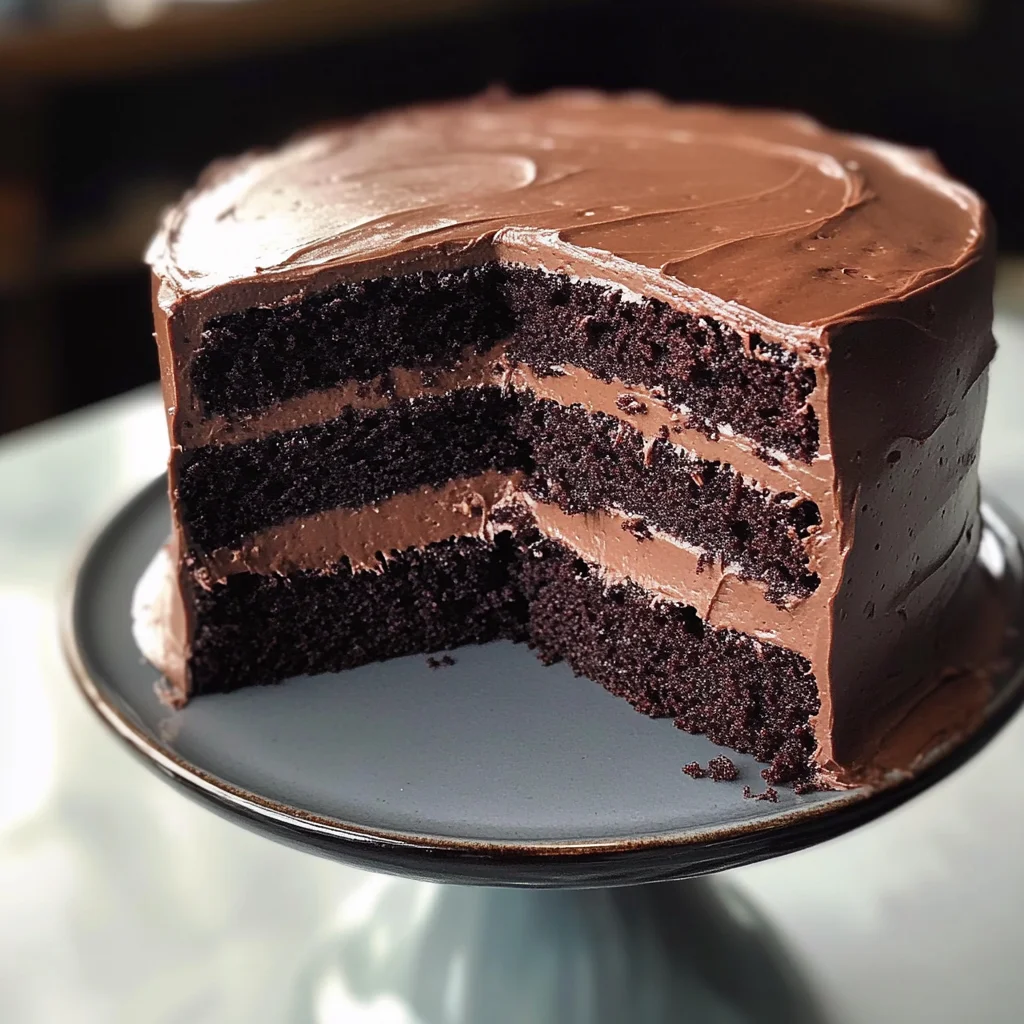
It’s finally time for my favorite part—frosting our gorgeous layers with that velvety ganache! First things first: ensure your cakes have cooled completely; if they’re even slightly warm, they’ll melt away all that lovely ganache goodness we’ve worked so hard on creating. Choose one layer as your base and place it on a serving platter or cake stand (if you’re feeling fancy!). Using an offset spatula or simply a butter knife spread an even layer of ganache across the top—don’t worry if some drips down the sides; that’s part of its charm!
After frosting the first layer generously (you want enough ganache so every bite has that luscious richness), gently place the second layer on top and repeat with another generous slathering of ganache across the top and down the sides—you want every inch covered in this delectable treat! As you frost, don’t be shy with adding more ganache if needed; remember we are aiming for indulgence here! For an extra touch of elegance (and let’s face it—we deserve it), consider garnishing with chocolate shavings or fresh berries once frosted—the colors pop against that dark chocolate canvas beautifully.
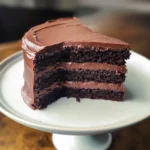
Finally, take a step back and admire your creation—that beautiful Ina Garten Chocolate Fudge Cake Recipe stands proudly before you, ready to bring joy at any celebration or quiet evening dessert craving alike. Remember: patience is key once again here—allowing everything to set for at least 30 minutes before slicing will help maintain clean edges when cutting through those sumptuous layers!
With every bite, you’re not just tasting chocolate; you’re experiencing warmth wrapped in love—a truly extraordinary dessert made with care and passion. Enjoy every moment as you share this delightful masterpiece with friends and family—it’s bound to become a cherished addition to any gathering!
Storage and Enjoyment Tips for Your Ina Garten Chocolate Fudge Cake Recipe
Now that you have crafted this masterpiece of a cake, it’s time to revel in every delicious bite! But let’s talk about how to savor this indulgent treat even longer. The beauty of the Ina Garten Chocolate Fudge Cake is not just in its immediate enjoyment; it’s also about how well it can be preserved for future cravings. Storing your cake properly ensures that every slice remains as delectable as the first, allowing you to relish those rich flavors and moist textures well beyond the initial baking day!
Storing Leftover Ina Garten Chocolate Fudge Cake Recipe
To keep your leftover Ina Garten Chocolate Fudge Cake at its prime, you’ll want to choose an airtight container or wrap it tightly in plastic wrap. This helps create a little fortress against air and moisture, ensuring that each slice stays fresh and flavorful. Ideally, your cake can be stored at room temperature for up to three days; however, if you have leftovers after that (which is rare, trust me!), you can pop it in the refrigerator for about a week. To maintain the cake’s moistness, consider placing a slice of bread in the container with it—this little trick keeps everything beautifully soft and prevents any dryness from creeping in. And let me tell you, even after a few days, this cake retains its rich chocolatey goodness, making it profoundly satisfying to devour again! When you’re ready for another slice, simply enjoy it at room temperature or warm it slightly in the microwave for about 10 seconds for that freshly baked feel.
Freezing Ganache for Later
If you find yourself with extra ganache or want to freeze portions of your cake for later indulgence (because who wouldn’t want chocolate cake ready at their beck and call?), you’re in luck! Freezing is a fantastic way to preserve both the ganache and the cake itself. To freeze your ganache, simply let it cool completely before transferring it into an airtight container or freezer-safe bag. It can stay good in the freezer for up to three months without losing its lush texture or flavor. When you’re ready to use it again, just thaw overnight in the fridge and then gently reheat over low heat until silky smooth once more! This convenience factor means that whenever an impromptu celebration arises or a sudden chocolate craving strikes—you have everything on hand. Trust me; knowing there’s chocolate ganache waiting in your freezer feels like having a secret stash of joy!
Ina Garten Chocolate Fudge Cake
Indulge in the rich and decadent experience of Ina Garten’s Chocolate Fudge Cake Recipe, a dessert that transforms simple ingredients into a show-stopping treat. This cake features moist layers infused with deep chocolate flavor and is generously topped with a velvety ganache, making it perfect for any celebration or just to satisfy your sweet cravings. Each slice promises an inviting aroma and a tender crumb, creating memories that linger long after the last bite. Whether you’re celebrating a special occasion or treating yourself on a weekday, this cake will undoubtedly bring joy to your table.
- Prep Time: 30 minutes
- Cook Time: 35 minutes
- Total Time: 1 hour 5 minutes
- Yield: Serves approximately 12 1x
- Category: Dessert
- Method: Baking
- Cuisine: American
Ingredients
- 1 ¾ cups all-purpose flour
- 2 cups sugar
- ¾ cup cocoa powder
- 2 tsp baking soda
- 1 tsp baking powder
- 1 tsp salt
- 1 cup buttermilk
- ½ cup vegetable oil
- 2 eggs
- 2 tsp vanilla extract
- 1 cup hot coffee
- 8 oz semisweet or bittersweet chocolate, chopped
- 1 cup heavy cream
- 2 tbsp butter
Instructions
- Preheat your oven to 350°F (175°C) and grease two 9-inch round cake pans.
- In a large bowl, whisk together the flour, sugar, cocoa powder, baking soda, baking powder, and salt.
- In another bowl, mix the buttermilk, vegetable oil, eggs, and vanilla until combined.
- Combine wet ingredients into dry ingredients gradually and then stir in the hot coffee until smooth.
- Divide the batter evenly between the prepared pans and tap them gently to release air bubbles.
- Bake for 30 to 35 minutes or until a toothpick inserted comes out clean.
- Let cool in pans for about 10 minutes before transferring to wire racks to cool completely.
- For the ganache, heat heavy cream until just boiling; pour over chopped chocolate and let sit for two minutes before stirring until smooth. Add butter and vanilla extract; let cool until spreadable.
- Frost cooled cakes with ganache as desired.
Nutrition
- Serving Size: 1 serving
- Calories: 400
- Sugar: 45g
- Sodium: 250mg
- Fat: 18g
- Saturated Fat: 10g
- Unsaturated Fat: 7g
- Trans Fat: 0g
- Carbohydrates: 58g
- Fiber: 3g
- Protein: 6g
- Cholesterol: 40mg