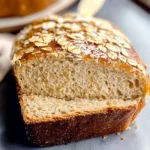
Honey Oat Bread (Gluten-Free, Dairy-Free Option)
The scent of freshly baked bread wafting through the kitchen is like a warm hug from the inside out, isn’t it? It evokes memories of cozy mornings and shared conversations over steaming cups of tea. Today, I want to share with you a cherished recipe that has truly become a staple in my home: Honey Oat Bread (Gluten-Free, Dairy-Free Option). This is not just any bread; it’s a delightful creation filled with wholesome oats and sweetened with the natural goodness of honey. Each slice is a tender experience that will transport you to a place where comfort meets nourishment. What’s more, this bread requires no yeast, making it an incredibly accessible treat that can be ready in under an hour! Trust me when I say that once you get a taste of this moist and fluffy loaf, it will quickly become one of your go-to recipes.
This Honey Oat Bread has a beautiful story behind it—rooted in simplicity yet bursting with flavor. It’s perfect for any occasion: whether you’re looking for a quick breakfast on busy mornings or trying to impress guests during tea time. Every bite carries the essence of home-baking artistry combined with health-conscious choices. The combination of oats and honey creates this utterly intoxicating sweetness with an inviting texture. And let’s not forget that lovely golden crust! As you toast it or slather on your favorite jam, know that you’re not just enjoying bread; you’re experiencing a moment of pure joy.
Honey Oat Bread (Gluten-Free, Dairy-Free Option): A Heartfelt Loaf
Ah, my dear friend, let’s embark on this culinary journey together! Making your own bread at home is one of life’s most rewarding experiences, and I promise you that this Honey Oat Bread will fill your kitchen with love and warmth.
Ingredients:
Before we dive into the magic of baking, let’s gather our ingredients. Each element plays a crucial role in creating this delightful loaf, so let’s take the time to appreciate what they bring to the table—quite literally!
- 2 1/3 cups gluten-free measure for measure flour. This special flour blend is essential for achieving that beautifully tender crumb without gluten’s elasticity. When choosing your flour, look for options labeled measure for measure, as they are designed to substitute directly for wheat flour in recipes without needing additional adjustments. If you’re adventurous in the kitchen, experimenting with different brands can lead to unique results—some may add a nuttier flavor while others yield lighter textures.
- 3/4 teaspoons xanthan gum (omit if your GF flour blend already includes it). Xanthan gum acts like gluten by providing structure and chewiness in gluten-free baked goods. Think of it as the glue holding everything together! If your flour blend already has xanthan gum included, you can skip this step entirely; however, if not, don’t overlook its importance—it can make or break the texture of your bread.
- 2 1/2 teaspoons baking powder. This leavening agent is absolutely paramount for giving our Honey Oat Bread that delightful rise as it bakes. Baking powder works by releasing gases when combined with moisture and heat, creating tiny bubbles within the dough that makes our bread light and fluffy. Always check your baking powder’s expiration date before using—it loses its potency over time!
- 1 teaspoon salt. It may seem like a small addition compared to other ingredients but don’t underestimate salt’s power! It enhances all flavors while balancing sweetness; plus, it helps control yeast activity (even though we aren’t using yeast here). Opt for fine sea salt for even distribution throughout the dough—a little goes a long way!
- 1 cup plain Greek yogurt (or dairy-free Greek yogurt for dairy-free option). Greek yogurt adds moisture and richness while also providing protein—which means our Honey Oat Bread is not only delicious but also nutritious! The tanginess balances the sweetness of honey beautifully. If you’re going dairy-free, there are excellent plant-based yogurts available now that mimic traditional Greek yogurt’s texture quite well.
- 1 large egg. Eggs are essential for binding ingredients together while contributing to the overall structure and moisture content of our bread. They help create those delightful air pockets within each slice! If you’re looking for an egg substitute due to dietary restrictions or preferences, consider using flaxseed meal mixed with water or even unsweetened applesauce—both work wonders here!
- 1/4 cup coconut oil, melted. Coconut oil brings wonderful flavor and moisture into our bread without overpowering other ingredients—a perfect companion to honey! Plus, it’s stable at high temperatures which makes it ideal for baking. If coconut isn’t your thing or if you prefer another taste profile altogether, feel free to swap in olive oil or avocado oil.
- 1/4 cup + 1 tablespoon honey, separated. The star ingredient! Honey doesn’t just sweeten our bread; it lends an exquisite depth of flavor while keeping everything moist thanks to its humectant properties (it attracts moisture!). Use raw honey if possible for added enzymes and nutrients—or choose maple syrup if you’re aiming for vegan options.
- 1 cup + 2 tablespoons old-fashioned gluten-free rolled oats, separated. Oats provide fantastic texture and heartiness to our Honey Oat Bread while adding their nutty flavor profile too! Be sure to select certified gluten-free oats if necessary since cross-contamination can occur during processing.
- 3/4 cup unsweetened almond milk. Almond milk serves as a great liquid base without adding unnecessary sugars or calories—its mild flavor complements our other ingredients beautifully! You can substitute any plant-based milk here: oat milk or soy milk would work wonderfully too!
Equipment You’ll Need:
Before we jump into making this lovely loaf together, let’s ensure we have all the right tools at hand—trust me; they make all the difference in our baking journey! Good equipment often leads to better results and makes the process much smoother.
- 9×5-inch loaf pan – This pan size is non-negotiable when crafting your Honey Oat Bread because it provides adequate space for rising without compromising shape or density. Using an alternative size could result in uneven baking times or bread spilling over—no one wants a messy oven!
- Parchment paper – Lining your pan with parchment paper is essential as it allows easy removal once baked—a simple but crucial step in ensuring your loaf maintains its beautiful shape and doesn’t stick stubbornly to the edges!
- Mixing bowls – Having both large and medium mixing bowls makes combining wet and dry ingredients straightforward without confusion—plus they help keep things organized!
- Whisk – A whisk will be invaluable when blending dry ingredients or mixing wet ones together smoothly; it’s all about creating that lovely uniform batter without lumps.
- Wooden spoon or spatula – For folding everything together gently without over-mixing—this step ensures we maintain tenderness within our Honey Oat Bread rather than turning it into something dense.
Now that we’ve gathered our tools and ingredients let’s dive into making this beautiful loaf—from prepping everything perfectly to watching it rise gloriously in the oven!
Preparing the Honey Oat Bread (Gluten-Free, Dairy-Free Option)
Step 1: Preheat Your Oven & Prepare Your Pan
First things first: let’s get that oven preheated to 375°F (190°C). Preheating is crucial because it ensures even cooking from start to finish; nobody likes unevenly baked bread where parts are underdone while others are burnt! While waiting for the oven temperature to reach its zenith, grab your trusty 9×5-inch loaf pan—you’ll want to grease it lightly before lining the bottom with parchment paper for easy removal later on. Greasing helps stick less than ideal batters glide out effortlessly after cooling down—a little precaution goes a long way!
Step 2: Whisk Dry Ingredients Together
In a large mixing bowl (the bigger size will accommodate everything later), sift together your gluten-free flour blend along with baking powder and salt until well combined—the sifting aerates these elements so they mix seamlessly into one another while avoiding clumps throughout; trust me—you’ll appreciate how light-and-fluffy every bite turns out! Once sifted thoroughly using either whisk action or gentle stirring motions ensures all dry components come together harmoniously without missing anything important… no lumpy surprises please!
Step 3: Combine Wet Ingredients
Moving onto our wet mixture now: grab another medium-sized bowl where we’ll blend together beaten egg alongside yogurt (that creamy goodness!), melted coconut oil followed by honey—and don’t forget about those gorgeous oats sitting patiently waiting nearby! Mixing these elements properly creates an emulsion-like consistency which will give us both moisture AND sweetness throughout every bite… yum! After you’ve stirred until fully incorporated—and don’t worry if there are still some visible oat flakes lingering around—they’ll soften beautifully during baking anyway—now it’s time to add almond milk slowly… gently fold everything until smoothness prevails… resist temptation here folks—not over-mixing is key here otherwise tough-textured loaves await us instead… who wants tough?
Step 4: Combine Wet & Dry Mixtures
Now comes one of my favorite moments—the moment when these two mixtures finally unite into something extraordinary! Slowly pour those luscious wet ingredients over top dry ones—using gentle strokes from wooden spoon means ensuring we avoid dense lumps forming whilst maintaining tenderness within dough overall—that’s what we’re aiming for after all right? The final product should resemble thick batter consistency akin cake-like texture—not too runny nor overly stiff either… just right folks—that way everyone wins when slicing later down road!!
I hope you’re feeling as excited as I am about this process so far; stay tuned because soon enough you’ll be pulling fresh-baked glory straight from oven… just wait until aroma fills whole house too…
[Continue detailing subsequent steps…]
Step 5: Pouring the Batter with Love
Now that you’ve lovingly combined your wet and dry ingredients, it’s time to pour that glorious batter into your prepared loaf pan. This is where the magic happens! As you transfer the thick, cake-like mixture, you’ll notice a beautiful interplay of colors and textures—creamy from the yogurt, rich from the coconut oil, and speckled with oats. Gently scrape the sides of your bowl to ensure every drop of this deliciousness makes its way into the pan. Trust me on this: every little bit counts!
Before you proceed, take a moment to sprinkle those remaining 2 tablespoons of oats on top. This isn’t just for show; these oats will toast beautifully in the oven, creating a delightful crunchy topping that complements the soft, tender bread beneath. It’s all about texture here! Once you’ve done this, give your pan a gentle shake side to side—this helps to settle the batter evenly. Make sure it’s level because an uneven loaf can lead to an awkward rise during baking. Your goal is an even, golden crust that looks as inviting as it smells!
Step 6: The Baking Symphony
With your oven preheated and ready, it’s finally time for our loaf to meet the heat! Slide your filled loaf pan onto the center rack of your oven—this is crucial because it allows for even air circulation around the bread, promoting that perfect rise and golden-brown crust we’re aiming for. Set your timer for 30 minutes but keep a close eye on it! Each oven behaves differently; some are gentler while others can be a bit fiery.
Around the 30-minute mark, start checking for doneness by inserting a toothpick into the center of your bread. If it comes out clean or with just a few moist crumbs clinging to it (not wet batter!), it’s ready to come out. If not, give it another 5-10 minutes—after all, patience is key here! What you’re looking for is that gorgeous golden brown color on top, which signals not only visual perfection but also indicates caramelization—a process that enhances flavor and aroma in ways that are truly extraordinary.
Step 7: Cooling Down – A Crucial Moment
Once your Honey Oat Bread has emerged from its cozy oven retreat and is glowing with that perfect golden hue, resist any temptation to slice right away! I know it’s hard; that intoxicating aroma wafting through your kitchen is utterly irresistible! But let’s talk about why cooling matters—it allows steam to escape and prevents your loaf from becoming gummy or overly dense when sliced. Cooling also sets the structure of your bread, ensuring each slice holds together beautifully.
Carefully remove the bread from the pan after about 5-10 minutes of cooling in its pan—this helps prevent sticking but also gives you time to admire what you’ve created! Then transfer it onto a cooling rack (if you have one) or a plate if that’s what you’re working with. Let it cool completely before slicing—this usually takes around 30 minutes but can feel like an eternity when you’re eager for that first bite! The anticipation makes those first slices all the more rewarding; trust me on this!
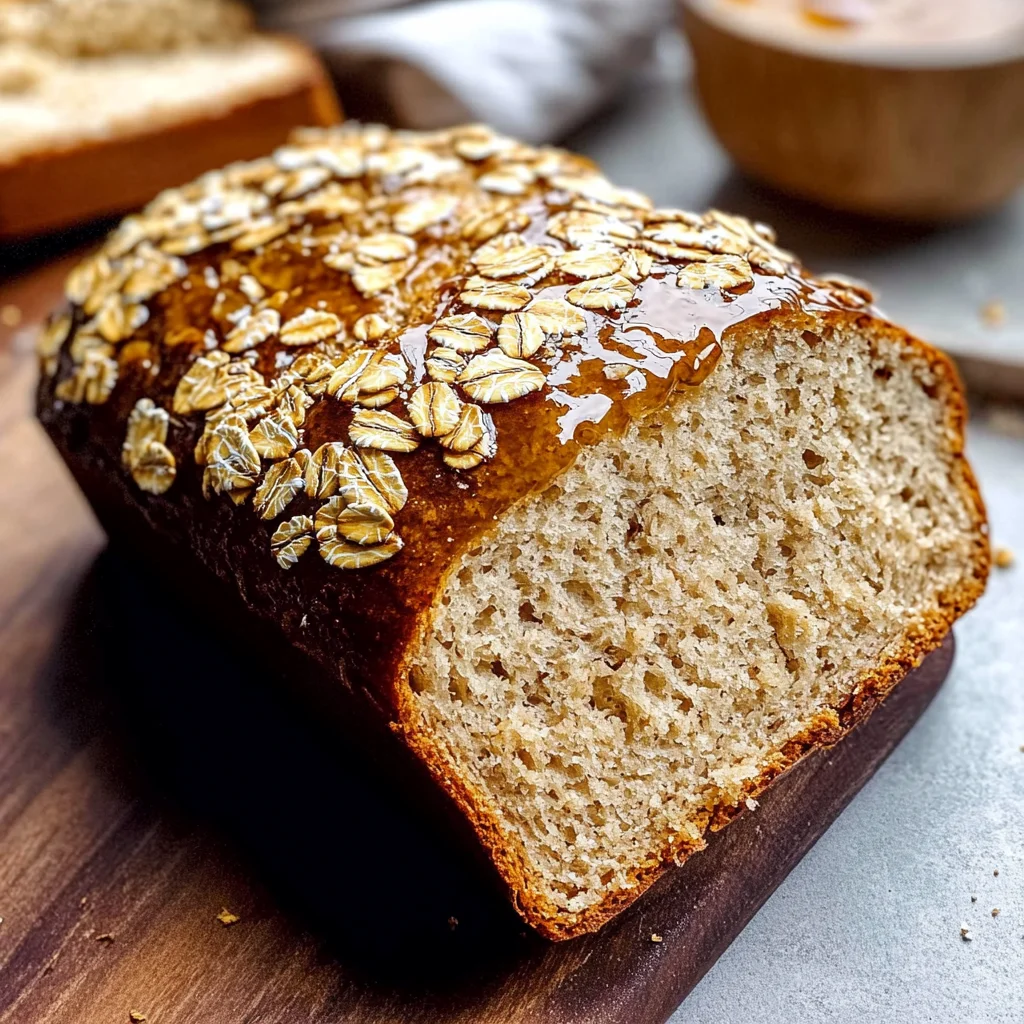
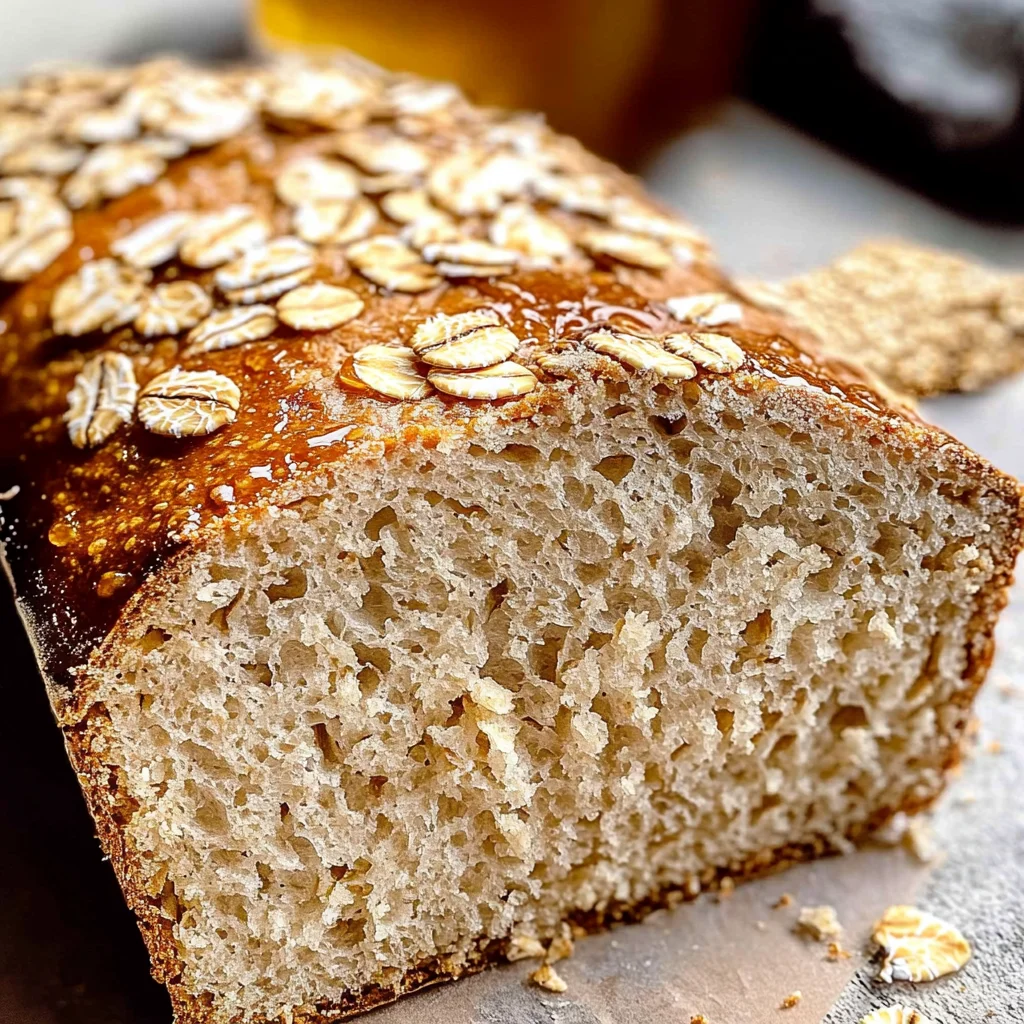
Step 8: The Final Touch – Honey Brushing Bliss
Now comes one of my favorite parts—the finishing touch that elevates this already delightful bread into something truly special: brushing it with honey! Take those remaining tablespoons of honey and gently warm them up in a small saucepan or microwave until they achieve a pourable consistency—it should be like liquid gold flowing over your masterpiece. This step adds an extra layer of sweetness and shine that truly transforms each bite into a heavenly experience.
Once warmed, using a pastry brush or simply drizzling with a spoon, lightly coat the top of your cooled bread with honey. Don’t rush this step; take your time spreading it evenly across the surface so every slice enjoys this extra loveliness when served. It’s also worth mentioning how beautiful this looks—the honey glistens under light like tiny stars embedded in golden crust! After this final touch, let it rest for just a few moments before slicing into it—you’ll be rewarded with warm aromas filling up your space as you prepare for that first delicious bite.
Conclusion:
As we wrap up this delightful journey through making Honey Oat Bread (Gluten-Free, Dairy-Free Option), I hope you’re feeling as excited as I am about creating this beautiful loaf in your own kitchen! There’s something truly magical about watching simple ingredients transform into such a flavorful and comforting bread. The combination of honey’s natural sweetness with the hearty texture of oats creates an experience that goes beyond mere sustenance—it’s pure warmth served on a platter. Each bite carries not just taste but also nostalgia, reminding me of sunny mornings spent around the table with my loved ones.
This recipe is not just about taste; it’s about joy—the joy of mixing, kneading (if you choose), baking—all leading up to that unforgettable moment when you pull that golden loaf from the oven. It’s perfect for sharing at breakfast gatherings or enjoyed quietly with a cup of tea while watching the world go by. The gentle sweetness makes it versatile enough to be dressed up with fruit spreads or simply enjoyed plain on its own. Picture pulling apart a slice while still warm and spreading creamy almond butter on top—a heavenly combination that brings comfort with every mouthful.
Imagine savoring one slice topped with fresh berries and another drizzled with honey; each variation opens up a new world of flavors waiting to be explored. For an afternoon pick-me-up, try pairing your slice with a rich cup of herbal tea—the warmth complements those tender crumb textures so beautifully! And if you’re feeling adventurous? You could add mix-ins like nuts or seeds before baking; just think about how their crunch would enhance each bite! This recipe is wonderfully adaptable—you can easily switch things up based on what you have on hand or what tickles your fancy.
So don’t wait any longer—get into your kitchen and whip up this Honey Oat Bread today! Share your creations with family and friends; they’ll thank you for bringing such joy into their lives. I can’t wait to hear how yours turns out; make sure to connect with me after trying it out! Happy baking!
Honey Oat Bread (Gluten-Free, Dairy-Free Option)
Indulge in the comforting warmth of homemade Honey Oat Bread. This delightful loaf, perfect for breakfast or a wholesome snack, combines the natural sweetness of honey with the hearty texture of oats. With no yeast required, this recipe is simple and can be ready in under an hour! Each slice is moist, fluffy, and filled with nutritious ingredients, making it a family-friendly option for those seeking gluten-free and dairy-free delights. Whether enjoyed plain, toasted with your favorite spread, or as part of a delightful brunch spread, this bread will quickly become a staple in your home.
- Prep Time: 10 minutes
- Cook Time: 30 minutes
- Total Time: 40 minutes
- Yield: Approximately 12 servings 1x
- Category: Breakfast
- Method: Baking
- Cuisine: American
Ingredients
- 2 1/3 cups gluten-free measure-for-measure flour
- 3/4 teaspoon xanthan gum (if needed)
- 2 1/2 teaspoons baking powder
- 1 teaspoon salt
- 1 cup plain Greek yogurt (or dairy-free alternative)
- 1 large egg (or substitute)
- 1/4 cup coconut oil, melted
- 1/4 cup + 1 tablespoon honey
- 1 cup + 2 tablespoons old-fashioned gluten-free rolled oats
- 3/4 cup unsweetened almond milk
Instructions
- Preheat oven to 375°F (190°C) and prepare a greased 9×5-inch loaf pan lined with parchment paper.
- In a large bowl, whisk together gluten-free flour, baking powder, xanthan gum (if using), and salt.
- In another bowl, mix the egg (or substitute), yogurt, melted coconut oil, honey, and almond milk until well combined.
- Pour wet ingredients into dry ingredients and gently fold until just combined.
- Transfer batter to the prepared loaf pan and sprinkle remaining oats on top.
- Bake for about 30 minutes or until a toothpick inserted into the center comes out clean.
- Let cool in the pan for about 10 minutes before transferring to a wire rack to cool completely.
Nutrition
- Serving Size: 1 serving
- Calories: 148
- Sugar: 5g
- Sodium: 150mg
- Fat: 6g
- Saturated Fat: 5g
- Unsaturated Fat: 1g
- Trans Fat: 0g
- Carbohydrates: 22g
- Fiber: 2g
- Protein: 4g
- Cholesterol: 18mg