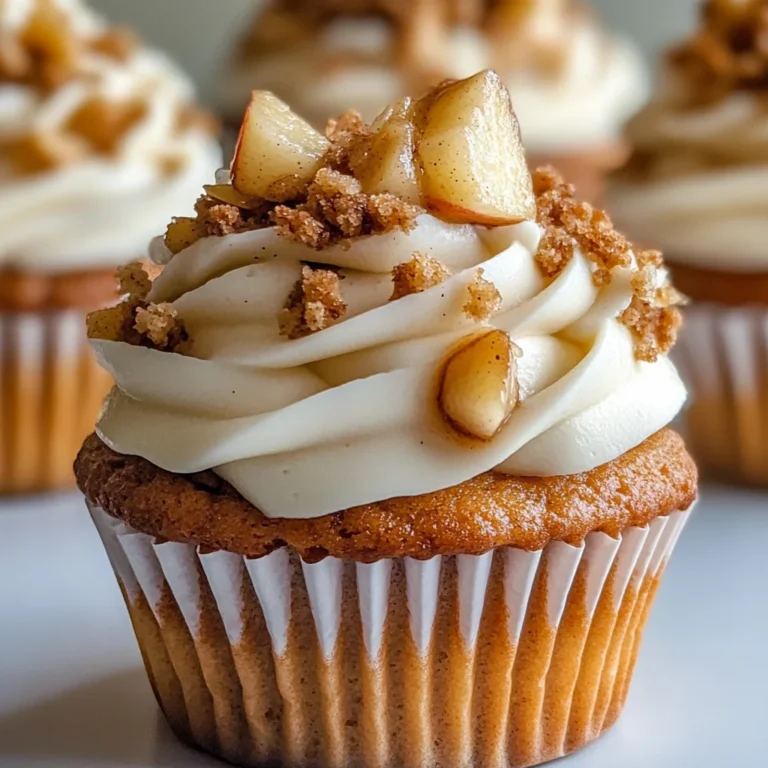
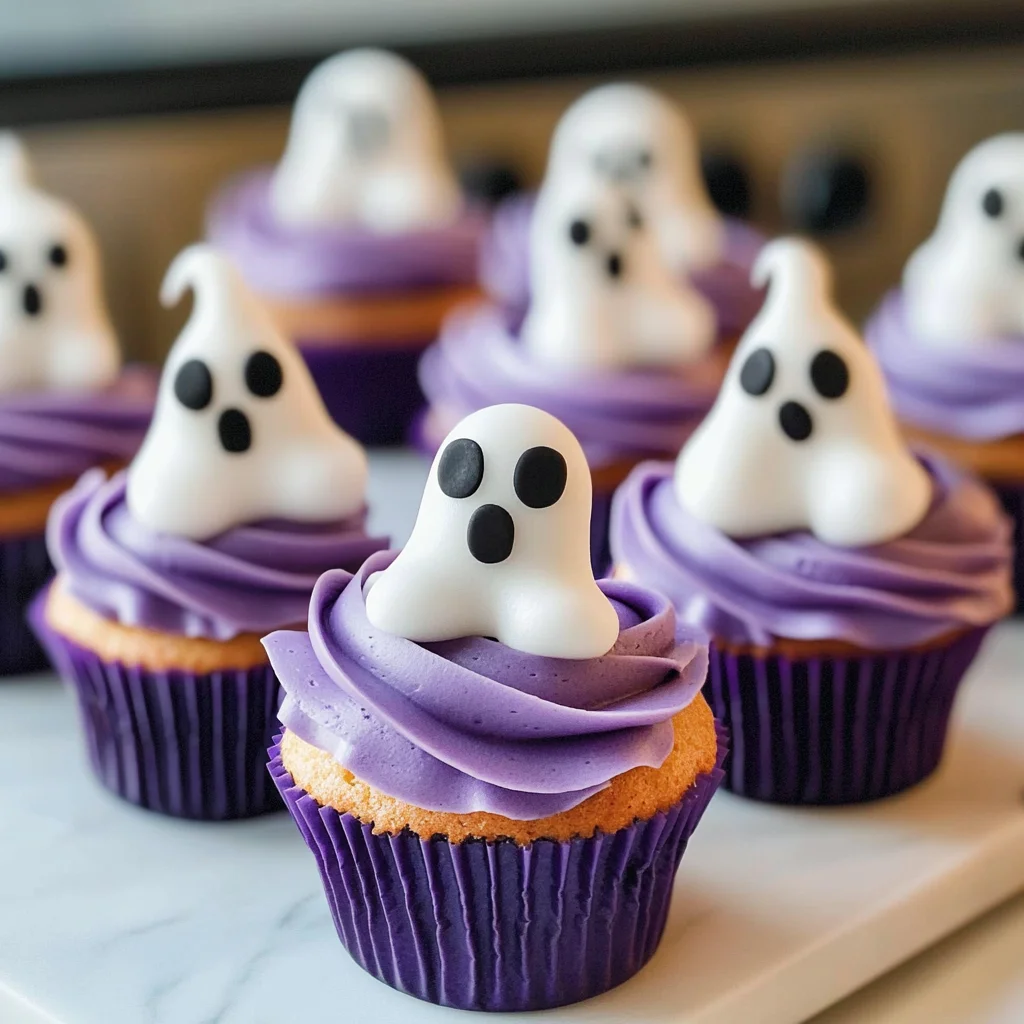
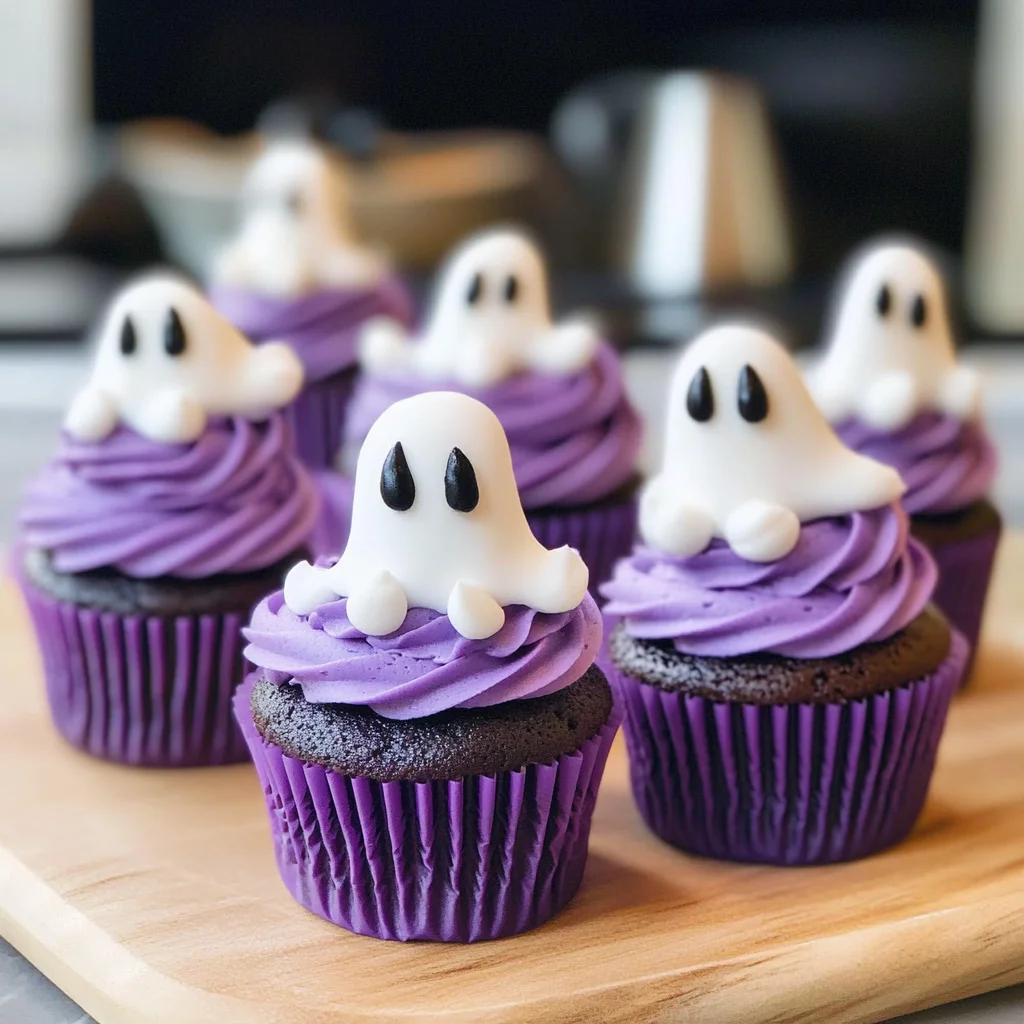
Halloween Ghost Cupcakes
If you’re looking for a fun and festive treat to celebrate the spooky season, you’ve come to the right place! These Halloween Ghost Cupcakes are not only adorable but also delicious, making them a perfect addition to any gathering. Whether you’re hosting a Halloween party, surprising your kids after school, or just indulging in some sweet fun at home, these cupcakes will surely bring smiles all around.
What makes this recipe special is the delightful combination of fluffy meringue ghosts atop rich purple buttercream frosting. Plus, they’re easy enough for anyone to whip up! So tie on your apron and get ready for a treat that’s as much fun to make as it is to eat!
Why You’ll Love This Recipe
- Super Simple: The steps are straightforward, perfect for bakers of any level.
- Family-Friendly: Kids will love helping out with the decorating!
- Perfectly Festive: These cupcakes add a whimsical touch to any Halloween celebration.
- Make-Ahead Friendly: The meringue ghosts can be prepared in advance and stored until you’re ready to serve.
Ingredients You’ll Need
Let’s gather some simple and wholesome ingredients that will transform into these spooky delights. With just a few staple items from your kitchen, you’ll be well on your way to creating these Halloween Ghost Cupcakes!
For the Meringue Ghosts
- 2 large Egg Whites (Room Temperature)
- 1/4 tsp Cream of Tartar
- 1/2 cup White Sugar
For the Buttercream Frosting
- 1 stick Unsalted Butter (softened)
- 2 cups Confectioner’s Sugar
- 2 tbsp Milk
- Purple Gel Food Coloring
For Decorating
- Black Decorating Frosting
Variations
This recipe is wonderfully flexible! Here are some ideas to customize your ghostly treats:
- Change Up the Colors: Feel free to swap out the purple gel food coloring for orange or green for a different spooky vibe.
- Add Flavor: Consider mixing in a teaspoon of vanilla extract into your buttercream for extra flavor.
- Try Different Toppings: Instead of meringue ghosts, why not top with candy eyes or chocolate sprinkles?
- Gluten-Free Option: Use gluten-free flour in your cupcake batter if you want to make them gluten-free friendly.
How to Make Halloween Ghost Cupcakes
Step 1: Preheat Your Oven
Start by preheating your oven to 200 degrees F. This low temperature is essential for baking the meringues slowly and evenly. While that’s heating up, line a baking sheet with parchment paper—it will prevent sticking and make cleanup easier!
Step 2: Whip Up the Meringue
In a large bowl, pour in your room temperature egg whites. Using an electric mixer on low speed, begin beating them until foamy. Adding cream of tartar at this stage helps stabilize the egg whites—this means fluffier meringues later on!
Step 3: Sweeten the Deal
Slowly add sugar while gradually increasing your mixer speed to its highest setting. Keep mixing until you see bright white peaks forming—this means you’ve achieved semi-stiff peaks! It’s like magic watching those egg whites transform.
Step 4: Pipe Your Meringue Ghosts
Scoop the meringue mixture into a piping bag fitted with Wilton tip #12. Now it’s time to pipe! Create ghostly mounds by forming bases about 1 inch in diameter, then pipe upwards until they’re about 2 inches high with pointed tips on top.
Step 5: Bake Your Ghosts
Pop those mounds into the oven and bake for two hours. Once time’s up, turn off the oven but leave them inside for another 30 minutes—this helps dry them out completely so they become crunchy little ghosts.
Step 6: Make Your Buttercream Frosting
While those spooky friends are baking away, let’s work on our buttercream! In a large bowl, combine softened butter, confectioners’ sugar, and milk. Beat everything together until smooth and creamy—this is going to be delicious!
Step 7: Color Your Frosting
Now comes the fun part! Add one small drop of purple gel food coloring to your buttercream and mix until fully incorporated. This vibrant color brings that festive spirit alive!
Step 8: Frost Those Cupcakes
Scoop out your beautiful purple frosting into another piping bag fitted with Wilton tip #12. Give each cupcake a generous swirl of frosting—make them as tall as you like!
Step 9: Decorate Your Meringues
Once your meringues have cooled down from their long bake in the oven, it’s time to decorate! Attach Wilton tip #3 onto black decorating frosting and pipe cute little eyes and mouths onto each ghost.
Step 10: Assemble Your Cupcakes
Finally, place one adorable meringue ghost atop each frosted cupcake. If you have any extras, don’t worry—they’re great served alongside!
And there you have it—your delightful Halloween Ghost Cupcakes are ready to enchant friends and family alike! Enjoy every bite of these festive treats!
Pro Tips for Making Halloween Ghost Cupcakes
Creating these delightful Halloween Ghost Cupcakes is a fun and rewarding experience, especially with a few handy tips!
- Use Room Temperature Egg Whites: Starting with room temperature egg whites helps them whip up to a greater volume, resulting in fluffier meringues that hold their shape beautifully.
- Be Precise with Measurements: Baking is a science, so measuring your ingredients accurately ensures that your cupcakes and meringue turn out perfectly. It’s worth taking a moment to be precise!
- Piping Technique Matters: When piping the meringue ghosts, focus on creating a sturdy base before building upwards. This technique helps prevent collapsing and gives your ghosts the spooky height they need.
- Cool Gradually: After baking the meringues, allow them to cool in the oven. This gradual cooling process prevents cracking, ensuring your ghosts remain intact and fabulous.
- Don’t Rush the Frosting: Give yourself enough time to mix the buttercream until it’s smooth and fully tinted. A well-mixed frosting not only looks better but also tastes delicious on each cupcake!
How to Serve Halloween Ghost Cupcakes
Presenting your Halloween Ghost Cupcakes can be just as fun as making them! With a little creativity, you can create an enchanting display that will impress your guests.
Garnishes
- Edible Glitter: A sprinkle of edible glitter adds a magical touch that captures the spirit of Halloween.
- Candy Eyes: For added whimsy, place tiny candy eyes on top of the buttercream frosting or around the cupcakes for an extra ghostly effect.
Side Dishes
- Spooky Fruit Salad: A colorful mix of seasonal fruits like oranges, grapes, and apples cut into fun shapes (like bats or pumpkins) make for a refreshing side that balances the sweetness of the cupcakes.
- Witch’s Brew Soup: A vibrant green soup made from pureed peas or spinach offers a healthy contrast and adds to your spooky theme. Serve it warm in cauldron-like bowls for added flair!
- Cheesy Pumpkin Quesadillas: These cheesy delights are easy to make by using pumpkin puree mixed with cheese between two tortillas. Cut them into jack-o’-lantern shapes for festive fun alongside your cupcakes.
- Ghostly Veggie Platter: Arrange assorted vegetables like cauliflower and carrots in ghost shapes with dips that resemble graveyards; think black bean dip or hummus with some olive eyeballs!
With these serving suggestions and pro tips, your Halloween Ghost Cupcakes will not only taste amazing but will also look spectacular at any gathering! Enjoy the smiles they bring!
Make Ahead and Storage
These Halloween Ghost Cupcakes are not only a fun treat to make but also perfect for meal prep! You can easily whip them up in advance for parties, gatherings, or even just to enjoy throughout the week.
Storing Leftovers
- Store leftover cupcakes in an airtight container at room temperature for up to 3 days.
- If you want to keep them longer, place them in the fridge where they will last about a week.
- Keep meringue ghosts separate from the frosted cupcakes to maintain their crispness.
Freezing
- Allow the frosted cupcakes to cool completely before freezing.
- Place them in a single layer in an airtight container or wrap them tightly with plastic wrap.
- They can be frozen for up to 2 months. Just be sure to label and date your containers!
Reheating
- If you prefer warm cupcakes, let them thaw in the refrigerator overnight.
- To reheat, place them in a microwave-safe dish and heat for about 10-15 seconds until warm. Avoid overheating as this can dry them out.
FAQs
Here are some common questions about these delightful Halloween Ghost Cupcakes.
Can I make Halloween Ghost Cupcakes without eggs?
Yes! You can use aquafaba (the liquid from canned chickpeas) as a substitute for egg whites. Use approximately 3 tablespoons of aquafaba per egg white.
How do I store leftover Halloween Ghost Cupcakes?
Store leftover cupcakes in an airtight container at room temperature for up to 3 days or refrigerate for about a week. Keep the meringue ghosts separate to preserve their texture!
What can I use instead of cream of tartar?
If you don’t have cream of tartar, you can substitute it with an equal amount of lemon juice or white vinegar when making the meringue.
How do I get my meringue ghosts to stay upright on the cupcakes?
Make sure your meringue is thick enough and pipe a small amount of buttercream on top of each cupcake before placing the ghost on it. This will help keep them stable.
Are Halloween Ghost Cupcakes suitable for kids?
Absolutely! These cupcakes are not only adorable but also fun for kids to make and decorate. Just supervise during baking and when using piping bags.
Final Thoughts
I hope you enjoy making these whimsical Halloween Ghost Cupcakes as much as I do! They’re not just delicious but also bring a festive spirit to your table. Perfect for sharing with family and friends or simply indulging yourself, these spooky treats are sure to delight. Happy baking, and may your kitchen be filled with laughter and joy as you create these little ghostly delights!
Halloween Ghost Cupcakes
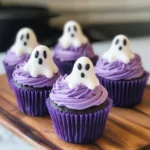
Get ready to charm your guests with these delightful Halloween Ghost Cupcakes! Perfect for any spooky celebration, these cupcakes feature fluffy meringue ghosts perched atop rich purple buttercream frosting. With a combination of fun and flavor, they are easy enough for bakers of all levels and make for a fantastic family activity. Whether you’re hosting a Halloween party or simply looking to add some festive cheer to your home, these cupcakes are sure to impress. Plus, the meringue can be prepared in advance, making them an ideal make-ahead treat!
- Prep Time: 30 minutes
- Cook Time: 2 hours
- Total Time: 2 hours 30 minutes
- Yield: Makes approximately 12 cupcakes 1x
- Category: Dessert
- Method: Baking
- Cuisine: American
Ingredients
- 2 large egg whites
- 1/4 tsp cream of tartar
- 1/2 cup white sugar
- 1 stick unsalted butter, softened
- 2 cups confectioner’s sugar
- 2 tbsp milk
- Purple gel food coloring
- Black decorating frosting
Instructions
- Preheat your oven to 200°F and line a baking sheet with parchment paper.
- In a bowl, whip room temperature egg whites until foamy. Add cream of tartar.
- Gradually add sugar while increasing mixer speed until stiff peaks form.
- Pipe meringue into ghost shapes on the baking sheet and bake for 2 hours; leave in the oven for an additional 30 minutes.
- Prepare buttercream by mixing softened butter, confectioners’ sugar, and milk until creamy; add purple food coloring.
- Frost each cupcake with the purple buttercream and top with meringue ghosts.
Nutrition
- Serving Size: 1 cupcake (70g)
- Calories: 290
- Sugar: 30g
- Sodium: 45mg
- Fat: 10g
- Saturated Fat: 6g
- Unsaturated Fat: 4g
- Trans Fat: 0g
- Carbohydrates: 47g
- Fiber: 0g
- Protein: 3g
- Cholesterol: 25mg