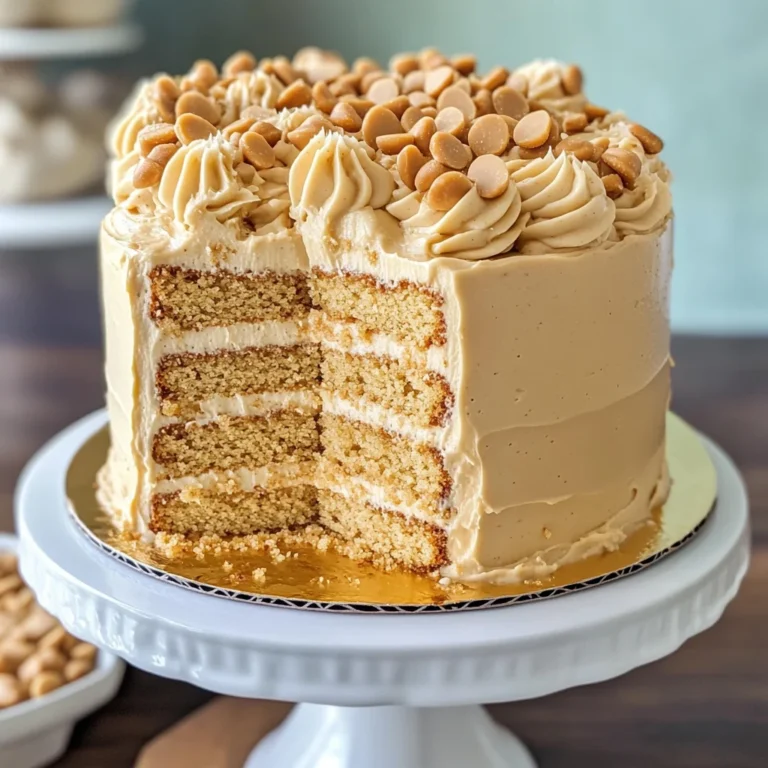
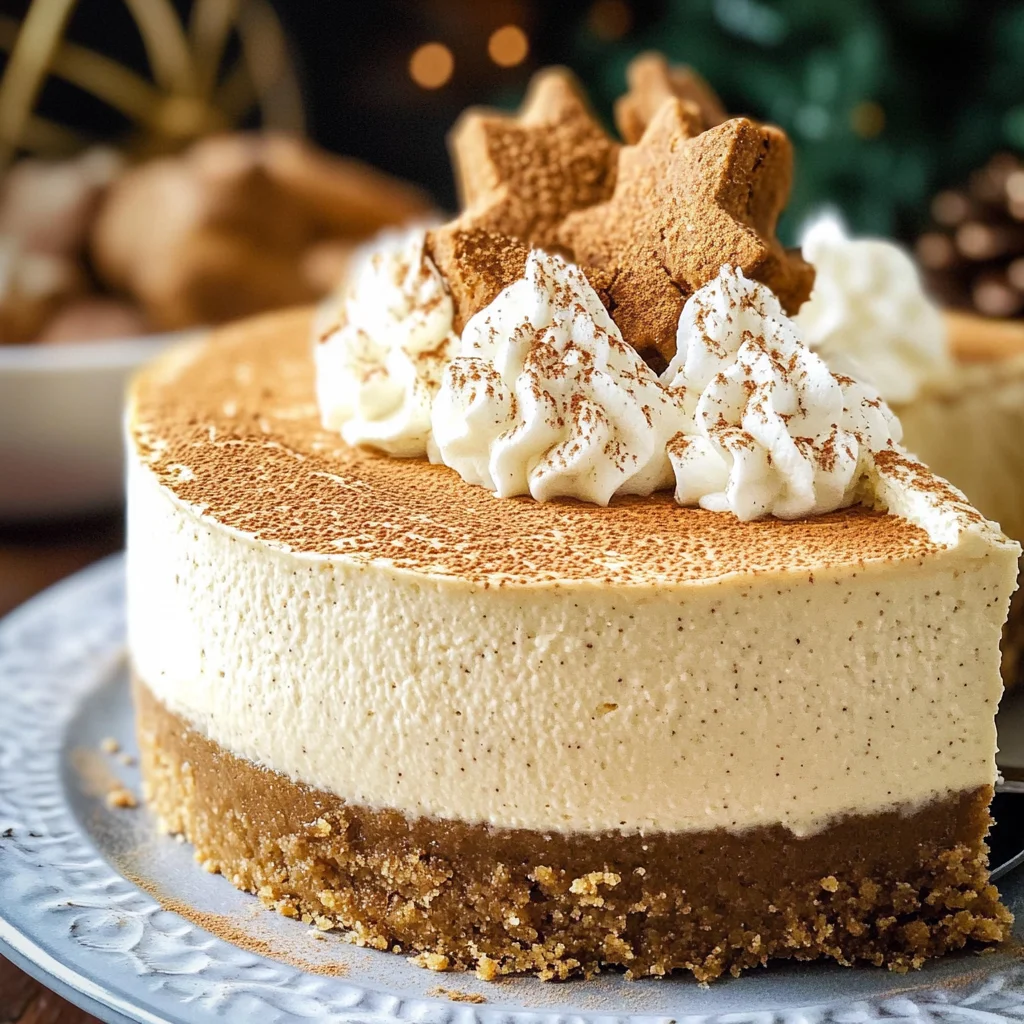
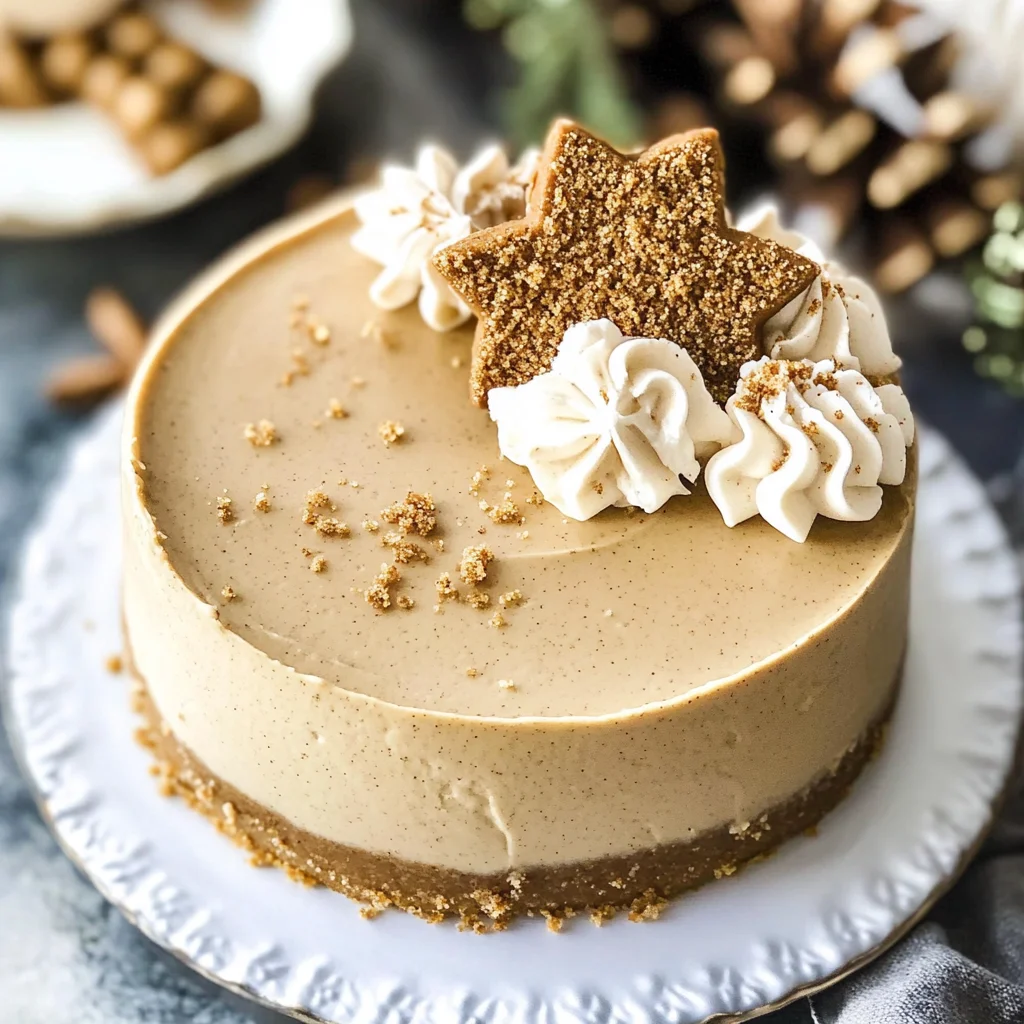
Gingerbread Cheesecake
There’s something utterly enchanting about the aroma of warm spices wafting through your kitchen during the holidays. It’s a scent that wraps around you like a cozy blanket, whispering tales of festive gatherings and cherished memories. This Gingerbread Cheesecake isn’t just a dessert; it’s an experience that merges the rich traditions of holiday baking with the creamy decadence of cheesecake. Each bite offers a symphony of flavors—spicy, sweet, and creamy—that dances on your palate, invoking feelings of nostalgia and joy. I promise you, whether you’re sharing it at a holiday gathering or savoring it during a quiet moment at home, this dessert will become a beloved staple in your culinary repertoire.
What I love most about this recipe is its ability to bridge the gap between tradition and innovation. The classic flavors of gingerbread—those aromatic spices that remind us of childhood memories spent decorating cookies—pair beautifully with the luxurious texture of cheesecake. The combination is not only delicious but also visually stunning when topped with a luscious molasses mousse. Imagine presenting this showstopper at your next gathering; it’s bound to spark conversation and delight among friends and family. So grab your apron, and let’s embark on this delightful culinary journey together!
Gingerbread Cheesecake: A Holiday Delight That Will Warm Your Heart
This Gingerbread Cheesecake is the perfect way to celebrate the season! With its buttery shortbread crust, spiced cheesecake filling, and rich molasses mousse topping, it captures all the essence of gingerbread while elevating it to new heights. Trust me when I say that this dessert will leave everyone asking for seconds!
Ingredients:
As we dive into making this Gingerbread Cheesecake, let’s take a moment to appreciate each ingredient’s role in crafting this masterpiece. Every component plays a part in creating that unforgettable flavor and texture.
- 1 3/4 cups (255g) Walkers shortbread crumbs (two 5.3 oz packages): The foundation of our cheesecake, shortbread crumbs provide that buttery crunch we crave in a crust. Walkers shortbread is renowned for its high quality and rich flavor; using these ensures your crust will have an irresistible taste and texture. If you can’t find Walkers, feel free to substitute with other high-quality shortbread or even homemade shortbread crumbs—just make sure they’re finely crushed for an even texture.
- 1 tbsp sugar: This little addition might seem minor, but it helps balance out the flavors in our crust beautifully. Sugar enhances sweetness while contributing to that lovely caramelization during baking, which adds depth to the flavor profile.
- 3/4 tsp cinnamon: Cinnamon is essential in bringing warmth and spice to our dessert—it’s what evokes those holiday vibes! Using freshly ground cinnamon can elevate your cheesecake with its more potent flavor compared to pre-ground options.
- 2 tbsp (28g) butter, melted: Butter is crucial here as it binds our crust ingredients together and infuses them with richness. Always use unsalted butter so you can control the saltiness of your dish more effectively.
- 24 ounces (678g) cream cheese, softened: Cream cheese is what gives our cheesecake its signature creamy texture and tangy flavor. Make sure it’s softened at room temperature before mixing; otherwise, you’ll end up with lumps in your batter rather than that smooth consistency we desire.
- 1 cup (225g) packed light brown sugar: The moisture from brown sugar adds both sweetness and depth to our filling thanks to its molasses content. This ingredient will help create that beautiful caramel-like flavor profile characteristic of gingerbread.
- 3 tbsp (25g) all-purpose flour: Flour acts as a stabilizer in our cheesecake filling; it helps absorb excess moisture during baking so we don’t end up with a soggy center.
- 3/4 cup (173g) sour cream: Sour cream adds tanginess which beautifully complements the sweetness of our cheesecake while also enriching its creaminess. Don’t skip this; it’s vital for achieving that luxurious mouthfeel!
- 1/4 cup (60ml) molasses: Molasses brings dark sweetness and deep color to both our filling and mousse topping—it’s what makes this cheesecake truly unique! Opt for light molasses for a more subtle flavor or dark if you prefer something bold.
- 1 tsp vanilla extract: Pure vanilla extract enhances all other flavors present in our cake without overpowering them—a non-negotiable addition for depth!
- 2 tsp ground ginger: Ground ginger provides that characteristic zing associated with gingerbread treats. Choose high-quality spices for maximum freshness!
- 1 1/2 tsp ground cinnamon: While we’ve already used some cinnamon in the crust, adding more into the filling amplifies those warm spice notes we crave during colder months.
- 1 tsp ground nutmeg: Nutmeg contributes an earthy warmth that rounds out our spice blend beautifully—just be cautious not to overdo it since too much can be overwhelming.
- 1/2 tsp ground cloves: Cloves add an exotic touch with their pungent aroma reminiscent of holiday baking; they work hand-in-hand with other spices here.
- 4 eggs: Eggs are essential—they not only provide structure but also contribute richness while helping set our cheesecake as it bakes.
- 1 1/4 cups (300ml) heavy whipping cream: Whipping cream will give us that lightness in our mousse topping while also balancing out richer ingredients like cream cheese.
- 1/2 cup (58g) powdered sugar: Powdered sugar dissolves easily into whipped cream; it perfectly sweetens without leaving any gritty texture behind.
- 3 tbsp (45ml) molasses: We’re doubling down on molasses here for our mousse! It creates an incredibly rich topping full of flavor—don’t skip this step!
- 3/4 tsp ground cinnamon (for mousse): A pinch added here ensures every layer bursts with holiday cheer—the more spice, the better!
- 1/4 tsp ground nutmeg (for mousse): Just like earlier, nutmeg shines through with subtlety yet adds complexity—trust me on this one!
- 8 ounces (226g) cream cheese, softened (for mousse): Another layer means another chance for silky smoothness! Softening beforehand is critical again here—no lumps allowed!
- 3/4 cup (180ml) heavy whipping cream (for mousse): More whipping cream creates fluffy cloud-like perfection atop our cake!
- 6 tbsp (44g) powdered sugar (for whipped topping): Sweetness meets fluffiness once again; remember how easy powdered sugar dissolves?
- 1/2 tsp ground cinnamon (for whipped topping): Because who doesn’t love extra spiciness?
- 1/2 tsp vanilla extract (for whipped topping): Enhanced aromas are always welcome—and trust me when I say they elevate everything!
Now that we’ve gathered all these wonderful ingredients together let’s move on to understanding how each piece fits into creating our delightful masterpiece!
Equipment You’ll Need:
Before diving into cooking magic, having the right tools makes all the difference between chaos and culinary bliss! These are essential partners in creating something wonderful that’ll delight your senses while ensuring efficiency along every step of preparation.
- 9-inch springform pan: This pan is absolutely paramount because it allows easy removal after baking without damaging delicate layers inside—perfectly showcasing your beautiful creation! Consider lining it with parchment paper at the bottom too; it’ll make lifting out much easier later on.
- Parchment paper: Line your springform pan base before pouring in batter—it prevents sticking which could lead disastrous results when trying to remove after cooling down!
- Mixing bowls: Invest in several sizes; you’ll need large ones for blending batters plus smaller ones when preparing various toppings separately throughout these steps!
- Electric mixer: An electric mixer saves time while offering consistency when creaming ingredients together smoothly—you deserve minimal effort here since cheesecakes require quite some work anyway!
By now you should feel excited about getting started on preparing this fantastic dessert—it brings everyone together during festive times spent celebrating love through food!
Step 1: Crafting Your Shortbread Crust
Let’s start by creating that delectable shortbread crust—the very base holding everything together! Preheat your oven to 325°F (163°C). While it’s warming up—a step you don’t want to rush—line the bottom of your springform pan with parchment paper before greasing its sides lightly using non-stick spray or butter grease as well; these preparations ensure easy removal later on when slicing into servings once cooled down completely after baking sessions ahead! In a small bowl combine all crust ingredients until evenly distributed throughout before pressing firmly onto both bottoms & edges within prepared pans carefully—not too hard though as we want tenderness rather than toughness after baking finishes up later down road ahead too… Bake them around ten minutes until slightly golden brown appears upon surface tops then set aside cooling off briefly while focusing next steps ahead towards crafting luscious fillings above afterwards…
Step 2: Preparing Your Filling
Now comes one exciting part—creating luscious layers filled with spice-infused goodness! Reduce oven temperature down now closer toward 300°F (148°C)—this lower heat allows cheesecakes cook evenly without cracking surfaces later when done too soon… In larger mixing bowl beat softened cream cheese alongside packed brown sugar & flour together gently over lower speeds initially so less air gets trapped inside batter mixture itself leading inconsistencies appearing post-baking afterwards too… Scrape sides down regularly throughout mixing processes ensuring no lumps remain left behind either way before adding sour cream next along smoothening process further by incorporating molasses alongside vanilla extract combined finally spices including ginger/cinnamon/nutmeg/clove blends altogether fully fused throughout mixture thereafter resulting divine aroma rising toward noses nearby delicious smells wafting around kitchen spaces currently engaged within heartfelt moments shared amongst loved ones alike nearby through life experiences unfoldings possible within realms just waiting embrace laughter shared among families gathered forth upon tables where desserts await patiently sitting ready serve lovingly crafted pieces made hands-on ways…
Step 3: Baking Bliss
Time now moves forward bringing us closer toward completing masterpieces unfolding before eyes watching closely as they transform slowly inside heated ovens awaiting perfection achieved gradually over time starting from earlier stages laid foundations built strong enough withstand pressure endured throughout entire process until fully cooked through such long waits felt worth it every minute spent nurturing creations lovingly crafted hands-on forms yielding rewards translate onto plates served guests present joining festivities surrounding special occasions arise each year reminding everyone cherish traditions passed along generations before continuing legacies told tales told recounting histories lived within families across lands far wide reaching places unknown yet found still lingering sentiments fondly remembered embraced held tightly close forevermore impacting hearts cherished forever belonging treasured forevermore among memories created lasting impressions made echo across time bringing smiles laughter joy shared amongst kindred spirits alike returning back home seasons changing ever-lasting bonds formed cemented firmly growing stronger throughout lifetimes spent living life fullest enjoying small pleasures derived simple joys ignited passions igniting flames bright shining brightly illuminating paths chosen walking journeys traveled discovering beauty lies hidden everywhere waiting reveal itself if one simply takes time pause reflect wonder existed moments fleeting yet profound enough shape destinies fulfill dreams…
Step 4: Chill Time – Letting It Set
Once baked properly finished off neatly pull out pans resting atop counters cooling off gently allowing cakes settle down gradually adjusting textures forming final touches needed reach optimal states desired obtaining firmness sufficient meet standards expected cut slices would yield well-defined shapes while maintaining integrity compositions intact untouched preventing mishaps occurring ruining visual aesthetics presented serving guests finally once chilled sufficiently enough hours pass by letting chill overnight ensures best results achieved ultimately leaving expectations fulfilled beyond measure delighted hearts satisfied palates longing anticipation met rewarded blissfully indulging sweets awaited eagerly eager enjoyments alike…
I hope these early steps inspire confidence as we continue crafting delightful layers building toward something extraordinary full flavors cradling warmth kindness spread across gatherings surrounded loved ones celebrating special moments shared intimately amongst family friends alike—all brought forth thanks labor love infused every bite enjoyed savored deeply nourished souls hearts warmed filled joy laughter shared endlessly resonating echoes memories created lasting impressions forever etched minds hearts soulfully intertwined journeys traveled along paths walked freely embracing possibilities endless opportunities found seeking nurturing beauty hidden everywhere waiting reveal itself if one simply takes time pause reflect wonder existed moments fleeting yet profound enough shape destinies fulfill dreams…
Step 5: Blending the Perfect Cheesecake Filling
Now that we have our crust beautifully baked and waiting, it’s time to dive into creating the luscious filling for our Gingerbread Cheesecake. Start by reducing your oven temperature to a cozy 300°F (148°C). This lower heat is absolutely crucial because it helps to gently cook the cheesecake without causing those dreaded cracks on the surface. Trust me, a smooth, crack-free top is not just a matter of aesthetics; it’s about achieving that velvety texture we all crave with every bite. In a large mixing bowl, combine 24 ounces (678g) of softened cream cheese, 1 cup (225g) of packed light brown sugar, and 3 tablespoons (25g) of all-purpose flour. Mixing these together at low speed is essential – if you whip too vigorously, you’re inviting air bubbles that can lead to cracks when baking. Scrape down the sides of your bowl with a spatula to ensure everything is well combined; this step ensures an even mix throughout.
Next, we’ll add in the rich depth of flavor with 3/4 cup (173g) of sour cream and 1/4 cup (60ml) of molasses, alongside that aromatic vanilla extract. As you incorporate these ingredients on low speed, take a moment to breathe in that intoxicating aroma! The molasses adds a comforting warmth that pairs beautifully with our holiday spices. Speaking of spices, now’s the time to sprinkle in 2 teaspoons of ground ginger, 1 1/2 teaspoons of ground cinnamon, 1 teaspoon of nutmeg, and half a teaspoon of ground cloves—each spice will dance together to create this symphony of flavors that defines our cheesecake. Mix until everything is fully combined and silky smooth; this filling should feel like pure liquid gold as it flows from your spatula.
Step 6: The Art of Adding Eggs
Now comes one of my favorite parts: adding the eggs! You’ll want to crack in each egg one at a time—this method allows for gentle incorporation into the batter which keeps the texture light yet rich. After each addition, mix just enough so that you don’t see any streaks but don’t overdo it; less is more here! Over-beating can introduce air into the mixture once again, which might cause your cheesecake to puff up and then deflate as it cools. That’s definitely not what we want! You should end up with a beautifully creamy mixture that looks luxurious and smells divine. Once all four eggs are added and properly mixed in, take a moment to admire that wonderful consistency—it should flow off your spatula like thick honey.
Step 7: Pouring Your Creation
With our filling prepped and looking utterly amazing, it’s time to pour this heavenly concoction into our cooled crust. Carefully spoon the cheesecake filling over the crust in your springform pan, spreading it evenly with a spatula. This step is vital because an even layer ensures uniform baking—it helps avoid any potential sinking or uneven areas later on. Watching this filling settle into place is almost therapeutic; I often find myself daydreaming about how incredible this will taste once it’s baked and chilled!
Now comes an essential technique called a water bath or bain-marie—a non-negotiable step for achieving that creamy texture we all love so much. Place your springform pan inside another larger pan and fill this outer pan with warm water until it reaches halfway up the sides of your springform pan. This gentle steam from the water bath will help regulate temperature around the cheesecake as it bakes, preventing those unsightly cracks. Bake for approximately 1 hour and 20 minutes; keep an eye on it during this time—the edges should be firm while the center remains slightly jiggly when you gently shake the pan.
Step 8: Mastering Cooling Techniques
Once your timer goes off, resist the urge to open that oven door immediately! Instead, turn off the heat and let your cheesecake sit in there for an additional 30 minutes with the door closed—a little patience goes a long way here! This gradual cooling process allows any remaining heat to continue cooking your cheesecake gently without shocking it with cold air from outside. After those precious thirty minutes have passed, crack open the oven door just slightly and allow your cheesecake to cool for another half hour inside; you’ll notice how beautifully it settles during this time.
After an hour has elapsed since baking began—with patience truly being rewarded—you can finally remove your gorgeous creation from its steamy environment! Set it aside on a wire rack until it’s no longer warm before transferring it into the refrigerator for chilling—this step is critical as we want our Gingerbread Cheesecake to firm up beautifully before serving. Ideally aim for at least five to six hours—or better yet—overnight if you can manage! I know waiting can be tough when you’re excited about dessert but trust me: allowing those flavors to meld overnight transforms your cheesecake into something truly extraordinary.
And there you have it—a truly remarkable Gingerbread Cheesecake recipe that’s bound to become a cherished tradition within your own holiday celebrations year after year! Happy baking!
Storage and Enjoyment Tips for Your Gingerbread Cheesecake
Now that your Gingerbread Cheesecake is beautifully set and ready to dazzle your taste buds, let’s talk about how to keep this delightful creation fresh and enjoyable. The anticipation of sharing it with friends or family is just as exciting as the baking process itself! Trust me, once you take that first bite, you’ll want to savor every slice for as long as possible. So let’s dive into the best practices for preserving this creamy, spiced masterpiece.
Storing Leftover Gingerbread Cheesecake
To ensure your leftover Gingerbread Cheesecake remains a heavenly treat, store it in an airtight container in the refrigerator. I recommend using a container that seals tightly to prevent any fridge odors from mingling with your cheesecake’s rich flavors. When stored properly, you can enjoy this delicious dessert for up to five days! However, I must share a little pro tip: placing a slice of bread in the container can help maintain moisture—who knew that simple ingredient could work wonders? After storage, you’ll find that the cheesecake develops even deeper flavors; the spices have time to mingle, making each bite profoundly satisfying. When you’re ready to indulge again, simply serve it cold or let it sit at room temperature for about 20 minutes before diving in—this way, the textures and flavors truly shine.
Freezing Gingerbread Cheesecake for Later
If you’re looking to extend the life of your Gingerbread Cheesecake even further, freezing is an excellent option! To do so properly, slice your cheesecake into individual servings and wrap each piece tightly in plastic wrap, then place them into a freezer-safe container or bag. This method protects against freezer burn while keeping those enticing flavors intact. It will stay wonderfully preserved for up to three months! When you’re ready to enjoy a slice from frozen, simply transfer it to the refrigerator overnight to thaw. This option is fantastic not only because it allows you to enjoy this holiday treat long after the festivities are over but also because it means you can surprise friends or family with a delicious homemade dessert whenever they pop by. The convenience factor here is absolutely paramount—think of all those last-minute gatherings where a slice of this cheesecake will surely impress!
Gingerbread Cheesecake
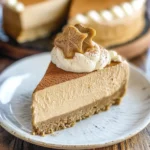
Indulge in the delightful experience of our Gingerbread Cheesecake, a perfect centerpiece for your holiday gatherings. This creamy dessert combines the warm spices of gingerbread with a velvety cheesecake filling, all resting on a buttery shortbread crust. Topped with a luscious molasses mousse and adorned with cinnamon hints, each bite is an enchanting fusion of flavors that evokes the spirit of the season. Whether you’re celebrating with family or enjoying a quiet moment, this Gingerbread Cheesecake promises to be a new favorite in your holiday repertoire.
- Prep Time: 30 minutes
- Cook Time: 1 hour and 30 minutes
- Total Time: 0 hours
- Yield: Makes approximately 12 servings 1x
- Category: Dessert
- Method: Baking
- Cuisine: American
Ingredients
- 1 3/4 cups Walkers shortbread crumbs
- 1 tbsp sugar
- 3/4 tsp cinnamon
- 2 tbsp (28g) butter, melted
- 24 ounces (678g) cream cheese, softened
- 1 cup (225g) packed light brown sugar
- 3 tbsp (25g) all-purpose flour
- 3/4 cup (173g) sour cream
- 1/4 cup (60ml) molasses
- 1 tsp vanilla extract
- 2 tsp ground ginger
- 1 1/2 tsp ground cinnamon
- 1 tsp ground nutmeg
- 1/2 tsp ground cloves
- 4 eggs
- 1 1/4 cups (300ml) heavy whipping cream (for mousse)
- 1/2 cup (58g) powdered sugar (for mousse)
- 3 tbsp (45ml) molasses (for mousse)
- 3/4 tsp ground cinnamon (for mousse)
- 1/4 tsp ground nutmeg (for mousse)
- 8 ounces (226g) cream cheese, softened (for mousse)
- 3/4 cup (180ml) heavy whipping cream (for mousse)
- 6 tbsp (44g) powdered sugar (for whipped topping)
- 1/2 tsp ground cinnamon (for whipped topping)
- 1/2 tsp vanilla extract (for whipped topping)
Instructions
- Preheat oven to 325°F (163°C). Prepare a 9-inch springform pan by lining the bottom with parchment paper and lightly greasing the sides.
- In a bowl, mix shortbread crumbs, sugar, cinnamon, and melted butter until combined. Press firmly into the bottom of the pan and bake for 10 minutes.
- Lower oven temperature to 300°F (148°C). In a large bowl, beat cream cheese until smooth. Gradually add brown sugar and flour; mix well. Incorporate sour cream, molasses, vanilla extract, and spices until smooth.
- Add eggs one at a time, mixing gently after each addition.
- Pour filling into cooled crust and bake for approximately 1 hour and 20 minutes or until edges are set but center is slightly jiggly.
- Cool in the oven for 30 minutes before letting it chill in the refrigerator for at least five hours or overnight.
- For the mousse topping, whip heavy cream with powdered sugar and molasses until stiff peaks form. Fold in softened cream cheese gently.
- Spread mousse over chilled cheesecake and refrigerate again for at least one hour before serving.
Nutrition
- Serving Size: 1 slice (approximately 95g)
- Calories: 370
- Sugar: 28g
- Sodium: 280mg
- Fat: 25g
- Saturated Fat: 15g
- Unsaturated Fat: 8g
- Trans Fat: 0g
- Carbohydrates: 31g
- Fiber: 0g
- Protein: 5g
- Cholesterol: 90mg