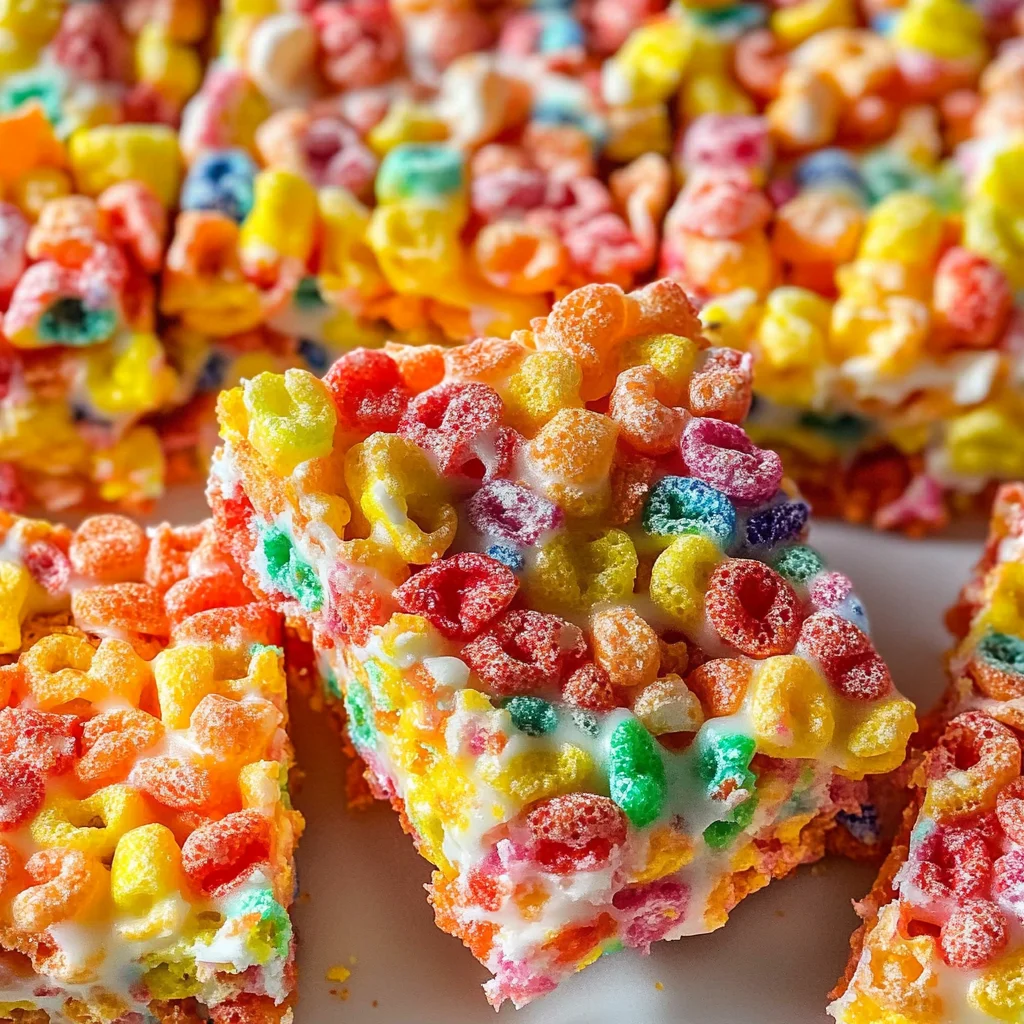
Fruity Pebbles Rice Krispie Treats
There’s something utterly enchanting about the simple act of making Fruity Pebbles Rice Krispie Treats. It’s more than just a recipe; it’s a joyous explosion of color and flavor that whisk us back to carefree childhood days filled with laughter, friends, and the delightful crunch of cereal. The moment you pour those vibrant Fruity Pebbles into your mixing bowl, you can almost hear the cheerful giggles echoing around you as memories come flooding back. This treat is a playful twist on the classic Rice Krispie treat, bringing that nostalgic crunch together with a rainbow of fruity goodness. Each bite is a sweet reminder of innocence and joy—how can you not smile when indulging in these colorful delights?
As you embark on this culinary adventure, let me assure you: these Fruity Pebbles Rice Krispie Treats are not only quick to whip up but they’re also an absolute crowd-pleaser. Perfect for birthday parties, school events, or even just a cozy night in with your loved ones, these treats transcend occasion. They bring people together—whether it’s kids giggling over their favorite cereal or adults reminiscing about their own childhoods. Plus, with just three ingredients and ten minutes of your time, you’ll create something truly extraordinary. Trust me when I say that sharing these treats will make you feel like a superstar in the kitchen!
Ingredients:
Before we dive into the fun part of making these delightful treats, let’s gather our colorful cast of ingredients! Each one plays a vital role in creating the perfect balance of flavor and texture that makes Fruity Pebbles Rice Krispie Treats so irresistible.
- 5 cups fruity pebble cereal. This iconic cereal is the heart and soul of our recipe—its bright colors are not just visually appealing but also contribute that wonderful fruity flavor we all love. When selecting your cereal, look for fresh boxes that give off that unmistakable sweet scent; stale cereal can lead to disappointing results. The unique texture of Fruity Pebbles combined with the melty marshmallow creates a symphony of crunch and chewiness that will have everyone coming back for seconds.
- 1/4 cup salted butter. Butter serves as our magical binding agent here—it brings richness and depth to our treats while also enhancing the overall flavor profile. Using salted butter is absolutely paramount because it adds a lovely contrast to the sweetness of the marshmallows and cereal, balancing everything out beautifully. Make sure your butter is at room temperature before you start melting it; this ensures it blends seamlessly with our marshmallows without any lumps or clumps.
- 4 cups mini vegan marshmallows. These little puffs are what transform our fruity cereal into gooey delight! Vegan marshmallows melt down beautifully to create that luscious sticky mixture we need for coating our cereal evenly. When shopping for vegan marshmallows, check labels carefully as brands vary widely in quality and taste; some may have a hint of vanilla or coconut which can add an additional layer of flavor to your treats. The key here is to melt them slowly over low heat so they become creamy and smooth without risk of burning—this step is crucial for achieving that perfect consistency!
Equipment You’ll Need:
Before diving into creating your Fruity Pebbles Rice Krispie Treats, having the right equipment at hand makes everything smoother and more enjoyable! Think of these tools as essential partners in crafting something truly delightful.
- Large mixing bowl – This will be where all the magic begins! A spacious bowl allows plenty of room for mixing without worrying about spills or messes, letting you focus on enjoying the process rather than stressing about cleanup later.
- Medium saucepan – You’ll need this for melting your butter and marshmallows together. A medium size gives you enough surface area to melt efficiently while ensuring even heating without risking scorching any ingredients—nobody wants burnt marshmallows in their treats!
- Rubber spatula – This versatile tool is perfect for gently folding ingredients together without crushing your beloved Fruity Pebbles. Its flexibility allows you to scrape down every last bit from the sides of your bowl or saucepan so nothing goes to waste.
- 8×8-inch pan – A classic choice for setting your treats! This size works perfectly to create nice thick squares that are easy to cut once cooled properly—don’t rush this step as letting them set correctly gives you those satisfying chewy bars we crave.
- Wax or parchment paper – While technically not equipment per se, using wax or parchment paper helps tremendously with pressing down your mixture into the pan without sticking—plus cleanup becomes a breeze!
Preparing the Fruity Pebbles Rice Krispie Treats
Step 1: Gather Your Ingredients
Let’s start by pouring 5 cups of that vibrant fruity pebble cereal into a large mixing bowl! As soon as those colorful flakes hit the bowl, take a moment to appreciate their cheerful hues—it’s like having a party right there in front of you! Once you’ve got them all nestled comfortably in their bowl home, set it aside for now because we’re going to create something wonderfully gooey next.
Step 2: Melt Your Butter
In a medium saucepan over low heat, toss in 1/4 cup salted butter and allow it to melt gently—think liquid gold flowing smoothly as it warms up! Keep an eye on it; this process shouldn’t take long at all—just a few moments will do. Once melted completely, add in 4 cups mini vegan marshmallows right away! Stir constantly with your trusty rubber spatula until each fluffy morsel has melted down into creamy oblivion; this typically takes about 3–5 minutes depending on how patient you’re feeling (and believe me, it’s worth every second).
Step 3: Combine Cereal and Marshmallow Mixture
Now comes my favorite part: pouring that velvety melted marshmallow mixture over those crunchy fruity pebbles! As you do this, watch closely how everything transforms before your very eyes—the marshmallow enveloping each piece like a warm hug! Use your spatula again here; gently fold until every last bit of cereal is coated evenly with this luscious concoction—don’t rush this step because every morsel deserves its share!
Step 4: Press Into Your Pan
Time to transfer this glorious mixture into the prepared 8×8-inch pan! First things first though: take some wax or parchment paper and use it to help press down evenly—you want these treats packed together but still light enough that they maintain their chewiness when biting into them later on! Be careful though—pressing too hard can lead them being dense instead of fluffy—which isn’t what we want at all.
There’s truly something magical happening here as we witness our creation start taking shape; it’s exciting seeing how something so simple can become utterly extraordinary with just some love and attention!
Continue following through each step patiently until you’ve achieved perfection—trust me when I say it’s worth every moment spent waiting for those beauties cool before slicing into squares…
Fruity Pebbles Rice Krispie Treats: A Colorful, Chewy Delight
As we continue on this delightful journey of creating Fruity Pebbles Rice Krispie Treats, I can already feel the excitement bubbling up! If you’ve ever bitten into a classic Rice Krispie treat and marveled at its gooey, sweet perfection, then get ready for an even more joyful experience. These treats are not just a dessert; they are an explosion of color and flavor that will transport you back to carefree childhood days. Let’s dive right into the next steps!
Step 5: Cool and Set – The Transformation
Now that your colorful concoction has been pressed into the pan, we enter a crucial phase: the cooling process. It might seem like a simple step, but trust me, it’s absolutely paramount! Allowing these treats to cool completely is essential for achieving that perfect chewy texture. As they cool, the melted vegan marshmallows firm up slightly, transforming from a sticky mixture into a cohesive treat that holds its shape beautifully when sliced.
Patience is key here; you want to let them rest for about 20-30 minutes at room temperature. If you’re in a hurry (and who isn’t sometimes?), you can pop the pan in the refrigerator for about 5 minutes instead. Just remember, rushing this step may result in overly soft treats that fall apart when you cut them. If you choose to refrigerate, keep an eye on them – they should be set but still slightly pliable to ensure that signature chewiness. You’ll know they’re ready when they feel firm to the touch but still have just a hint of give.
Step 6: Slice and Serve – The Big Reveal
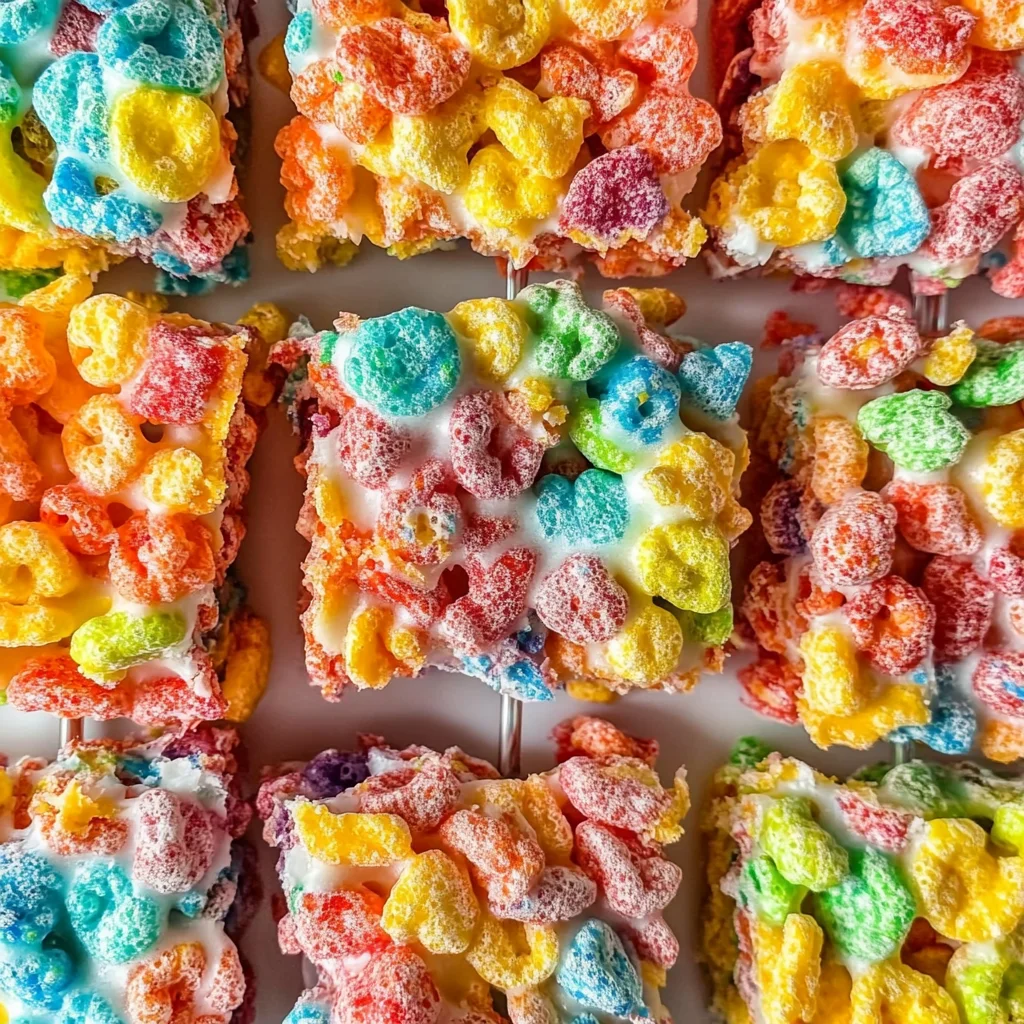
Once your Fruity Pebbles Rice Krispie Treats have cooled and set perfectly, it’s time for the grand reveal! Gently lift them out of the pan using your parchment paper or wax paper as handles—this makes it easy and keeps those edges nice and clean. Now comes the fun part: slicing! Using a sharp knife or pizza cutter (yes, I promise it works beautifully), cut your treats into 9 squares or rectangles—whatever shapes suit your fancy!
When slicing, take care not to use too much pressure; you want to maintain that delightful airy texture inside while ensuring each piece is filled with vibrant colors and flavors. The visual appeal is just as important as the taste here—these treats should look like a rainbow exploded in your kitchen! As you cut through them, notice how they hold their shape yet yield softly under pressure—this balance is what makes them so profoundly satisfying.
Step 7: Enjoying Your Creation – The Sweet Moment
Now that you’ve successfully cut your Fruity Pebbles Rice Krispie Treats into perfect squares, it’s time to savor the moment! This is where all your hard work pays off—the anticipation builds as you pick up one of these vibrant squares and take your first bite. As soon as those chewy marshmallows hit your tongue, you’ll be welcomed by a symphony of fruity flavors that dance across your palate.
I can’t stress enough how utterly intoxicating these little bites are! Each square bursts with sweetness and nostalgia, reminding us of sunny mornings spent with our favorite cereal or shared snacks during movie nights with friends. Try pairing these treats with a glass of cold almond milk or enjoy them alongside fresh fruit for an extra pop of flavor. Trust me when I say there will be smiles all around—it’s impossible not to feel joy when indulging in this colorful treat!
Step 8: Storing Your Treats – Keeping the Magic Alive
If by some miracle there are any leftovers (though I highly doubt it!), storing your Fruity Pebbles Rice Krispie Treats properly ensures that their delightful texture remains intact for days to come. Place them in an airtight container at room temperature; this will help keep them soft and chewy without becoming overly hard or stale. Avoid putting them in the fridge unless necessary because chilling can turn their lovely texture into something less appealing.
Remember, they are best enjoyed fresh within a few days; however, if you’re like me and love having sweet snacks on hand during busy weeks, these treats make an excellent meal prep option! Just be prepared for friends and family to constantly ask you when you’ll be making another batch. After all, who could resist such an easy-to-make dessert that brings joy in every bite?
Conclusion:
As we wrap up this delicious journey through making Fruity Pebbles Rice Krispie Treats, I can’t help but feel excited about sharing this recipe with you! Isn’t it incredible how such simple ingredients come together to create something so profoundly satisfying? The colorful cereal combined with the gooeyness of vegan marshmallows creates an experience that dances on your palate with every bite. These treats are not just desserts; they are little squares of happiness that evoke nostalgia while still feeling modern and playful.
This recipe is an absolute must-try—not only because of its delightful taste but also because making it is such an enjoyable process! It’s wonderfully accessible to cooks of all skill levels, meaning anyone can jump right in and create this masterpiece within minutes. Picture yourself pulling that pan from your kitchen counter, slicing into those soft squares as the colors pop against the light—the anticipation builds as everyone gathers around, eager for their first taste!
When it comes time to serve these Fruity Pebbles Rice Krispie Treats, imagine savoring one alongside a steaming cup of coffee or cocoa for an afternoon pick-me-up. Or perhaps you’d like to pair it with vanilla almond milk for breakfast; yes please! For an utterly decadent experience, consider drizzling some vegan chocolate over the top before serving—how does that sound? You could even crumble some nuts or dried fruits on top for added texture; the possibilities are endless!
Feeling adventurous? This recipe is wonderfully adaptable! You could swap out the Fruity Pebbles for another cereal entirely—think Cocoa Puffs or Cinnamon Toast Crunch—for unique flavor profiles that will surprise and delight your taste buds. Or how about adding some fun sprinkles for extra flair? The beauty lies in its versatility; I encourage you to get creative! Share your experiences with me—I’d love to hear how you made this recipe your own and what new flavors you explored!
Fruity Pebbles Rice Krispie Treats
Indulge in the delightful taste of Fruity Pebbles Rice Krispie Treats, a colorful twist on the classic dessert that brings joy to both kids and adults alike. With just three simple ingredients, these no-bake treats are not only quick to make but also perfect for any occasion, whether it’s a birthday party, family gathering, or cozy movie night. As you melt the vegan marshmallows and mix in the vibrant Fruity Pebbles cereal, you’ll be transported back to carefree childhood days filled with laughter and sweetness. Each bite is a crunchy, chewy explosion of fruity flavor that will leave everyone smiling. Get ready to create lasting memories with this fun and easy recipe!
- Prep Time: 10 minutes
- Cook Time: 5 minutes
- Total Time: 15 minutes
- Yield: Makes about 9 servings 1x
- Category: Dessert
- Method: No-bake
- Cuisine: American
Ingredients
- 5 cups Fruity Pebbles cereal
- 1/4 cup salted butter
- 4 cups mini vegan marshmallows
Instructions
- In a large mixing bowl, pour in the Fruity Pebbles cereal and set aside.
- In a medium saucepan over low heat, melt the salted butter. Once melted, add in the mini vegan marshmallows. Stir constantly until fully melted and smooth (about 3-5 minutes).
- Pour the melted marshmallow mixture over the cereal and gently fold until all pieces are coated evenly.
- Transfer the mixture into an 8×8-inch pan lined with parchment paper. Use another piece of parchment paper to press down firmly but gently until even.
- Allow to cool at room temperature for 20-30 minutes or refrigerate for 5 minutes before slicing into squares.
Nutrition
- Serving Size: 1 square (45g)
- Calories: 140
- Sugar: 12g
- Sodium: 90mg
- Fat: 5g
- Saturated Fat: 3g
- Unsaturated Fat: 2g
- Trans Fat: 0g
- Carbohydrates: 23g
- Fiber: 0g
- Protein: 1g
- Cholesterol: 15mg