Fluffy Coconut Cake
I’ve always been captivated by the way a simple cake can evoke such deep emotions and memories. When I think of a Fluffy Coconut Cake, I don’t just see a dessert; I feel the warmth of family gatherings, the laughter echoing through the kitchen, and the sweet fragrance of coconut wafting through the air. This cake is more than just an item on a dessert table; it’s a celebration of life’s special moments! Each bite transports you to a tropical paradise, where soft, fluffy layers meet creamy frosting and a delightful crunch from shredded coconut. It’s an experience that sings of joy and comfort—a true revelation that bridges tradition with a modern twist.
As we embark on this culinary journey together, let me assure you that baking this Fluffy Coconut Cake is not merely about following a recipe; it’s about creating something truly extraordinary. Whether you’re planning a birthday party, an afternoon tea with friends, or simply want to indulge yourself with something sweet, this cake fits beautifully into any occasion. The combination of its lightness and rich flavors makes it irresistible, beckoning you to savor each mouthful. Trust me on this one: once you’ve tasted a slice of this cake, you’ll understand why it’s often requested for celebrations in my home.
Fluffy Coconut Cake: A Slice of Paradise
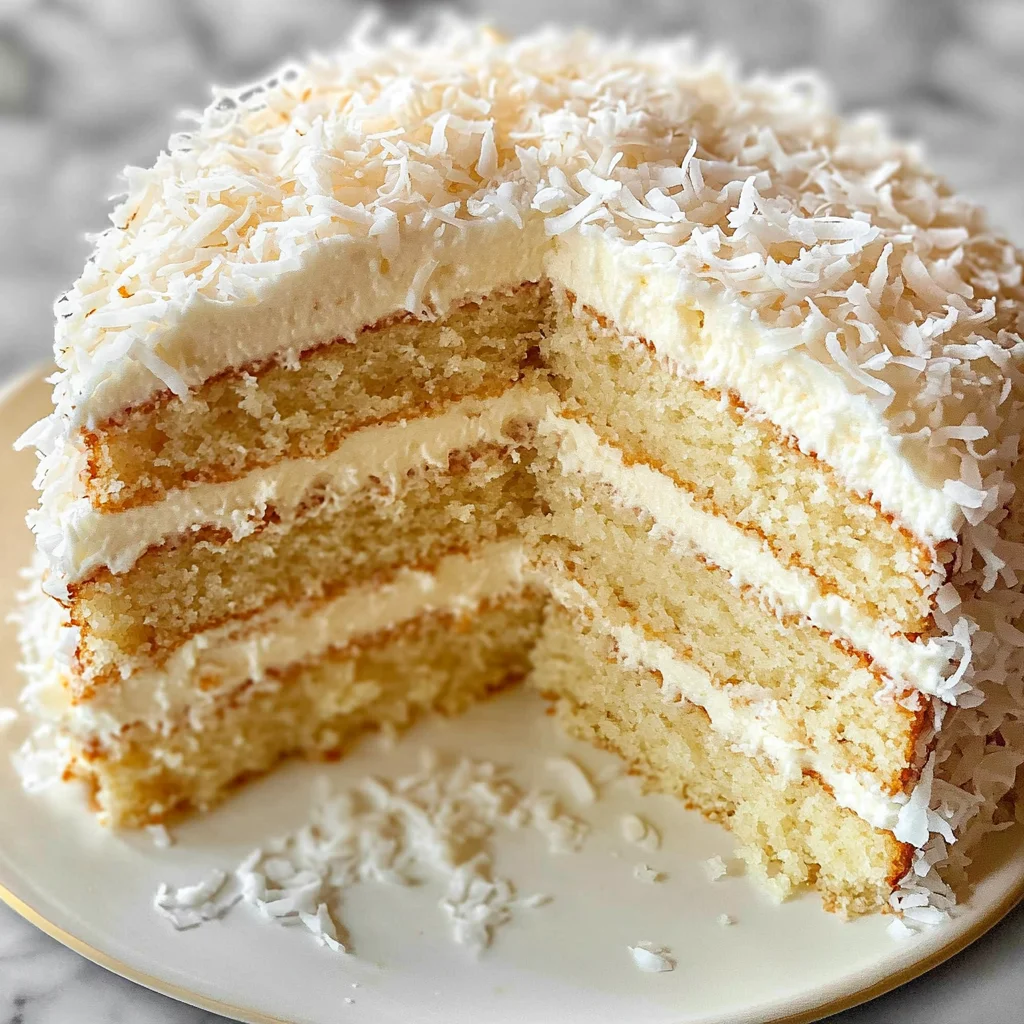
Welcome to your new favorite dessert adventure! Today, we’re diving into the world of baking with this delightful Fluffy Coconut Cake. With every layer lovingly crafted and finished off with a luscious cream cheese frosting that sings with hints of vanilla and coconut, you’re in for a treat! Let’s roll up our sleeves and get started on this delectable creation that’s bound to become a beloved staple in your kitchen.
Ingredients:
Before we roll up our sleeves and dive into this wonderful baking adventure, let’s take a moment to appreciate each ingredient that will come together in harmony to create our Fluffy Coconut Cake. Understanding what each component contributes not only adds depth to your baking knowledge but also enhances the overall experience!
- 450 g cake flour: This is foundational for our Fluffy Coconut Cake—cake flour has a lower protein content compared to all-purpose flour, which gives us that tender crumb we’re striving for. It absorbs moisture better too, leading to an irresistibly soft texture. If you can’t find cake flour, you can make your own by replacing 2 tablespoons of every cup of all-purpose flour with cornstarch!
- 1 tsp salt: Don’t overlook this tiny but mighty ingredient! Salt elevates the sweetness while balancing flavors throughout the cake. It enhances other ingredients without making it taste salty; think of it as the secret handshake between flavors—absolutely paramount!
- 1 tbsp baking powder: This little leavening agent is responsible for making our cake rise beautifully! Baking powder reacts with moisture and heat during baking to produce carbon dioxide bubbles, giving us that delightful fluffiness. Always check your baking powder’s freshness; expired powder can lead to dense cakes instead of those airy layers we desire.
- 170 g unsalted butter (softened): Ahh… butter! The magic ingredient in any baked good—softened butter is crucial here because it helps create those tiny air pockets when creamed with sugar. This process adds volume and contributes to our cake’s lightness. Look for high-quality butter as it will elevate your cake’s flavor significantly.
- 420 g caster sugar: Caster sugar dissolves quickly and blends seamlessly into our batter, ensuring even sweetness throughout without leaving graininess behind. Plus, sugar not only sweetens but also helps retain moisture—a non-negotiable for keeping our cake deliciously moist over time.
- 7 g vanilla extract: Vanilla extract is like liquid gold—it elevates everything it touches! Its warm notes complement the coconut beautifully while adding depth to the overall flavor profile. Always choose pure vanilla extract over imitation for that authentic taste that truly shines through.
- 375 g canned coconut milk: This creamy delight brings both richness and coconut flavor directly into our batter—perfect for enhancing the tropical vibe we’re aiming for! Be sure to use full-fat canned coconut milk for maximum creaminess; it provides essential moisture while ensuring every bite is luscious.
- 60 g vegetable oil: Adding oil helps keep our cake moist without weighing it down as some butters might do if overused. It also contributes to a tender crumb; trust me when I say that oil can work wonders in cakes!
- 5 eggs (divided): Eggs are essential for structure—while some recipes call for whole eggs only, separating them allows us to whip egg whites separately with cream of tartar (which stabilizes them), helping achieve maximum fluffiness in our batter. You’ll want eggs at room temperature so they blend better into the mixture.
- 1/4 tsp cream of tartar: This white powdery hero stabilizes whipped egg whites during beating so they maintain their volume when folded into the batter later on—a small but critical step in ensuring we achieve that cloud-like texture.
- 200 g shredded coconut: For added texture and flavor! Shredded coconut gives our cake those delightful bites filled with chewy goodness. Toasting it lightly can intensify its nuttiness if you’re feeling adventurous!
- 500 g unsalted butter (softened) – Yes, we need more butter for our fabulous frosting! Just like before, softened butter helps create that velvety smooth consistency we crave in cream cheese frosting while providing richness that’s simply irresistible.
- 500 g cream cheese (chilled): Cream cheese is what makes our frosting incredibly lush—its tangy flavor balances out sweetness beautifully while providing structure as well! Ensure it’s chilled before using; warm cream cheese can lead to soupy frosting which no one wants!
- 7 g vanilla extract (for frosting): A touch more vanilla never hurts! It complements both the cream cheese’s tanginess and adds warmth alongside sugary sweetness—just enough to make your taste buds sing!
- 155 g milk powder: Here’s where things get interesting! Milk powder lends creaminess without adding excess liquid—it enhances both flavor and stability in your frosting while contributing an extra layer of indulgence.
- 310 g powdered sugar: Finally, powdered sugar sweetens up our frosting perfectly while allowing us complete control over its thickness—add more or less depending on whether you prefer stiff or spreadable consistency!
With these wonderful ingredients gathered around you like friends ready to join in on this adventure, let’s move onward toward crafting your very own Fluffy Coconut Cake masterpiece!

Equipment You’ll Need:
Having the right tools at your side makes all the difference when embarking on any culinary journey. Think of them as trusty companions who will help bring your delicious vision to life with ease and joy! Let’s go through what you’ll need:
- Mixing bowls (various sizes) – You’ll want several mixing bowls handy; one large bowl for combining dry ingredients and another for wet ones ensures smooth sailing throughout preparation without confusion or mess!
- Electric mixer or whisk – While traditional whisking builds character (and muscle!), an electric mixer saves time—and trust me when I say achieving fluffy egg whites by hand takes dedication! Whichever route you choose depends largely on personal preference.
- Rubber spatula or wooden spoon – Essential tools for folding ingredients together gently; these allow you not only mix thoroughly but also scrape down sides easily ensuring no ingredient goes unused!
- Cake pans (two 9-inch round) – Opting for quality non-stick pans will ensure effortless removal after baking—you deserve perfectly shaped layers without tears or crumbles ruining presentation!
- Cooling racks – These allow proper airflow around cakes post-baking which prevents sogginess from forming due to steam accumulation underneath—I promise they’re worth having around even if just occasionally used!
Equipped with these fantastic tools at hand combined with detailed knowledge about each ingredient’s role within this creation process—we’re ready now more than ever before—to make magic happen in your kitchen together as we prepare this Fluffy Coconut Cake!
Preparing the Fluffy Coconut Cake
Now comes perhaps my favorite part—the actual creation process where all your hard work pays off beautifully as those ingredients transform before your eyes into something heavenly! Let’s get started step by step so nothing gets overlooked along our exciting baking journey:
Step 1: Prepping Your Kitchen
Before throwing ourselves into mixing flour and sugar together like excited children at playtime—it’s important first things first! Preheat your oven at 175°C (350°F) so it reaches optimum temperature before placing cakes inside later on—the perfect environment fosters even cooking throughout resulting in glorious outcomes every single time. Also gather all ingredients measured precisely ahead—as chaotic kitchens rarely yield perfect cakes—and line your two prepared round pans with parchment paper circles cut just right plus grease their sides gently using either cooking spray or butter so there are no sticky surprises waiting when removing layers afterward!
Step 2: Mixing Dry Ingredients
In one large mixing bowl combine together 450 grams of cake flour along with one teaspoon salt plus one tablespoon baking powder before whisking vigorously until well blended—this ensures uniform distribution without clumps forming later down road causing uneven rising during bake time! Remember what I mentioned earlier about how salt enhances flavors? Trust me here—it plays nice alongside sweetness too creating balance necessary within final product overall taste profile too—in fact keeping dry ingredients separate prevents potential lumps entering batter later on!
Step 3: Creaming Butter & Sugar
In another bowl place softened butter (170 grams) then add caster sugar (420 grams)—now comes magic moment folks; using electric mixer set speed low at first gradually increase until mixture becomes light fluffy pale yellow color (think sunshine!)—this process known as creaming incorporates air bubbles into fat which ultimately yields lighter baked goods results than if left uncreamed instead resulting denser textures instead—trust me don’t rush through this crucial step here please!! Keep mixing roughly four minutes total until achieves desired outcome… oh how divine does smell already fill room around us!!
Step 4: Incorporating Wet Ingredients
Now let’s slowly drizzle in canned coconut milk alongside vegetable oil whilst continuing mix at lower speed till fully incorporated—then follow suit adding eggs one at time ensuring each blends fully before proceeding next addition therein otherwise risk curdled batter situation occurring leading undesirable results after bake cycle finishes thus ruining hard work thus far achieved—we want smooth silky consistency throughout whole mixture splendidly enriched flavorful goodness emerging from below surface area revealing itself gradually—that glorious tropical essence awaits us dear friend!!
As you immerse yourself deeper step-by-step possibilities unfold wondrous creations await ahead still… Ready yourselves embrace joyous adventure unfolding right now within walls beloved kitchen yours forevermore!!
Stay tuned — there are many more exciting steps ahead where we’ll finish preparing our luscious frosting that’ll crown this beautiful cake perfectly!!
Step 5: Creating the Perfect Cake Batter
Now that we have all our ingredients beautifully prepped, it’s time to bring them together and create a batter that will be the foundation of our Fluffy Coconut Cake. Start by taking your softened butter—make sure it’s at room temperature, as this ensures it cream perfectly with the sugar. In a large mixing bowl, combine the 170 g of unsalted butter with the 420 g of caster sugar. Using an electric mixer, beat them together on medium speed until the mixture becomes light and fluffy, which should take about 3 to 5 minutes. This step is absolutely crucial; incorporating air into the butter and sugar creates a lighter texture in your cake. You want to see that pale color and feel that airy consistency—it’s like magic!
Once your butter and sugar are ready, add in the vanilla extract along with half of your eggs (which you’ve already divided). Remember to include those yolks first for this stage; they add richness and moisture to the cake. Beat everything well until combined, scraping down the sides of the bowl as needed—don’t skip this! It ensures every bit of goodness is mixed in. Next, gently pour in the 375 g of canned coconut milk while continuing to mix on low speed. This liquid gold brings a luscious, tropical flavor that permeates every bite and keeps your cake moist when baking. Trust me on this; you’ll want that rich coconut essence throughout your cake.
Step 6: Folding in Dry Ingredients
With your wet mixture perfected, it’s time to incorporate the dry ingredients: the cake flour, salt, and baking powder. This step requires a delicate touch—folding instead of mixing vigorously helps maintain that precious air you’ve worked so hard to create. In a separate bowl, whisk together 450 g of cake flour, 1 tsp of salt, and 1 tbsp of baking powder until evenly distributed. The baking powder is essential here because it acts as a leavening agent; it’s what allows our cake to rise beautifully in the oven.
Now comes the fun part! Gradually add your dry mixture into the wet ingredients in three parts. With each addition, use a silicone spatula or wooden spoon to fold gently until just combined. Be careful not to overmix; this could develop gluten in your batter and lead to a dense cake instead of that light fluffiness we’re aiming for! You should see some streaks of flour remaining—that’s perfectly okay! The key here is patience; don’t rush this step. Once you’ve folded everything together nicely and there are no visible lumps (but some flour streaks are acceptable), it’s time to move on.
Step 7: Whipping Egg Whites for Extra Fluff
This is where we elevate our Fluffy Coconut Cake to its ultimate potential through an extra special technique: whipping egg whites! Take those reserved egg whites (the ones set aside from before) and add them into a clean mixing bowl. Sprinkle in a pinch (about 1/4 tsp) of cream of tartar—this ingredient acts as a stabilizer during whipping, helping achieve those glorious peaks we’re after! Using your electric mixer again, whip these egg whites on medium-high speed until soft peaks form; this usually takes about 3-5 minutes.
When you lift your beaters out of the mixture, you should see soft peaks forming—a gentle curl at the tip rather than standing stiffly upright. This is exactly what we want! The incorporation of whipped egg whites into our batter is non-negotiable for achieving a fluffy texture; they provide additional lift without adding any density. Gently fold one-third of these whipped egg whites into your batter first—this lightens it up and makes it easier for you to blend in the rest without deflating all that lovely air you’ve introduced earlier.
Step 8: Baking Your Perfect Fluffy Coconut Cake
Preheat your oven now if you haven’t already done so—set it at a cozy 350°F (175°C). While that’s warming up, prepare your cake pans by greasing them generously with vegetable oil or butter and dusting them lightly with flour or shredded coconut for added flavor and aesthetic appeal when unmolding later. Now it’s time for one last gentle fold! Add in those remaining whipped egg whites into your batter carefully until just combined—you’ll want that ethereal fluffiness throughout without losing any air.
Once mixed, divide your batter evenly between two prepared round cake pans (about 8 inches each). Give each pan a gentle tap on the counter to release any trapped air bubbles hiding within—a little action goes a long way towards preventing unwanted holes or uneven surfaces once baked! Slide them into your preheated oven and let them bake for about 20-25 minutes or until golden brown on top—a toothpick inserted should come out clean or with just a few moist crumbs attached.
As they bake away, indulge yourself in their heavenly aroma wafting through your kitchen—it will truly be intoxicating! Keep an eye on them towards the end because ovens can vary quite drastically; if they start browning too quickly but aren’t fully cooked yet, cover them lightly with aluminum foil for protection against excess heat while they finish off baking.
And there you have it—the journey towards creating an unforgettable Fluffy Coconut Cake is complete! Each slice represents not just deliciousness but also love woven through culinary techniques passed down from generation to generation—a timeless recipe perfect for sharing moments filled with joy around family gatherings or simply indulging oneself after long days longing for something sweet yet comforting. Enjoy every tasty bite!
Storage and Enjoyment Tips for Your Fluffy Coconut Cake
Now that your Fluffy Coconut Cake is beautifully baked and frosted, it’s time to dive into the joy of enjoying this heavenly dessert! Picture yourself slicing through that fluffy, moist cake, revealing the luscious layers of cream cheese frosting and a sprinkling of shredded coconut. The anticipation alone makes my heart race! But what if you have leftovers? Fear not; I have some delightful tips for storing this cake to keep it tasting just as divine as the moment it was freshly made.
Storing Leftover Fluffy Coconut Cake
When it comes to preserving your Fluffy Coconut Cake, the key is all about keeping its dreamy texture intact. I recommend using an airtight container or wrapping individual slices tightly in plastic wrap. This method seals in moisture while protecting those delicate flavors from any unwanted odors in your fridge. If stored properly, your cake will remain fresh for about 3 to 5 days. For those who want to maintain its quality even longer, try placing a slice of bread in the container with the cake—yes, you heard that right! The bread absorbs excess moisture and helps prevent the cake from drying out. After chilling in your fridge, you’ll still be greeted with that intoxicating aroma and soft bite when you indulge again. And if you find yourself craving a piece after a few days? I promise you, it tastes even better as those luscious flavors meld together!
Freezing the Fluffy Coconut Cake for Later
Now, let’s talk about how to freeze your Fluffy Coconut Cake properly—it’s easier than you might think! Allow the cake to cool completely before wrapping it securely in plastic wrap; this prevents freezer burn and preserves its lovely texture. You can store it frozen for up to three months without sacrificing flavor or fluffiness! When you’re ready to enjoy a slice (or two!), simply transfer it from the freezer to the refrigerator and let it thaw overnight. Trust me on this: having slices of this cake tucked away in the freezer is like holding onto little pieces of sunshine for those moments when you need a sweet treat or an impromptu celebration. It’s incredibly convenient for busy days or unexpected guests—just pull out a slice, let it come back to life at room temperature, and watch everyone’s faces light up at the first taste!
Fluffy Coconut Cake
Indulge in the delightful experience of baking a Fluffy Coconut Cake that transports you to a tropical paradise with every bite. This cake features soft, airy layers enriched with the creamy essence of coconut, enveloped in an irresistible cream cheese frosting. Perfect for celebrations or a cozy afternoon treat, each slice is a testament to the joy of homemade desserts. Whether for a birthday party or just because, this recipe is designed to impress and satisfy your sweet cravings. So gather your ingredients and let’s create a cake that radiates warmth and happiness!
- Prep Time: 30 minutes
- Cook Time: 25 minutes
- Total Time: 55 minutes
- Yield: Approximately 12 servings 1x
- Category: Dessert
- Method: Baking
- Cuisine: Tropical
Ingredients
- 450 g cake flour
- 1 tsp salt
- 1 tbsp baking powder
- 170 g unsalted butter (softened)
- 420 g caster sugar
- 7 g vanilla extract
- 375 g canned coconut milk
- 60 g vegetable oil
- 5 eggs (divided)
- 1/4 tsp cream of tartar
- 200 g shredded coconut
- 500 g unsalted butter (softened) for frosting
- 500 g cream cheese (chilled)
- 7 g vanilla extract (for frosting)
- 155 g milk powder
- 310 g powdered sugar
Instructions
- Preheat your oven to 175°C (350°F). Prepare two greased and floured 9-inch round cake pans.
- In one bowl, whisk together cake flour, salt, and baking powder.
- In another bowl, cream softened butter and caster sugar until light and fluffy. Add vanilla extract and half of the eggs, mixing well.
- Gradually add coconut milk and vegetable oil to the wet mixture, blending until smooth.
- Fold the dry ingredients into the wet mixture gently until just combined.
- Whip egg whites with cream of tartar until soft peaks form. Carefully fold one-third into the batter, then incorporate the remaining egg whites.
- Divide batter evenly between prepared pans and bake for 20-25 minutes or until a toothpick comes out clean.
- Let cakes cool completely before removing from pans.
Nutrition
- Serving Size: 1 slice (85g)
- Calories: 390
- Sugar: 32g
- Sodium: 210mg
- Fat: 24g
- Saturated Fat: 14g
- Unsaturated Fat: 8g
- Trans Fat: 0g
- Carbohydrates: 38g
- Fiber: 1g
- Protein: 4g
- Cholesterol: 105mg