Espresso Custard Pie
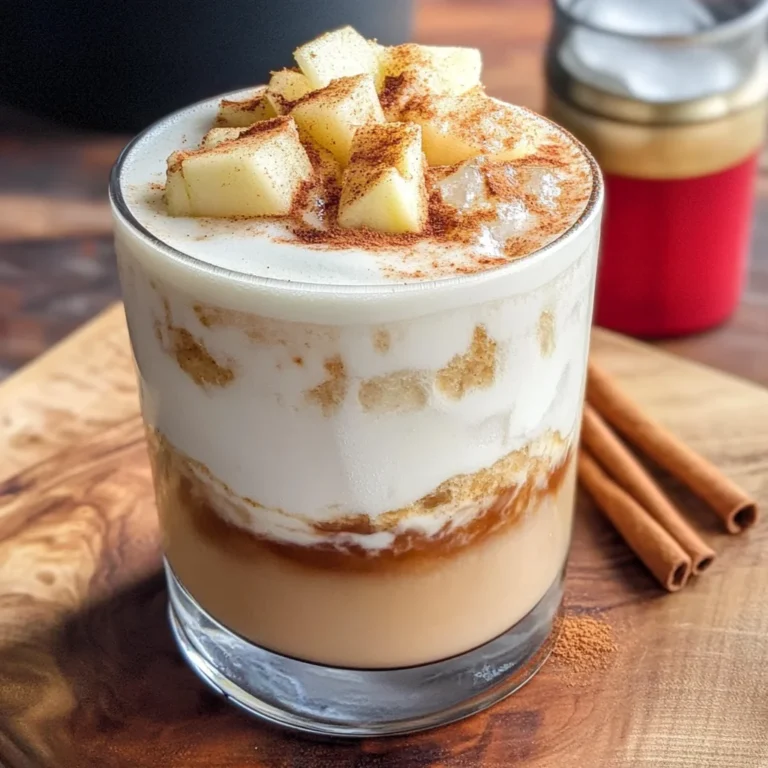
There’s something profoundly magical about food that transcends mere nourishment; it’s a bridge connecting our past to the present, weaving together memories, emotions, and shared experiences. When I think of dessert, my heart flutters at the thought of the comforting embrace of sweetness mingled with the rich aroma of coffee. Imagine slicing into a pie that not only tantalizes your taste buds but also wraps you in a warm hug of nostalgia. This Espresso Custard Pie is not just a recipe; it’s an experience—a creamy, plant-based delight that sings with the boldness of espresso and the soothing creaminess of coconut milk. Each bite transports you to a dreamy café on a sunlit afternoon, where laughter fills the air and every conversation feels like poetry.
Crafting this Espresso Custard Pie is as much about the journey as it is about the destination. With each step, you’ll discover how simple ingredients can transform into something utterly intoxicating. This is a dessert for those who crave comfort without compromise—no eggs or animal-derived products in sight! Instead, we rely on nature’s bounty, using alternatives that keep our values intact while delivering an indulgent treat. Can you imagine serving this to friends after dinner? The way their eyes light up as they take that first bite? It’s moments like these that remind us why we gather around tables, sharing stories and sweet treats alike.
Espresso Custard Pie: A Dreamy Delight for Coffee Lovers
Welcome to your new favorite dessert! This Espresso Custard Pie is not only incredibly easy to make but also offers an elegant twist on traditional custards. With its flaky crust and silky filling, it captures everything we adore about desserts while keeping things light and plant-based. Trust me when I say this pie will become your go-to for impressing guests or simply treating yourself after a long day.
Ingredients:
As we embark on this culinary journey together, let’s dive deep into each ingredient that brings this Espresso Custard Pie to life. Every component plays a vital role in crafting that perfect balance of flavors and textures, so let’s get to know them intimately!
- 1½ cups vegan graham cracker crumbs – These delightful crumbs form the foundation of our pie crust, providing a lovely crunch that contrasts beautifully with the creamy custard filling. When selecting your graham crackers, look for those made with wholesome ingredients—this will ensure your crust has both flavor and integrity. If you can’t find vegan options at your local store, consider making your own by crushing plain vegan cookies or even digestive biscuits!
- ¼ cup melted vegan butter or coconut oil – This addition is crucial for binding our graham cracker crumbs together and creating that perfect crumbly texture we all adore in pie crusts. I personally love using coconut oil for its subtle flavor and health benefits; just make sure it’s melted but not too hot when you mix it in—too much heat can affect how well it binds with the crumbs.
- 1 tbsp maple syrup – A touch of natural sweetness adds depth to the crust while enhancing its flavor profile. Maple syrup isn’t just there for sweetness; its caramel-like notes elevate each bite of the pie. If you’re in a pinch, agave syrup works well too—but let me tell you, nothing quite rivals pure maple syrup.
- 1 cup full-fat coconut milk – This luscious ingredient is what makes our custard rich and creamy without any dairy! Full-fat coconut milk provides a velvety texture that envelops all those wonderful flavors. When purchasing coconut milk, opt for brands that use minimal additives—your taste buds will thank you!
- ½ cup almond milk – Adding almond milk lightens up our custard while still offering creaminess thanks to its nutty undertones. It balances out the richness from the coconut milk beautifully! If almond allergies are a concern or if you’d prefer another option, feel free to substitute with oat or soy milk.
- ½ cup brewed espresso – Here lies the star ingredient! The essence of robust coffee runs through this pie like liquid gold—its boldness cuts through sweetness and adds complexity to our custard. Brew your espresso strong; we want it to stand tall against other flavors rather than fade into obscurity.
- ¼ cup cornstarch – This thickening agent transforms our mixture into something sliceable yet smooth once chilled. It plays a non-negotiable role in ensuring our custard sets properly without any graininess—trust me on this one! Make sure to whisk it thoroughly into your liquid ingredients to avoid lumps.
- ⅓ cup brown sugar – For depth and sweetness, brown sugar is simply divine here. Its molasses content enriches the overall flavor while giving our custard that lovely caramel hue. If you’re looking for an unrefined option, consider using coconut sugar instead—it’ll impart a similar flavor profile.
- 1 tbsp maple syrup – Yes, another splash! A little more sweetness rounds out our custard perfectly while harmonizing with other robust flavors like espresso and cinnamon (if you choose to add it). It’s subtle but makes all the difference!
- 1½ tsp vanilla extract – Vanilla acts as an aromatic whisper throughout this dessert—its warm notes enhance all flavors harmoniously while elevating them without overpowering any single element. Always opt for pure vanilla extract over imitation; you’ll appreciate it more than you know!
- ½ tsp cinnamon (optional but spicy) – This spice introduces warmth and complexity—a lovely surprise alongside coffee! If cinnamon speaks to your soul like it does mine, don’t hesitate to add more; however, remember that moderation allows every flavor its moment in the spotlight.
- Pinch of salt – A tiny pinch may seem inconsequential but trust me when I say it’s absolutely paramount! Salt enhances sweetness by balancing flavors beautifully throughout our custard filling—don’t skip this step!
Equipment You’ll Need:
Having the right tools at your disposal makes all the difference when bringing this Espresso Custard Pie together—it turns what might feel like an overwhelming task into a joyous experience filled with creativity! While these items aren’t ingredients per se, think of them as essential partners in your culinary adventure.
- 9-inch pie dish – A beautiful pie dish not only showcases your masterpiece but also conducts heat evenly during baking—a must-have for achieving that golden-brown crust we crave!
- Mixing bowls – Opt for both large and medium-sized bowls so you can easily whisk together dry ingredients before combining them with wet ones—the right size helps prevent spills!
- Whisk or electric mixer – A good whisk does wonders when blending liquids smoothly without lumps (especially when incorporating cornstarch). An electric mixer can speed up whisking when making meringue toppings or whipped creams later on if desired.
- Saucepan – Choose one that’s sturdy enough for stovetop cooking—this will help ensure even heating as we bring together all those delightful custard components later on.
- Spatula – A flexible spatula makes transferring mixtures effortlessly easy; whether pouring custards into pie shells or scraping mixing bowls clean—having one on hand keeps everything tidy!
Now that we’ve gathered all our ingredients and tools together let’s dive headfirst into preparing this delectable Espresso Custard Pie!
Step 1: Preheat With Purpose
First things first: preheating your oven should be done like you’ve got somewhere important to be because trust me—it matters! Set it to 350°F (175°C) so it’s nice and warm by the time we’re ready to pop in our pie crust later on. Preheating ensures even cooking throughout every layer of goodness; letting cold batter hit hot ovens creates steam which helps achieve perfect textures within baked goods (crispy outside yet tender inside!).
Step 2: Make Your Crust
In a medium bowl, combine 1½ cups of vegan graham cracker crumbs with ¼ cup melted vegan butter (or coconut oil) along with 1 tablespoon maple syrup until fully blended—the mixture should resemble damp sand clumping together nicely between fingers without crumbling apart too easily! It’s crucial here not just for structure but also because deliciousness starts from base layers—the more effective they are at holding shape when pressed down tightly onto surfaces below them means better support once filled later on!
Once mixed well enough (think cookie dough texture), transfer this crumbly blend directly into your prepared pie dish pressing firmly along bottom edges first then working upwards towards sides ensuring uniform thickness throughout (think firm yet gentle pressure). Bake crust for around ten minutes until set before allowing cooling completely before adding luscious custard filling next!
Step 3: Whisk Together Your Filling
While waiting patiently (yes—I know it’s tough!), grab out another mixing bowl where you’ll be combining some pretty magical liquids together shortly after cooling off original baked crust base earlier while simultaneously prepping ahead too—instead let’s coax flavors alive first! Combine ½ cup brewed espresso alongside both kinds of milks (full-fat coconut + almond) plus remaining ingredients: brown sugar/cornstarch/maple syrup/vanilla/cinnamon/salt—all whisked vigorously until smooth sans lumps left behind thereafter—we want silky perfection here folks…
This step becomes non-negotiable since uneven mixtures lead directly toward unsatisfying texture outcomes once set post-fridge chilling period later down line—watch carefully now because bubbling begins occurring as simmering process heats gradually from medium range stovetop temperature settings applied discretely until mixture thickens noticeably after eight-ten minutes total elapsed time spent stirring nonstop thereby preventing sticking risks happening instead!
Step 4: Pour Into Your Crust
With patience finally rewarded upon observing newly thickened consistency achieved earlier successfully now comes time where excitement heightens even further—you’re about ready pour luscious espresso-infused heaven directly atop cooled graham cracker crust base already prepped beforehand earlier today! Using spatula aids greatly here keeping everything neat whilst ensuring none wasted either if possible along way too…
Take care pouring gently allowing settling occur naturally across surface area evenly looks appealing visually satisfying too once finished pouring process completes entirely leaving behind no gaps left visible anywhere found afterwards either leading us towards next steps ahead soon enough…
Stay tuned as we continue through these blissful steps toward completing our beloved Espresso Custard Pie magic unfolding right before our very eyes! What do you think? Can you smell those aromas already wafting through your kitchen?
Step 5: Whisking Up a Dreamy Custard
Now comes the part that transforms our simple ingredients into an utterly intoxicating custard. Grab your favorite saucepan and let’s whisk together the star players: your freshly brewed espresso, full-fat coconut milk, and almond milk. It’s crucial to use full-fat coconut milk as it lends a luxurious creaminess that is simply non-negotiable for this dessert. The almond milk adds a subtle nuttiness that perfectly complements the bold coffee flavor. As you pour these liquids into the saucepan, take a moment to appreciate the rich aroma wafting up—this is what dreams are made of! Add in the brown sugar, cornstarch, maple syrup, vanilla extract, optional cinnamon, and a pinch of salt.
Now, here’s where patience pays off: Place your saucepan over medium heat and start stirring gently. You’re not just mixing; you’re coaxing flavors to meld and thicken into something spectacular. This process usually takes about 8 to 10 minutes. You want to keep an eye on it—stir consistently to prevent any lumps from forming. At first, it might seem too thin; don’t worry! As it heats up, the cornstarch will activate and work its magic, thickening the mixture into a velvety custard. The goal is to achieve a smooth texture where the mixture coats the back of a spoon—a perfect visual cue indicating it’s ready for the next step. Remember, if you feel any resistance while stirring or see bubbles forming on the edges, that’s your signal that you’re close! Trust me; this stage is vital for achieving that luxurious mouthfeel we all crave.
Step 6: Pouring It All Together
Once you’ve whisked your custard mixture to that heavenly consistency we just talked about, it’s time for one of my favorite moments—pouring it into the crust! By now, your pie crust should have cooled down from its brief baking session, which is absolutely paramount because adding hot custard to a warm crust could lead to sogginess—an absolute no-go in pie world! Carefully pour the luscious custard into your prepared graham cracker crust with a gentle hand. You’ll notice as you pour that glossy surface glides effortlessly across the crust; it’s like watching liquid gold cascade into place.
Here’s why we want to do this step carefully: First off, you want an even distribution so every slice gets that wonderful balance of crust and filling. Secondly, the contrast in temperature between the warm custard and cool crust creates that delightful texture when served—think creamy against crispy! After pouring it all in, take a spatula and gently spread any remaining custard evenly in case there are lumps (which can happen if you’re not careful). Then sit back for a moment and admire your creation before moving on. This dessert is truly coming together beautifully!
Step 7: The Art of Chilling
Ahhh, now we arrive at one of my favorite steps—the chilling phase! I know waiting can be tough sometimes; after all the hard work you’ve put in so far, who wouldn’t want to dive right in? But trust me on this one—allowing your Espresso Custard Pie to chill in the refrigerator for at least two hours is absolutely essential for several reasons. First off, this time allows our custard filling to set properly—it needs this cool environment to firm up into those perfectly sliceable pieces we dream about when we think of pie.
During this chilling period, something magical happens: flavors deepen and meld together beautifully. The espresso becomes more pronounced while still being balanced by the sweetness from the sugars and maple syrup. And let’s not forget about texture; as it chills out in your fridge, it transitions from warm comfort food to cool bliss—a transformation that will elevate every bite you take later. I recommend covering it loosely with plastic wrap or parchment paper during this time but be careful not to press down on the custard or you’ll ruin its silky surface! When it’s time is up (or if you’ve had enough patience!), check its firmness by giving it a gentle shake—if it jiggles slightly but holds its shape well, you’re good to go!
Step 8: The Grand Finale
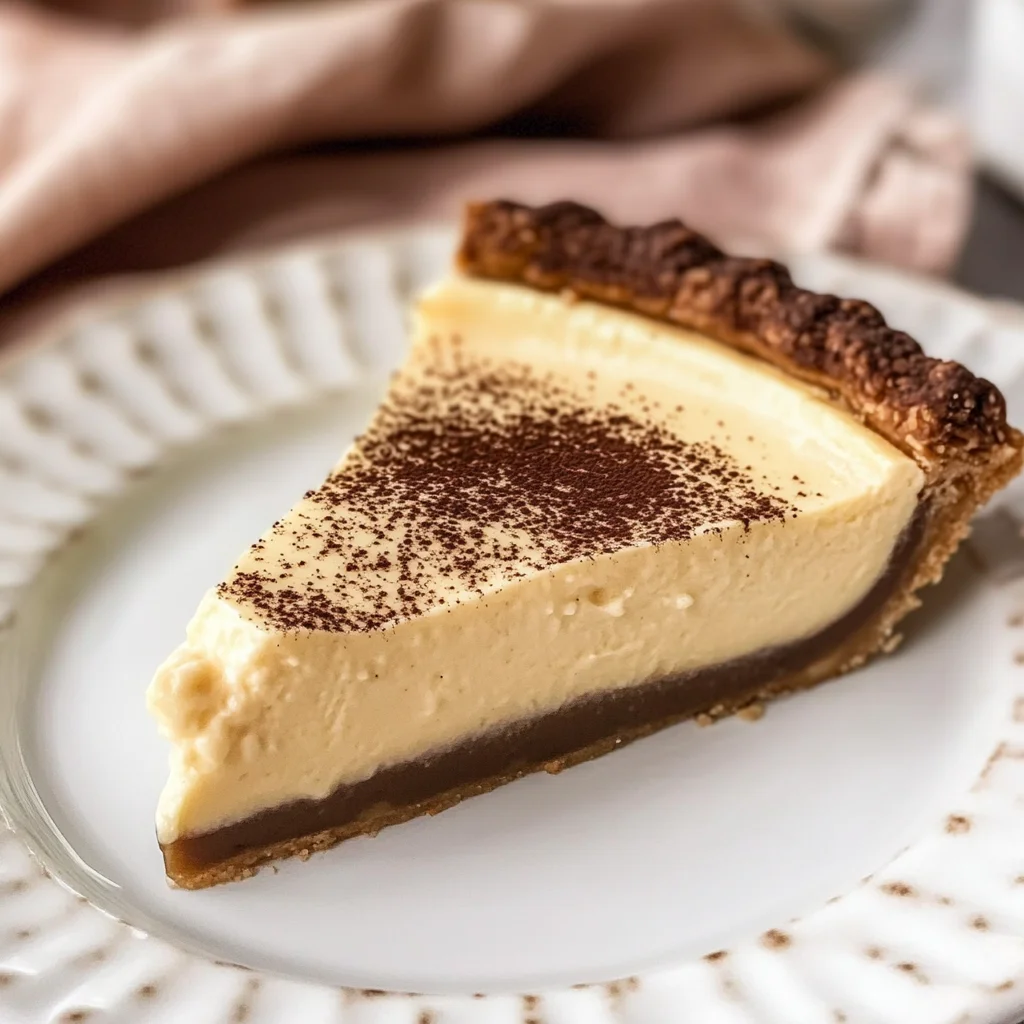
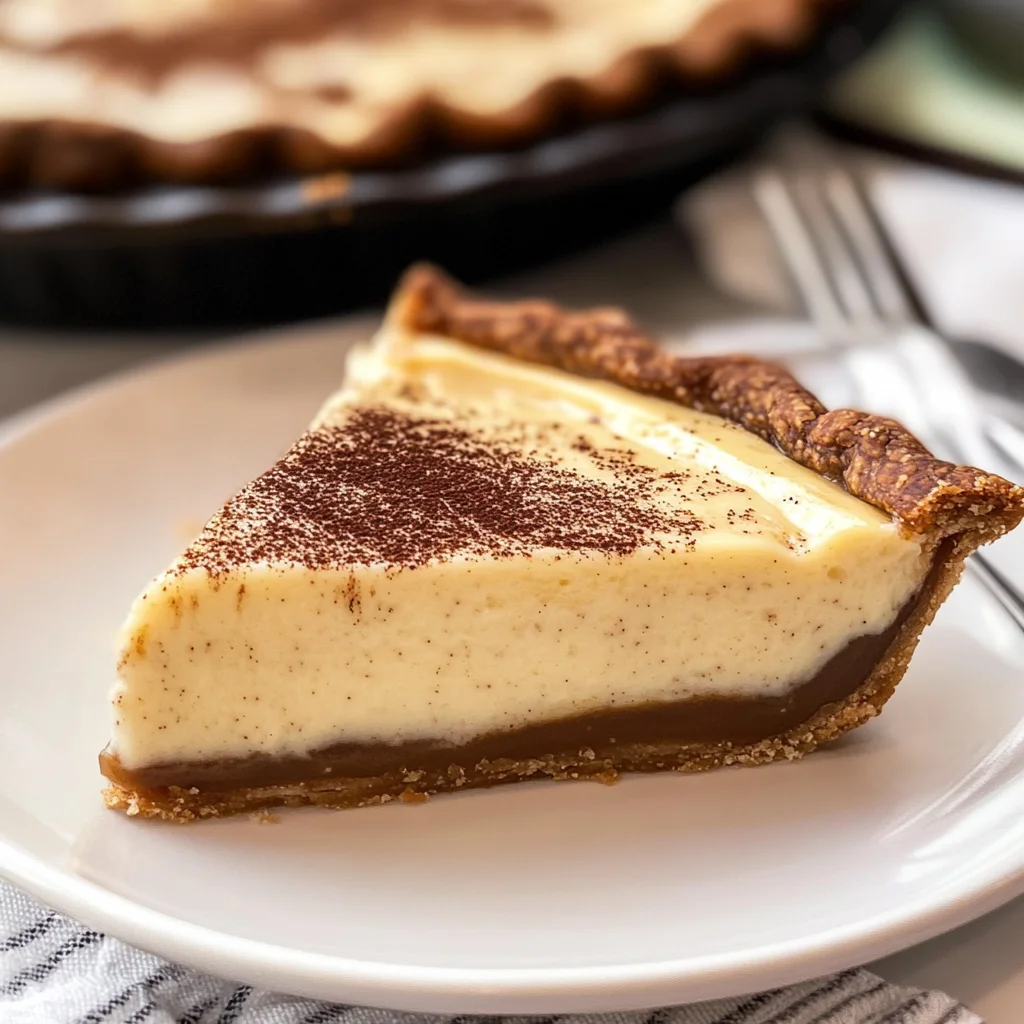
Finally! Your patiently chilled Espresso Custard Pie is ready for unveiling! Carefully remove it from the refrigerator and take a moment to admire how beautifully set it has become—the creamy filling contrasting oh-so-perfectly with that golden-brown graham cracker crust is just an irresistible sight! Now comes one of my favorite finishing touches: serving it up with some flair! You can go classic with vegan whipped cream or get creative with shaved chocolate or cocoa powder dusted on top—each option brings its own symphony of flavors enhancing this already extraordinary dessert.
When slicing into your pie, use a sharp knife dipped in hot water—it makes cutting through those layers seamless and gives you clean edges every time! Serve each piece chilled; I promise you’ll hear gasps of delight as friends and family take their first bites. They’ll experience not just dessert but a celebration of flavors—the rich espresso mingling gracefully with creamy undertones set against that lightly crunchy crust creating an experience that’s profoundly satisfying. Trust me when I say there won’t be leftovers after serving this beauty at your next gathering!
Conclusion:
As we reach the end of our culinary journey together with this beautiful Espresso Custard Pie recipe, I must say—it’s been nothing short of exhilarating! From the moment you mix those graham cracker crumbs with coconut oil to create a crust that’s both flaky and comforting, to whisking together that rich custard that dances on your palate—it’s all part of what makes this dessert so extraordinary. The combination of bold espresso with creamy coconut milk creates a symphony of flavors that will linger on your taste buds long after you’ve savored each bite.
This recipe isn’t just about satisfying your sweet tooth; it’s about sharing joy and delight with every person lucky enough to enjoy it. It’s incredibly versatile too; whether you’re hosting friends for brunch or curling up with a good book on a rainy afternoon, this pie shines in any setting. Imagine pulling it from the fridge on a warm summer evening—the anticipation builds as you slice through its velvety layers—and then watching as everyone gathers around for a taste of something truly special.
To elevate your experience further, consider pairing each slice with fresh berries for that burst of tartness or perhaps drizzling some homemade chocolate sauce over top—it adds such depth! For an afternoon pick-me-up, I love serving it alongside a steaming cup of herbal tea or coffee; it’s like having dessert and beverage all in one blissful moment. And if you’re feeling adventurous? Top your slices with whipped coconut cream or even some shaved dark chocolate for an elegant finish that feels luxurious yet entirely approachable.
Feeling adventurous? This recipe is wonderfully adaptable; you could swap out the espresso for matcha powder if you’re craving something different yet equally delightful! Or try experimenting with various plant-based milks—oat milk can lend a lovely creaminess—and don’t shy away from adding spices like nutmeg or cardamom for unexpected warmth. Whatever path you choose to take with this beautiful dessert, I invite you to make it yours and share your experiences with loved ones. There’s true magic in cooking—a chance to connect through food—and I can’t wait for you to dive into making this Espresso Custard Pie! Please let me know how yours turns out!
Espresso Custard Pie

Espresso Custard Pie is a delightful and indulgent dessert that beautifully combines the bold flavors of espresso with a creamy, plant-based custard filling. With its flaky graham cracker crust and rich espresso-infused filling, this pie offers a comforting treat perfect for any occasion—be it a cozy family dinner or an elegant gathering with friends. Best of all, it’s crafted without eggs or dairy, making it an accessible option for those seeking delicious vegan desserts.
- Prep Time: 20 minutes
- Cook Time: 10 minutes
- Total Time: 30 minutes
- Yield: Serves approximately 8 slices 1x
- Category: Dessert
- Method: Baking
- Cuisine: Vegan
Ingredients
- 1½ cups vegan graham cracker crumbs
- ¼ cup melted vegan butter or coconut oil
- 1 tbsp maple syrup
- 1 cup full-fat coconut milk
- ½ cup almond milk
- ½ cup brewed espresso
- ¼ cup cornstarch
- ⅓ cup brown sugar
- 1½ tsp vanilla extract
- Pinch of salt
Instructions
- Preheat your oven to 350°F (175°C).
- Mix the graham cracker crumbs, melted vegan butter, and maple syrup in a bowl until combined.
- Press the mixture into a 9-inch pie dish and bake for about 10 minutes. Allow to cool.
- In another bowl, whisk together the coconut milk, almond milk, brewed espresso, cornstarch, brown sugar, vanilla extract, and salt until smooth.
- Pour the mixture into a saucepan over medium heat, stirring continuously until thickened (about 8-10 minutes).
- Once thickened, pour the custard into the cooled crust and refrigerate for at least two hours to set.
- Serve chilled and enjoy!
Nutrition
- Serving Size: 1 slice (approx. 106g)
- Calories: 265
- Sugar: 16g
- Sodium: 150mg
- Fat: 15g
- Saturated Fat: 13g
- Unsaturated Fat: 2g
- Trans Fat: 0g
- Carbohydrates: 30g
- Fiber: 2g
- Protein: 3g
- Cholesterol: 0mg