Eggnog Gooey Butter Bars
The holiday season is upon us, and with it comes the sweet anticipation of gatherings filled with laughter, warmth, and delightful treats that evoke cherished memories. There’s something utterly magical about a dessert that transports you back to cozy nights by the fire, sipping on creamy eggnog while the world outside is blanketed in snow. Today, I’m thrilled to share my Eggnog Gooey Butter Bars—a recipe that encapsulates the spirit of the season, combining the rich flavors of eggnog with a gooey, buttery filling that feels like a warm hug for your taste buds. These bars are more than just a dessert; they’re a celebration of everything we love about this time of year.
As I pour my heart into each step of this recipe, I can’t help but think about how food has an incredible ability to bring us together. The blend of spices in these Eggnog Gooey Butter Bars—nutmeg whispering sweet nothings and vanilla creating a symphony of flavor—will fill your kitchen with an aroma so intoxicating that you’ll find yourself dreaming of holidays past. Trust me when I say that baking these bars is not just about following instructions; it’s about immersing yourself in the joyous spirit of cooking. So grab your apron, and let’s embark on this delicious adventure together!
Eggnog Gooey Butter Bars: A Holiday Delight
Let me tell you why these Eggnog Gooey Butter Bars deserve a special place on your dessert table this holiday season! They are the perfect marriage between rich creaminess and buttery sweetness, all while being incredibly easy to make. Imagine biting into a soft, chewy bar that melts in your mouth, leaving behind hints of nutmeg and vanilla—a truly extraordinary experience! Not only do these bars bring comfort to our taste buds, but they also spark conversations and create lasting memories as we gather around the table with loved ones.
These bars are ideal for holiday parties or simply as a treat for yourself after a long day. The beauty of them lies not only in their flavor but also in their simplicity; you won’t need to be a professional baker to pull this off successfully. I promise you, once you’ve tasted one of these gooey delights, you’ll want to keep them on repeat throughout the holidays.
Ingredients:
Embarking on our culinary journey requires just the right ingredients! Each component plays its part beautifully in creating those unforgettable Eggnog Gooey Butter Bars.
- 1 box white cake mix. This is where the magic begins! The cake mix serves as the foundation for our crust—it’s quick, easy to work with, and provides delicious sweetness without requiring complex measurements or additional ingredients. When selecting your cake mix, opt for one without unnecessary additives or preservatives for a cleaner flavor profile. You can choose any brand you trust; just remember that this box will offer both structure and sweetness to our bars.
- 1/2 cup (1 stick) butter (melted). The melted butter is crucial for achieving that rich flavor and tender texture we’re looking for in our crust. It binds our dry ingredients together while providing moisture and richness essential for baking. Always choose unsalted butter so you can control the saltiness in your recipe better. This step is non-negotiable; if you skip melting it first, you’ll end up with lumps instead of a smooth dough!
- 1 egg. An egg acts as a binding agent here—bringing everything together and adding moisture to our crust while contributing to its overall structure. When incorporating eggs into your doughs or batters, always use large eggs at room temperature if possible; this helps them mix more evenly into your mixture.
- 1 (8 oz pkg) cream cheese (softened). This ingredient is what makes our filling luxuriously creamy! Softened cream cheese blends beautifully into our batter without leaving any lumps behind. Make sure it’s at room temperature before mixing; otherwise, you’ll struggle to achieve that silky smooth consistency we crave in these bars.
- 3 eggs. Similar to our earlier egg addition but these contribute to the richness and structure needed for our gooey filling! They add moisture while helping create that delightful custard-like texture when baked—absolutely paramount for achieving that ooey-gooey center.
- 1/2 tsp vanilla extract (alcohol-free) & 1 tsp vanilla extract. Vanilla is one of those magical ingredients that enhance all other flavors present in your dish! Using both alcohol-free vanilla extract allows everyone—including those who avoid alcohol—to enjoy every bite while still ensuring depth and complexity in flavor thanks to its aromatic qualities.
- 1/4 tsp ground nutmeg. Nutmeg brings warmth and an exquisite aromatic quality reminiscent of holiday baking! Just a dash adds depth—a little goes a long way here since nutmeg can easily overpower other flavors if used excessively.
- 1 (16 oz box) powdered sugar. Essential for sweetness! Powdered sugar dissolves easily into liquids which means it will seamlessly blend into your filling without creating any graininess; plus, it helps achieve the delightful gooey texture we desire.
- 1/4 cup eggnog. Of course, we can’t forget about eggnog itself—it’s what makes these bars uniquely festive! Use store-bought or homemade eggnog depending on how adventurous you’re feeling; either way it’ll provide moisture alongside its iconic flavor profile full of spices like cinnamon and clove.
- 1/4 cup butter (melted) again ensures richness in our filling while maintaining that soft texture we’re after—just like before!
- Additional powdered sugar for dusting (optional) adds an elegant finishing touch! It’s optional but highly recommended because who doesn’t love a little extra sweetness on top? Dusting gives these bars an inviting appearance that’ll have everyone reaching for seconds.
Equipment You’ll Need:
Having the right tools at your disposal makes all the difference when creating something wonderful like these Eggnog Gooey Butter Bars! While they might not be ingredients, think of them as essential partners on this delicious journey.
- 13×9 baking pan – A sturdy pan ensures even baking throughout your dessert! If you’re using glass or ceramic pans instead of metal ones, just keep an eye on baking times as they often require longer due to different heat retention properties.
- Mixing bowls – You’ll need multiple sizes: one large bowl for combining crust ingredients and another medium-sized bowl specifically for making your creamy filling mixture from scratch!
- Stand mixer or hand mixer – A must-have when it comes time to whip up that silky-smooth filling! If you don’t own either option yet don’t fret—you can absolutely use elbow grease and whisk by hand too; just know it will take longer!
- Rubber spatula – This handy tool will help scrape down sides during mixing so nothing goes unblended—ensuring everything combines perfectly without wasting any precious batter!
- Measuring cups & spoons – Equipping yourself with accurate measurements guarantees consistent results from batch-to-batch which is crucial when baking desserts like these gooey bars where precision truly matters!
Preparing the Eggnog Gooey Butter Bars
Step 1: Prepping Your Oven & Pan
To kick things off right away let’s preheat our oven to 350 degrees F—the ideal temperature allowing those flavors within our bars’ crust develop beautifully while ensuring they bake evenly through each layer! While that’s happening line up your trusty 13×9 baking pan with foil—this simple step ensures effortless removal later on when it’s time slice into those decadent squares after cooling down completely post-baking session (and trust me—you’ll thank yourself later!). Make sure you extend those foil edges over sides as well so when they’re ready all you have left is lifting them straight out without fussing around trying get them out cleanly from deep within their confines—the ultimate goal here is convenience after all!
Once lined appropriately give it generous spritzes using cooking spray before setting aside momentarily; this extra precaution ensures no sticking occurs once we pour batter inside!
Step 2: Creating Our Crust
In a large mixing bowl combine together one box white cake mix along with half cup melted butter followed by one whole egg until they form thick cohesive dough consistency resembling cookie dough rather than wet batter—this should take roughly two minutes max using either stand mixer attachment paddle or spatula if going manual route instead! Press down evenly across bottom surface area within prepared pan until smooth layer forms without air pockets—that’s key here because unevenness could lead uneven cooking later down line leading torched edges whereas undercooked centers would ruin entire experience altogether…so take care here friends!
Step 3: Mixing Up That Irresistible Filling
Now let’s switch gears towards crafting luscious creamy filling starting off strong by placing softened cream cheese inside bowl mixer beating until achingly soft/smooth approximately one minute maximum (no lumps allowed!). Next gradually introduce three eggs individually ensuring full incorporation each time followed quickly thereafter by both types vanilla extracts alongside quarter teaspoon ground nutmeg—the aromatic properties released during blending shall elevate final product tenfold trust me folks—and finally let’s sift entire box powdered sugar directly atop before throwing two last elements: quarter cup eggnog & melted butter bringing us closer evermore towards divine creation awaiting completion soon enough…
Step 4: Pouring & Baking It All Together
Once everything’s combined seamlessly pour luscious mixture directly over crust layer previously formed then slide gently onto middle rack oven set timer around thirty-seven forty-five minutes max depending upon individual ovens’ quirks noting golden brown coloration forming atop surface layer serves as best indicator readiness status achieved perfectly balanced outcome expected thereafter—the jiggle whilst moving should feel comforting yet firm indicating successful bake achieved thankfully resulting gooey delight awaits enjoying momentarily ahead…
Stay tuned as we’ll dive deeper into chilling methods next alongside final touches before indulging fully into those heavenly slices awaiting discovery ahead shortly thereafter…
Step 5: Pouring the Creamy Filling
Now that your crust is ready and resting comfortably in the pan, it’s time to turn your attention to that luscious eggnog filling—a truly magical blend that will transform these bars into something extraordinary. In a stand mixer, start by beating the softened cream cheese until it’s creamy and smooth, which should take about a minute. This step is non-negotiable because achieving that silky texture is what will give your bars their signature gooeyness. Once the cream cheese is perfectly whipped, it’s time to introduce the eggs. Add them in one at a time, ensuring you beat well after each addition—this process not only incorporates air into the mixture but also helps create a light and fluffy filling that contrasts beautifully with the dense crust.
Next, add both the alcohol-free vanilla extract and regular vanilla extract for that aromatic sweetness that brings everything together. And let’s not forget about the nutmeg; just a hint can elevate your filling from ordinary to sublime! The nutmeg adds warmth and depth, evoking memories of holiday gatherings. After mixing in these ingredients, it’s crucial to sift in the entire box of powdered sugar. This step ensures there are no lumps in your filling, resulting in a velvety overall texture that glides smoothly over your crust. Finally, stir in the eggnog and melted butter until everything is perfectly incorporated. Picture this: as you pour this golden concoction over your crust, you’re creating an irresistible layer of rich flavor that will make every bite feel like a warm hug.
Step 6: Baking to Perfection
With your crust prepped and topped with that divine filling, it’s time to bake these Eggnog Gooey Butter Bars to perfection. Preheat your oven to 350 degrees Fahrenheit if you haven’t done so yet—this temperature is absolutely paramount for achieving just the right balance between a slightly crisp top and a gooey center. As you slide the pan into the oven, I want you to feel excitement bubbling within you; this is where magic happens! Bake them for approximately 37 to 45 minutes—the exact timing can vary based on your oven’s quirks. Keep an eye on them as they bake; you’re looking for a beautiful golden-brown color on top along with slight puffiness around the edges.
It’s essential to check for doneness carefully—while it might be tempting to pull them out at first sight of color, remember they should still jiggle just a bit when moved. This jiggle is completely normal and signals that while the outer edges have set beautifully, there’s still some gooey goodness waiting inside. The residual heat will continue cooking them even after they’re out of the oven, helping them firm up without losing that characteristic softness we adore so much about gooey butter bars. Trust me on this; waiting for just the right visual cues will ensure you’re rewarded with those melt-in-your-mouth textures we all crave!
Step 7: Cooling Down
Once those gorgeous bars are out of the oven and cooling on your countertop, it’s important not to rush this step—patience is truly key here! Allowing them to cool completely for at least an hour lets all those flavors meld together beautifully while giving structure to your bars. As they sit, they’ll transition from being wobbly treasures straight from the oven to more stable squares that hold their shape when cut. You’ll find yourself entranced by their heavenly aroma wafting through your kitchen—this scent alone can bring back cherished memories of holiday festivities and family gatherings.
After an hour has passed—and I know it feels like an eternity—you’ll want to pop those bars into the refrigerator for around two hours. You see, chilling does wonders! It helps firm up not only the filling but enhances every single flavor within those layers. When cold, these bars become even more luscious as they develop an almost creamy consistency that’s simply out of this world. Plus, slicing them becomes much easier when they’re chilled; nobody wants messy edges or squished corners when serving these beauties! So take a deep breath and let them rest; I promise you it’ll be worth it!
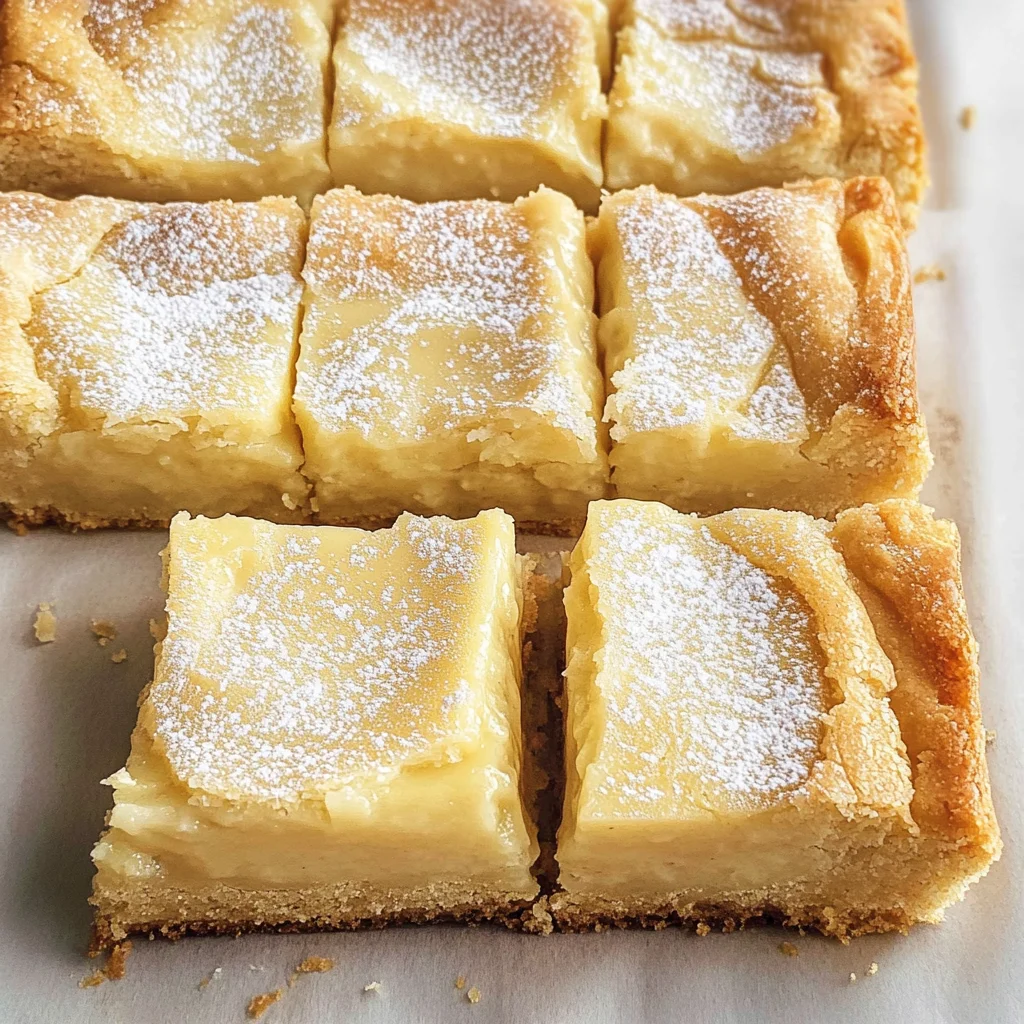
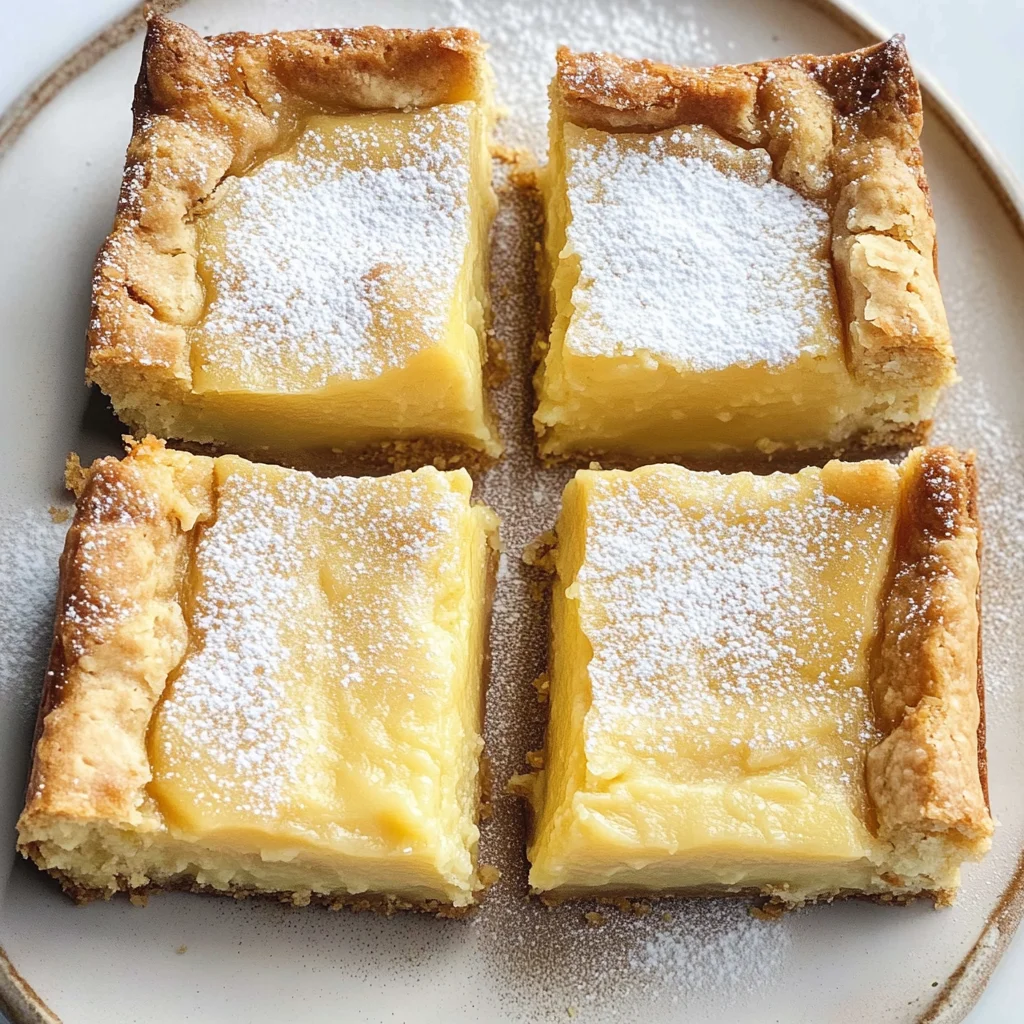
Step 8: Slicing Into Squares
Now comes one of my favorite moments—the grand unveiling! After those two long hours have finally elapsed (I know you’ve been eagerly waiting!), take out your Eggnog Gooey Butter Bars from the fridge and behold their transformation! Carefully lift them out using the foil overhang—this little trick makes removing them from the pan so much easier than wrestling with sticky corners or breaking apart delicate edges.
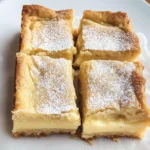
Place them on a cutting board and grab a sharp knife; trust me when I say having a sharp knife will make all the difference in achieving clean cuts without disturbing those beautiful layers you’ve worked so hard on! As you slice through these bars, you’ll hear that satisfying crunch of crust followed by resistance as you reach through the delectable gooey filling—it’s music to any baker’s ears! For presentation purposes—or just because it’s utterly delightful—dust each square lightly with powdered sugar before serving if you’d like. It adds such a festive touch while reminding everyone just how special these treats are.
Conclusion:
As we wrap up this joyous journey through the making of your Eggnog Gooey Butter Bars, I can’t help but feel giddy with excitement! From the moment those fragrant spices waft through your kitchen to the rich creaminess that melts in your mouth with every bite, this recipe captures the essence of holiday warmth and comfort. It’s not just about baking; it’s about creating memories filled with laughter and love shared over something sweet. The combination of buttery crust and eggnog-infused filling is undeniably enchanting—it feels like wrapping yourself in a warm blanket on a chilly winter evening.
These bars are truly a must-try not only for their delightful taste but also for the sheer joy they bring during preparation! Whether it’s a festive gathering or just an ordinary weekday treat, watching these gooey delights rise in your oven is like magic unfolding right before your eyes. Imagine pulling them out as golden-brown beauties, their intoxicating aroma filling every corner of your home; it’s an experience that beckons friends and family alike to gather around and share in this culinary delight.
For serving suggestions, picture enjoying one alongside a steaming cup of spiced chai or perhaps even indulging in one while cozied up with your favorite book—a perfect afternoon escape! And if you’re feeling particularly adventurous, why not pair these scrumptious bars with some vanilla ice cream? Or perhaps drizzle them with warm caramel sauce—each variation will take your experience to another level of blissful decadence.
Feeling adventurous? This recipe is wonderfully adaptable! You could infuse different spices—think cinnamon or even ginger—to give it an unexpected twist! Perhaps add some chopped pecans or walnuts into the filling for added crunch. The possibilities are endless! I wholeheartedly encourage you to experiment and make this recipe your own; after all, cooking is about expressing love through flavors! So go ahead—bake these delightful Eggnog Gooey Butter Bars, share your experiences with friends and family, and let me know how they turn out; I’d love to hear all about it!
Eggnog Gooey Butter Bars
Indulge in the festive delight of Eggnog Gooey Butter Bars! These creamy, luscious treats combine the rich flavors of eggnog with buttery sweetness, creating a dessert that perfectly captures the spirit of the holiday season. With a soft, chewy crust and an irresistibly gooey filling, these bars are sure to evoke warmth and joy during gatherings with family and friends. The delightful blend of nutmeg and vanilla elevates this dessert to new heights, making it a must-have on your holiday dessert table. Easy to make and even easier to love, these Eggnog Gooey Butter Bars provide the perfect sweet escape for cozy nights or festive celebrations.
- Prep Time: 15 minutes
- Cook Time: 40 minutes
- Total Time: 55 minutes
- Yield: Approximately 16 servings 1x
- Category: Dessert
- Method: Baking
- Cuisine: American
Ingredients
- 1 box white cake mix
- 1 stick (1/2 cup) unsalted butter, melted
- 4 large eggs (1 for crust + 3 for filling)
- 8 oz cream cheese, softened
- 1/4 cup eggnog
- 2 tsp alcohol-free vanilla extract
- 1/4 tsp ground nutmeg
- 16 oz powdered sugar
Instructions
- Preheat oven to 350°F (175°C). Line a 13×9" baking pan with foil and spray with cooking spray.
- In a large mixing bowl, combine cake mix, melted butter, and 1 egg until dough is formed. Press into the bottom of the prepared pan.
- In another bowl, beat cream cheese until smooth. Add remaining eggs one at a time, mixing well after each addition. Then mix in eggnog, both vanilla extracts, nutmeg, and sifted powdered sugar until fully blended.
- Pour filling over the crust evenly and bake for 37-45 minutes until golden brown but still slightly jiggly in the center.
- Cool for an hour then refrigerate for at least two hours before slicing into squares.
Nutrition
- Serving Size: 1 bar (approximately 70g)
- Calories: 230
- Sugar: 22g
- Sodium: 180mg
- Fat: 10g
- Saturated Fat: 6g
- Unsaturated Fat: 4g
- Trans Fat: 0g
- Carbohydrates: 32g
- Fiber: <1g
- Protein: 3g
- Cholesterol: 50mg