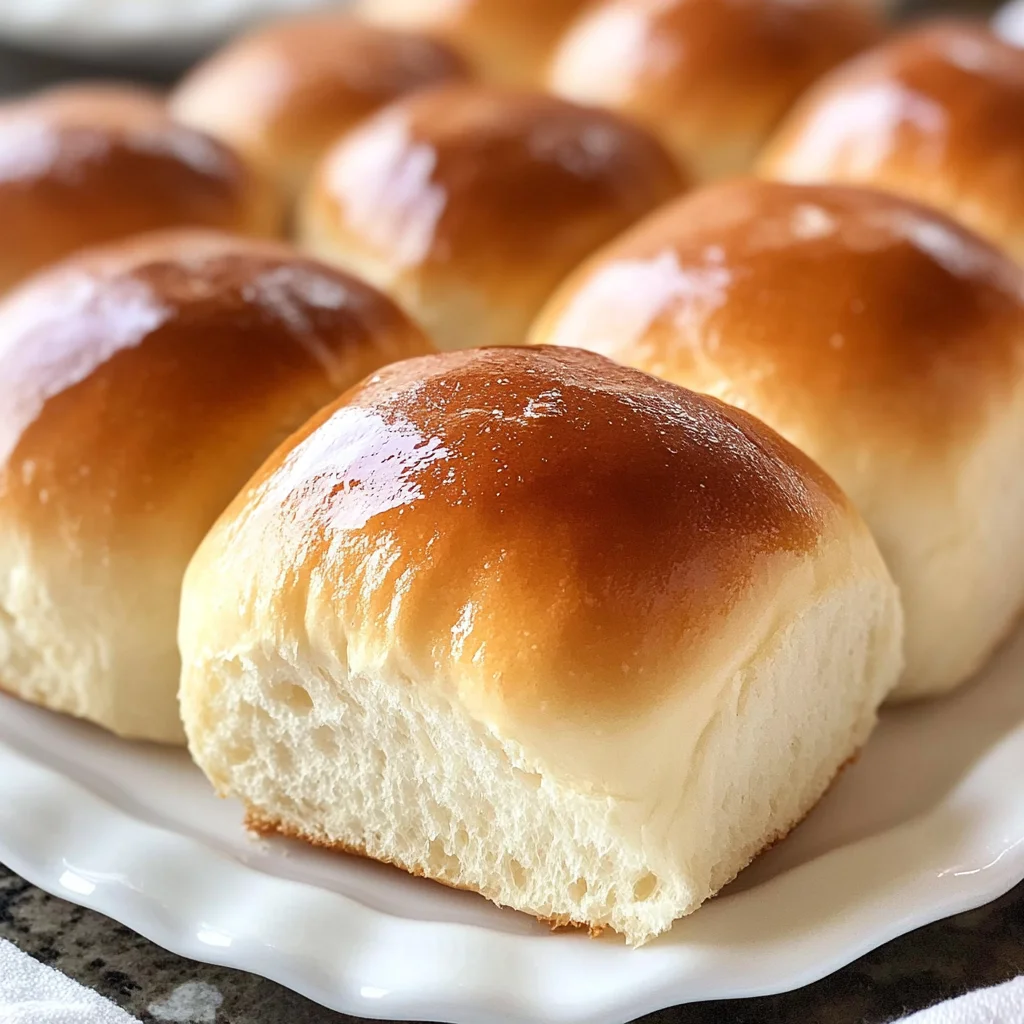
Easy Bread Machine Dinner Rolls
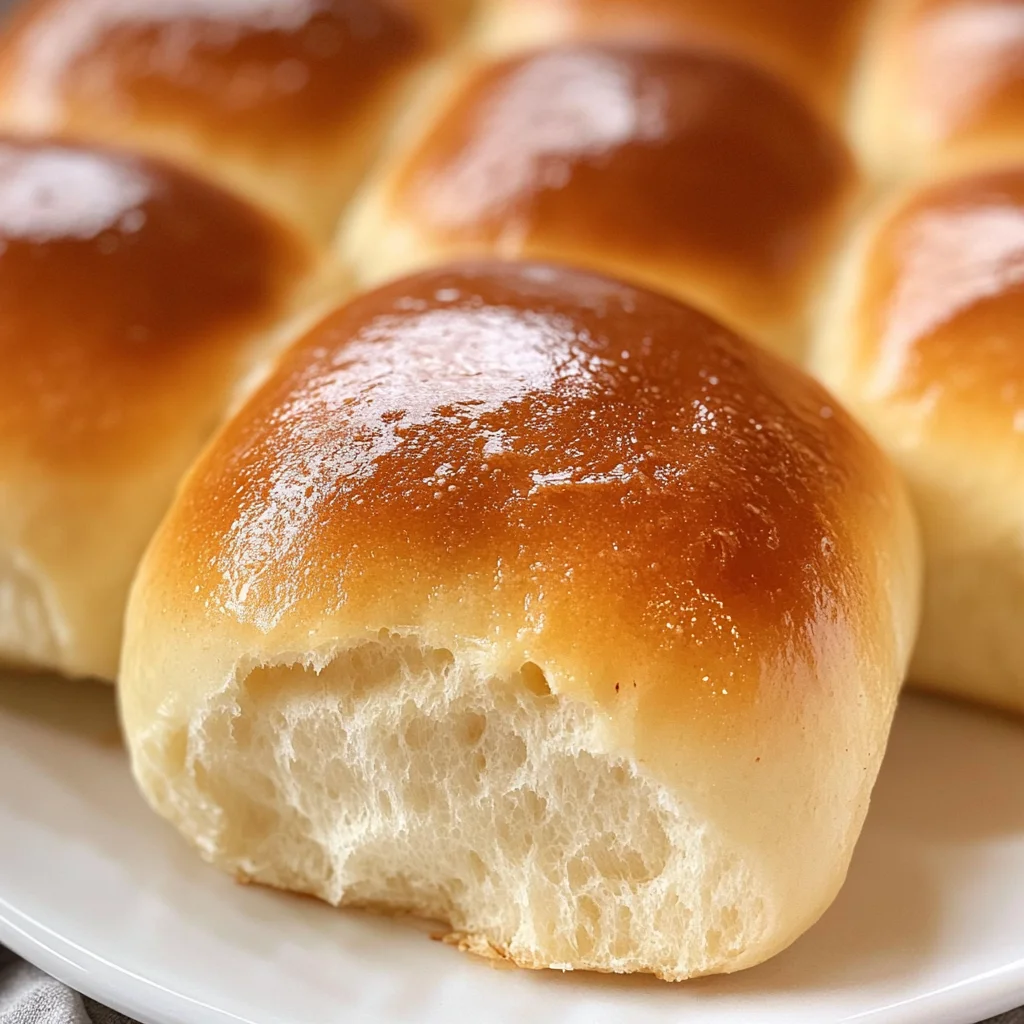
There’s something utterly enchanting about the aroma of freshly baked bread wafting through your home, isn’t there? It’s like an embrace from a warm friend, enveloping you in a sense of comfort and belonging. When I think about my Easy Bread Machine Dinner Rolls, I’m reminded of family gatherings where the air was thick with laughter, stories, and the delightful sound of tearing into soft, pillowy rolls. These rolls are not merely a side dish; they’re a cherished tradition that brings people together around the dinner table. Imagine biting into one—its golden crust giving way to a soft, fluffy interior that practically melts in your mouth. That’s what you can expect with this recipe, and I promise you, it’s as straightforward as it is rewarding!
What makes these Easy Bread Machine Dinner Rolls so special? Well, let me tell you: it’s all about convenience combined with homey goodness. Using a bread machine simplifies the process while still allowing for that homemade touch we all crave. You get to enjoy the rituals of baking without spending hours in the kitchen or worrying about kneading dough by hand. The bread machine takes care of that for you! This means more time to catch up with friends or simply enjoy a quiet moment while your rolls rise to perfection, transforming simple ingredients into something truly extraordinary. Trust me; once you experience the joy of these rolls fresh out of the machine, you’ll be hooked!
Easy Bread Machine Dinner Rolls: Soft Pillows of Delight
Let’s dive into this delightful recipe together! Here’s how we can create these beautiful dinner rolls that will surely impress anyone who gets to taste them.
Ingredients:
As we embark on this culinary journey together, each ingredient plays a vital role in creating those perfect dinner rolls you’ll undoubtedly fall in love with!
- 1 1/4 cups milk. Milk is an essential ingredient in our Easy Bread Machine Dinner Rolls; it provides moisture and richness that contributes to the rolls’ soft texture. When warmed slightly before adding to your mixture (around body temperature is perfect), it activates the yeast more effectively—this step is non-negotiable because it promotes optimal rising and fluffiness in your rolls. If you’re looking for alternatives due to dietary restrictions or preferences, almond or oat milk work wonderfully too; just ensure they are unsweetened varieties for best results.
- 3 cups strong flour. Strong flour, often referred to as bread flour due to its higher protein content compared to all-purpose flour, is crucial for developing gluten structure within our rolls. This gluten gives our dinner rolls their characteristic chewiness and helps them rise beautifully during baking. When measuring flour, spoon it into your measuring cup instead of scooping directly from the bag—this avoids compacting it and ensures you don’t end up with dense rolls.
- 3 tablespoons granulated sugar. Sugar isn’t just for sweetness here; it acts as food for our yeast during fermentation. As the yeast consumes sugar, it produces carbon dioxide gas that helps our dough rise dramatically! This process creates those lovely air pockets we adore when we bite into these rolls. If you’re looking for healthier alternatives, feel free to use honey or maple syrup; just remember that liquid sweeteners may require slight adjustments in other liquid ingredients.
- 1 teaspoon salt. Salt is absolutely paramount in enhancing flavor throughout our bread machine dinner rolls—it brings out the inherent flavors of every ingredient harmoniously! However, it’s essential to add salt at the right time; if added directly on top of yeast at first mix (without being dissolved), it can inhibit yeast activity and result in flat rolls without those delightful rises.
- 2 tablespoons melted butter. Butter adds richness and flavor while also contributing to that desirable tender crumb texture we seek in dinner rolls. By melting it beforehand and letting it cool slightly before adding (to avoid cooking off any yeast), you’re ensuring that every bite exudes warmth and buttery goodness—a comforting hug on your palate! For a dairy-free option, consider using coconut oil or vegan margarine.
- 1 package active dry yeast (equivalent to 2 1/4 teaspoons). Yeast is the star performer here! It’s what transforms our humble mixture into something magical by fermenting sugars and producing gases—this is where our fluffy texture comes from! Make sure your yeast is fresh; old yeast won’t give you any rise and could result in sad little rocks instead of light-as-air rolls.
Equipment You’ll Need:
Having the right tools makes all the difference when you’re crafting something so wonderful as these Easy Bread Machine Dinner Rolls! While ingredients are essential partners in this journey, so too are your trusty kitchen gadgets.
- Bread machine: This fantastic appliance is what makes this recipe incredibly easy! It kneads the dough perfectly while allowing time for fermentation without requiring constant supervision from us—talk about a win-win! If you don’t have one yet but love baking bread regularly, investing in this gadget will enhance your culinary adventures tremendously!
- Measuring cups & spoons: Precision is key when creating delicate baked goods like dinner rolls; using proper measuring tools ensures consistent results every time. Don’t skimp on quality here either—using dry measuring cups for flour/sugar versus liquid ones makes a world of difference!
- Spatula: A sturdy spatula helps us scrape down sides of bowls effortlessly while mixing ingredients together smoothly; having one on hand ensures no precious mixture goes untouched!
Now that we’ve gathered our ingredients and equipment let’s jump into making those exquisite Easy Bread Machine Dinner Rolls—you’re going to love how uncomplicated yet satisfying this process truly is!
Step 1: Mixing Ingredients Like Magic
Start by pouring warm milk into your bread machine pan—remember, not too hot but warm enough (about 110°F) because this warmth will coax our yeast from its dormant state into action! Next comes granulated sugar sprinkled over top; this activates everything beautifully as well as sweetens our dough subtly without overwhelming flavors later on. Then gently add melted butter—it should be cooled slightly so that it doesn’t harm those precious yeast cells before finishing with strong flour layered carefully over all other ingredients followed by salt sprinkled evenly atop last before finally crowning everything off with active dry yeast nestled gently within its own small well made at center surface area!
Step 2: The Art of Kneading
Once everything’s loaded up inside that marvelous bread machine ready for action—set it according instructions per manufacturer guidelines opting for “dough setting” which typically runs between 90 minutes depending on specific models utilized (don’t worry if yours differs!). This process involves kneading dough continuously until smooth elastic surface forms—that’s when gluten develops fully giving us strength needed hold shapes during rising phase ahead! Keep an eye on things during first few minutes though—if mixture seems too sticky add tiny spoonfuls extra flour gradually until desired consistency achieved which should resemble soft pliable ball rather than gooey mess clinging stubbornly bowl edges.
Step 3: First Rise – Patience Is Key
After kneading completes successfully (should take approximately 10 minutes), leave lid closed allowing dough relax undisturbed while it rises significantly within pan itself—this usually takes around an hour but could vary depending warmth environment conditions present around kitchen space at end day! You’ll notice surface expands noticeably doubling volume size overall making room fluffy goodness inside each roll waiting patiently emerge later on plate soon enough—I assure you seeing transformation unfold will fill heart joy anticipation alone!
Step 4: Shaping Into Rolls
Once dough has risen adequately remove from pan gently onto lightly floured countertop avoiding excess pressure applied onto risen areas since want preserve airy bubbles formed throughout initial stages too much pushing down will deflate efforts made prior creating lovely light airy textures desired ultimately achieving great success outcome sought after consistently across batches produced hereafter… Divide generously portioned pieces roughly equal sizes rolling each into small balls shape before placing them closely next one another within greased baking dish—it’s okay if they touch slightly since they’ll expand further during second rise phase leading delightful interconnectedness shared amongst community spirit behind every bite enjoyed later together over meal times spent fondly reminiscing memories shared past events unfolded alongside delicious bread baked fresh today awaiting tasting moments ahead soon thereafter planned ahead ultimately culminating joyous occasion celebrating simple pleasures life brings unexpectedly daily basis through homemade items prepared lovingly kitchens everywhere around world today still thriving vibrancy energy imparted upon experiences linger long after served plates cleared away following happy gatherings concluded thoughtfully among loved ones always cherished dearly inside hearts forevermore…
Now get ready because soon enough these incredible Easy Bread Machine Dinner Rolls will transform ordinary meals into extraordinary feasts filled laughter joy shared through flavors experienced collectively enjoying nurturing bonds forged throughout culinary adventures embarked upon together bringing everyone closer than ever imagined possible…
The Magic of Making Easy Bread Machine Dinner Rolls
Baking homemade bread is like wrapping your kitchen in a warm hug; it fills the air with an utterly intoxicating aroma that brings everyone running. If you’ve ever wondered how to conjure up that delightful experience without turning on your oven for hours, let me introduce you to my beloved Easy Bread Machine Dinner Rolls. This recipe is not just a collection of ingredients and steps; it’s a heartfelt invitation to create something beautiful that will grace your table with love and laughter. Trust me, once you embark on this bread-making journey, you’re going to cherish every moment spent kneading, rising, and finally tasting those fluffy rolls.
Step 5: Embrace the Yeast – Activation Time!
Now that we have our ingredients ready, it’s time to bring our yeast to life! In a small bowl, combine the milk—1 1/4 cups—measured at about 110°F (warm but not too hot to touch) with the active dry yeast. Stir gently until it’s all combined and let it sit for about 5-10 minutes. This step is absolutely crucial because activating the yeast ensures that it blooms properly, releasing carbon dioxide and creating those delightful pockets of air that make our rolls light and airy. You’ll know it’s ready when you see a frothy layer forming on top, like a soft cloud resting above your mixture—a sign of happy yeast working its magic!
Step 6: The Dough Come Together
Once our yeast has come alive, it’s time for the symphony of flavors to unite in the bread machine. Carefully pour in the activated yeast mixture into the machine’s baking pan. Next, add 3 cups of strong flour, which is essential for structure—think of it as the backbone of our rolls—followed by 3 tablespoons of granulated sugar for sweetness and 1 teaspoon of salt to balance out those flavors. Finally, drizzle in 2 tablespoons of melted butter, which adds richness and contributes to that beautiful golden crust we all adore. Close the lid and select the dough setting on your bread machine, which typically takes about an hour and a half. Don’t rush this step because allowing time for mixing ensures everything comes together cohesively—this is when we begin building texture!
Step 7: The Transformative Power of Rising
After your dough has mixed thoroughly in the bread machine, it’s time for one of my favorite parts—the rising! Once the cycle is complete, open that lid and take a moment to appreciate how much larger your dough has become; it should have doubled in size and feel soft and elastic when you poke it gently with your finger. This rise happens due to fermentation; as our yeast consumes sugars from the flour, it releases carbon dioxide gas causing those lovely bubbles. Think about this—the longer you allow your dough to rest after kneading or mixing (even if it’s just an extra few minutes), the more flavor develops. If possible, take out your dough gently onto a floured surface—this is where you’ll shape each roll—and don’t forget to handle it lovingly; overworking can deflate those precious bubbles we’ve cultivated!
Step 8: Shaping Your Rolls – A Labor of Love
Now comes the fun part—shaping! With floured hands (to prevent sticking), divide your dough into equal pieces; I recommend cutting them into 12 pieces for perfectly sized rolls. Gently stretch each piece into a smooth ball by tucking in edges toward the center—this creates surface tension which helps them rise beautifully later on. Place these adorable little balls onto a greased baking dish or lined baking sheet—make sure they’re nestled close but not touching too much because they need space to grow even bigger! Cover them lightly with a clean kitchen towel or plastic wrap (a cozy blanket for our rolls!) and let them rise again for another 30 minutes or so until they puff up like little clouds. Watching them grow during this time is magical; patience here pays off tremendously as each roll transforms into an airy delight.
Final Touches: Baking Your Perfect Easy Bread Machine Dinner Rolls
With our rolls beautifully risen and ready for their grand debut in the oven, we’ll move on to ensure they bake to perfection.
Step 9: Baking – The Golden Moment
Preheat your oven to 375°F (190°C). This is crucial because we want that heat evenly distributed throughout as soon as we place our rolls inside—creating an environment where they can puff up even more while developing that gorgeous golden-brown crust we all crave. Bake them for approximately 16-20 minutes, but keep an eye on them after about 15 minutes; every oven varies slightly! You want them golden brown on top and if you tap them lightly on the bottom with your finger, they should sound hollow—this means they’re done! The aroma wafting through your home will be utterly divine—it’s like having culinary magic happening right before your eyes.
Once baked, remove them from the oven and let them cool slightly before serving—you can brush them with a bit more melted butter at this stage if you’re feeling indulgent! These rolls are best enjoyed warm from the oven but can also be stored covered at room temperature for up to two days (though I promise they won’t last that long!).
And there you have it—your very own batch of Easy Bread Machine Dinner Rolls waiting to elevate any meal into something extraordinarily special. Whether you’re hosting friends or simply enjoying dinner with family, these rolls are bound to steal hearts—and possibly become a cherished tradition in your home just as they have in mine! Happy baking!
Storage and Enjoyment Tips for Your Easy Bread Machine Dinner Rolls
And just like that, your kitchen is filled with the tantalizing aroma of freshly baked dinner rolls! There’s nothing quite like pulling these fluffy beauties from the bread machine, their golden tops glistening in the light, inviting you to take that first warm bite. But wait! Before you dive in, let’s talk about how to keep this delightful goodness around for as long as possible, ensuring every bite is just as soft and scrumptious as when they first emerged.
Storing Leftover Easy Bread Machine Dinner Rolls
Once you’ve enjoyed your feast of Easy Bread Machine Dinner Rolls, you’ll want to think about how to store any leftovers (if there are any!). The best way to keep these rolls fresh is by placing them in an airtight container at room temperature. This keeps them cozy and prevents them from drying out. If stored properly, they can last for up to three days—though I have a feeling they might disappear much sooner than that! For maintaining their quality, consider placing a slice of bread in the container with them; this little trick helps keep moisture in and ensures your rolls remain irresistibly soft. After a day or two, they may lose a bit of that fresh-baked charm, but fear not! A quick reheating in the oven or microwave can revive their original fluffiness. Simply pop them in the oven at 350°F for about 5-10 minutes or use the microwave for around 10-15 seconds. Trust me on this—there’s truly nothing better than a warm roll straight from the oven!
Freezing Easy Bread Machine Dinner Rolls for Later
If you find yourself with a surplus of these delicious rolls—or if you’re simply planning ahead—you’ll be thrilled to know that freezing them is a fantastic option. To freeze your rolls properly, allow them to cool completely after baking. Once cooled, wrap each roll individually in plastic wrap or aluminum foil and place them into a freezer-safe bag or container. This way, they’ll keep well for up to three months without losing too much of their delightful texture. When you’re ready to enjoy one (or more!), there’s no need to thaw; simply pop it directly into the oven at 350°F for about 10 minutes. The convenience factor here is absolutely paramount! You can have warm, homemade rolls anytime you desire—perfect for unexpected guests or those cozy weeknight dinners. It’s like having a little piece of homemade happiness waiting for you!
Easy Bread Machine Dinner Rolls
Experience the joy of homemade bread with these Easy Bread Machine Dinner Rolls! Soft, fluffy, and incredibly simple to make, these delightful rolls are perfect for any meal. The aroma of freshly baked bread fills your home, creating a warm atmosphere that invites family and friends to gather around the table. With just a few basic ingredients and the magic of your bread machine, you can create rolls that boast a golden crust and a tender interior. Whether served alongside hearty soups, vibrant salads, or as a standalone treat with butter, these dinner rolls are sure to become a beloved staple in your household.
- Prep Time: 15 minutes
- Cook Time: 20 minutes
- Total Time: 35 minutes
- Yield: Makes about 12 rolls 1x
- Category: Side
- Method: Baking
- Cuisine: American
Ingredients
- 1 1/4 cups warm milk (110°F)
- 3 cups strong flour (bread flour)
- 3 tablespoons granulated sugar
- 1 teaspoon salt
- 2 tablespoons melted butter (or coconut oil for dairy-free)
- 1 package active dry yeast (2 1/4 teaspoons)
Instructions
- Pour warm milk into the bread machine pan.
- Sprinkle sugar over the milk and gently add melted butter.
- Add strong flour on top, followed by salt and finally nestle the yeast in the center.
- Select the dough setting on your bread machine and start it.
- After dough rises (about 90 minutes), transfer to a floured surface.
- Shape into small balls and place them in a greased baking dish.
- Let rise again for about 30 minutes until puffy.
- Preheat oven to 375°F (190°C) and bake rolls for 16-20 minutes until golden brown.
Nutrition
- Serving Size: 1 roll
- Calories: 140
- Sugar: 2g
- Sodium: 130mg
- Fat: 3g
- Saturated Fat: 1g
- Unsaturated Fat: 2g
- Trans Fat: 0g
- Carbohydrates: 25g
- Fiber: 1g
- Protein: 4g
- Cholesterol: 5mg