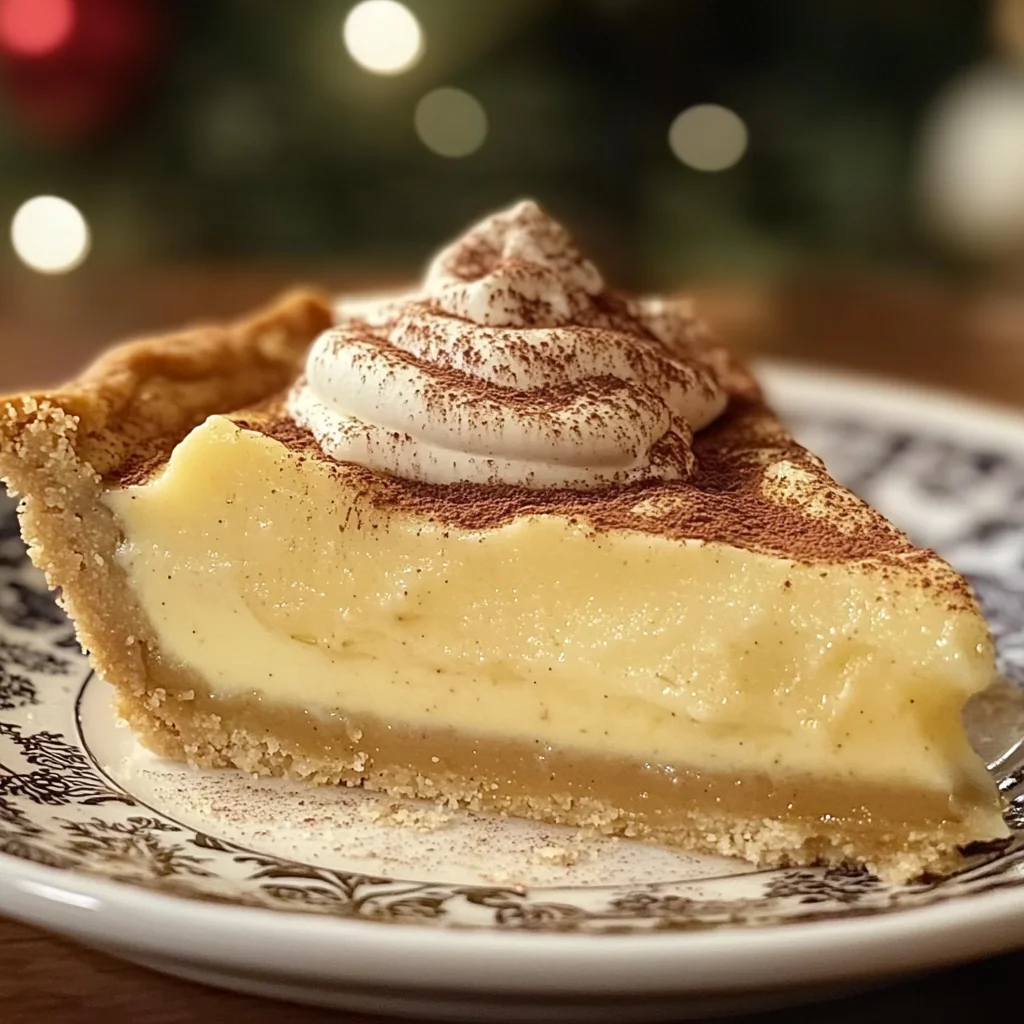
Christmas Eve Cinnamon Vanilla Custard
There’s something profoundly magical about the holiday season, a time when the air is thick with the scent of pine, and kitchens across the world transform into warm havens of comfort and joy. As I reflect on my favorite traditions, one dish always stands out: the Christmas Eve Cinnamon Vanilla Custard. This dessert isn’t just a recipe; it’s a cherished experience that draws family and friends together, evoking laughter and love around the table. With its buttery crust cradling a velvety custard infused with warming cinnamon and pure vanilla, each bite offers a symphony of flavors that feels like a hug from the inside out. It’s more than a dessert; it’s an invitation to slow down, savor, and celebrate the moments that matter most.
Every year as December rolls in, I find myself captivated by the nostalgia this custard brings—memories of late-night baking sessions with my grandmother filling our home with sweet aromas. It’s no surprise that this Christmas Eve treat has become a beloved staple in my family. The blend of creamy custard and festive spices creates a comforting atmosphere that resonates during the chilly holiday nights. I promise you; once you taste this delightful creation, it will find a special place in your heart—and on your holiday dessert table for years to come.
Christmas Eve Cinnamon Vanilla Custard: A Festive Delight Worth Sharing
This recipe is not only easy to make but also incredibly rewarding, bringing joy to those who partake in its lusciousness. The marriage of creamy cinnamon-vanilla custard with a flaky buttery crust is simply irresistible! So let’s roll up our sleeves and embark on this delicious journey together. You’ll see how every step unfolds effortlessly if you follow along closely.
Ingredients:
As we prepare to create this spectacular custard, let’s take a moment to appreciate each ingredient that plays a significant role in bringing this dessert to life. Every component adds its unique character, making our Christmas Eve Cinnamon Vanilla Custard truly extraordinary.
- 1 1/4 cups all-purpose flour. This flour serves as the foundation for our buttery crust, providing structure while remaining tender when baked. When selecting flour, aim for high-quality all-purpose flour; it should feel soft and powdery between your fingers. If you’re feeling adventurous or want extra flavor, consider using whole wheat pastry flour instead—it’ll give your crust a lovely nutty taste!
- 1/2 cup cold unsalted butter, cut into small cubes. The temperature of your butter is crucial here—cold butter helps create those flaky layers we adore in pie crusts by preventing gluten formation during mixing. Unsalted butter allows you to control the saltiness of your pie better; if you prefer salted butter, simply reduce any additional salt added elsewhere in the recipe. Always opt for good-quality butter as it imparts rich flavor that elevates our dessert.
- 2-3 tablespoons ice water. This may seem simple, but trust me when I say that adding ice water is essential for achieving the right texture in our dough. Cold water helps keep the butter solid while mixing—this is non-negotiable! Start with 2 tablespoons and add more only if necessary; you want just enough moisture for the dough to come together without becoming gummy.
- A pinch of salt. Salt is often overlooked but plays an absolutely paramount role in enhancing flavors throughout this recipe. It balances sweetness and elevates all other ingredients’ profiles—in this case, it will bring out the richness of our custard beautifully.
- Optional: 1 tablespoon sugar for a slightly sweet crust. If you’re someone who enjoys just a hint of sweetness in their crust (and who doesn’t?), adding sugar will make it slightly more inviting! Choose granulated sugar here—it melts easily during baking and contributes subtle caramel notes without overpowering your dish.
- 3 large eggs. Eggs are vital to achieving that silky-smooth texture we crave in custards—they provide structure while also enriching flavors with their natural creaminess. When choosing eggs, go for fresh ones; free-range or organic options will yield even better results as they typically have richer yolks.
- 1/2 cup granulated sugar. We’ll use granulated sugar not only to sweeten but also to aid in achieving an airy consistency when whisked with eggs—a process known as emulsification which incorporates air bubbles into our mixture for lightness! Plus, sugar helps balance out any potential bitterness from spices like cinnamon.
- 1 1/4 cups heavy cream. When it comes to creating indulgent desserts like custards or sauces, heavy cream is liquid gold! Its high-fat content ensures richness that makes every bite utterly intoxicating while contributing to that luscious mouthfeel we desire! For those looking for alternatives—coconut cream works well too if you’re avoiding dairy altogether.
- 2 teaspoons pure vanilla extract. This is where we infuse flavor magic into our custard! Pure vanilla extract has an incomparable depth compared to imitation versions; look for dark amber-colored extracts made from real vanilla beans—the aroma alone will have you dreaming!
- 1 teaspoon ground cinnamon. Ahh… cinnamon—the hallmark spice of cozy winter desserts! It brings warmth and familiarity while complementing vanilla perfectly here—trust me; this spice will wrap you up like your favorite blanket on chilly evenings!
- A pinch of salt (again). Once more we’re reinforcing flavors! Adding another pinch here ensures everything melds beautifully together without any excess sweetness clouding our palate.
Now that we’ve gathered all these wonderful ingredients let’s move forward together!
Equipment You’ll Need:
Before diving into making this delightful custard, let’s talk about some essential tools you’ll need on hand—these are your trusty companions throughout this culinary journey! Having the right equipment makes everything smoother—and trust me; you’ll appreciate how much easier it’ll be once we’re rolling!
- Mixing bowls (various sizes) – You’ll want at least two bowls: one for mixing your dry ingredients (flour) and another larger bowl for combining wet ingredients (eggs and cream). Having different sizes allows ease during preparation so you can avoid spills while getting organized!
- Pastry cutter or fork – This handy tool helps blend cold butter into flour seamlessly until you achieve that desired crumbly texture in your dough—a crucial part of crafting flaky crusts! If you don’t have one at hand—a fork or even clean fingers work wonders too!
- Plastic wrap – Essential for wrapping dough before chilling—it prevents moisture loss while keeping things tidy and neat in your fridge so everything stays fresh until you’re ready to roll it out later on!
- Pie dish (9-inch) – A classic choice here since we’re making a pie-style custard dessert! Opt for glass or ceramic dishes if possible—they distribute heat evenly while allowing easy visibility into how golden-brown everything looks through baking time!
With these tools prepped up nicely alongside our ingredient lineup—we’re officially ready to start creating something marvelous together!
Preparing the Christmas Eve Cinnamon Vanilla Custard
Step 1: Crafting Our Buttery Crust
First things first—let’s dive into crafting that flaky pie crust which serves as the perfect base for our luscious custard filling! Start by whisking together 1 1/4 cups all-purpose flour along with a pinch of salt (and optional sugar if you’d like) in a large mixing bowl until fully blended—this process ensures even distribution throughout your dough later on! Now comes one of my favorite parts: introducing cold unsalted butter cut into small cubes into our dry mix using either a pastry cutter or simply your fingers. The goal here is crucial—to work quickly so as not to melt any butter too much; we want those beautiful chunks intact because they’ll create steam pockets during baking which lead us toward flakiness galore!
Once you’ve achieved coarse crumbs resembling sand mixed with pebbles (it should be slightly crumbly yet still hold shape), gradually drizzle in 2 tablespoons ice water—mix gently after each addition until everything begins coming together cohesively without sticking excessively onto surfaces around us—it takes patience but trust me on this one: don’t rush through squeezing moisture back into dry bits! Form what resembles dough into an average-sized disc shape before wrapping tightly using plastic wrap before refrigerating at least half an hour—this rest period allows gluten relaxation resulting ultimately leads toward tenderness once baked later down road!
Step 2: Whisking Up Our Creamy Custard
With our chilled crust resting comfortably in its cool haven within refrigerator compartments nearby—it’s time now turning focus onto preparing sensational filling that’ll elevate each slice beyond mere satisfaction towards pure indulgence! In another large bowl—whisk together three large eggs alongside half cup granulated sugar until smoothened completely incorporating air bubbles seamlessly allows mixture volume increase noticeably over time too! Adding two teaspoons pure vanilla extract alongside one teaspoon ground cinnamon introduces aromatic warmth enveloping every corner creating familiar nostalgia reminiscent holidays past—all beautifully combined harmoniously awaiting what’s next!
Once these key players unite magnificently—gradually introduce liquid companion known as heavy cream (1 ¼ cups worth)—the richness here transforms everything further towards decadent territory whilst ensuring silky-smooth texture prevails overall too!! Gently whisk until fully combined showcasing glossy sheen forming atop surface indicating readiness ahead ensuring pinch additional salt enhances final taste profile balancing sweetness achieved earlier through egg-sugar combo ensuring nothing overpowers true essence shining through beautifully crafted masterpiece unfolding gracefully right now…
Step 3: Merging Crust & Filling
It’s time—the moment we’ve eagerly awaited arrives as we carefully remove chilled dough from frigid surroundings revealing wonderfully firm yet pliable mass we’d crafted earlier before rolling gently upon floured surface allowing expansion fit snugly within nine-inch pie dish waiting patiently nearby—a perfect frame finally taking shape before us!! Don’t forget trimming edges neatly around rim creating clean finish followed by crimping patterns offering visual charm alongside functionality securing contents inside firmly protecting all delicate goodness emanating forth thereafter…
Preheat oven now aiming towards gentle warmth setting temperature at 375°F (190°C)—our journey doesn’t end here though: lining crust interior surfaces using parchment paper filled generously with pie weights/dried beans prevents unwanted bubbling occurrence ensuring smooth flat surface remains intact throughout initial bake phase lasting approximately ten-twelve minutes allowing golden brown edges form gently first before removing weights subsequently returning bare shell back inside oven five more minutes until set completely cooling entirely prior proceeding final assembly steps ahead…
Step 4: Baking Your Creation
Here comes perhaps most exhilarating part watching transformation unfold closely—you’re just steps away from indulging delicious reward soon arriving shortly after taking place steadily over forty-five-fifty minutes within heated embrace reaching desired consistency visually confirming edges firmed up noticeably center retains slight jiggle signaling readiness thus far achieved successfully surrounding environment filled fragrant notes wafting freely inviting everyone gather round excited anticipation building rapidly now…
Once timer buzzes signaling completion rejoice briefly allowing pie cool wire rack undisturbed minimum two hours permitting residual cooking continue quietly happening meanwhile sensory experience elevates anticipation reaching new heights entirely!!!
And there we have it—the culmination of love poured forth across kitchen space transforming simple ingredients transformed ultimate celebratory dessert worthy sharing amongst loved ones gathering close by enjoying warm cups coffee/hot cocoa accompanying blissful slices shared merrily exchanging stories laughter reminding us why moments spent together hold such profound significance amidst festive celebrations ahead!!
So go ahead—you deserve treat yourself alongside company dear hearts stirring memories created anew through delightful culinary endeavors embracing joy wholeheartedly leading toward unforgettable experiences shaping future traditions year after year alike!!!
Step 5: Pouring in the Custard – The Heart of Your Creation
Now that your pie crust has cooled beautifully, it’s time to bring the star of the show to life: the custard filling. This step is where the magic truly happens, as you combine creamy richness with aromatic spices. First, gather that luscious egg mixture you prepared earlier; it should look silky and smooth, a promise of the delightful texture to come. Carefully pour this custard into the pre-baked pie crust. You want to do this gently to avoid splashing, which can create an unsightly mess and disrupt that perfect, creamy surface you’re aiming for.
As you pour, keep an eye on the filling level—it’s crucial not to overfill the crust! Leave about half an inch from the top edge; this will allow room for the custard to rise and set without spilling over during baking. Trust me on this; a spill can lead to a sticky situation in your oven! Once filled, give it a gentle shake or tap on the counter to release any air bubbles that might have formed. This ensures a smooth custard without those pesky holes that could detract from its beauty.
Step 6: Baking Your Custard – The Transformation
With your custard nestled safely within its buttery shell, it’s time to slide this masterpiece into the oven for baking at 350°F (175°C). Set your timer for about 45-50 minutes, but remember that every oven is unique; some might bake faster than others. The goal here is for the edges of your custard to firm up while leaving a slight jiggle in the center—that’s what makes it so deliciously creamy!
During this process, something incredible happens: the eggs coagulate while mingling with sugar and cream, creating a velvety texture that’s nothing short of transformative. It’s during this stage that patience becomes paramount; don’t rush in prematurely! You’ll know your custard is nearing readiness when you start to see tiny bubbles forming around the edges—this is a sign that it’s cooking beautifully. If you check too soon and find it underbaked, just close that door gently and let it work its magic a little longer.
Step 7: Cooling Down – Letting It Rest
Once those precious minutes are up and your kitchen is filled with an intoxicating aroma of cinnamon and vanilla—oh my goodness—you’ll carefully remove your custard pie from the oven. But hold on! This is where another important lesson in patience comes into play. This heavenly dessert needs time to cool down completely; I recommend letting it rest on a wire rack for at least two hours before slicing into it.
During cooling, you might notice how the center firms up just slightly more than when it first comes out of the oven—that’s exactly what we want! The residual heat continues cooking it gently without turning it rubbery or tough. And let’s be real—allowing it to chill also gives those flavors time to meld together harmoniously, enhancing every bite into a truly extraordinary experience. If you’re tempted to dive right in, hold back just a little longer—you’ll be rewarded with a more refined texture!
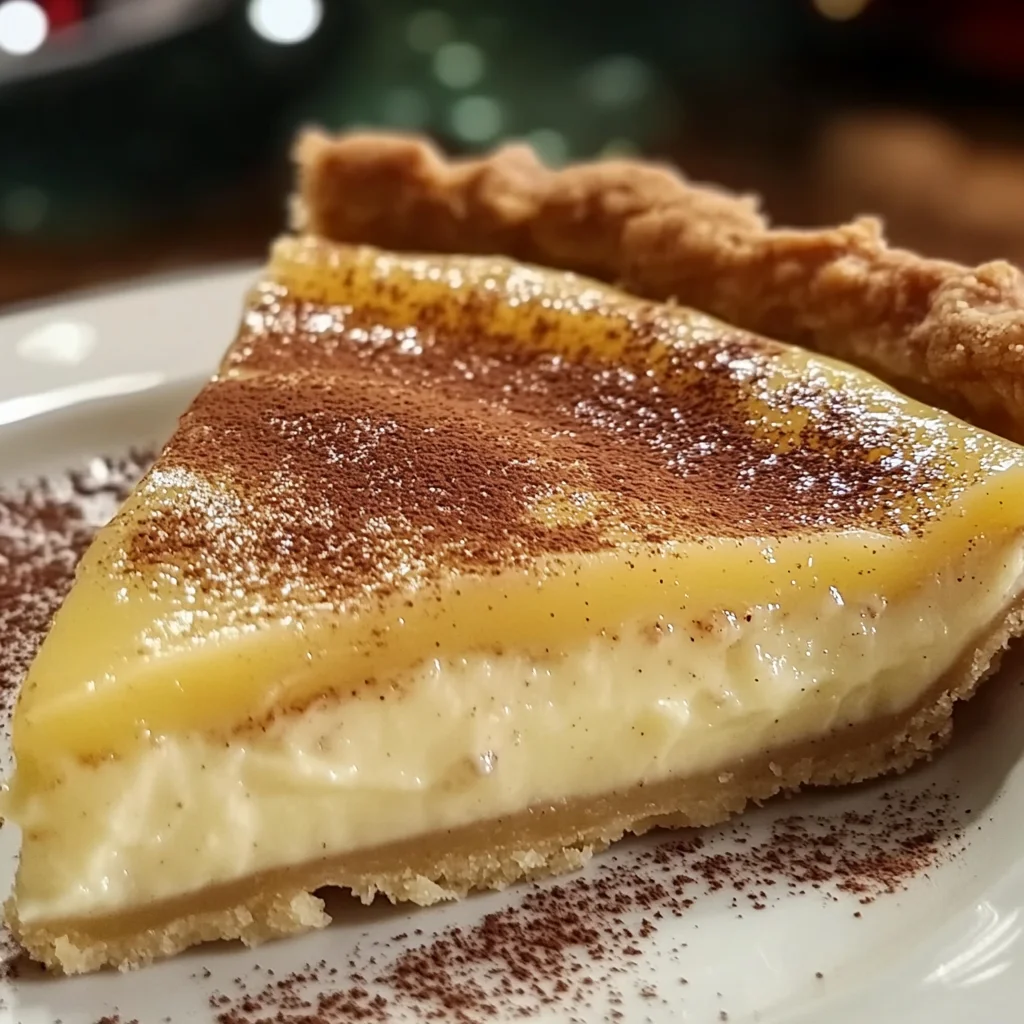
Step 8: Final Touches – Presentation Matters
After those long two hours have passed—and I promise they will be worth every second—it’s time for one of my favorite parts: serving up this stunning creation! Before slicing into your Christmas Eve Cinnamon Vanilla Custard, consider giving it an extra flourish with some homemade whipped cream or perhaps a subtle sprinkle of additional cinnamon on top. This not only adds visual appeal but also enhances those warm spice notes we love so much.
When you cut into your pie, take care with each slice—use a sharp knife dipped in hot water for cleaner cuts if necessary. A perfect slice should have that beautiful glossy filling glistening between layers of golden crust—a true feast for both eyes and palate! As you serve each piece alongside warm coffee or hot cocoa (trust me on this pairing), you’ll witness how everyone gathers around in awe at both its appearance and aroma—the atmosphere will be buzzing with excitement as they indulge in this festive delight.
Enjoying Your Christmas Eve Cinnamon Vanilla Custard
As you sit down with family or friends during this cozy holiday gathering, take a moment to savor not just each bite but also the joy that comes from sharing something so special. The combination of creamy custard enveloped by that buttery crust creates an unforgettable harmony of flavors sure to leave everyone smiling. So go ahead—slice generously and enjoy every blissful moment because this isn’t just dessert; it’s part of memories being created around your table!
And remember—this isn’t just about satisfying cravings; it’s about creating warmth and connection through food—a tradition I hope resonates deeply within you as well as within those lucky enough to share in this seasonal treat. Happy baking!
Storage and Enjoyment Tips for Your Christmas Eve Cinnamon Vanilla Custard
Now that you’ve crafted this incredible Christmas Eve Cinnamon Vanilla Custard, the excitement doesn’t have to end as you slice into its creamy, dreamy goodness. This dessert is not only a showstopper at your holiday gatherings but also remarkably easy to store for future enjoyment. Whether you’re planning to savor it alone or share it with friends, knowing how to preserve that silky custard will ensure every bite remains just as delightful as the first.
Storing Leftover Christmas Eve Cinnamon Vanilla Custard
To keep your custard fresh and delectable, it’s essential to store it properly. I recommend using an airtight container, which will help maintain its rich flavor and smooth texture while preventing any unwanted odors from infiltrating your dessert. Ideally, you’ll want to store it in the refrigerator, where it can happily reside for up to three days. Trust me on this: don’t rush the cooling process; letting it chill completely enhances the flavors, allowing those warm notes of cinnamon and vanilla to deepen beautifully. If you’re worried about maintaining that lovely texture, placing a piece of plastic wrap directly on the surface of the custard can help prevent any unsightly skin from forming. After a day or two in the fridge, don’t be surprised if the flavors evolve into something even more profound and harmonious—it’s like a little surprise waiting for you! When ready to serve, simply take it out and give it a gentle stir; enjoy it cold or at room temperature.
Freezing Christmas Eve Cinnamon Vanilla Custard for Later
If you find yourself with leftovers (or just want to prepare ahead!), freezing this custard is an excellent option that preserves its delightful essence. To freeze properly, allow your custard to cool completely before pouring it into a freezer-safe container—make sure it’s airtight! It can be frozen for up to two months without losing its luscious charm. When you’re ready to enjoy your custard again, simply thaw it in the refrigerator overnight before serving. The convenience of having this heavenly dessert on hand is truly wonderful; imagine pulling out a delightful slice right when you need a sweet treat after a long day! Plus, there’s something so rewarding about reclaiming those flavors from your freezer—it’s like having a little holiday magic waiting just for you.
Christmas Eve Cinnamon Vanilla Custard

Indulge in the festive spirit with our Christmas Eve Cinnamon Vanilla Custard, a creamy dessert that captures the essence of the holiday season. This delightful custard features a flaky buttery crust filled with a velvety mixture of eggs, heavy cream, and aromatic spices like cinnamon and vanilla. Each bite is a comforting embrace, reminiscent of joyful gatherings with family and friends. Perfect for holiday celebrations or cozy winter evenings, this custard pie is not just a treat—it’s an invitation to savor life’s sweetest moments together. Easy to make and utterly delicious, this recipe will surely become a cherished tradition in your home.
- Prep Time: 30 minutes
- Cook Time: 55 minutes
- Total Time: 1 hour 25 minutes
- Yield: Serves approximately 8 slices 1x
- Category: Dessert
- Method: Baking
- Cuisine: American
Ingredients
- 1 1/4 cups all-purpose flour
- 1/2 cup cold unsalted butter, cubed
- 2–3 tablespoons ice water
- A pinch of salt
- 3 large eggs
- 1/2 cup granulated sugar
- 1 1/4 cups heavy cream
- 2 teaspoons pure vanilla extract
- 1 teaspoon ground cinnamon
Instructions
- Preheat your oven to 375°F (190°C).
- In a mixing bowl, combine flour and a pinch of salt. Cut in cold butter until crumbly. Add ice water gradually until dough forms.
- Roll out the dough and fit it into a pie dish. Bake for about 10-12 minutes, then remove weights and bake for an additional 5 minutes until lightly golden.
- In another bowl, whisk eggs and sugar until smooth. Stir in heavy cream, vanilla extract, and cinnamon.
- Pour the custard filling into the pre-baked crust. Bake at 350°F (175°C) for 45-50 minutes or until set but slightly jiggly in the center.
- Cool on a wire rack for at least two hours before slicing.
Nutrition
- Serving Size: 1 serving
- Calories: 350
- Sugar: 25g
- Sodium: 170mg
- Fat: 24g
- Saturated Fat: 15g
- Unsaturated Fat: 8g
- Trans Fat: 0g
- Carbohydrates: 30g
- Fiber: 1g
- Protein: 6g
- Cholesterol: 120mg