Chickpea Salad
As I sit here, contemplating the vibrant hues of fresh vegetables and the wholesome goodness of chickpeas, I can’t help but feel a wave of nostalgia wash over me. This Chickpea Salad is not just a recipe; it’s an experience that transports me to sun-kissed Mediterranean shores with every bite. The crispness of the cucumbers, the juiciness of ripe tomatoes, and the aromatic embrace of fresh parsley create a symphony of flavors that is utterly intoxicating. It’s a dish that speaks to my heart—a beautiful marriage of freshness and simplicity that makes it perfect for any occasion, whether it’s a cozy lunch at home or a gathering with friends. Trust me when I say this salad is a revelation; it’s not just food; it’s nourishment for the soul.
When I first discovered this Chickpea Salad, I was captivated by its ease and versatility. It can seamlessly transition from a delightful side dish to a hearty lunch entrée—perfect for meal prep or those busy weeknights when you desire something quick yet satisfying. The best part? Each ingredient plays a vital role in crafting that perfect balance of flavor and texture. From the creamy richness of chickpeas to the sharp crunch of red onion, every component contributes to what I promise you will become one of your go-to recipes. Why is this salad so special? It’s all about celebrating wholesome ingredients without any fuss, making it accessible for everyone who wants to indulge in healthy eating without sacrificing taste.
Chickpea Salad: A Refreshing Mediterranean Delight
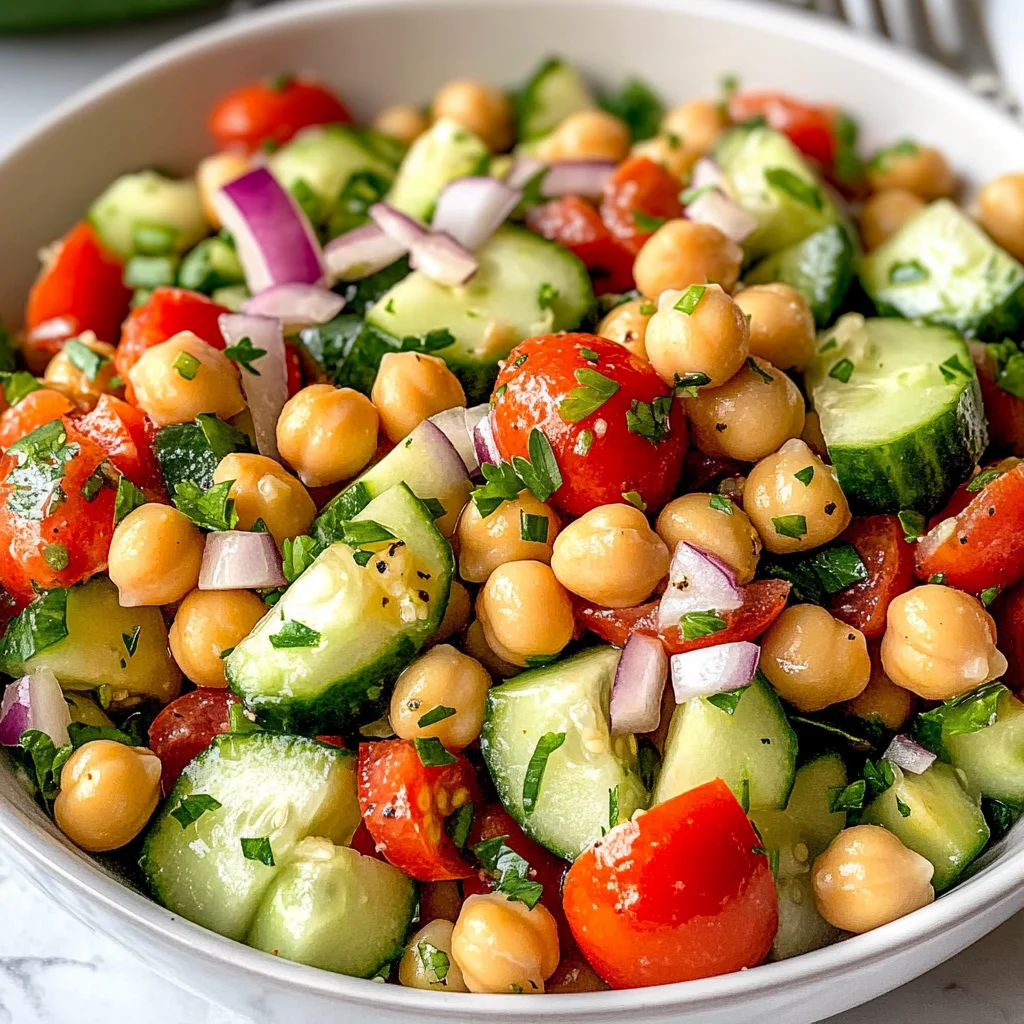
This Chickpea Salad is like a breath of fresh air on a warm summer day! Bursting with vibrant colors and flavors, it embodies everything wonderful about Mediterranean cuisine. Not only is it incredibly delicious, but it’s also packed with nutrients that will leave you feeling energized and satisfied. In just ten minutes, you can whip up this delightful dish that’s perfect for lunch or as a side at dinner. Let’s embark on this culinary journey together!
Ingredients:
As we dive into the ingredients for our Chickpea Salad, each element tells its own story and adds depth to our creation. Let’s celebrate these beautiful components together!
- 1 (15 oz) can chickpeas, rinsed and drained well. Chickpeas are often referred to as garbanzo beans, and they are the star of our salad! Not only do they provide a wonderful texture—creamy yet slightly firm—but they are also rich in protein and fiber, making them incredibly satisfying. Rinsing them well helps remove excess sodium from canned varieties while refreshing their flavor profile. If you prefer, you could use dried chickpeas soaked overnight and cooked until tender; however, canned ones save time without compromising quality.
- 2 cups chopped English cucumber (about 2/3 of 1 medium). English cucumbers are ideal for this salad because their thin skin doesn’t need peeling—so we get all those nutrients while enjoying their crunchy bite! They have fewer seeds than regular cucumbers, ensuring that your salad maintains its delightful crunch even after marinating in dressing. When selecting your cucumber, look for one that feels firm and has no blemishes; freshness is key here!
- 1 1/4 cups chopped Roma tomatoes (about 2). These tomatoes bring luscious juiciness and vibrant color to our dish! Roma tomatoes are particularly great because they have fewer seeds than other varieties and offer concentrated flavor, making them perfect for salads. When chopping them up, be sure to remove excess seeds if desired—this helps keep your salad from becoming watery over time while allowing their sweet essence to shine through.
- 1/4 cup chopped red onion. The red onion adds an essential sharpness that beautifully contrasts with the creamy chickpeas and sweet tomatoes. Finely chopping them ensures that each bite offers just the right amount of zing without overpowering the other flavors—it’s all about balance! If raw onion feels too strong for your palate, try soaking the chopped pieces in cold water for ten minutes before adding them to your salad; this will mellow their bite significantly.
- 3 Tbsp chopped fresh parsley. Fresh parsley brings an aromatic freshness that’s simply irreplaceable! Its bright green leaves not only enhance visual appeal but also elevate flavor with herbal notes that cut through richness while harmonizing with other ingredients beautifully. Always opt for fresh over dried here—the difference is profound! Just give it a rough chop before tossing it in; let those fragrant oils release!
- 1/4 cup extra virgin olive oil. Think of extra virgin olive oil as liquid gold; it’s absolutely paramount in bringing all these flavors together while adding healthy fats! Choosing high-quality olive oil will provide depth—a fruity or peppery note can really enhance your salad’s overall taste profile, making each bite unforgettable. Pouring it directly into your measuring cup allows for easy mixing with other dressing ingredients later on.
- 2 Tbsp fresh lemon juice. Freshly squeezed lemon juice adds brightness that lifts everything up! It works wonders in balancing flavors by cutting through richness while providing acidity—this is crucial for creating that restaurant-worthy taste at home. Don’t be tempted by bottled lemon juice; freshly squeezed juice has an unmatched vibrancy that elevates your salad immensely!
- 1 1/2 tsp minced garlic. Garlic introduces an aromatic warmth that’s so comforting—it brings depth without overwhelming sweetness or bitterness when used correctly! Mince finely so its flavor distributes evenly throughout the salad without any one bite being too garlicky or intense.
- 1 tsp Italian seasoning. A blend typically consisting of herbs like oregano, basil, thyme—and sometimes rosemary—Italian seasoning ties together all these lovely components into something cohesive yet complex! This addition lends an unmistakable Mediterranean flair that makes every forkful feel like a trip abroad.
- Salt and freshly ground black pepper. Seasoning thoughtfully at the end is important because it enhances every single flavor within your dish—it’s essential to taste as you go! Sea salt brings out natural sweetness while freshly cracked black pepper adds warmth—a duo that’s non-negotiable in achieving culinary greatness!
Equipment You’ll Need:
Having the right tools makes cooking more enjoyable—and trust me when I say they can make all the difference when preparing our Chickpea Salad! While these may not be ingredients themselves, think of them as essential partners in creating something truly wonderful.
- Cutting board – A sturdy cutting board provides ample workspace while protecting your countertops from knife marks during prep time! Opting for wooden or bamboo boards allows for easy knife care since they’re gentle on blades compared to plastic options.
- Sharp chef’s knife – A good quality chef’s knife is indispensable; it’ll make chopping vegetables effortless and safe by giving you precision control over cuts! Keeping it sharp means less effort during prep—plus safer handling reduces chances of slips or accidents.
- Mixing bowl – Choose a large mixing bowl where all ingredients can come together harmoniously without spilling over edges during tossing! A glass or stainless-steel option allows you to see vibrant colors emerge as layers combine beautifully—a feast not just for taste buds but eyes too!
- Measuring cups & spoons – Accurate measurements ensure consistent results every time—you want those ratios spot-on so flavors meld perfectly together! Using nesting measuring cups allows easy storage while keeping everything organized.
- Wooden spoon or spatula – This trusty tool helps stir everything gently without bruising delicate ingredients like tomatoes or parsley—preserving textures is key here! Investing in silicone spatulas allows scraping bowls clean easily post-prep—no waste allowed!
Preparing the Chickpea Salad
Step 1: Gather Your Ingredients
The first step towards creating our scrumptious Chickpea Salad begins with gathering all those beautiful ingredients mentioned earlier—you want everything within arm’s reach before diving in! Take a moment to appreciate each component visually before chopping away—this connection enhances appreciation throughout cooking process itself; remember it’s about more than just following directions blindly!
Step 2: Chop & Combine
Now comes one of my favorite parts: chopping those veggies into colorful bites full-of-flavor goodness! Start by dicing up your English cucumber into refreshing half-moons or cubes depending on personal preference—don’t rush this step since uniformity ensures even distribution throughout dish later on (think aesthetics)! Next up are Roma tomatoes which should be diced similarly—they add juiciness that’ll complement creaminess from chickpeas beautifully once mixed together along with onions & parsley hanging out waiting patiently nearby…
Give yourself permission here—to enjoy slicing away while letting mind wander freely… It’s therapeutic really! Once finished dicing everything up nicely toss them straight into large mixing bowl awaiting rest party guests joining soon enough…
Step 3: Create Your Dressing
With veggies happily mingling among each other now under watchful eye let’s whisk together dressing that’ll tie entire masterpiece together seamlessly without overpowering main players involved… Start off by measuring out extra virgin olive oil followed promptly by zesty lemon juice (I love watching golden liquid swirl around!) then introduce minced garlic along with Italian seasoning sprinkle generously across surface area inviting magic happen next… This process known as emulsifying ensures vinaigrette clings lovingly onto salads leaving no room left behind unseasoned whatsoever…
Step 4: Dress & Toss
At long last we arrive at culmination point where everything meets harmoniously—the moment truly shines when pouring dressing over mixed veggie bowl filled anticipation… As soon as liquid touches surfaces everyone gets coated evenly creating tantalizing aroma wafting through kitchen air inviting friends family nearby drawn closer hoping catch glimpse what’s unfolding inside… Grab wooden spoon gently folding mixture until fully incorporated letting nature take its course transforming simple ingredients into something profoundly satisfying collectively enjoyed amidst laughter shared company around table…
And there you have it—the beginnings of what will surely become one cherished favorite among those lucky enough be served generous portions ahead… Stay tuned as we continue exploring how best serve alongside delightful meals deserving praise worthy indulgence beyond expectation itself…
Crafting Your Flavorful Chickpea Salad
I am absolutely thrilled to guide you through the final touches of this delightful Chickpea Salad! We’ve already gathered our vibrant ingredients, and now it’s time to bring everything together in a way that will make your taste buds sing. The beauty of this salad lies not only in its fresh components but also in the way we marry those flavors with a dressing that truly elevates the dish. So let’s dive into the next steps and make this salad a showstopper!
Step 5: Combine Your Fresh Ingredients
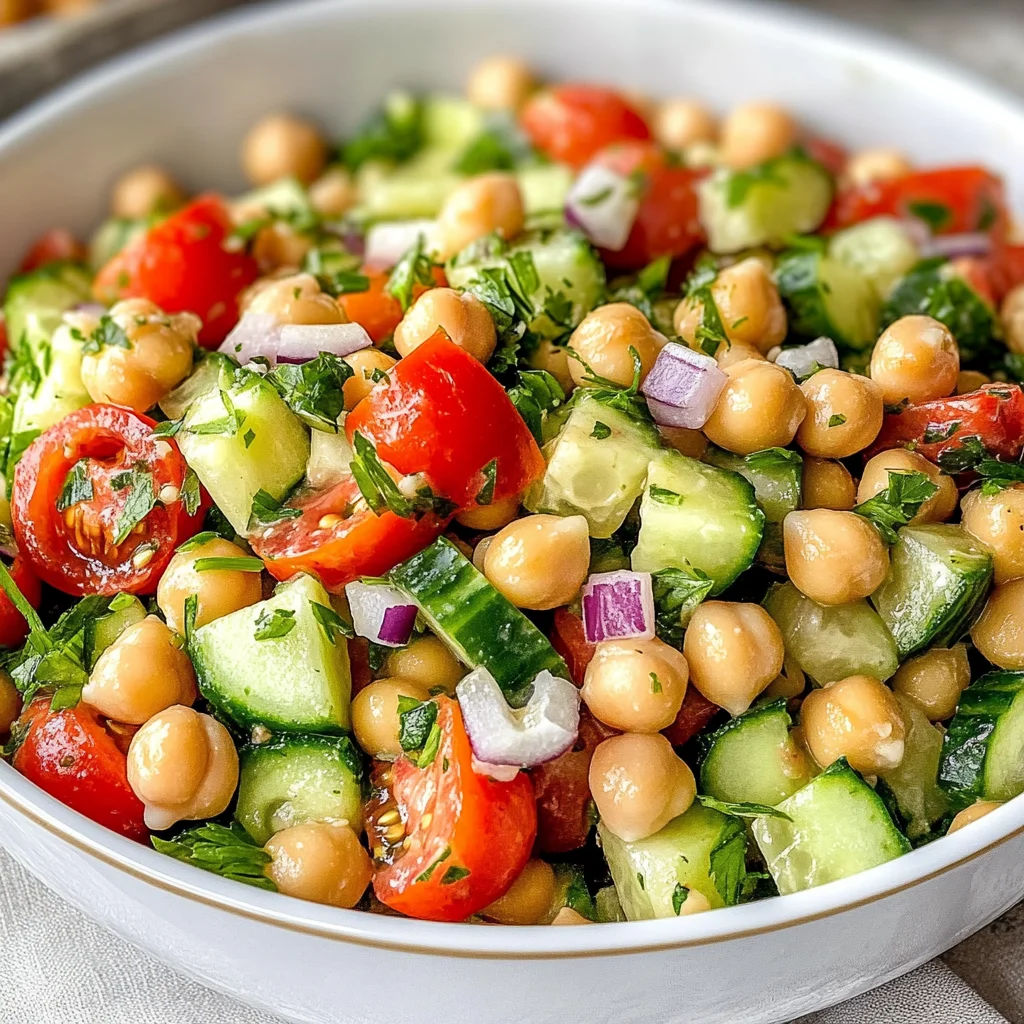
Now that we have our chickpeas, cucumber, tomatoes, red onion, and parsley ready, it’s time for the magical moment of combining these beautiful ingredients. Take a large mixing bowl—something spacious is key here. You want to give yourself plenty of room to work; after all, nobody likes a cramped salad! Gently add your rinsed and drained chickpeas first; they should be plump and glistening, ready to soak up all those incredible flavors. Next, toss in the chopped cucumber—its cool crunch will provide such a refreshing contrast against the creaminess of the chickpeas. Follow that with the juicy Roma tomatoes, which should be bursting with sweetness; their vibrant color will brighten the entire dish.
Now comes the red onion—the aromatic kick that adds depth to your salad. I often find myself enjoying a sweet, mellow onion for this recipe because it complements rather than overpowers. Finally, sprinkle in your freshly chopped parsley; its vibrant green hue isn’t just eye candy—it also packs a punch of flavor! As you mix these ingredients gently with a wooden spoon or spatula, take a moment to appreciate how each component contributes to what will soon be an utterly intoxicating harmony of textures and tastes. This step is crucial because it sets the foundation for our dressing to cling beautifully to each bite.
Step 6: Whip Up Your Zesty Dressing
No great salad is complete without an equally great dressing, and trust me when I say this one is special! In a liquid measuring cup (or any small bowl if you prefer), pour in 1/4 cup of extra virgin olive oil—the liquid gold that brings richness and depth to our Chickpea Salad. Then add 2 tablespoons of freshly squeezed lemon juice; I can’t emphasize enough how important this bright acidity is! It cuts through any heaviness and enhances all those fresh flavors we’ve just combined. You’ll want to use freshly squeezed juice if possible because bottled varieties can lack that vital zing and vitality.
Next up is the minced garlic—1 1/2 teaspoons should do nicely. Garlic doesn’t just add flavor; it also brings warmth and aromatic complexity that rounds out our dressing beautifully. Add 1 teaspoon of Italian seasoning—this blend is so fragrant and versatile! It infuses your salad with hints of basil, oregano, thyme, and more; I promise you won’t regret it. Finally, season generously with salt and freshly ground black pepper to taste—these are non-negotiable when it comes to balancing out all those vibrant flavors we’ve worked so hard to assemble. Once everything is in your measuring cup or bowl, whisk vigorously until emulsified; you’ll know it’s ready when it transforms into a silky dressing that coats the back of your spoon.
Step 7: Dress Your Salad with Care
With your dressing ready, it’s time for another transformative step: drizzling that luscious mixture over your assembled vegetables! This part feels almost like an art form—take your time as you pour the dressing evenly over the chickpea mixture. As you do this, imagine how each ingredient will absorb those beautiful flavors as they marry together on their journey toward deliciousness! Once you’ve drizzled every last drop over your veggies, grab two large utensils or simply clean hands (my favorite method) and gently toss everything together.
This step is where patience pays off immensely; don’t rush through it! You want every piece of cucumber hugging some creamy chickpea goodness while still maintaining its own unique flavor profile. Toss until fully coated—there should be no dry spots left behind! After tossing, take a moment to taste test your creation. This is your chance to adjust seasoning if necessary—a little more salt? Perhaps an extra squeeze of lemon? Trust me on this: tasting at this stage allows you to fine-tune those flavors before they settle into something extraordinary.
Step 8: Let It Chill (Yes, Really!)
Now comes one of my favorite secrets about salads: letting them chill in the refrigerator for at least 30 minutes before serving can elevate your Chickpea Salad from good to absolutely unforgettable! Why chill? Well, allowing those ingredients time together means they can mingle and develop deeper flavors—a little like letting wine breathe before serving (but without any alcohol!). During this marination period, those chickpeas will soften just slightly while soaking up all that zesty goodness from our dressing.
As you wait patiently (and yes, I know waiting can be tough when you’re hungry!), think about how deliciously satisfying each bite will be after these flavors have had their moment together! When you’re ready to serve up this sensational salad later on—you’ll notice how much juicier everything has become—and trust me when I say there’s something profoundly satisfying about digging into a dish where every ingredient sings in perfect harmony!
Final Touches: Serving Up Perfection
Finally! The moment has arrived where we unveil our stunning Chickpea Salad masterpiece. Just before serving—a quick stir will ensure everything remains evenly distributed and looking fabulous on the plate. If you like an extra pop of freshness right at the end, consider garnishing with additional parsley or even a sprinkle of feta cheese substitute made from nuts for that creamy finish without using any dairy products.
As you ladle generous portions onto plates or serve family-style right from the bowl (I always think meals are more fun shared!), take pride knowing you’ve crafted something truly special from scratch using wholesome ingredients. This Chickpea Salad not only serves as an astonishingly easy meal option but also stands testament to how simple ingredients can come together in truly extraordinary ways!
Remember: whether it’s lunching solo or sharing it around the dinner table with loved ones—each bite promises harmony on your palate that’s both nourishing and comforting at once! Enjoy every single mouthful—you deserve it!
Storage and Enjoyment Tips for Your Chickpea Salad
Now that you’ve whipped up this delightful Chickpea Salad, it’s time to savor the fruits of your labor! The vibrant colors and tantalizing aromas are simply irresistible, and I promise you, each bite is a celebration of flavor and freshness. But what happens if you have leftovers? Fear not! This salad is not only a quick and easy dish to prepare, but it also stores beautifully so you can enjoy it later.
Storing Leftover Chickpea Salad
To keep your Chickpea Salad as fresh as possible, transfer any leftovers into an airtight container. This is absolutely paramount because it locks in the bright flavors while keeping unwanted air out. Store it in the refrigerator where it will happily live for about three days. If you’re like me and want to maintain that crisp texture of the cucumbers and tomatoes, consider placing a slice of bread inside the container—this little trick absorbs excess moisture and helps your salad stay crunchy. After a day or two in storage, the flavors mingle beautifully, creating an even more profound taste experience; however, the veggies may soften slightly over time. For serving, there’s no need to reheat—simply pull it out of the fridge, give it a gentle toss to redistribute those fantastic flavors, and enjoy! I assure you, this salad is just as delicious cold as when it was first made.
Freezing Chickpea Salad for Later
While I usually recommend enjoying this Chickpea Salad fresh, if you find yourself with an abundance that you can’t consume within a few days, freezing some components can be a great option. To freeze effectively, I’d suggest separating out the chickpeas and dressing from the fresh vegetables before storing them in freezer-safe bags or containers. This way, they’ll keep beautifully for about three months without compromising their quality. When you’re ready to enjoy your chickpeas again, simply thaw them in the fridge overnight and toss with freshly chopped cucumbers and tomatoes right before serving. Trust me on this; it’s an incredible convenience that lets you savor those vibrant flavors even on busy days when cooking isn’t in the cards.
By taking these simple steps for storage and freezing, you’re ensuring that your Chickpea Salad remains a delightful treat rather than just another item in your fridge!
Chickpea Salad
This Chickpea Salad is a vibrant and refreshing dish that embodies the essence of Mediterranean cuisine. Packed with the creamy goodness of chickpeas, crisp cucumbers, juicy Roma tomatoes, and zesty red onions, every bite offers a delightful crunch that invigorates your palate. The fresh parsley adds an aromatic touch, while the olive oil and lemon juice dressing elevates the flavors to new heights. Perfect for meal prep or as a quick weeknight dinner side, this salad is not just nourishing—it’s a celebration of wholesome ingredients that can be enjoyed anytime. Whether you’re looking for a light lunch or a crowd-pleasing side dish for gatherings, this Chickpea Salad is sure to impress!
- Prep Time: 10 minutes
- Cook Time: None
- Total Time: 0 hours
- Yield: Serves 4
- Category: Salad
- Method: Mixing
- Cuisine: Mediterranean
Ingredients
- 1 (15 oz) can chickpeas, rinsed and drained
- 2 cups chopped English cucumber
- 1 1/4 cups chopped Roma tomatoes
- 1/4 cup chopped red onion
- 3 Tbsp chopped fresh parsley
- 1/4 cup extra virgin olive oil
- 2 Tbsp fresh lemon juice
- 1 1/2 tsp minced garlic
- 1 tsp Italian seasoning
- Salt and freshly ground black pepper to taste
Instructions
- Gather all ingredients and place them in a large mixing bowl.
- Chop the cucumbers, tomatoes, red onion, and parsley into bite-sized pieces.
- Add the chickpeas to the bowl along with the chopped vegetables.
- In a separate bowl, whisk together olive oil, lemon juice, minced garlic, Italian seasoning, salt, and pepper until well combined.
- Pour the dressing over the salad and gently toss to coat all ingredients evenly.
- Allow the salad to chill in the refrigerator for at least 30 minutes before serving to enhance flavors.
Nutrition
- Serving Size: 1 serving
- Calories: 230
- Sugar: 3g
- Sodium: 240mg
- Fat: 10g
- Saturated Fat: 1g
- Unsaturated Fat: 9g
- Trans Fat: 0g
- Carbohydrates: 30g
- Fiber: 7g
- Protein: 8g
- Cholesterol: 0mg