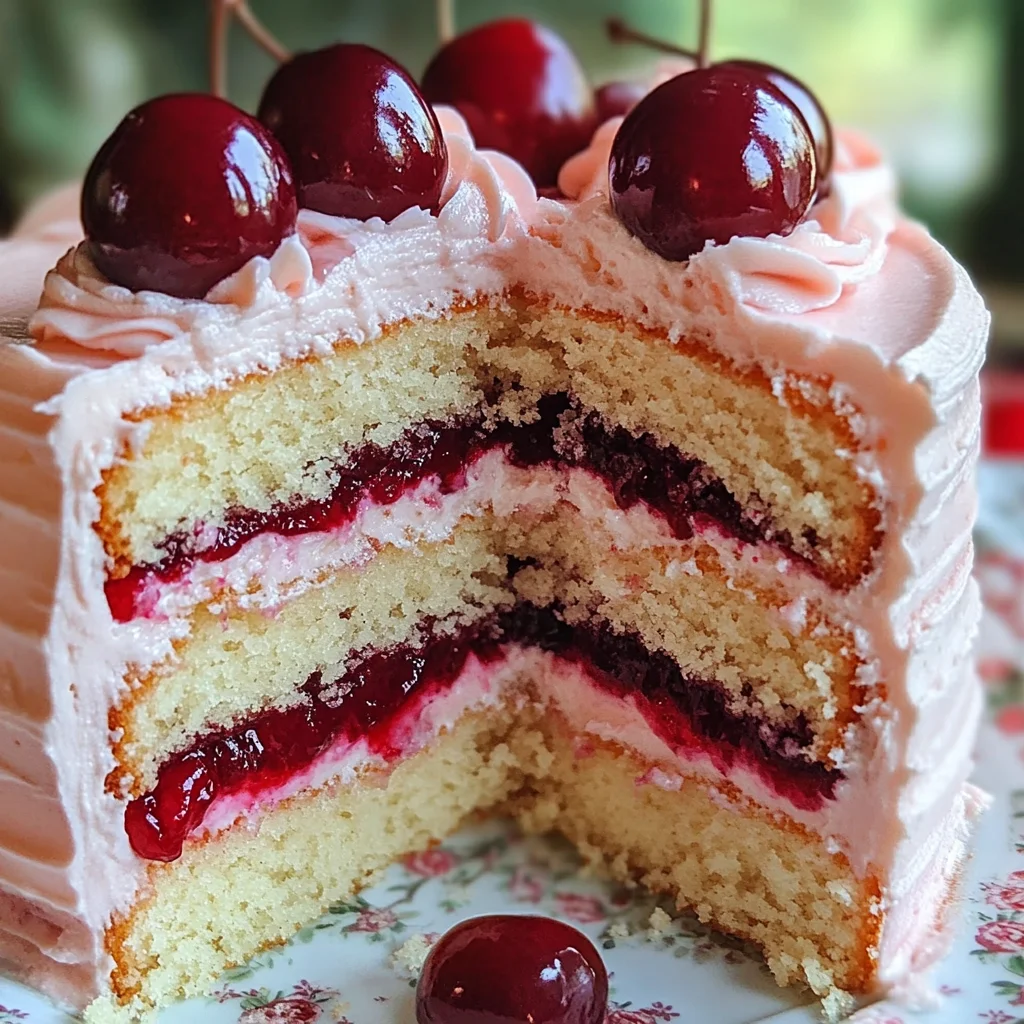
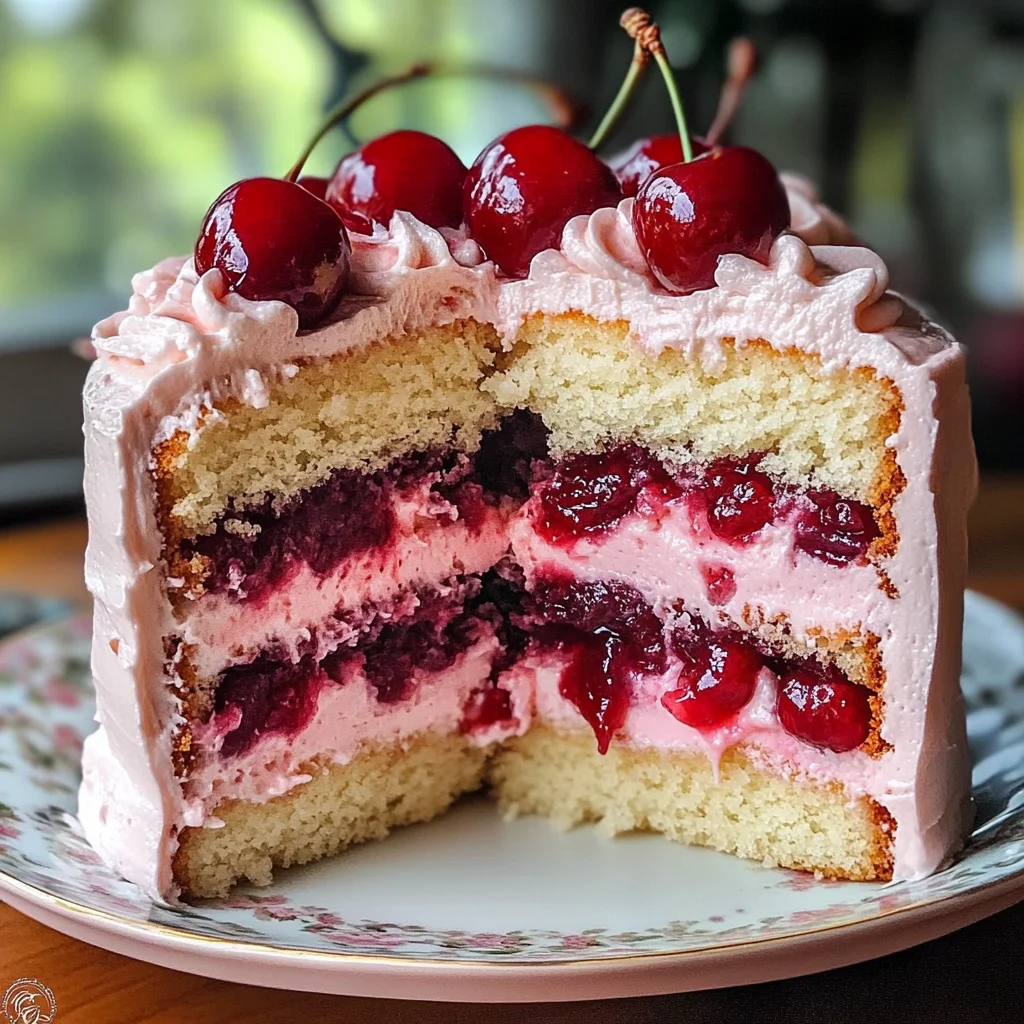
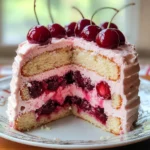
Cherry Layer Cake with Cherry Cream Cheese Frosting
Looking for a show-stopping dessert that bursts with flavor and charm? This Cherry Layer Cake with Cherry Cream Cheese Frosting is the ultimate treat for any celebration or sweet craving. With fluffy vanilla cake layers, a juicy cherry filling, and silky cherry-infused cream cheese frosting, it’s a heavenly combination of sweet, tart, and creamy. Whether you’re after quick breakfast indulgence, easy dinner party desserts, or creative food ideas for any occasion, this easy recipe will steal the spotlight. Each slice is a beautiful swirl of color and flavor—irresistible, elegant, and totally satisfying.
Why You’ll Love This Recipe
- Easy to Prepare: This cake comes together quickly, so you can spend less time in the kitchen and more time enjoying your day.
- Family-Friendly Appeal: With its delightful cherry flavor and creamy frosting, everyone will want a slice. It’s perfect for kids and adults alike!
- Perfect for Any Occasion: Whether it’s a birthday party or a cozy family gathering, this cake adds a special touch to any event.
- Make Ahead Convenience: You can bake the layers ahead of time and frost them just before serving for optimal freshness.
- Deliciously Versatile: The combination of cherries with cream cheese frosting makes every bite an unforgettable experience.
Ingredients You’ll Need
Gathering simple, wholesome ingredients makes baking this Cherry Layer Cake even more enjoyable! Here’s everything you need:
For the Cake
- 2½ cups all-purpose flour
- 2½ tsp baking powder
- ½ tsp salt
- 1 cup unsalted butter, softened
- 1¾ cups granulated sugar
- 4 large eggs, room temperature
- 2 tsp vanilla extract
- 1 cup whole milk (or buttermilk)
- 2 cups cherries (fresh, frozen, or canned), pitted and chopped
For the Frosting
- 8 oz cream cheese, softened
- ½ cup unsalted butter, softened
- 3½ cups powdered sugar
- 1 tsp vanilla extract
- ¼ cup cherry juice or puréed cherries (optional for flavor and color)
Variations
One of the best things about this recipe is how flexible it is! Here are some fun variations to make it your own:
- Add Chocolate Chips: Mix in some chocolate chips into the batter for a delightful chocolate-cherry twist.
- Use Different Fruits: Try substituting cherries with other fruits like raspberries or blueberries to create your own fruity masterpiece.
- Make It Gluten-Free: Swap out all-purpose flour with your favorite gluten-free blend for a gluten-free option that everyone can enjoy.
- Try Different Frostings: Experiment with different frostings such as whipped cream or a chocolate ganache if you want to switch things up!
How to Make Cherry Layer Cake with Cherry Cream Cheese Frosting
Step 1: Preheat Your Oven
Begin by preheating your oven to 350°F (175°C). This step ensures that your cake bakes evenly and rises beautifully.
Step 2: Prepare the Cake Pans
Grease and line three 8-inch round cake pans with parchment paper. This helps prevent the cake from sticking and makes it easy to remove once baked.
Step 3: Whisk Together Dry Ingredients
In a medium bowl, whisk together the flour, baking powder, and salt. This step combines the dry ingredients evenly and helps distribute the baking powder throughout the flour.
Step 4: Cream Butter and Sugar
In a large bowl, cream together the softened butter and sugar until light and fluffy—about 3–5 minutes. This process incorporates air into the mixture, resulting in a lighter texture for your cake.
Step 5: Add Eggs One at a Time
Add eggs one at a time while beating well after each addition. Mixing in the eggs gradually allows them to fully incorporate into the batter without curdling it.
Step 6: Mix in Vanilla Extract
After adding the eggs, mix in the vanilla extract. This adds wonderful flavor to your cake that pairs perfectly with cherries!
Step 7: Combine Flour Mixture and Milk
Alternately add your dry flour mixture and milk to the batter—starting and ending with flour. Mixing just until combined keeps your cake tender.
Step 8: Divide Batter into Pans
Divide your batter evenly between prepared pans. Bake them in your preheated oven for about 22–27 minutes until a toothpick inserted comes out clean.
Step 9: Cool Cakes Completely
Once baked, allow cakes to cool in pans for about 10 minutes before transferring them to wire racks. Cooling completely prevents melting your frosting later on.
Step 10: Make Cherry Filling
For delicious cherry filling, simmer chopped cherries with sugar (if desired) until slightly thickened. Allow it to cool completely before using it between layers.
Step 11: Prepare Cream Cheese Frosting
In another bowl, beat cream cheese until smooth. Add softened butter and beat until fluffy; then gradually mix in powdered sugar along with vanilla extract. If using cherry juice or purée for extra flavor and color, mix that in as well!
Step 12: Assemble Your Masterpiece
Now comes the fun part! Layer your cooled cakes by spreading frosting followed by cherry filling between each layer. Frost the top and sides generously with remaining frosting. If desired, garnish with fresh cherries on top!
And there you have it! A stunning Cherry Layer Cake with Cherry Cream Cheese Frosting that’s sure to impress anyone who lays eyes on it—and tastes it too! Enjoy every delightful slice!
Pro Tips for Making Cherry Layer Cake with Cherry Cream Cheese Frosting
Baking is all about precision and a little love, so here are some tips to ensure your Cherry Layer Cake turns out perfectly every time!
- Use Room Temperature Ingredients: Bringing your eggs and butter to room temperature helps create a smooth batter, resulting in a light and fluffy cake. Cold ingredients can lead to a dense texture.
- Don’t Overmix the Batter: Once you combine the wet and dry ingredients, mix just until incorporated. Overmixing can develop the gluten in the flour, making your cake tough instead of tender.
- Check for Doneness: Ovens can vary, so start checking your cakes a few minutes before the recommended baking time. A toothpick should come out clean or with just a few crumbs attached when they’re ready.
- Cool Completely Before Frosting: Allowing the cakes to cool completely ensures that the frosting doesn’t melt off. It also helps maintain the structure of your layers, making assembly much easier.
- Chill Your Frosting: If your cherry cream cheese frosting is too soft to spread easily, refrigerate it for about 15-20 minutes. This will help it firm up without losing that creamy texture.
How to Serve Cherry Layer Cake with Cherry Cream Cheese Frosting
Presentation is key when it comes to desserts—especially one as delightful as this Cherry Layer Cake! Here are some ideas to make your cake look as good as it tastes.
Garnishes
- Fresh Cherries: A few whole cherries perched on top not only enhance the visual appeal but also echo the flavors within the cake.
- Mint Leaves: A sprig of mint adds a pop of color and a refreshing aroma that complements the sweetness of cherries beautifully.
- Powdered Sugar Dusting: A light dusting of powdered sugar gives an elegant finish, making your cake look polished and inviting.
Side Dishes
- Vanilla Ice Cream: The creamy richness of vanilla ice cream pairs wonderfully with the tartness of cherries, creating a classic dessert duo.
- Whipped Coconut Cream: For a non-dairy option, whipped coconut cream provides a light and fluffy topping that complements the cherry flavor without overpowering it.
- Fruit Salad: A refreshing fruit salad made with seasonal fruits adds brightness and balances the sweetness of the cake.
- Coffee or Tea: Serving slices with a warm cup of coffee or herbal tea enhances the overall experience. The warmth of the beverage contrasts nicely with the coolness of the cake!
This Cherry Layer Cake with Cherry Cream Cheese Frosting is sure to be a hit at any gathering. With these tips and serving suggestions, you’re well on your way to creating a delightful dessert that everyone will love! Enjoy baking and indulging!
Make Ahead and Storage
This Cherry Layer Cake with Cherry Cream Cheese Frosting is not only a delightful treat but also perfect for meal prep! You can easily make components ahead of time, allowing you to enjoy this dessert whenever the craving strikes.
Storing Leftovers
- Cover the cake with plastic wrap or store it in an airtight container.
- Keep it in the refrigerator for up to 3-4 days.
- Allow it to come to room temperature before serving for the best flavor and texture.
Freezing
- Wrap individual slices in plastic wrap, then place them in a freezer-safe bag or container.
- The cake can be frozen for up to 2 months.
- Thaw overnight in the refrigerator before serving.
Reheating
- If you prefer your cake warm, gently microwave a slice for about 10-15 seconds.
- Avoid overheating, as this can dry out the cake.
FAQs
Here are some common questions that may help you while making this delicious dessert!
Can I make Cherry Layer Cake with Cherry Cream Cheese Frosting gluten-free?
Yes! You can substitute all-purpose flour with a gluten-free flour blend. Make sure the blend includes xanthan gum for better texture.
How do I store Cherry Layer Cake with Cherry Cream Cheese Frosting?
Store leftovers in an airtight container in the refrigerator for up to 3-4 days. Be sure to let it come to room temperature before enjoying!
Can I use frozen cherries for the filling?
Absolutely! Frozen cherries work great; just ensure they are thawed and drained well before using them in your filling.
What can I use instead of cream cheese if I want a lighter frosting?
For a lighter option, consider using Greek yogurt mixed with a bit of powdered sugar. This will give you a creamy texture without all the richness.
How do I prevent my cake layers from sticking to the pans?
Make sure to grease and line your pans with parchment paper. This will help your cakes come out smoothly without any sticking.
Final Thoughts
I truly hope you enjoy making this Cherry Layer Cake with Cherry Cream Cheese Frosting as much as I do! It’s such a cheerful dessert that’s perfect for any event or even just a sweet treat at home. Remember, baking should be fun and enjoyable, so don’t hesitate to get creative with your decorations or flavors. Happy baking, and may each slice bring joy to your table!
Cherry Layer Cake with Cherry Cream Cheese Frosting
Indulge in the delightful experience of our Cherry Layer Cake with Cherry Cream Cheese Frosting—an elegant dessert that is sure to impress at any gathering. This cake features fluffy vanilla layers interlaced with a luscious cherry filling and topped with creamy cherry-infused frosting. Each slice bursts with vibrant flavors, making it a perfect centerpiece for birthdays, holidays, or casual get-togethers. With easy-to-follow instructions and options for customization, you can create a memorable dessert that caters to every palate. Whether enjoyed as an afternoon treat or served after dinner, this cherry cake will elevate your dessert game and leave everyone asking for seconds.
- Prep Time: 30 minutes
- Cook Time: 25 minutes
- Total Time: 55 minutes
- Yield: Serves approximately 12 1x
- Category: Dessert
- Method: Baking
- Cuisine: American
Ingredients
- 2½ cups all-purpose flour
- 2½ tsp baking powder
- ½ tsp salt
- 1 cup unsalted butter, softened
- 1¾ cups granulated sugar
- 4 large eggs, room temperature
- 2 tsp vanilla extract
- 1 cup whole milk
- 2 cups cherries (fresh, frozen, or canned), pitted and chopped
- 8 oz cream cheese, softened
- ½ cup unsalted butter, softened
- 3½ cups powdered sugar
- ¼ cup cherry juice or puréed cherries (optional for flavor and color)
Instructions
- Preheat your oven to 350°F (175°C) and grease three 8-inch round cake pans.
- In a bowl, whisk together the flour, baking powder, and salt.
- Cream the butter and sugar until light and fluffy. Add eggs one at a time, followed by the vanilla.
- Alternately mix in the dry ingredients and milk until just combined.
- Fold in chopped cherries and divide the batter among the prepared pans.
- Bake for 22–27 minutes until a toothpick comes out clean. Cool completely on wire racks.
- For the frosting, beat cream cheese and butter until smooth, then add powdered sugar and vanilla. Mix in cherry juice if desired.
- Assemble by layering cakes with frosting and cherry filling in between each layer.
Nutrition
- Serving Size: 1 serving
- Calories: 360
- Sugar: 30g
- Sodium: 220mg
- Fat: 15g
- Saturated Fat: 9g
- Unsaturated Fat: 4g
- Trans Fat: 0g
- Carbohydrates: 54g
- Fiber: 1g
- Protein: 4g
- Cholesterol: 70mg