Cheesy Chicken Skillet with Broccoli and Rice
There’s something truly magical about a meal that brings comfort, joy, and satisfaction all at once. The Cheesy Chicken Skillet with Broccoli and Rice isn’t just a dinner; it’s an experience that wraps you in warmth, beckoning you to gather around the table with loved ones. Imagine the moment when the rich aroma of melted cheese and sautéed broccoli fills your kitchen, transporting you back to simpler times—perhaps your childhood or family gatherings where laughter mingled with the delightful clinking of cutlery. This dish is not only a quick weeknight solution; it’s a heartfelt embrace on a plate, where every creamy bite dances on your palate, proving that comfort food can also be healthy.
When I think of this recipe, I’m reminded of how cooking should feel: effortless yet rewarding, nourishing yet indulgent. This Cheesy Chicken Skillet is all about balance—combining tender chicken and vibrant broccoli with creamy cheese sauce over fluffy rice creates a symphony of flavors that’s simply irresistible. It’s incredibly versatile too! You can whip it up for a cozy family dinner or impress friends during a casual gathering. Trust me on this—once you experience the magic of this dish, it will become a regular in your meal rotation.
Cheesy Chicken Skillet with Broccoli and Rice: A Comforting Family Favorite
Welcome to what might just become your new go-to recipe! This Cheesy Chicken Skillet with Broccoli and Rice blends convenience with heartiness in an extraordinary way. With easy-to-find ingredients and just 30 minutes of your time, you’ll have a wholesome meal that pleases everyone at the table. It’s perfect for those busy weeknights when you want something delightful without spending hours in the kitchen. So grab your apron, and let’s dive into this deliciously cheesy adventure!

Ingredients:
As we embark on this culinary journey together, each ingredient plays a vital role in creating the comforting embrace of our Cheesy Chicken Skillet with Broccoli and Rice. Let’s explore what makes these components so special!
- ¼ cup unsalted butter (½ stick). This luscious golden treasure is essential for creating a rich base for our cheese sauce. Unsalted butter allows us to control the saltiness of our dish while providing that silky texture when melted. It serves as the foundation for flavor development during our cooking process; trust me, skipping quality butter would be like leaving out the heart from your favorite love song!
- ⅓ cup all-purpose flour or gluten-free flour blend. This is crucial for thickening our cheese sauce to achieve that dreamy creaminess we all crave. If you’re opting for gluten-free flour, make sure it’s specifically designed for baking—this ensures it interacts correctly with the liquids and provides that same luscious result as traditional flour does.
- 3 cups milk of choice (we used 2% dairy milk). Milk adds creaminess and richness to our sauce while helping dissolve the flour into a smooth mixture—this step is non-negotiable if you want to avoid lumps! Whether you prefer dairy or plant-based alternatives like oat or almond milk, ensure it’s unsweetened to maintain that savory flavor profile.
- 1 cup low-sodium chicken broth or vegetable broth. Our broth brings depth and warmth to the dish without overwhelming it with saltiness. Using low-sodium options allows you to control flavors more effectively while still enriching every bite—think of it as adding an extra layer of warmth to each mouthful.
- 1 teaspoon garlic powder. Garlic powder infuses our skillet with aromatic goodness without overpowering other flavors. It offers convenience as there’s no peeling or chopping required; just sprinkle it in for an instant flavor boost!
- 1 teaspoon onion powder. Similar to garlic powder, onion powder adds another layer of savory goodness that enhances our dish’s overall profile beautifully without any bite from raw onions.
- 1 teaspoon fine salt. Salt is vital in elevating all flavors in cooking—it truly is magic! We add just enough here to enhance our cheese sauce without making it overly salty since we already have flavorful ingredients working together.
- 1 teaspoon Dijon mustard. This ingredient might surprise you, but mustard brings a remarkable tangy depth that balances out the rich creaminess perfectly! It’s amazing how such a small amount can elevate everything else—you’ll see!
- ½ teaspoon dried thyme. Thyme adds an earthy note that complements chicken beautifully; its subtle complexity truly rounds out our flavor profile while ensuring each bite feels comforting and familiar.
- ¼ teaspoon paprika. Paprika introduces a gentle smokiness alongside its vibrant color—a feast for both eyes and taste buds! Just imagine how beautiful it will look on your plate!
- ¼ teaspoon black pepper. Freshly ground black pepper adds warmth and brightness while enhancing all other flavors; it’s one of those understated heroes in any savory dish.
- 8 ounces shredded sharp cheddar cheese (2 ½ – 2 ¾ cups), plus more for topping. Cheese is undoubtedly one of the stars here! Sharp cheddar melts beautifully while delivering robust flavor; ensure it’s shredded for easy incorporation into our sauce—who doesn’t love gooey melted cheese?
- 1 (16-ounce) bag frozen broccoli florets. Frozen broccoli retains nutritional value while offering convenience—all washed and prepped! Plus, its bright green color adds visual appeal alongside essential vitamins; I promise you’ll hardly notice you’re eating vegetables!
- 12 ounces cooked chicken, shredded or cut into bite-sized pieces (about 2 ½ cups). Rotisserie chicken works wonderfully if you’re short on time! The key is using cooked chicken which saves us precious minutes during prep time while providing protein-packed heartiness throughout every spoonful.
- 3 cups cooked rice (basmati, jasmine, or brown rice). Rice acts as an excellent base that soaks up all those incredible flavors from our creamy sauce; use whichever variety suits your preference best! If you’ve got leftover rice from another meal sitting in your fridge—perfect!
- Optional garnish: chopped parsley or thyme leaves, cracked black pepper, or crushed red pepper flakes are great finishing touches giving fresh color alongside added texture if desired!
Equipment You’ll Need:
Cooking becomes so much smoother when you have the right tools at hand—these essential partners make crafting our Cheesy Chicken Skillet even more enjoyable! Each piece aids us in achieving fantastic results effortlessly.
- Large skillet – Ideally suited for this recipe because it allows ample surface area to cook everything evenly while providing space to stir without spilling over! A heavy-bottomed skillet will hold heat better than thinner ones—look for high-quality materials like cast iron or stainless steel for best results.
- Whisk – A good whisk will be your best friend when creating that smooth cheese sauce we’re after! It helps incorporate air into mixtures while preventing lumps from forming as we combine liquids seamlessly—no one wants lumpy cheese sauce!
- Measuring cups & spoons – Precision matters here—notably when measuring liquids versus dry ingredients as they behave differently during cooking processes! Ensure they’re readily available so you can focus solely on enjoying every moment spent preparing this delicious meal.
- Spatula or wooden spoon – These tools allow us to stir vigorously without scratching non-stick surfaces while ensuring nothing sticks at bottom during cooking—we want every last bit incorporated into our lovely skillet!
Now that we’ve gathered everything let’s jump into creating this delightful Cheesy Chicken Skillet with Broccoli and Rice together!
Step 1: Melting Liquid Gold
Start by placing your large skillet over medium-high heat; add in the unsalted butter until it’s fully melted into liquid gold dancing merrily across the pan’s surface—a fragrant invitation calling everyone closer towards deliciousness ahead! As soon as it’s bubbling gently—don’t rush this step—you’ll want those solids from butter to combine harmoniously before introducing flour for thickening purposes next!
Step 2: Creating Our Thickening Base
Once melted completely, sprinkle in your measured flour slowly as you whisk continuously—a technique called roux which helps thicken sauces beautifully whilst adding depth simultaneously! Keep whisking diligently until everything has combined fully over low heat (about 30 seconds)—this builds foundational flavors within sauce itself before moving onto larger quantities later on…
Step 3: Pouring In Creamy Richness
Now reduce heat down further before gradually incorporating milk into previous mixture one cup at time whilst continuing whisking smoothly throughout entire process until no lumps remain visible whatsoever—that silky texture we’re aiming for should start emerging right away once combined properly… Next comes broth addition followed by spices which elevate this dish beyond ordinary comfort food territory altogether!
Step 4: Bringing It All Together
Increase heat back up again until mixture reaches lively boil stage whilst stirring constantly—all those flavors meld beautifully together now producing an utterly intoxicating aroma wafting throughout kitchen inviting everyone nearby over eagerly… After about minute passes remove from heat entirely before folding freshly shredded cheddar inside velvety sauce allowing melt freely transforming simple blend into luxurious masterpiece worth sharing proudly amongst friends gathered around table tonight celebrating life through delicious food experiences shared together…
With these initial steps complete—your journey towards Cheesy Chicken Skillet continues onward toward filling bowls ready serve delightfully warm steaming portions filled abundance love care put forth preparing special meals cherished memories created along way…
Step 5: The Creamy Cheese Transformation
Now that we have a beautifully thickened sauce bubbling away, it’s time to introduce the star of our show: the cheese! This step is crucial because the cheese not only adds a rich flavor but also contributes to that luscious, velvety texture that makes this dish so utterly satisfying. Using about 8 ounces of shredded sharp cheddar cheese—2 ½ to 2 ¾ cups depending on how cheesy you like it—be sure to add it in batches. This allows for even melting and prevents any clumping, which can lead to an uneven distribution of flavor throughout your dish. As you stir the cheese into the hot sauce, watch as it transforms into a smooth, creamy goodness that envelops everything in its path. Trust me; this moment is nothing short of magical!
You’ll want to remove the skillet from the heat just after stirring in the cheese. The residual heat will continue melting the cheese without overcooking it, preserving that delightful creaminess we’re after. If you were to keep it on the burner too long, you risk separating the fats from the proteins, leading to an undesirable grainy texture. So, be patient and let that lovely liquid gold do its thing for a moment before moving on.
Step 6: Bringing It All Together
With our heavenly cheese sauce ready and waiting, it’s time to bring all the elements together in one glorious skillet. Return your skillet back to medium-high heat—this is where we start layering those flavors! Add in your frozen broccoli florets first; they don’t need thawing because they’ll cook beautifully in the sauce while retaining their vibrant green color and crunch. Stir them into your cheesy concoction until they are well coated.
Next up is our cooked chicken—whether you’ve shredded rotisserie chicken or prepped some leftovers, this step is incredibly forgiving and flexible. Stirring in about 12 ounces (or approximately 2 ½ cups) ensures every bite is packed with protein and flavor. I always remind my friends that this is where we create that comforting harmony; think of how each ingredient complements one another—a symphony of flavors dancing together! Finally, fold in those fluffy grains of cooked rice (3 cups) like a warm hug around all those delicious components. This combination not only makes for a hearty meal but also helps absorb all that incredible flavor.
Step 7: The Magic of Cooking Through
With everything combined beautifully in your skillet, let’s focus on cooking through this delicious medley for about 8-10 minutes. This isn’t just about heating things up; it’s about allowing those flavors to meld together fully and ensuring each ingredient reaches its perfect tenderness. As you stir occasionally, keep an eye on how the broccoli transforms—it should turn bright green and become tender yet still retain a slight crunch; nobody wants mushy broccoli here!
During this time, allow yourself to savor the intoxicating aroma wafting through your kitchen; it’s nothing short of captivating! You might notice some bubbling around the edges—that’s normal! Just make sure to adjust your heat if things seem like they’re bubbling too vigorously; we want gentle simmering instead of a rapid boil at this point. After about ten minutes, give everything a taste—this is your chance to adjust seasoning if needed! A little more salt? Perhaps a dash more pepper? Cooking should feel personal, so trust your instincts here!
Step 8: The Grand Finale with Cheesy Topping
As we approach the final stage of our Cheesy Chicken Skillet with Broccoli and Rice, let’s talk about that extra touch—the additional layer of cheese on top! Once the skillet has been bubbling away for those precious minutes and everything is warmed through nicely, sprinkle some more shredded cheese over the top. This step elevates our dish from merely delicious to downright extraordinary!
Covering it with a lid for about 2-3 minutes allows that cheese topping to melt just perfectly without overcooking anything below. You’ll know it’s ready when you see lovely strings forming as you lift up your spoon or spatula—a sure sign of cheesy perfection! Pay attention here because timing matters; too long uncovered could lead to dried-out edges rather than gooey goodness throughout. Once melted, remove from heat and let it sit for about 5-10 minutes before diving in. This resting period is non-negotiable—it gives everything time to settle down while thickening slightly for an ideal serving consistency.
Final Touches: Garnishing Your Masterpiece
As you prepare to serve this beautiful Cheesy Chicken Skillet with Broccoli and Rice, don’t forget those finishing touches that make all the difference! Consider garnishing with freshly chopped parsley or thyme leaves for a pop of color and freshness—it adds not only visual appeal but also an aromatic brightness that balances out all those rich flavors. A sprinkle of cracked black pepper or crushed red pepper flakes can introduce an exciting kick if you’re feeling adventurous!
When you’re ready to plate up these comforting servings filled with love and flavor, take a moment to appreciate what you’ve created—each spoonful brimming with warmth and nourishment designed not only for filling bellies but also hearts! I promise you; this dish will become a cherished favorite at your table just as it has at mine. Enjoy every bite knowing you’ve crafted something truly special from start to finish—bon appétit!
Storage and Enjoyment Tips for Your Cheesy Chicken Skillet with Broccoli and Rice
Now that you’ve crafted this delightful dish, it’s time to relish every spoonful! This Cheesy Chicken Skillet with Broccoli and Rice is not just a meal; it’s an experience bursting with flavor that you’ll want to share. But let’s talk about what happens when you have leftovers—because trust me, this dish is so tasty, you might just want to keep it around for another day!
Storing Leftover Cheesy Chicken Skillet with Broccoli and Rice
To store your delicious leftovers, simply transfer the cooled Cheesy Chicken Skillet to an airtight container. This ensures that all those mouthwatering flavors stay locked in. It will keep wonderfully in the refrigerator for about 3 to 4 days, making it perfect for meal prep or simply enjoying the next day. If you’re worried about the rice drying out, here’s a pro tip: place a slice of bread in the container before sealing it. It acts like a mini-humidifier, keeping everything moist and flavorful! After storage, the vibrant colors of the broccoli may soften slightly, but I promise you, the taste remains as comforting and satisfying as ever. When you’re ready to indulge again, just reheat it gently on the stovetop or in the microwave until heated through—maybe even add a splash of broth or milk if you find it needs a little pick-me-up!
Freezing Cheesy Chicken Skillet with Broccoli and Rice for Later
If you happen to have more than enough (and who could blame you?), freezing this delightful dish is absolutely wonderful! Just let it cool completely before transferring individual portions into freezer-safe containers or freezer bags, squeezing out any air to prevent freezer burn. This hearty meal can be stored in the freezer for up to 3 months—perfect for those busy weeknights when cooking feels like a chore! When you’re ready to enjoy your frozen masterpiece, simply thaw it overnight in the fridge and reheat on low heat until it’s piping hot throughout. The convenience factor here is fantastic; having homemade comfort food at your fingertips is truly a game changer!
Now that we’ve covered storage options that keep this dish fresh and fabulous, let’s dive into why this recipe should become a staple in your kitchen!
Cheesy Chicken Skillet with Broccoli and Rice

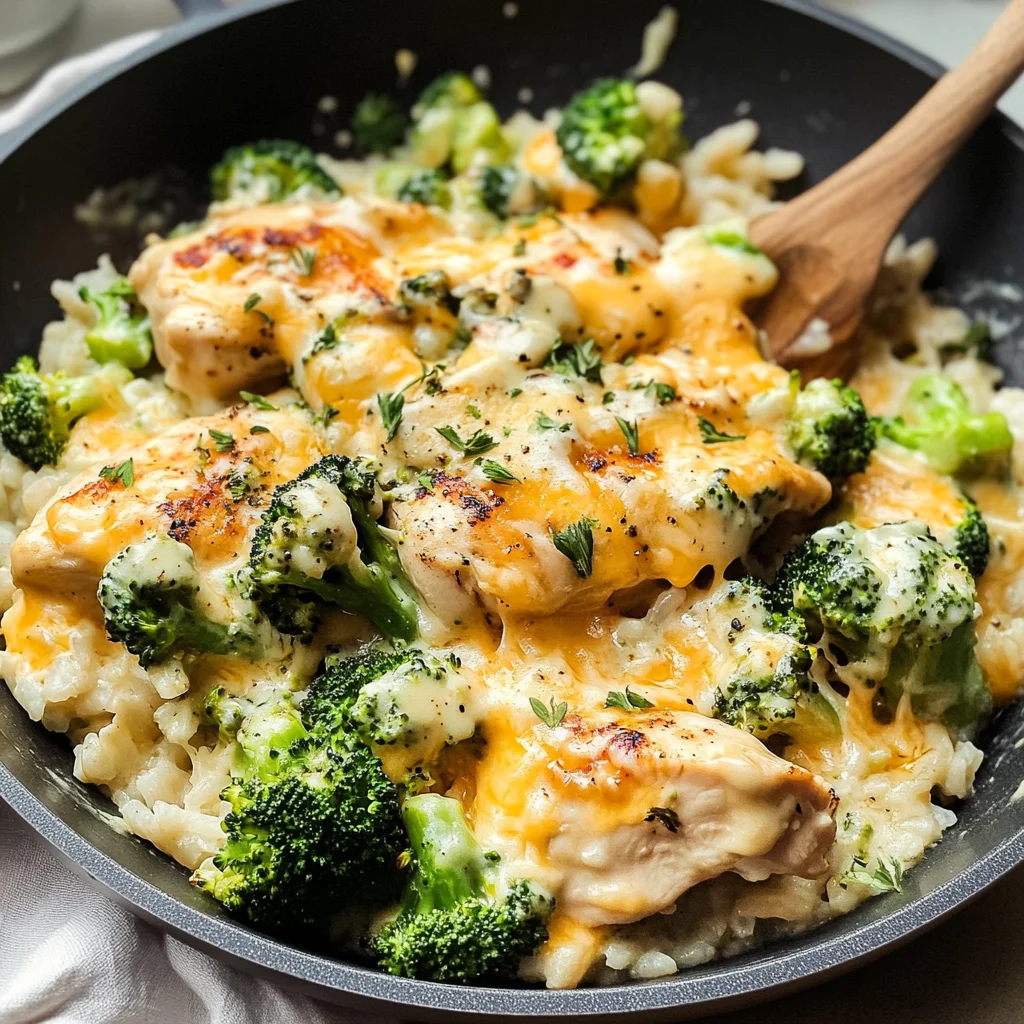
Indulge in the warmth and comfort of our Cheesy Chicken Skillet with Broccoli and Rice—a delightful one-pan meal that combines tender chicken, vibrant broccoli, and a creamy cheese sauce enveloping fluffy rice. This recipe is not just about feeding your family; it’s about creating cherished moments around the dinner table. In just 30 minutes, you can whip up this satisfying dish that’s perfect for busy weeknights or casual gatherings with friends. Each bite is a blend of rich flavors that will transport you back to cozy family dinners filled with laughter and love.
- Prep Time: 10 minutes
- Cook Time: 20 minutes
- Total Time: 30 minutes
- Yield: Serves 4
- Category: Main
- Method: Stovetop
- Cuisine: American
Ingredients
- ¼ cup unsalted butter
- ⅓ cup all-purpose flour
- 3 cups milk (unsweetened)
- 1 cup low-sodium chicken broth
- 1 teaspoon garlic powder
- 1 teaspoon onion powder
- 1 teaspoon fine salt
- 1 teaspoon Dijon mustard
- ½ teaspoon dried thyme
- ¼ teaspoon paprika
- ¼ teaspoon black pepper
- 8 ounces shredded sharp cheddar cheese
- 1 (16-ounce) bag frozen broccoli florets
- 12 ounces cooked chicken (shredded)
- 3 cups cooked rice
Instructions
- In a large skillet over medium-high heat, melt the unsalted butter. Once melted, whisk in the flour until smooth.
- Gradually add milk and chicken broth while whisking continuously to avoid lumps. Cook until thickened.
- Stir in garlic powder, onion powder, mustard, thyme, paprika, salt, and pepper.
- Add shredded cheddar cheese gradually until melted and smooth.
- Fold in frozen broccoli florets, cooked chicken, and cooked rice until well combined.
- Cook on medium-high heat for an additional 8-10 minutes or until heated through.
- Top with extra cheese if desired and let sit for a few minutes before serving.
Nutrition
- Serving Size: 1 cup (250g)
- Calories: 450
- Sugar: 6g
- Sodium: 650mg
- Fat: 20g
- Saturated Fat: 10g
- Unsaturated Fat: 7g
- Trans Fat: 0g
- Carbohydrates: 45g
- Fiber: 3g
- Protein: 30g
- Cholesterol: 70mg