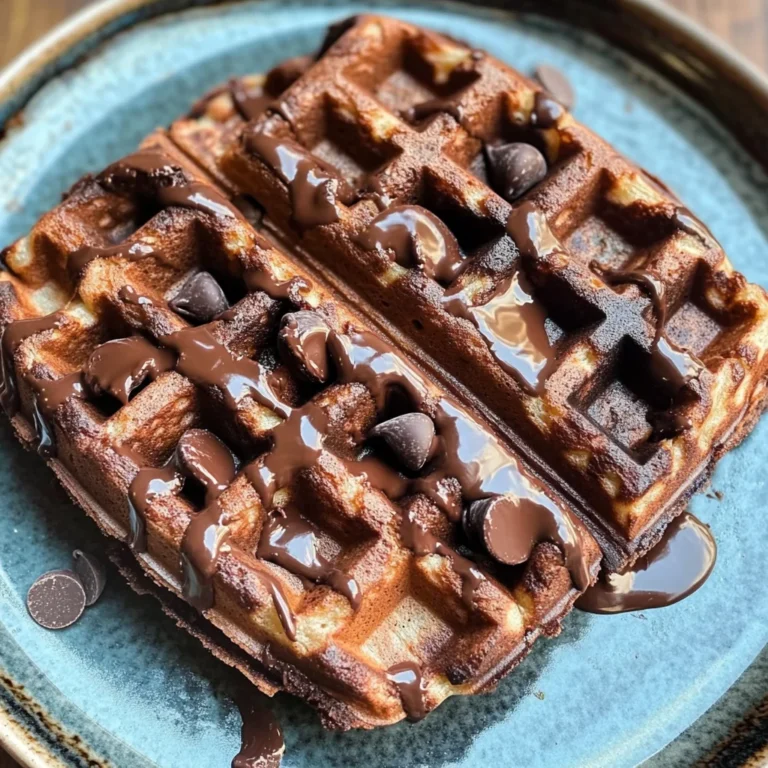
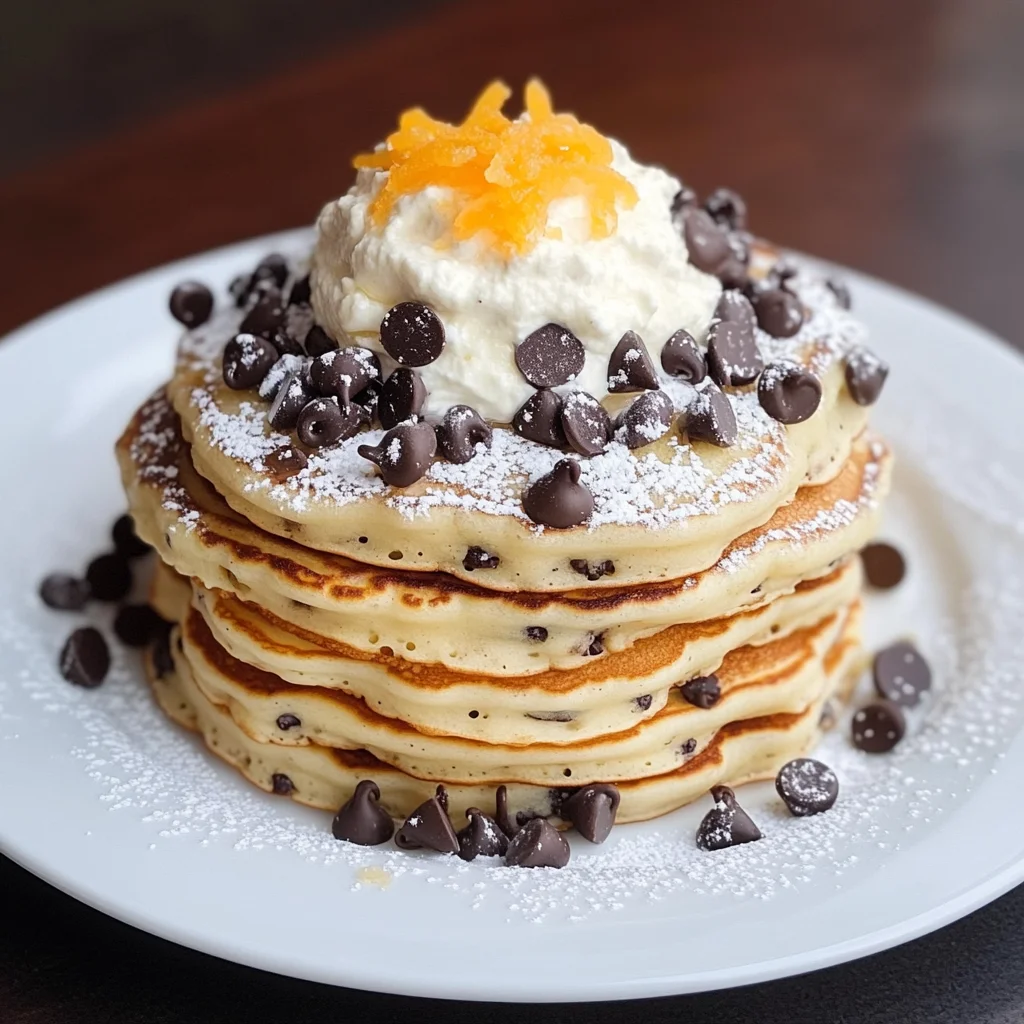
Cannoli Pancakes
There’s a certain magic that happens in the kitchen when we decide to create something new, something that we can share with those we love. It’s a feeling that transcends the mere act of cooking; it becomes an experience, a celebration of flavors, and a connection to our roots. Today, I’m excited to share a recipe that embodies all of this—the delightful Cannoli Pancakes! Imagine fluffy pancakes infused with the creamy richness of ricotta, brightened by fresh orange zest, and dotted with chocolate chips that melt into pockets of sweetness. These pancakes aren’t just breakfast; they are a warm embrace on a plate, a bridge between Italian tradition and your morning routine.
As you gather your ingredients and dream about the warm aroma wafting through your kitchen, let me tell you why these Cannoli Pancakes are so special. Inspired by the classic Italian dessert, cannoli, these pancakes bring together all those beloved flavors into one comforting dish. The combination of ricotta cheese—known for its creamy texture and mild flavor—blends beautifully with the citrusy brightness of orange zest and the warmth of cinnamon. And let’s not forget those mini chocolate chips that add an irresistible touch of decadence. Whether it’s for a cozy Sunday brunch or a festive Mother’s Day celebration, these pancakes will undoubtedly impress everyone at your table!
Cannoli Pancakes: A Sweet Twist on Tradition
Now that you’re feeling inspired, let’s dive into making these heavenly Cannoli Pancakes! They might sound fancy, but trust me—this recipe is simple and accessible to anyone who loves to cook. You’ll find yourself whipping up these delightful pancakes in no time! So grab your apron and let’s embark on this delicious culinary adventure together.
Ingredients:
This is where the magic begins! Each ingredient plays a vital role in crafting the perfect Cannoli Pancakes. As you prepare to gather them all together, think about how they will come together to create a symphony of flavors that will dance on your taste buds.
- 1 cup all-purpose flour: This foundational ingredient is essential for providing structure to our pancakes. It helps create that lovely fluffy texture we crave while maintaining just enough stability so they hold their shape when flipped. When selecting flour, look for high-quality brands; some even offer “extra fine” options which can yield lighter results. If you want to experiment with whole wheat or gluten-free alternatives, you can certainly swap part or all of this with those options—but keep in mind it may alter the final pancake texture slightly.
- 2 Tablespoons powdered sugar: This sweet addition is what makes our pancakes feel indulgently dessert-like without being overly sweet. Its fine texture dissolves easily into the batter, providing just the right amount of sweetness while enhancing that dreamy cannoli flavor profile we’re after. If you’re watching sugar intake or prefer less sweetness overall, feel free to reduce this amount based on your preferences!
- 1 teaspoon baking powder: An absolute must-have for fluffy pancakes! Baking powder acts as our leavening agent—when combined with moisture and heat during cooking, it releases carbon dioxide bubbles that create lift and lightness in each pancake. Make sure yours is fresh; old baking powder can result in dense pancakes instead of the airy fluffiness we desire.
- 1/2 teaspoon ground cinnamon: Ahh, cinnamon—a spice that’s nothing short of magical! Its warm notes evoke comfort and nostalgia while perfectly complementing the creamy ricotta and orange zest in our dish. This aromatic spice not only enhances flavor but also has health benefits like anti-inflammatory properties. Feel free to adjust based on personal taste; if you’re a fan of spices like nutmeg or cardamom, experiment by adding just a hint!
- 1/4 teaspoon salt: While it may seem counterintuitive to add salt to sweet dishes like pancakes, trust me—it’s non-negotiable! Salt amplifies flavors and balances sweetness beautifully. It brings out the best in every single ingredient without making your dish taste salty at all.
- 1 cup ricotta cheese (drained): The star ingredient here! Ricotta provides both creaminess and richness while keeping our pancakes moist from within. When choosing ricotta, look for whole-milk versions for maximum creaminess; if possible, go for fresh made from local producers—it truly makes all the difference! Be sure to drain any excess liquid before adding it to your batter; this ensures we have just the right consistency without making things too runny.
- 3/4 cup milk: Milk adds moisture to our batter while helping achieve that perfect consistency—a lovely balance between thick enough for structure yet loose enough for easy pouring onto the griddle. You can use any milk you prefer—whole milk offers richness while almond milk or oat milk works wonderfully as dairy-free alternatives!
- 2 large eggs: Eggs do more than bind ingredients—they contribute essential moisture and help provide lift through their protein content when heated. Always crack them into a separate bowl first before adding them in—you’ll avoid potential shell mishaps this way!
- 2 teaspoons fresh orange zest: The zest is where all those beautiful citrus oils reside! Adding freshly grated orange zest elevates our Cannoli Pancakes beyond ordinary breakfast fare—it infuses each bite with vibrant brightness reminiscent of sunny days spent savoring authentic Italian desserts.
- 1 teaspoon vanilla: Just like salt enhances sweetness, quality vanilla extract adds depth and complexity without overpowering other flavors present in our dish—think of it as an enhancer rather than merely another flavor component.
- 3/4 cup mini chocolate chips (or combination of chocolate chips and pistachios): Who doesn’t love chocolate? Mini chocolate chips melt beautifully inside these pancakes creating pockets filled with gooey goodness as they cook—pure bliss! Alternatively (or additionally), chopped pistachios add crunchiness reminiscent of traditional cannolis while offering nutritional benefits too!
- Butter (for pan): Finally—a little butter goes a long way here! Not only does it prevent sticking when cooking but also lends richness imparted from its fat content giving those golden-brown edges we adore so much during breakfast time!
Equipment You’ll Need:
Before diving into preparation mode, let’s ensure we have everything set up for success! Having the right tools not only makes cooking smoother but also transforms what could be a chaotic experience into something truly enjoyable.
- Large mixing bowls – You’ll need at least two sizeable bowls—one for dry ingredients and another for wet ones—to keep everything organized as we mix our batter together seamlessly.
- Whisk – A good whisk is essential here; it allows us to incorporate air efficiently into both our dry ingredients initially as well as when mixing wet ones separately before combining later on—it helps achieve that lightness we crave!
- Nonstick skillet or griddle – This piece is crucial because we want those beautiful golden-brown pancake bottoms without worrying about them sticking stubbornly onto surfaces while cooking away happily over medium heat.
- Spatula – A sturdy spatula helps flip those delicate wonders easily without crumbling apart mid-air—it’s essential during flipping time so ensure yours has some flexibility too!
With all our ingredients gathered close at hand alongside necessary equipment ready-to-go—we’re primed for pancake perfection ahead!
Preparing the Cannoli Pancakes
Step 1: Whisking Together Dry Ingredients
Let’s start by bringing our dry ingredients together in one large mixing bowl—a process known simply as whisking! Begin by measuring out one cup of all-purpose flour followed by two tablespoons powdered sugar along with one teaspoon baking powder, half teaspoon ground cinnamon plus quarter teaspoon salt—all essential components working harmoniously towards achieving that ideal pancake texture we’re aiming for today! Now take your whisk (or even use a fork if needed) then combine everything together until well mixed; you want uniformity here since clumps will cause uneven baking later down this delicious journey!
This step sets us up beautifully because incorporating air early ensures lighter results once cooked—the better combined they are now means fluffier stacks later on which honestly makes ALL difference when enjoying breakfast time favorites such as these Cannoli Pancakes!
Step 2: Combining Wet Ingredients
In another mixing bowl (preferably medium-sized), whisk together one cup drained ricotta cheese alongside three-fourths cup milk plus two large eggs followed closely behind by two teaspoons freshly grated orange zest along with one teaspoon vanilla extract until thoroughly blended together—you’ll notice how creamy & luscious everything melds nicely into one another creating an utterly intoxicating mixture awaiting its turn among dry counterparts soon enough!
This step is critical because properly blending wet components forms base flavors throughout each bite later down road plus ensures proper hydration throughout pancake batter itself preventing dryness altogether while yielding moist interiors post-cooking sessions ahead too—a win-win situation if I ever saw one!
Step 3: Uniting Dry & Wet Mixtures
Now comes perhaps my favorite part—the melding process where we’ll marry both dry & wet mixtures harmoniously within same bowl (trust me folks this moment feels rewarding!) Create well within center area inside previously mixed dry bowl then pour rich velvety blend directly into this space created earlier ensuring even distribution occurs across entire surface area surrounding…and gently fold/stir until just incorporated—not overmixing is paramount here since doing so might lead towards toughened textures instead which nobody wants especially when indulging upon such heavenly creations like Cannoli Pancakes!
Once combined adequately feel free tossing three-fourths cup mini chocolate chips either directly inside or alternatively choose option combining chocolate chip/pistachio combo bringing forth delightful textures alongside mouthwatering flavors playing off each other perfectly once cooked beneath bubbling hot skillets shortly thereafter…
Step 4: Cooking Up Those Fluffy Wonders
Time now awaits us as melted butter awaits sizzling away atop nonstick skillet preheated over medium heat (just imagine how heavenly aromas will soon fill kitchen space). Using ladle/spoon pour approximately half-cup worth batter onto heated surface allowing gentle spreading naturally occurring since viscosity allows flexibility throughout shape formation too…watch carefully waiting patiently till bubble formations arise upon surface area signaling readiness indicating flipping point has come closer than ever before—turning sides golden brown takes roughly 2-4 minutes per side depending upon size chosen so don’t rush this step unless wanting less-than-perfect aesthetics later down line folks trust me here patience pays off immensely ultimately yielding beautiful results everyone dreams about eating shortly thereafter!
Continue repeating above steps till all batter used up ensuring proper spacing maintained between each stacked pancake proudly showcasing unique shapes made originally keeping guests excitedly anticipating what’s coming next…
Stay tuned as we delve deeper into serving suggestions soon along with further tips transforming ordinary breakfasts into extraordinary feasts sure leaving lasting impressions amongst loved ones alike…
Cannoli Pancakes: A Delicious Italian Twist on Breakfast
Ah, Cannoli Pancakes! Just saying the name makes my mouth water and my heart swell with joy. This recipe is not just about pancakes; it’s a beautiful fusion of flavors that brings the beloved Italian dessert right to your breakfast table. Imagine fluffy pancakes infused with creamy ricotta, a zing of fresh orange zest, and pockets of melting chocolate chips—it’s like having dessert for breakfast without any guilt! The best part? It’s surprisingly easy to whip up these delightful treats in your own kitchen, making it perfect for a special brunch with loved ones or simply to brighten up your weekday mornings.
Now, let’s dive into the preparation and ensure that every step is executed perfectly.
Step 5: Create the Pancake Batter Magic
Once you’ve combined your dry ingredients in that large bowl—a step that’s crucial for ensuring even distribution of flavors—you’ll want to move on to the wet ingredients. In a separate mixing bowl, take your ricotta cheese (make sure it’s well-drained because excess moisture can lead to soggy pancakes) and whisk it together with milk, eggs, fresh orange zest, and vanilla until everything is seamlessly blended. I cannot stress enough how important this step is; the ricotta is what gives these pancakes their signature texture—creamy yet light. It’s like magic as you transform those simple ingredients into something ethereal!
When you’ve achieved that lovely smooth consistency, it’s time to introduce this luscious mixture into your dry bowl. Make a well in the center of the flour mix—this little crater is going to hold all that wet goodness—and pour it in gently. Now comes the fun part: using a whisk, combine everything until just blended. You want to see some lumps; they’re actually signs that you’re on the right path to pancake perfection! Overmixing can lead to tough pancakes—nobody wants that! So trust me on this: be gentle and patient here; it’s absolutely paramount for achieving that tender bite we all crave.
Step 6: Stirring in Sweet Surprises
Now that you have your batter coming together beautifully, it’s time to add those chocolate chips—or if you’re feeling adventurous, some finely chopped pistachios for an extra nutty crunch! Fold them gently into the batter with a spatula or wooden spoon. This helps maintain the fluffiness while ensuring each pancake gets its fair share of sweetness. Trust me when I say there’s nothing quite like biting into those warm pancakes and discovering melty chocolate chips nestled inside; it’s sheer bliss!
As you mix these delectable additions, take a moment to savor that intoxicating aroma wafting from your bowl. It’s a reminder of why cooking from scratch is so rewarding—you’re not just making food; you’re creating memories, and this batter holds all the potential for delicious moments ahead.
Step 7: Heat Up Your Pan
With your batter ready to go, it’s time to turn our attention to cooking these beauties! Grab a large non-stick skillet or griddle and place it over medium heat. This step is critical because evenly heating your pan ensures that every pancake cooks through at the same rate without burning. Add a generous pat of butter—just enough to coat the bottom of the skillet while letting it melt into golden liquid gold. Butter not only prevents sticking but also adds rich flavor and contributes beautifully to browning.
Once melted, it’s time for action! Spoon about half a cup of batter onto the hot skillet for larger pancakes (or about a quarter cup if you prefer smaller ones). Don’t rush this step; patience pays off here! Let them cook undisturbed for about 2-4 minutes or until you see bubbles forming on top—the telltale sign they’re ready for flipping. You’ll know they’re golden brown underneath when you gently peek—it should be beautifully caramelized.
Step 8: The Perfect Flip
Ahh—the flip! This part can feel daunting but fear not—I promise you can do it! Once those delightful bubbles appear, use a spatula carefully slide under one pancake at a time and flip it over with confidence. You should see a gorgeous golden-brown color looking back at you—a sure sign you’ve nailed it! Cook this side for another 2-4 minutes until fluffy and cooked through.
Keep an eye on them during their second cooking phase; every stove behaves differently so adjust accordingly if needed. If they’re browning too quickly but aren’t cooked through yet, lower your heat slightly—it’s all about finding that sweet spot!
Next Major Phase – Finishing Touches
As we approach the finish line of our Cannoli Pancakes journey, let’s talk about the toppings—the final flourish that will elevate these pancakes from delicious to utterly extraordinary!
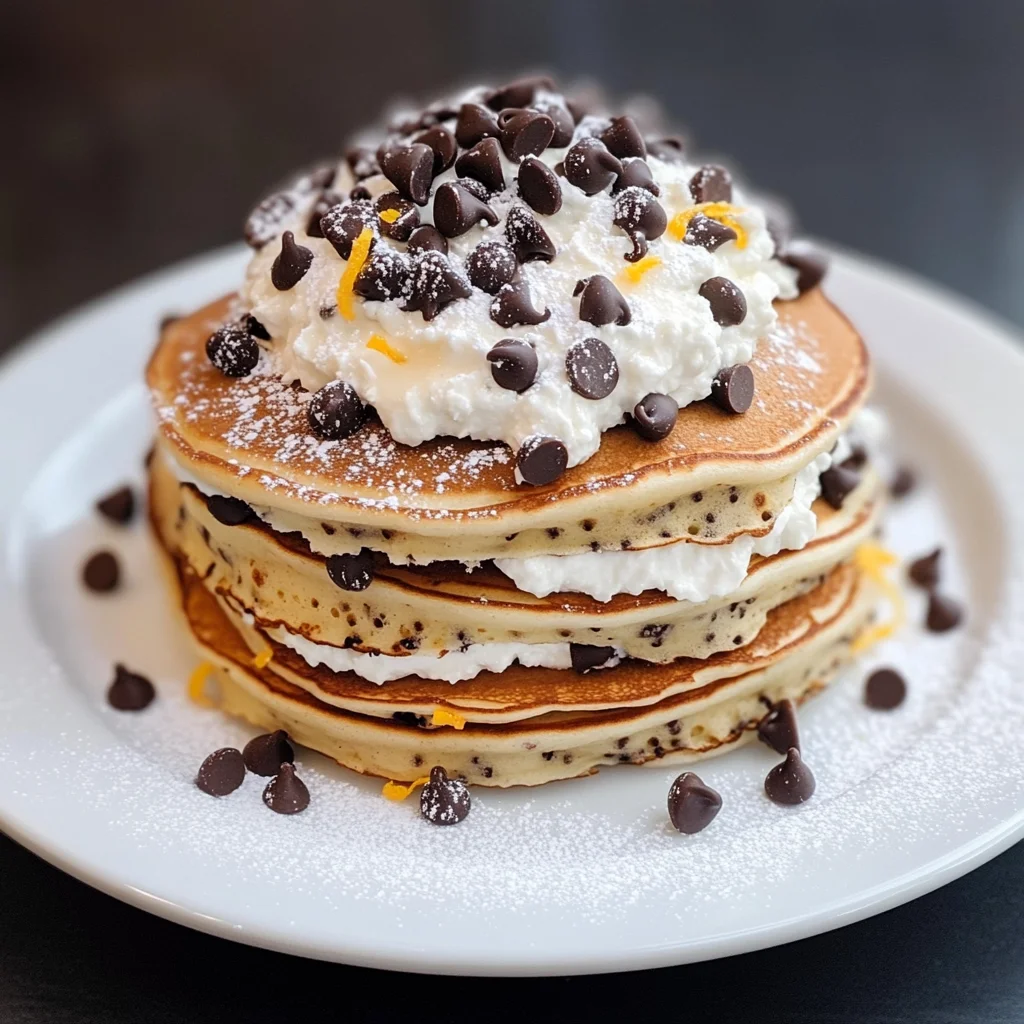
Step 9: Topping Your Masterpiece
Once all pancakes are cooked (and believe me when I say you’ll want to stack them high!), it’s time for one last detail—the toppings! While simple maple syrup is always tempting, imagine drizzling some warm honey or even homemade whipped cream over these beauties instead—how utterly indulgent does that sound? You might also sprinkle extra mini chocolate chips on top or even some crushed pistachios for added crunch and color—the possibilities are endless!
I encourage you not to skip this part because presentation matters; it’s all about tantalizing not just your taste buds but also your eyes! As you sit down with friends or family around the table filled with laughter and warmth, remember every bite is more than just food—it’s an experience steeped in love and tradition.
So there you have it—Cannoli Pancakes ready to take center stage at your breakfast table. They’re light yet rich, sweet yet sophisticated—a truly extraordinary way to start any day. Enjoy every moment as you indulge in this culinary adventure because life is too short not to savor every single bite!
Storage and Enjoyment Tips for Your Cannoli Pancakes
Now that you’ve created these delightful Cannoli Pancakes, it’s time to bask in the glory of your culinary creation! The aroma of orange zest mingling with warm cinnamon wafts through your kitchen, tempting everyone around to gather and indulge. As you serve these fluffy, ricotta-infused pancakes, remember that they can bring joy not just today but also tomorrow! Yes, you heard me right; these pancakes can be savored even after their initial debut. So let’s dive into how to store them properly and maintain their deliciousness for those future cravings.
Storing Leftover Cannoli Pancakes
To keep your leftover Cannoli Pancakes in top-notch condition, simply stack them neatly in an airtight container. This is crucial because it prevents them from drying out and ensures they stay moist and fluffy. You can store them in the refrigerator for up to three days, but trust me—these pancakes are so irresistible that they might not last that long! If you want to keep them fresher for longer, consider placing a slice of bread in the container with the pancakes; this little trick helps absorb excess moisture while keeping everything beautifully soft. When you’re ready to enjoy them again, a quick reheat in the microwave or on a skillet will restore their warmth and texture perfectly. Imagine biting into a pancake that feels just as divine as when it was freshly made!
Freezing Cannoli Pancakes for Later
If you find yourself with an abundance of these heavenly Cannoli Pancakes—or if you’re simply planning ahead—freezing is an excellent option! To freeze them properly, allow the pancakes to cool completely first, then lay them flat in a single layer on a baking sheet until frozen solid. Once they’re firm, transfer them into a freezer-safe bag or container, ensuring all air is removed to prevent freezer burn. These beauties can be stored frozen for up to two months—perfect for those busy mornings when you crave something special without the effort of making it from scratch! When you’re ready to indulge again, simply pop them into the toaster or microwave straight from the freezer, and watch how they come back to life with just a touch of heat. Isn’t that convenience absolutely wonderful?
Cannoli Pancakes
Experience blissful mornings with our Cannoli Pancakes recipe—an Italian twist on breakfast favorites. Try it today!
- Prep Time: 15 minutes
- Cook Time: 20 minutes
- Total Time: 35 minutes
- Yield: Serves approximately 4 people (makes about eight pancakes) 1x
- Category: Breakfast
- Method: Frying
- Cuisine: Italian
Ingredients
- 1 cup all-purpose flour
- 2 tablespoons powdered sugar
- 1 teaspoon baking powder
- 1/2 teaspoon ground cinnamon
- 1/4 teaspoon salt
- 1 cup ricotta cheese (drained)
- 3/4 cup milk
- 2 large eggs
- 2 teaspoons fresh orange zest
- 1 teaspoon vanilla extract
- 3/4 cup mini chocolate chips
Instructions
- In a large mixing bowl, whisk together the flour, powdered sugar, baking powder, cinnamon, and salt.
- In another bowl, combine the drained ricotta, milk, eggs, orange zest, and vanilla; whisk until smooth.
- Make a well in the dry ingredients and pour in the wet mixture. Gently fold until just combined; it's okay if there are some lumps.
- Stir in the mini chocolate chips.
- Heat a non-stick skillet over medium heat and melt some butter to coat the surface.
- Pour about half a cup of batter into the skillet for each pancake; cook until bubbles form on top (about 2-4 minutes), then flip and cook for another 2-4 minutes until golden brown.
Nutrition
- Serving Size: 1 pancake (approximately 85g)
- Calories: 206
- Sugar: 5g
- Sodium: 246mg
- Fat: 8g
- Saturated Fat: 4g
- Unsaturated Fat: 3g
- Trans Fat: 0g
- Carbohydrates: 26g
- Fiber: 0g
- Protein: 7g
- Cholesterol: 64mg