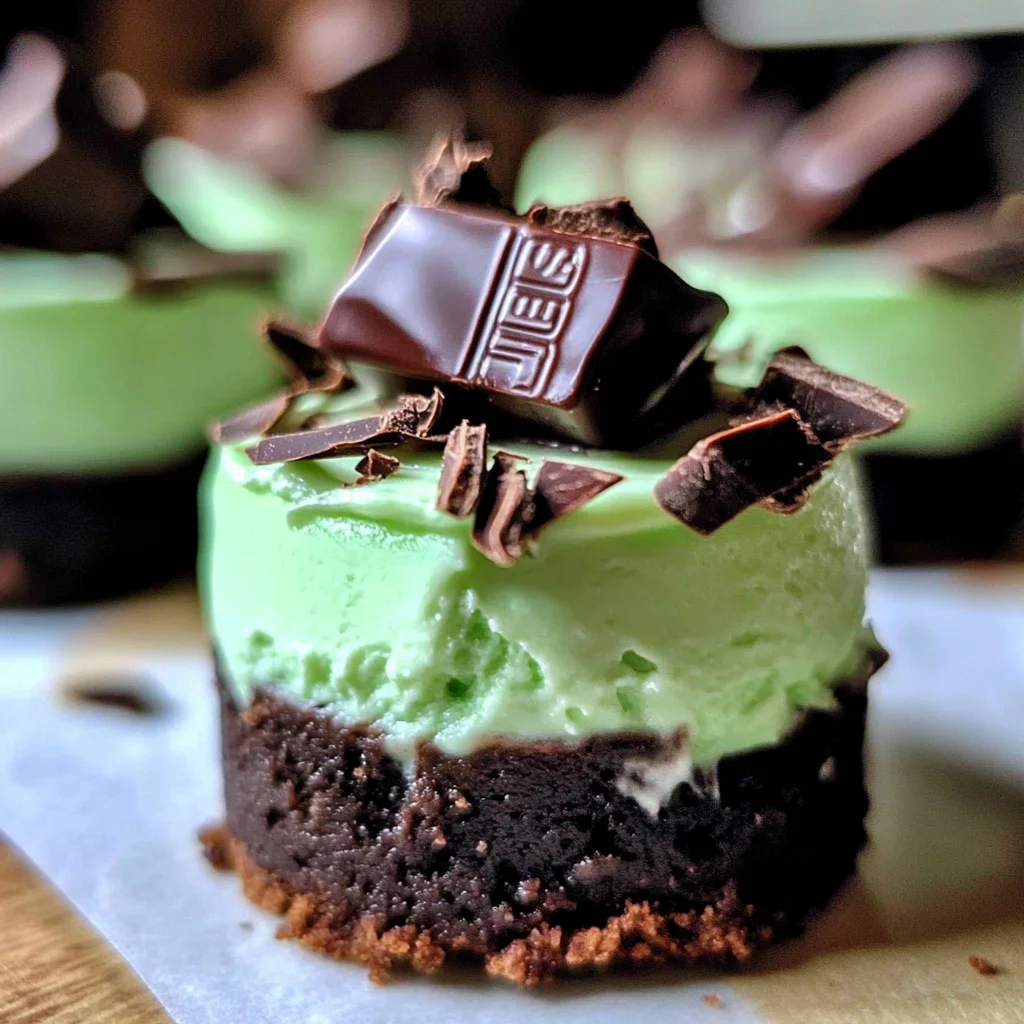
Andes Mint Mini Cheesecakes
There’s something truly magical about the way certain recipes can transport us back to cherished moments, and for me, these Andes Mint Mini Cheesecakes are no exception. The rich combination of creamy cheesecake and refreshing mint, all nestled atop a chocolatey graham cracker crust, is like a warm hug on a plate. Picture this: you take a bite, and the smoothness of the cream cheese filling melts in your mouth while the hint of mint dances playfully on your palate. It’s not just dessert; it’s an experience that brings friends and family together, sparking joy and laughter around the table. Each mini cheesecake is not only adorable but also party-worthy, making them perfect for any celebration, from holiday gatherings to cozy get-togethers with loved ones. Trust me when I say that once you serve these delightful treats, they’ll become a staple in your dessert repertoire!
What makes these Andes Mint Mini Cheesecakes so special is their ability to bridge tradition and innovation. While cheesecakes have long been a beloved dessert, adding the distinct flavor of Andes mints elevates them into something extraordinary. The contrast between the creamy richness of the filling and the cool minty freshness creates a symphony of flavors that tantalizes the taste buds. These mini cheesecakes are perfect for any occasion—whether you’re looking to impress guests at a dinner party or simply treat yourself after a long day. I often find myself making a double batch because they freeze beautifully! Just imagine opening your freezer and finding these little gems waiting for you—a little slice of happiness whenever you need it.
Andes Mint Mini Cheesecakes: A Delightful Twist on Classic Cheesecake
Welcome to my kitchen! Today we’re diving into something incredibly special—Andes Mint Mini Cheesecakes. These delightful bites are not just easy to make; they’re so charming that they’ll bring smiles to everyone lucky enough to enjoy them. So roll up your sleeves and let’s embark on this fun culinary adventure together!
Ingredients:
As we gather our ingredients, I want you to feel the excitement building—you’re about to create something utterly intoxicating! Each element plays its role in crafting these delicious mini cheesecakes that will leave everyone asking for seconds.
- Nonstick baking spray. This is crucial as it ensures that our mini cheesecakes release effortlessly from their pan when they’re ready to serve. You want each one to look as perfect as possible, right? A light coat of nonstick spray prevents sticking without altering the flavor or texture of your delightful treats.
- 1¼ cups chocolate graham cracker crumbs. This ingredient serves as the foundation for our mini cheesecakes—the crust! The chocolate adds depth and pairs beautifully with the creamy filling and minty notes. If you’re feeling adventurous, consider making your own crumbs by processing chocolate graham crackers in a food processor until finely ground; this way you can customize the texture just how you like it.
- 2 tablespoons sugar. Sugar not only sweetens our crust but also helps it bind together nicely with melted butter. It transforms those crunchy crumbs into an irresistible base that complements the lush filling perfectly.
- 4 tablespoons butter melted. Butter is our glue here! When melted, it combines seamlessly with sugar and graham cracker crumbs to create this rich mixture that holds its shape when baked. Using unsalted butter allows you to control the sweetness perfectly; just be sure it’s melted but not too hot when mixing it in.
- 2 8-ounce boxes of cream cheese softened. This is where our cheesecakes get their dreamy creaminess! Softened cream cheese blends beautifully into a velvety filling that’s both rich and satisfying. Make sure it’s at room temperature for easy mixing—trust me, cold cream cheese will leave you with lumpy batter which we absolutely want to avoid!
- ¼ cup plus 2 tablespoons sugar. We’re adding more sugar here because cheesecake deserves its sweetness! This amount strikes a balance between richness and just enough sweetness without overpowering those lovely mint tones.
- 1 egg. The egg works wonders in binding everything together while also giving structure to our cheesecake filling as it bakes—think of it as a binding agent creating that creamy texture we all adore.
- 1 teaspoon mint extract. Ahh, mint! This ingredient brings everything alive with its refreshing flavor; it’s what makes these mini cheesecakes sing! Use high-quality mint extract for an authentic taste—this isn’t just any flavoring; it’s truly paramount in achieving that signature minty goodness.
- 4 drops green food coloring. While this isn’t necessary for flavor, it adds that classic visual appeal we often associate with mint desserts—it’s all about aesthetics too! A few drops will give your cheesecakes that beautiful green hue without overwhelming them.
- 1¼ cups chocolate chips. These little morsels are essential for drizzling over your finished mini cheesecakes; they add another layer of chocolate decadence that’s hard to resist! Dark or semi-sweet chocolate works wonderfully here—choose what you love best!
- 15 Andes mints coarsely chopped. Finally, we finish off our creation with these iconic candies! Their unique blend of chocolate and mint elevates each cheesecake bite into pure bliss—it’s an indulgence you won’t want to skip!
Equipment You’ll Need:
Before we dive into making these delectable treats, let’s take a moment to gather our tools! Having the right equipment makes this process smoother and more enjoyable—it’s like having trusted friends by your side in the kitchen.
- Mini cheesecake pan – This specialized pan is essential for creating perfectly sized portions that cook evenly throughout; plus, they make serving effortless! If you don’t have one on hand, no worries! You can use standard muffin tins lined with paper liners instead—they’ll still yield great results!
- Mixing bowls – You’ll need various mixing bowls for combining ingredients at different stages—ideally one large bowl for mixing our crumb crust and another for our creamy filling.
- Stand mixer or handheld electric mixer – A stand mixer makes whipping up that luscious cream cheese filling an absolute breeze while ensuring everything gets mixed uniformly—and who doesn’t love hands-free convenience? If you don’t have one available, grab an electric hand mixer instead; just be prepared to work a bit harder!
- Spatula – A rubber or silicone spatula helps scrape down sides and fold ingredients gently without deflating our precious filling—this step may seem small but trust me: it’s absolutely critical!
- Measuring cups & spoons – Precision matters when baking! Accurate measurements ensure consistent results every time; use dry measuring cups for solids like flour or sugar and liquid measuring cups for things like melted butter or milk.
Now that we’ve gathered our ingredients and tools let’s jump right into preparing those Andes Mint Mini Cheesecakes!
Step 1: Prepping Your Pan
Start by preheating your oven to 325 degrees Fahrenheit—this temperature will help achieve that perfect bake without overcooking those delicate cheesecakes later on. While waiting for it to reach temperature, generously spray your mini cheesecake pan with nonstick baking spray; this step ensures easy removal once they’ve cooled down properly after baking—a non-negotiable part of this process if you want picture-perfect treats!
Step 2: Crafting Your Crust
In a medium-sized bowl, combine 1¼ cups of chocolate graham cracker crumbs with 2 tablespoons sugar along with those luscious melted four tablespoons butter until well mixed together—the mixture should resemble wet sand at this point! It’s important not only because it’ll hold its shape during baking but also because it’ll provide incredible flavor depth against our sweet filling later on. Once combined evenly throughout (trust me—you can’t rush this!), divide evenly among each mini cheesecake mold before pressing down gently using either spoon or fingers—it should feel packed yet still crumbly enough not crumble away upon cutting into later!
Step 3: Creating That Dreamy Filling
Now comes my favorite part—the luscious filling! In either stand mixer bowl or large mixing bowl using hand mixer (your choice!), beat together both boxes (16 ounces) softened cream cheese along with ¼ cup plus two tablespoons sugar until smooth—this process known as creaming allows air bubbles form resulting ultimately light airy texture we crave from every bite of cheesecake perfection! Once blended beautifully (make sure there are no lumps!), add in one egg followed by one teaspoon mint extract along with four drops green food coloring before mixing again on low speed until fully incorporated—don’t rush through here because incorporating air properly gives us fluffy result rather than dense lumpiness which would ruin entire experience later on!
Step 4: Baking Bliss
Now it’s time pour that fabulous cream cheese mix over prepared crusts dividing evenly among molds (a generous scoop per mold works wonders!). Bake those beauties in preheated oven set at 325 degrees Fahrenheit exactly twenty minutes long—they will puff slightly but don’t worry if they seem soft—remember they’ll firm up while cooling down afterward when reaching room temp then chill overnight ideally before serving next day! After twenty minutes has passed turn off oven completely propping open door slightly using wooden spoon allowing gentle cooling process occur slowly—that’s important here since sudden temperature drop could cause cracking otherwise ruining presentation completely.
I can’t wait for you all to experience how wonderfully delicious these Andes Mint Mini Cheesecakes truly are—I promise once you’ve tasted one you’ll understand why they’re such a hit at any gathering or simply enjoyed alone after dinner too!
Step 5: Patience is a Virtue – Cooling Time
Once your delicious Andes Mint Mini Cheesecakes have baked for their allotted 20 minutes, it’s time for one of the most crucial steps in baking: cooling. Now, I know it’s tempting to dive right in and taste those little beauties, but trust me—this step is non-negotiable. By turning off the oven and propping open the door with a wooden spoon, you’re allowing the cheesecakes to cool down gradually. This slow cooling process helps prevent cracking on the surface and ensures a smooth texture throughout. You want them to rest in that warm environment for about 5-10 minutes, just soaking up the residual heat while stabilizing.
As you watch them cool, you’ll notice they might puff up slightly during baking; don’t be alarmed! This is perfectly normal as they expand with heat. Once you see them settling back down, it’s a sign that they’re ready for the next phase. Avoid taking them out too soon—if you do, you risk compromising that creamy consistency we’ve worked so hard to achieve. So hang tight; this moment of anticipation will make the reward all the sweeter!
Step 6: The Chill Factor – Letting Them Rest
After their brief interlude in the warm oven, these mini cheesecakes need some quality time in the refrigerator. I cannot stress enough how important chilling is for achieving that perfect cheesecake texture! Aim for at least four hours or, if time permits, overnight is even better. This allows those flavors to meld beautifully and lets the cheesecake firm up just right. The cold environment also enhances the mint flavor—can you already imagine that cool sensation dancing on your palate?
While they’re chilling, take a moment to appreciate how far you’ve come in this baking journey! When you finally remove them from the pan after chilling, they should feel firm yet still have that delicate creaminess when bitten into. Remember, patience pays off here; rushing this step can lead to a mushy mess instead of the delightful bites you’re aiming for.
Step 7: Melting Magic – Preparing Your Chocolate Topping
Now comes one of my favorite parts—the chocolate topping! Melting chocolate chips may sound simple, but it’s an art form that deserves your attention and love. Use a microwave-safe bowl and heat those chocolate chips in 30-second intervals at medium power. Stir between each interval until they are beautifully melted and glossy; this usually takes about 1-2 minutes total depending on your microwave’s wattage. Trust me on this: keeping an eye on your chocolate is essential because burnt chocolate is not only heartbreaking but can also ruin your otherwise perfect Andes Mint Mini Cheesecakes.
When melting chocolate, always remember that it should be smooth and pourable without any lumps or solid bits remaining—you want it to flow like liquid gold over each cheesecake! Once melted, let it cool slightly before using it as a topping; this will ensure it doesn’t melt into your cheesecakes but rather sits atop them like a luxurious blanket.
Step 8: The Grand Finale – Assembling Your Cheesecakes
The moment has arrived! After all that love and care put into these Andes Mint Mini Cheesecakes, we’re finally ready to dress them up with our luscious melted chocolate and chopped Andes mints. Start by carefully removing each mini cheesecake from its pan—this can be done by gently pressing from underneath if they’re stuck or using a small offset spatula to help release them without damaging their beautiful shapes.
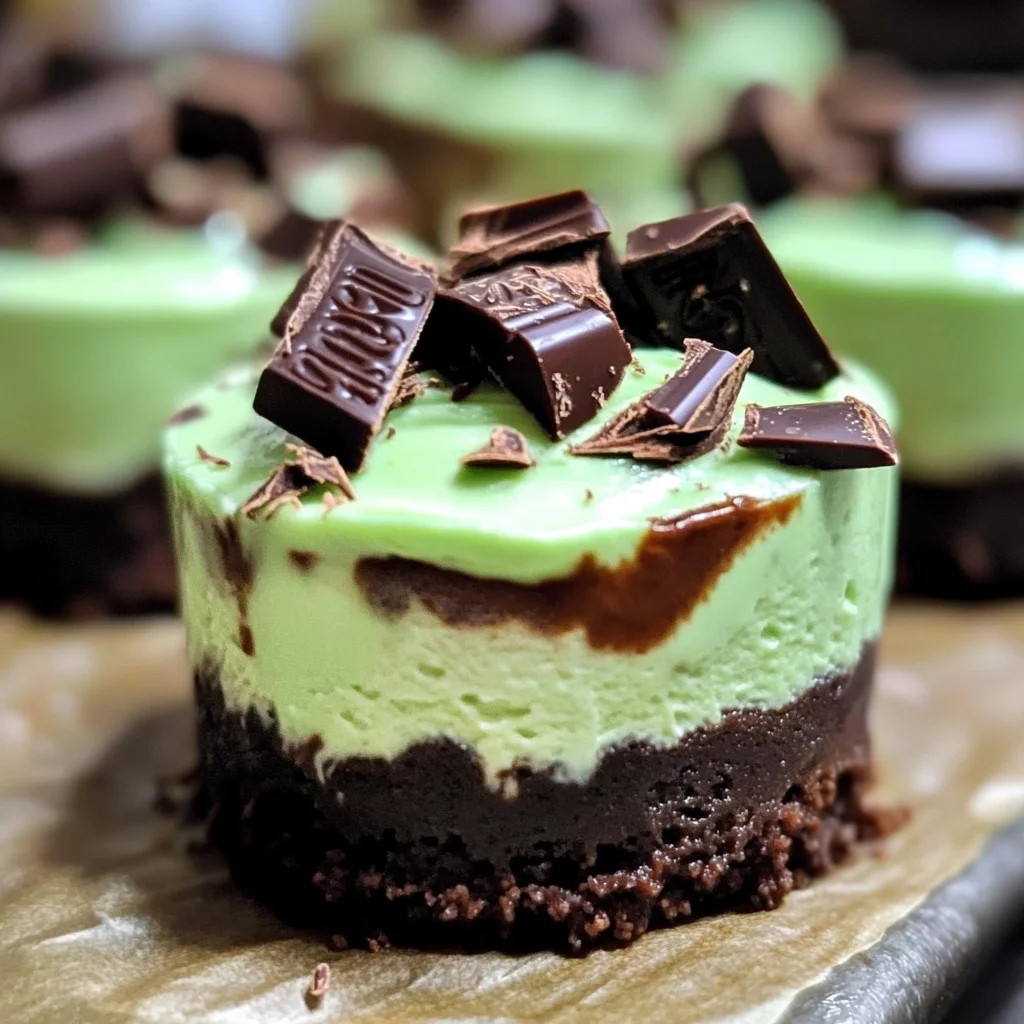
Now place each cheesecake on a serving platter or individual dessert plates; I promise they will look utterly adorable displayed together! Using a heaping tablespoon of your melted chocolate topping, drizzle generously over each mini cheesecake—it should cascade over the edges like a rich waterfall of decadence. Follow up by sprinkling coarsely chopped Andes mints over top; not only does this add visual appeal with their vibrant green color contrasting against the dark chocolate, but it also intensifies that minty flavor we all adore.
Finally, step back and admire your work! Each bite will be an explosion of textures and flavors—smooth creaminess from the cheesecake combined with crunchy bits of minty freshness and velvety chocolate bliss. These little treats are party-ready and sure to impress anyone fortunate enough to indulge in them!
Final Touches – Serving Suggestions
As we wrap up our adventure with these Andes Mint Mini Cheesecakes, let’s talk about serving suggestions because presentation can elevate any dish from ordinary to extraordinary! Consider pairing these delightful bites with fresh raspberries or strawberries for a pop of color and tanginess; their acidity cuts through the richness beautifully while adding an extra layer of flavor complexity.
You could also serve these mini cheesecakes alongside whipped coconut cream for those who prefer a dairy-free option—it adds an airy sweetness that complements mint wonderfully while being irresistibly fluffy! And don’t forget about garnishes; fresh mint leaves or even drizzles of additional melted chocolate can transform your dessert into an Instagram-worthy masterpiece.
What makes these Andes Mint Mini Cheesecakes truly special isn’t just their exquisite taste but also how they bring people together around shared moments of joy—whether it’s at a festive gathering or simply enjoying a quiet evening treat at home. So gather your loved ones around and indulge in these scrumptious bites—you’ve earned every delicious morsel!
Storage and Enjoyment Tips for Your Andes Mint Mini Cheesecakes
Now that you’ve crafted these adorable Andes Mint Mini Cheesecakes, it’s time to revel in the joy of enjoying them! But wait—don’t just dive right in; let’s chat about how to preserve this delightful creation so you can savor them over the next few days or even longer. These little bites of heaven are perfect for sharing with friends, family, or simply keeping for those moments when you need a sweet escape. I promise you, they deserve the best storage treatment to maintain their creamy texture and enchanting minty flavor!
Storing Leftover Andes Mint Mini Cheesecakes
To keep your Andes Mint Mini Cheesecakes fresh and delicious, opt for an airtight container. This is essential because exposure to air can cause them to dry out or absorb unwanted odors from the fridge. Ideally, store them in the refrigerator where they’ll stay perfectly chilled and ready for a late-night treat or surprise guest! These cheesecakes will maintain their delightful quality for about 5 to 7 days—trust me on this, you’ll want every last crumb. If you notice any slight drying out after a couple of days, a clever trick is to place a slice of bread in the container alongside them; it helps keep the moisture levels just right! After storage, when you’re ready to enjoy one (or two), you’ll find that the flavors have had time to meld beautifully—just imagine that first bite, with the smooth creaminess balanced by the rich chocolate and refreshing mint.
Freezing Andes Mint Mini Cheesecakes for Later
For those moments when you want to prepare ahead—or perhaps you’re planning a gathering and want something sweet on hand—freezing these mini cheesecakes is an absolute game-changer. To freeze them properly, make sure they are fully cooled first. Then, gently remove each cheesecake from its pan and lay them flat on a baking sheet lined with parchment paper; freeze them until solid before transferring to an airtight container or freezer bag. This method prevents them from sticking together and maintains their delightful shape! These frozen treats can last up to three months in your freezer without losing their charm. When you’re ready to indulge, simply take one out and let it thaw in the refrigerator for a few hours or overnight—it’s like having a secret stash of happiness waiting just for you! The convenience factor here is fabulous; imagine pulling out these beauties whenever you’re craving something sweet without any fuss at all!
Andes Mint Mini Cheesecakes

Indulge in the delightful Andes Mint Mini Cheesecakes—an enchanting blend of creamy cheesecake and refreshing mint, all resting on a rich chocolate graham cracker crust. Perfect for any celebration or cozy gathering, these bite-sized desserts are guaranteed to bring smiles to your loved ones. Their vibrant green hue and decadent chocolate drizzle make them not only delicious but also visually appealing. Whether you’re hosting a party or simply treating yourself after a long day, these mini cheesecakes are an unforgettable experience that deserves a place in your dessert repertoire.
- Prep Time: 20 minutes
- Cook Time: 20 minutes
- Total Time: 40 minutes
- Yield: Makes approximately 12 servings 1x
- Category: Dessert
- Method: Baking
- Cuisine: American
Ingredients
- Nonstick baking spray
- 1¼ cups chocolate graham cracker crumbs
- 2 tablespoons sugar
- 4 tablespoons unsalted butter, melted
- 16 ounces cream cheese, softened
- ¼ cup plus 2 tablespoons sugar
- 1 egg
- 1 teaspoon mint extract
- 4 drops green food coloring
- 1¼ cups chocolate chips
- 15 Andes mints, coarsely chopped
Instructions
- Preheat your oven to 325°F and spray a mini cheesecake pan with nonstick baking spray.
- In a bowl, mix chocolate graham cracker crumbs, 2 tablespoons of sugar, and melted butter until combined. Press evenly into the bottom of each mold.
- In a mixer, beat softened cream cheese and remaining sugar until smooth. Add the egg, mint extract, and food coloring; blend until creamy.
- Pour the filling over the crusts and bake for 20 minutes or until set. Allow to cool in the oven with the door ajar for about 10 minutes.
- Chill in the refrigerator for at least four hours or overnight before serving.
- Melt chocolate chips in intervals until smooth; drizzle over cooled cheesecakes and top with chopped Andes mints.
Nutrition
- Serving Size: 1 mini cheesecake (50g)
- Calories: 193
- Sugar: 14g
- Sodium: 120mg
- Fat: 12g
- Saturated Fat: 7g
- Unsaturated Fat: 4g
- Trans Fat: 0g
- Carbohydrates: 19g
- Fiber: 1g
- Protein: 3g
- Cholesterol: 33mg