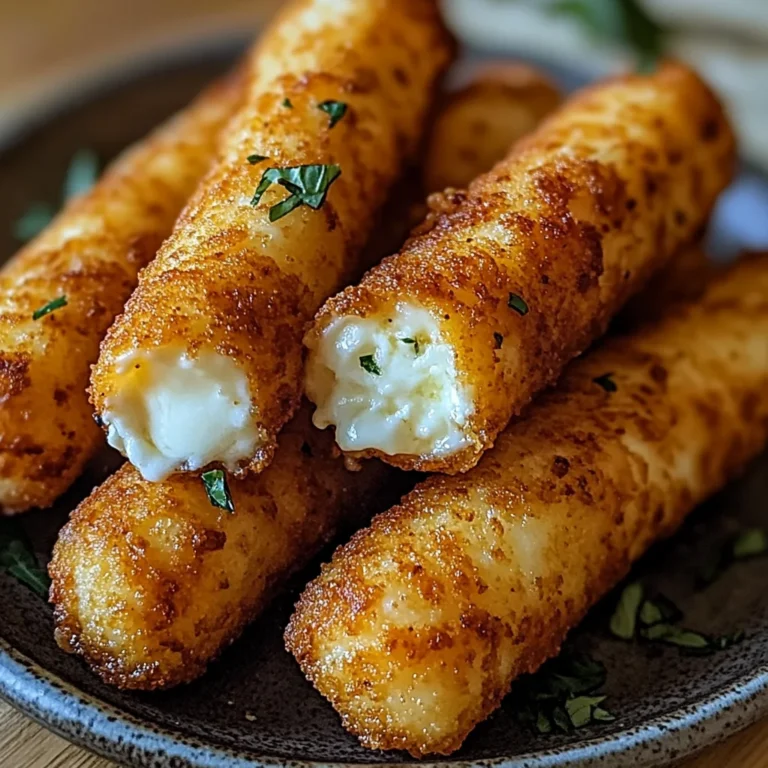
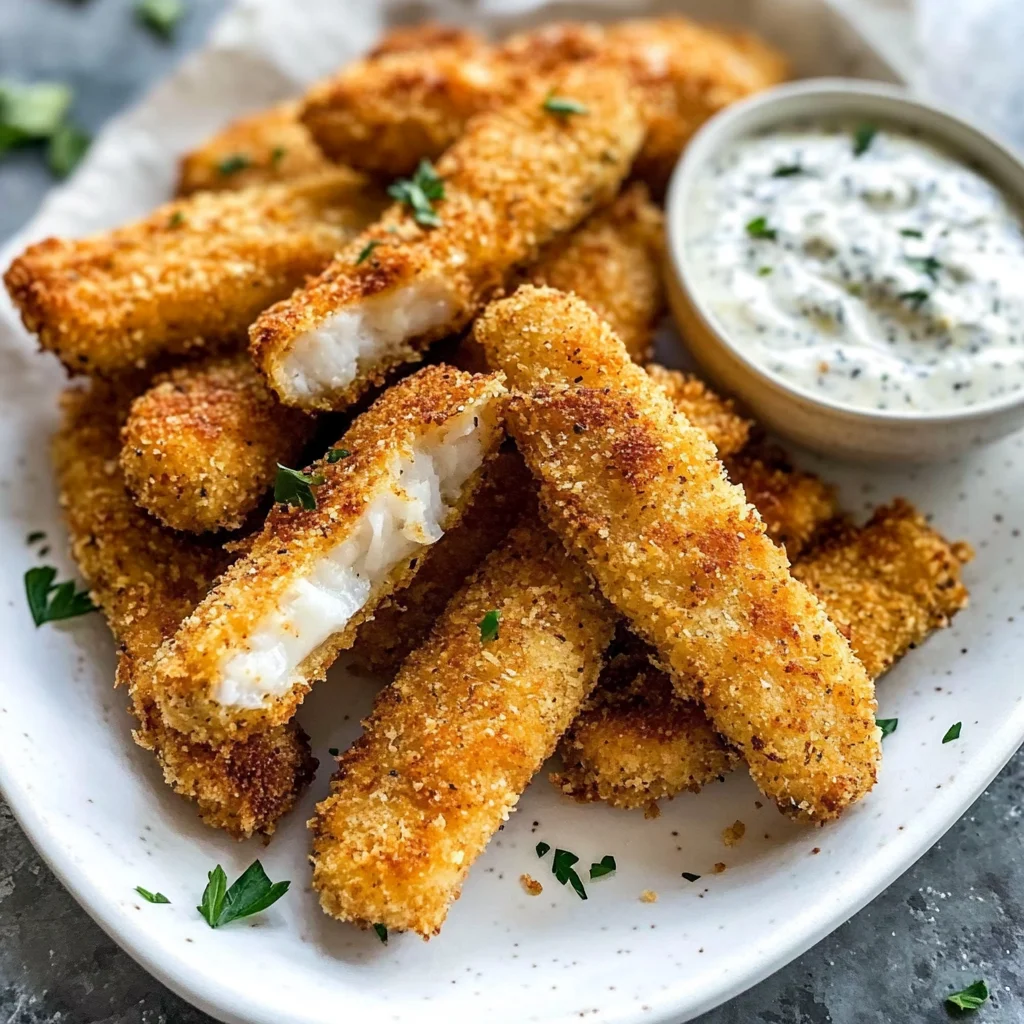
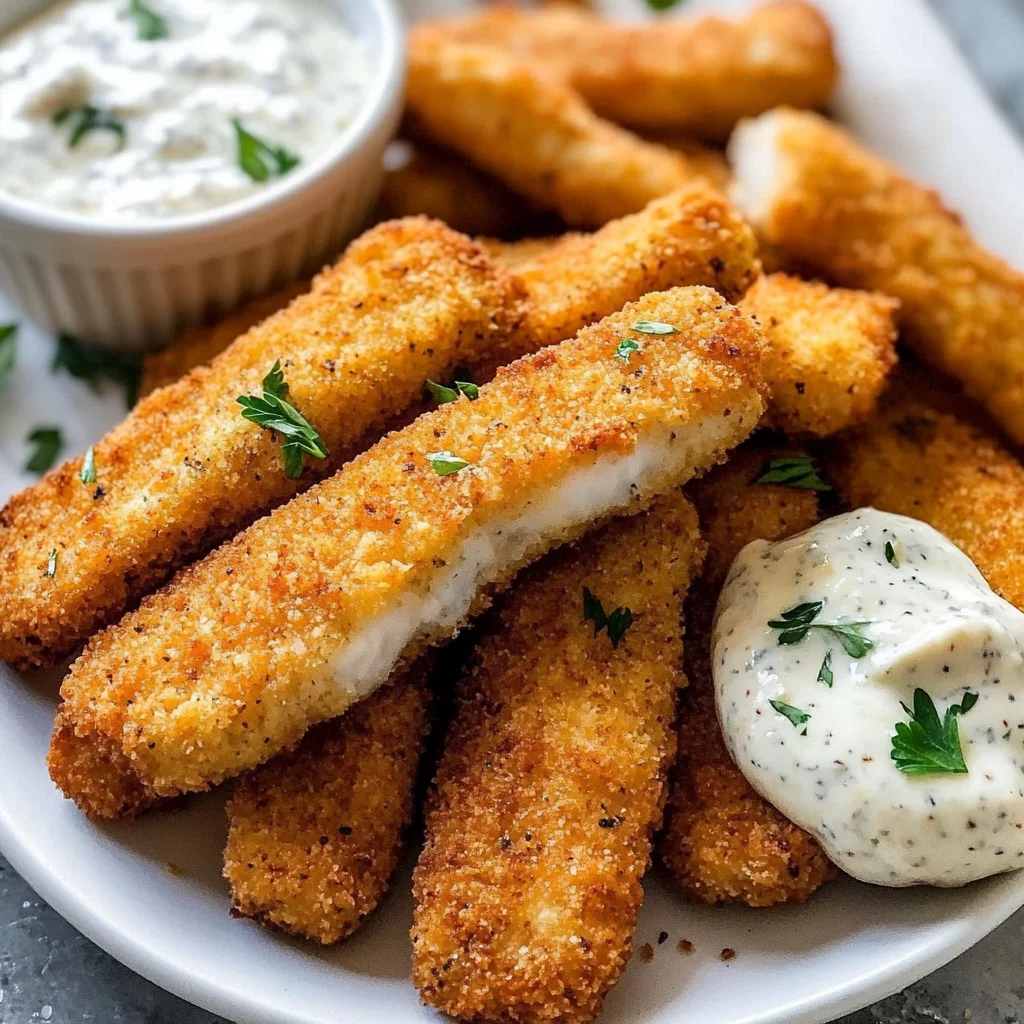
Crispy Baked Fish Sticks with Tartar Sauce
There’s something magical about the smell of freshly baked fish sticks wafting through the kitchen, isn’t there? It transports me back to my childhood, where every crispy bite was a celebration of flavors and textures. These Crispy Baked Fish Sticks with Tartar Sauce are not just any ordinary dish; they are a delightful fusion of nostalgia and modern culinary technique that transforms a simple meal into an extraordinary experience. Picture this: golden-brown fish sticks, each coated in a deliciously seasoned crispy exterior, paired with that zingy, creamy tartar sauce that dances on your palate. It’s comfort food at its finest, yet it feels fresh and innovative, making it perfect for any meal—be it brunch or dinner.
What I love most about this dish is how versatile it is. You can whip it up for a cozy family dinner or serve it to impress your friends during a casual get-together. The beauty lies in the process; every step is an invitation to engage your senses and savor the moment. We’re embracing the crunch, the flavor explosion, and the joy of creating something that everyone will adore. Trust me when I say that once you dive into this recipe, you’ll be hooked—not just on the taste but on the experience of making something truly special together.
Crispy Baked Fish Sticks with Tartar Sauce: A Comforting Classic Reimagined
As we embark on this culinary adventure together, let me remind you that cooking is not just about following steps; it’s about connecting with ingredients and letting your creativity flow. These fish sticks are delightfully crunchy on the outside while remaining tender and flaky within—a true treat for all ages! Pair them with homemade tartar sauce, and you’ve got a meal that’s not only comforting but also sophisticated in its simplicity. So grab your apron, roll up those sleeves, and let’s make some magic happen!
Ingredients:
Before we dive into the cooking process, it’s essential to gather our ingredients. Each one plays a vital role in crafting these delicious fish sticks and their accompanying tartar sauce.
- 1 pound (450g) white fish fillets (like cod or haddock). Choosing high-quality fish is crucial here; it serves as the heart of our dish. Fresh fillets should have a mild odor, firm texture, and bright appearance—these traits indicate freshness and flavor potential. If you can get your hands on some sustainably sourced fish, even better! The flaky consistency of whitefish pairs beautifully with our crispy coating while providing a neutral canvas for all those yummy spices we’ll be adding later.
- 1 cup (120g) breadcrumbs (preferably panko). Panko breadcrumbs are absolute game-changers because they create that coveted extra crunch we all crave in a good fish stick. Their lightness allows for even browning without becoming soggy or heavy. If you’re looking for alternatives due to dietary preferences or availability, feel free to use crushed cornflakes or whole wheat breadcrumbs—they still deliver fantastic texture but may alter the flavor slightly.
- 1/2 cup (60g) all-purpose flour. This ingredient might seem simple but think of flour as the glue that holds everything together! Coating our fish fillets in flour helps to absorb moisture—allowing the egg wash to stick better—while also giving us that wonderful crispiness during baking. When selecting your flour, opt for unbleached if possible; it tends to have more flavor than its bleached counterpart.
- 2 large eggs. Eggs are non-negotiable when it comes to achieving that beautiful golden crust! They act as a binding agent—helping our breadcrumbs adhere while adding richness to our fish sticks’ overall flavor profile. Remember to whisk them well; this ensures an even coating that will produce uniformly crispy results.
- Salt and pepper to taste. Don’t underestimate seasoning! A pinch of salt brings out natural flavors in our fish while pepper adds that subtle kick we all love without overpowering the dish’s delicate essence. Be generous but remember—it’s always easier to add more later than to take away!
- 1 tablespoon (15ml) lemon juice. This ingredient is absolutely paramount! The acidity from lemon juice brightens up our tartar sauce while complementing the richness of fried foods like our crispy baked fish sticks beautifully. Plus, who doesn’t adore that refreshing zesty flavor? Freshly squeezed is always preferred over bottled for maximum vibrancy.
- 1 cup (240ml) mayonnaise (or vegan mayonnaise). Here’s where things get exciting! Mayonnaise serves as the base for our tartar sauce—it provides creaminess and depth while balancing out other flavors beautifully. When choosing mayo, look for brands made with quality oils without unnecessary additives—your taste buds will thank you later!
- 2 tablespoons (30g) dill pickles, finely chopped. These little gems introduce crunchiness and tanginess into our tartar sauce—a delightful contrast against the rich mayo! If you’re not fond of pickles or want something different, consider substituting them with capers for an equally delicious twist.
- 1 teaspoon (5g) dried dill weed (or fresh if available). Dill brings an aromatic herbal note that’s simply irresistible in tartar sauce! It works harmoniously with pickles while enhancing overall flavor complexity—trust me on this one; it’s worth adding!
- Salt and pepper again for seasoning our tartar sauce—because every component deserves attention!
Now that we’ve gathered everything we need let’s move forward into crafting these delightful bites!
Equipment You’ll Need:
Having the right tools at hand makes all the difference in creating culinary masterpieces—and trust me; you’ll want these essential partners by your side throughout this journey! Each piece plays an important role in ensuring success.
- Baking sheet lined with parchment paper: This non-stick surface ensures that our fish sticks won’t cling stubbornly when they’re perfectly golden brown after baking—it makes cleanup effortless too! If you don’t have parchment paper handy, simply greasing your baking sheet will work fine but may require monitoring closely since sticking could occur more easily.
- Three shallow bowls: These trusty companions will help us set up an efficient breading station by holding flour in one bowl, beaten eggs in another, and panko breadcrumbs mixed with seasonings in yet another bowl—all ready for action! Using shallow bowls allows easy access when dredging those delicate fillets without creating too much mess.
- Whisk: A simple yet vital tool used primarily for beating eggs here—this helps create a smooth mixture without lumps so every piece gets evenly coated before heading into those crunchy breadcrumbs.
- Tongs or fork: Either tool will do wonders for handling slippery raw fish fillets while dredging through flour then dipping into egg wash—you want precision during this stage since we aim for full coverage!
With our ingredients prepped alongside trusty kitchen tools assembled—we’re ready to dive into preparing these crispy baked delights!
Preparing the Crispy Baked Fish Sticks with Tartar Sauce
Step 1: Prepping Our Workspace
Before we begin crafting these delectable treats, take a moment to clear off your countertop. A tidy workspace sets you up for success—it allows you to focus entirely on what you’re doing instead of searching through cluttered drawers or navigating around random items scattered everywhere! Once everything’s organized neatly within arm’s reach—including those three shallow bowls mentioned earlier—we can now set up our breading station by placing them side by side: flour first followed by beaten eggs then finally panko breadcrumbs seasoned lightly with salt & pepper along with any additional herbs/spices desired such as paprika or garlic powder if you’re feeling adventurous today!
Step 2: Prepare Your Fish Fillets
Now comes an exciting part—let’s prepare our star ingredient—the whitefish fillets! Start by patting them dry using paper towels; removing excess moisture prevents sogginess later on during baking which could ruin that sought-after crispiness we’re aiming for here (and believe me—you want crispy!). Then cut each fillet into uniform strips approximately 1-inch wide—the key here is consistency; smaller pieces may dry out faster while larger ones might take longer than necessary resulting ultimately uneven cooking times across batches so keep an eye out! Once cut properly set aside until ready to coat fully before heading straight into hot oven bliss awaiting them soon thereafter…
Step 3: Dredging Compartmentalized
With our fillets prepped nicely now let’s move onto coating them accordingly using established assembly line method outlined earlier—the first dip should be into flour ensuring complete coverage followed swiftly by egg mixture afterward allowing excess liquid drain off before finally rolling those beauties gently across panko breadcrumb mix until fully enveloped within crunchy goodness—with fingers working their magic throughout ensure even distribution achieved across each piece effortlessly resulting wonderfully satisfying experience post-bake later down line!
Step 4: Baking Time!
Preheat oven at this stage according specified temperature indicated below ensuring optimal heat required achieves desired outcome subsequently achieved throughout process involving placing coated strips directly onto prepared baking sheet lined parchment paper spacing them out evenly apart enough allowing air circulation around each piece promoting even browning whilst avoiding overcrowding situation occurring potentially leading undesirable outcome instead thereby inviting disaster upon themselves prematurely ruining efforts thus far exerted willingly towards goal accomplished successfully reaching finish line quickly thereafter… Bake until golden brown about 20–25 minutes flipping halfway through recommended timing observed carefully watching closely maintaining vigilance throughout entire duration patiently waiting anticipation builds excitement bubbling beneath surface knowing soon enough feast awaits us forthcoming shortly thereafter!!
As always dear friend—I encourage you not rush any step along way savor sensation unfolding gradually savoring aromas wafting through kitchen bringing everyone together surrounding table sharing laughs memories created alongside simple joy derived from enjoying home-cooked goodness shared amongst loved ones cherished forevermore…
And voilà! You’ll soon find yourself served warm crispy baked fish sticks alongside zesty homemade tartar sauce ready devour accompanied laughter smiles exchanged freely filling room warmth love nourishing hearts souls alike forevermore…
The Journey to Crispy Perfection: Breading Your Fish Sticks
Step 5: The Art of Breading – Creating a Flavorful Shield
Now that your fish is perfectly cut into those delightful sticks, it’s time to embark on the magical journey of breading them. This part is not just about coating; it’s about enveloping each piece in a crispy armor of flavor that will transform your humble fish into an extraordinary bite. You’ll begin by setting up a breading station with three shallow dishes – one for flour, another for the egg mixture, and the last for the breadcrumbs. Trust me on this—having everything organized will make the process smoother and more enjoyable!
In your first dish, season about half a cup of all-purpose flour with salt, pepper, and perhaps a dash of garlic powder or paprika if you’re feeling adventurous. This initial layer provides a subtle flavor and helps the egg adhere better. Next, whisk together two large eggs with a splash of water in your second dish until they are well combined; this creates a lovely binding agent that will help the breadcrumbs cling beautifully to your fish sticks. Finally, in your third dish, mix one cup of panko breadcrumbs with some dried herbs like oregano or thyme. Panko adds that coveted crunch factor, while the herbs infuse every bite with aromatic goodness.
Now comes the fun part! Take each fish stick, dredge it lightly in the flour to ensure an even coating (shake off any excess), then dip it into the egg mixture, allowing any surplus to drip off before finally rolling it in those crunchy breadcrumbs. Make sure each piece is evenly coated – this step is absolutely paramount because it ensures that when you bake them, they will become golden brown and crispy rather than soggy. As you line them up on a parchment-lined baking sheet, take a moment to appreciate how these unassuming pieces of fish are transforming into something special!
Step 6: A Flavorful Chill – Why Resting Matters
Once your fish sticks are breaded and looking fabulous on that baking sheet, it’s essential to give them some time to rest before they meet their oven destiny. I know waiting can be tough (trust me, I’ve been there!), but letting them chill for at least 15 minutes in the refrigerator is crucial for achieving that perfect texture. Why? Well, resting allows the coating to set and adhere properly to the fish; this means less chance of it falling off during baking. Think of it as allowing flavors to mingle and develop.
As they chill out in the fridge, preheat your oven to 425°F (220°C). This high temperature is vital because it ensures those breadcrumbs crisp up beautifully without needing excessive oil—the hallmark of healthy yet indulgent cooking! When you pull those sticks out after their brief sojourn in the fridge, you might notice they feel firmer; this is exactly what we want. They’re now ready for their grand entrance into the oven!
Step 7: Baking Magic – Timing Is Everything
With your oven preheated and your fish sticks chilled, it’s time for them to bake! Carefully place your baking sheet on the middle rack of the oven and set a timer for 15 minutes. During this time, don’t rush! Resist opening that oven door too soon; each time you do so interrupts that beautiful heat circulation which is crucial for even cooking and browning. As they bake away, you’ll start noticing an intoxicating aroma wafting through your kitchen—this is when anticipation builds!
After 15 minutes have passed (and trust me, you’ll want to keep peeking!), flip each stick over gently using tongs or a spatula; this ensures both sides achieve equal crispiness as they finish baking on the other side. Now let them bake for another 10-15 minutes until they reach a glorious golden brown color—look for that inviting hue because it indicates crispiness while sealing in moisture from within. To check for doneness without cutting into them (which would release all those delicious juices), use a fork or knife; if it flakes easily at its thickest point without resistance—that’s your cue!
Step 8: The Final Flourish – Preparing Your Tartar Sauce
While those heavenly sticks are transforming in the oven, let’s talk about what makes this dish truly extraordinary—the tartar sauce! It’s often overlooked but can elevate your meal from good to absolutely phenomenal in just minutes! In a medium bowl, combine half a cup of vegan mayonnaise (or regular mayo if preferred) with two tablespoons of finely chopped dill pickles or relish—you’ll be amazed at how these tangy bites brighten everything up!
Next comes my secret weapon: add a teaspoon of Dijon mustard along with a squeeze of fresh lemon juice—this infusion brings acidity that cuts through richness while adding layers of flavor you simply cannot resist! Stir everything together until it’s nicely combined—oh my goodness, just smelling this sauce will make your mouth water! If you’re like me and enjoy extra depth, consider tossing in some chopped capers or fresh herbs like dill or parsley for added freshness.
Once everything is mixed well and has had time for those flavors to marry (just about 5-10 minutes should do), taste test! Adjust seasoning with salt and pepper as needed because every palate is unique—and let’s face it; you want this sauce to complement those crispy baked fish sticks perfectly.
The Grand Finale: Serving Your Crispy Baked Fish Sticks
Step 9: Plating Perfection – Making It Shine
Finally! The moment we’ve all been waiting for has arrived—the unveiling of our glorious crispy baked fish sticks alongside our homemade tartar sauce! Carefully remove that baking sheet from the oven—don’t forget to admire their golden beauty—it’s like seeing little soldiers ready for battle on your dinner plate! Serve them hot right out of the oven because that’s when they’re at their absolute best—not only visually stunning but also sizzling with warmth.
For an extra touch (because who doesn’t love presentation?), I recommend garnishing with fresh lemon wedges or even sprigs of parsley for color contrast against that crunchy exterior. Not only does this enhance visual appeal but squeezing some fresh lemon juice over those fish sticks just before eating brightens up all those flavors even more—trust me on this one!
And there you have it—a beautifully crafted dish that’s not just food but an experience meant to be savored! Whether you’re serving these crispy baked fish sticks at brunch or as part of a cozy weeknight dinner with friends or family, I promise you they’ll leave everyone raving about how deliciously satisfying they were. So go ahead—dive into this culinary adventure and enjoy every mouthwatering bite!
Storage and Enjoyment Tips for Your Crispy Baked Fish Sticks with Tartar Sauce
Now that you’ve crafted your very own Crispy Baked Fish Sticks with Tartar Sauce, the excitement doesn’t have to end here! I can just imagine you diving into that delightful crunch, paired perfectly with the creamy, zingy tartar sauce that lifts each bite to a whole new level. But what happens if you have some leftovers? Don’t worry; I’m here to guide you on how to store these treasures so they remain delicious, even after they’ve cooled down.
Storing Leftover Crispy Baked Fish Sticks with Tartar Sauce
For those fortunate enough to have leftovers (lucky you!), storing your Crispy Baked Fish Sticks is as crucial as the cooking process itself. Begin by allowing them to cool completely before transferring them to an airtight container. This is essential because trapping steam inside will lead to sogginess—definitely not what we want! Place a piece of parchment paper between layers if you’ve made a big batch; this little trick helps maintain their crispy texture. Stored properly in the fridge, they’ll stay fresh for up to three days. When you’re ready to enjoy them again, simply pop them in the oven at around 375°F (190°C) for about 10-15 minutes until they’re heated through and crispy once more. Trust me: reheating in the oven ensures they regain that intoxicating crunch rather than becoming rubbery in the microwave. Picture yourself biting into a perfectly reheated fish stick—it’s like having a mini celebration!
Freezing Crispy Baked Fish Sticks for Later
If you’re thinking ahead and want to prepare meals for those busy nights when cooking feels like climbing a mountain, freezing your Crispy Baked Fish Sticks is an absolute game-changer! To freeze them properly, allow the fish sticks to cool completely first, then lay them out on a baking sheet lined with parchment paper and pop them in the freezer for about an hour until frozen solid. Once they’re firm, transfer them into a zip-top bag or an airtight container, ensuring as much air as possible is removed. They can be stored this way for up to three months! The beauty of this method is that on those hectic days, all you have to do is take out what you need and bake them straight from frozen—no thawing required! Imagine pulling these golden bites from the oven, filling your kitchen with that warm aroma—it’s convenience wrapped in deliciousness!
Crispy Baked Fish Sticks with Tartar Sauce
Indulge in the nostalgic flavors of Crispy Baked Fish Sticks with Tartar Sauce, a delightful dish that perfectly marries childhood memories with modern culinary techniques. These fish sticks boast a golden-brown, crunchy exterior, encasing tender, flaky fish inside. Paired with a zesty homemade tartar sauce, they’re not just comfort food—they’re an experience that brings family and friends together around the table. Ideal for any meal, from casual weeknights to gatherings, this recipe is all about enjoying delicious food while creating lasting memories.
- Prep Time: 15 minutes
- Cook Time: 25 minutes
- Total Time: 40 minutes
- Yield: Serves approximately 4 people 1x
- Category: Dinner
- Method: Baking
- Cuisine: American
Ingredients
- 1 pound white fish fillets (like cod or haddock)
- 1 cup panko breadcrumbs
- 1/2 cup all-purpose flour
- 2 large eggs
- Salt and pepper to taste
- 1 tablespoon lemon juice
- 1 cup mayonnaise (or vegan mayonnaise)
- 2 tablespoons dill pickles, finely chopped
- 1 teaspoon dried dill weed
Instructions
- Preheat your oven to 425°F (220°C) and line a baking sheet with parchment paper.
- Pat the fish fillets dry and cut them into uniform strips about 1-inch wide.
- Set up three shallow dishes: one for flour seasoned with salt and pepper, another for whisked eggs, and the third for panko breadcrumbs mixed with additional seasonings if desired.
- Dredge each fish stick in flour, dip it in the egg wash, then coat it thoroughly in breadcrumbs.
- Place the breaded fish sticks on the baking sheet, ensuring they are spaced evenly apart.
- Bake for 20–25 minutes until golden brown, flipping halfway through for even crispiness.
- While baking, prepare the tartar sauce by mixing mayonnaise with chopped pickles, lemon juice, dill weed, salt, and pepper in a bowl.
- Serve hot alongside the tartar sauce for dipping.
Nutrition
- Serving Size: 3 fish sticks (120g)
- Calories: 290
- Sugar: 2g
- Sodium: 450mg
- Fat: 14g
- Saturated Fat: 2g
- Unsaturated Fat: 10g
- Trans Fat: 0g
- Carbohydrates: 28g
- Fiber: 1g
- Protein: 16g
- Cholesterol: 100mg