Chocolate Peanut Butter Smoothie Bowl
There’s something utterly enchanting about a bowl that embodies the perfect blend of chocolate and peanut butter, isn’t there? It’s as if you’ve unearthed a secret treasure—rich, thick, and creamy, this Chocolate Peanut Butter Smoothie Bowl is not just a meal; it’s an experience that dances on your palate and warms your heart. Just imagine waking up to a breakfast that tastes like dessert but is overflowing with wholesome goodness! The beauty of this recipe lies in its simplicity—just four primary ingredients come together to create something that feels indulgent yet is entirely guilt-free. I promise you, once you try this, it will become one of those cherished recipes you turn to time and again.
This isn’t just about nourishing your body; it’s about celebrating flavors and textures that bring joy to your mornings—or even cozy evenings when you’re craving something sweet yet healthy. The moment you blend frozen bananas with creamy peanut butter and rich cocoa powder, you’ll be swept away by the intoxicating aroma wafting through your kitchen. You might find yourself smiling at the thought of how easy it is to whip up such a delightful treat with minimal effort. And let’s not forget the toppings—there’s something so satisfying about artfully arranging them atop your smoothie bowl; each spoonful promises a delightful surprise.
Chocolate Peanut Butter Smoothie Bowl: A Decadent Breakfast Delight
Let me take you on a culinary journey as we explore this Chocolate Peanut Butter Smoothie Bowl together. With just a handful of ingredients and a few minutes of your time, you’ll be able to create an utterly extraordinary dish that can serve as breakfast or dessert—because who says we can’t indulge in our favorites at any hour? The best part? You can customize it with toppings galore! So grab your blender, and let’s dive into this deliciously creamy adventure.
Ingredients:
Embarking on this culinary journey begins with gathering the right ingredients. Each one plays an essential role in crafting our vibrant smoothie bowl, creating a symphony of flavors and textures that will leave you craving more.
- 2 large frozen bananas, peeled before freezing. Bananas are the magical base of our smoothie bowl, providing natural sweetness and creaminess that mimic soft-serve ice cream. Freezing them beforehand is crucial because it enhances their texture, making the smoothie thick and luscious. When selecting bananas for freezing, choose ones that are perfectly ripe—yellow with just a hint of brown spots—for optimal sweetness. Trust me on this: if they’re overripe when frozen, they’ll lend an overly strong flavor; under-ripe bananas can leave your bowl lacking in sweetness.
- 2 tbsp peanut butter. This ingredient adds depth and richness to our smoothie bowl while delivering a delightful nuttiness that pairs beautifully with chocolate. Opt for natural peanut butter made from just peanuts (and maybe some salt); avoid brands with added sugars or oils for the purest flavor experience. As you stir in the peanut butter, you’ll appreciate its creamy consistency as it melds seamlessly into the banana base—a union that’s absolutely non-negotiable for achieving our desired texture.
- 2 tbsp cocoa powder or cacao powder. Here’s where things get exciting! Cocoa powder brings that rich chocolatey flavor we all adore without unnecessary calories or sugars found in conventional dessert options. Cacao powder is an excellent alternative if you’re looking for something less processed—it retains more nutrients and has an even deeper chocolate taste. Whichever you choose, make sure it’s unsweetened; we’re already adding sweetness from other sources!
- 1-2 medjool dates or 1-2 tbsp maple syrup (optional). If you’re craving extra sweetness—or if your bananas aren’t quite ripe enough—you can opt for medjool dates or maple syrup to elevate our smoothie bowl further. Medjool dates are nature’s candy; their caramel-like richness adds complexity while also contributing fiber to your meal. Alternatively, maple syrup provides a beautiful liquid sweetness that blends effortlessly into the mixture without clumping.
- 1/2 tsp vanilla extract (optional). While entirely optional, adding vanilla extract can enhance the overall flavor profile of your smoothie bowl, creating an aromatic depth reminiscent of bakery delights! Choose high-quality pure vanilla extract for maximum impact; synthetic versions simply won’t do justice to our creation here.
- 1/4 cup non-dairy milk (almond, oat, coconut, etc.). This ingredient helps achieve the perfect consistency while keeping everything dairy-free! Depending on what kind of nut milk you prefer—be it almond for its subtle flavor or coconut for its tropical essence—you’ll want to adjust accordingly based on how thick or thin you want your final product to be.
For topping:
– Banana – A slice of fresh banana not only enhances presentation but also contributes additional creaminess.
– Peanut butter – Drizzling more peanut butter on top elevates both visual appeal and flavor!
– Chopped peanuts – These add delightful crunch and contrast against the smoothness of the base.
– Chocolate chips – A sprinkle of dairy-free chocolate chips will satisfy any sweet tooth!
– Granola – For some added texture and chewiness—I recommend opting for gluten-free granola if necessary!
Equipment You’ll Need:
Having the right tools makes all the difference in crafting this sumptuous Chocolate Peanut Butter Smoothie Bowl! Let’s talk about what you’ll need to ensure everything goes smoothly during preparation.
- High-Speed Blender: This is paramount for achieving that thick and creamy texture we’re after in our smoothie bowl. A good-quality blender will pulverize frozen bananas seamlessly into silky perfection without leaving any chunks behind—a crucial factor if you’re aiming for soft serve-like consistency!
- Spatula: A rubber spatula will help scrape down any stubborn bits stuck on the sides of your blender jar while ensuring every last ounce gets mixed thoroughly into your bowl—no waste here!
- Serving Bowl: Choose one that’s wide enough so you can easily add all those fabulous toppings without spilling over! Plus, aesthetics matter—the right bowl can truly elevate your presentation game.
Now that we have everything set up perfectly let’s dive into preparing this heavenly Chocolate Peanut Butter Smoothie Bowl!
Step 1: Gather Your Ingredients
Start by measuring out all your ingredients so they’re ready to go when it’s blending time! This process minimizes messes later on and ensures nothing gets forgotten amid excitement (I know how tempting it can be!). Don’t rush this step; take a moment to appreciate each ingredient’s unique qualities as they come together in harmony.
Step 2: Blend It Up
Add those frozen bananas first—they’re going to serve as your magical canvas! Next comes peanut butter—don’t skimp here; generous dollops create richness beyond compare—and then pour in cocoa powder followed by any sweeteners you’ve chosen (dates or maple syrup). Finally, drizzle non-dairy milk over everything—it acts like glue binding these flavors into one velvety mixture!
Blend until smooth; expect this process to take around 30 seconds depending on how powerful your blender is—but don’t forget to pause occasionally! Stop halfway through blending to scrape down those sides using your spatula so no ingredient feels left out!
Step 3: Achieve Your Desired Consistency
As blending progresses, keep an eye out for thickness—it should resemble soft serve ice cream at its peak! If things seem too thick after several attempts at blending (which can happen!), slowly introduce tiny splashes more non-dairy milk until everything comes together beautifully without losing its lusciousness—that balance is absolutely paramount here!
Step 4: Transfer & Top
Once you’ve achieved perfection within your blender jar—thick yet pourable—it’s time for transferal into a serving bowl! Use care when scooping out every last bit; there’s no reason we shouldn’t enjoy all aspects of our hard work! Now comes perhaps my favorite part: decorating with toppings! Take creative liberties here—arrange slices of banana fan-like atop smooth surfaces alongside drizzles from extra peanut butter jars scattered generously across edges before sprinkling chopped peanuts liberally around…
By now, I hope you’re feeling excited about diving into this decadent Chocolate Peanut Butter Smoothie Bowl that’s bursting with flavor while remaining wholesome too—let’s savor every single bite together!
Stay tuned for more steps where we’ll delve deeper into variations and additional toppings ideas—I can’t wait to share more delicious secrets with you soon!
Creating Your Chocolate Peanut Butter Smoothie Bowl
Step 5: Blending to Perfection
Now that you have all your ingredients gathered, it’s time to bring them together in a beautiful, harmonious blend. Begin by placing the frozen bananas into your blender; this is where the magic begins! The frozen bananas serve as the base of our smoothie bowl, providing a rich creaminess that mimics soft serve ice cream. They’re not just any ordinary bananas; they’ve been transformed through freezing into a velvety texture that’s utterly divine. Next, add the peanut butter and cocoa powder or cacao powder. The peanut butter not only introduces that irresistible nutty flavor but also contributes healthy fats, making this bowl not only delicious but nourishing too.
For sweetness, toss in your choice of medjool dates or maple syrup—this is truly a matter of preference! Dates offer a natural caramel-like sweetness while keeping everything wholesome, while maple syrup adds a delightful hint of warmth and complexity. If you’re feeling adventurous (which I wholeheartedly encourage), don’t skip the vanilla extract; it infuses an aromatic depth that ties all these flavors together beautifully. Finally, pour in that luscious non-dairy milk; I often recommend starting with 1/4 cup, but feel free to adjust as needed. You want a thick consistency here—think of it as building the foundation for your masterpiece!
Now, blend everything on high speed until it reaches a smooth and creamy texture—this should take about 30 seconds to a minute depending on your blender’s power. Don’t rush this step! Take your time and pause occasionally to scrape down the sides; let those stubborn bits mingle with the rest of the mixture. The goal here is to achieve a thick consistency that holds its shape when poured into the bowl—imagine it being so thick you could almost stand your spoon up in it! If it seems too thick at any point, don’t hesitate to add just a splash more non-dairy milk to help things along.
Step 6: Transferring Your Creation
Once you’ve reached that dreamy, creamy consistency, the next step is transferring your smoothie goodness into a bowl—a task that feels almost ceremonial! Grab your favorite serving bowl; I always find that using something vibrant makes the experience even more enjoyable. As you pour your smoothie mixture in, take a moment to appreciate its rich chocolatey hue—it’s like liquid gold waiting to be adorned with toppings! This stage is essential because how you present it can elevate this simple breakfast into something special, almost like an art form.
As you pour, notice how thick and luscious it feels against your spatula or ladle; if it’s flowing effortlessly but still holding its body beautifully, you’re right on track! Once you’ve got it all transferred (and trust me—you’ll want every glorious drop), take a second to smooth out the top with the back of your spoon or spatula for that perfect canvas ready for toppings. This little detail may seem trivial but smoothing out your base helps create an inviting surface for all those delicious toppings we can’t wait to pile on!
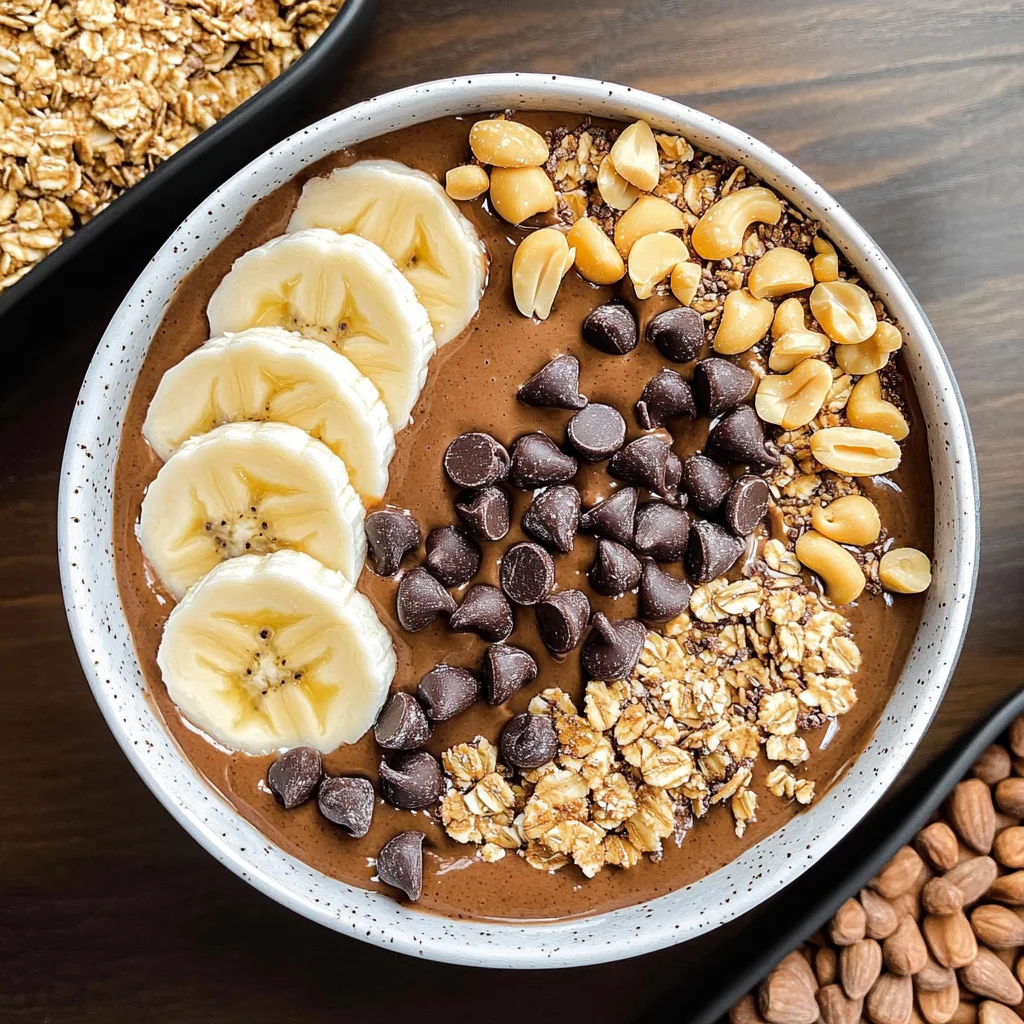
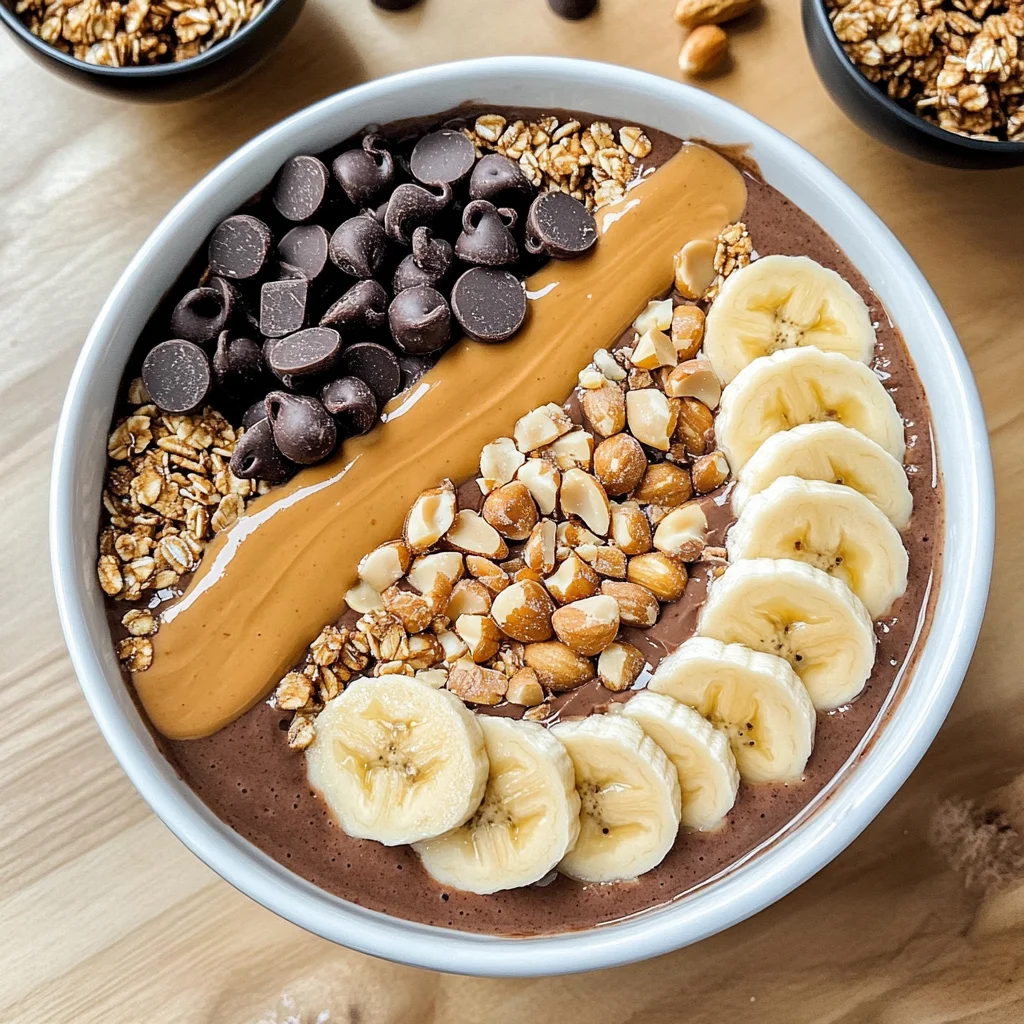
Step 7: Crafting Your Toppings
Now comes one of my favorite parts—the toppings! This is where we get to unleash our creativity and personal touch on this Chocolate Peanut Butter Smoothie Bowl. Imagine standing in front of an array of colorful toppings: slices of fresh banana glistening like sunshine, crunchy chopped peanuts adding texture and flavor contrast, and chocolate chips that melt slightly into the warm embrace of our smoothie base—truly a symphony of flavors waiting to happen!
Feel free to go wild here! Granola adds that satisfying crunch which perfectly complements the creamy base while also bringing an extra layer of wholesome goodness. But what makes each topping truly special is how they all come together harmoniously. Remember, there’s no right or wrong way to do this; rather think about balance—something sweet against something nutty or crunchy can create an incredible eating experience. Don’t forget that visual appeal matters too; arrange them artfully so each bite offers something different yet equally delightful!
I always tell my friends not to shy away from being generous with their toppings—after all, this isn’t just breakfast; it’s an experience meant to be savored fully! So sprinkle those chocolate chips with abandon or stack banana slices high—it’s all about what brings you joy!
Step 8: Enjoying Your Masterpiece
With everything beautifully arranged atop your Chocolate Peanut Butter Smoothie Bowl, it’s finally time for the most rewarding part—digging in! Grab yourself a sturdy spoon because trust me when I say you’re going to want something substantial for scooping up all those layers of deliciousness! As you take your first bite, relish in how each ingredient shines through—the creaminess from the banana base harmonizes effortlessly with nutty notes from peanut butter while hints of chocolate dance across your palate.
Take a moment here—inhale deeply and let those enticing aromas waft up toward you as you prepare for each bite. The contrasting textures will have you swooning; creamy blended smoothie meets crunchy granola and smooth chocolate chips create such delightful bites every time! And if you’re sharing (or perhaps hoarding) some leftovers? Don’t worry—they keep well in the fridge for up to 24 hours if stored correctly—but I promise you… this bowl won’t last long!
In conclusion, creating this Chocolate Peanut Butter Smoothie Bowl isn’t just about following steps—it’s about embracing flavors and textures while allowing yourself permission to enjoy every bite deeply and wholeheartedly. With its rich taste and nourishing ingredients, I can assure you this will become not just another recipe but rather a cherished part of your breakfast repertoire or dessert cravings alike!
Storage and Enjoyment Tips for Your Chocolate Peanut Butter Smoothie Bowl
Now that you’ve blended up this luscious Chocolate Peanut Butter Smoothie Bowl, it’s time to think about how to savor every last drop. While I truly believe that enjoying it fresh is an experience in itself—where each spoonful feels like a hug from the inside out—sometimes life calls for practicality. Whether you’re planning to make it ahead for breakfast or want to save some for later, I have you covered with some handy storage tips!
Storing Leftover Chocolate Peanut Butter Smoothie Bowl
If, by chance, you have any of this decadent smoothie bowl left over (which is hard to believe!), storing it properly is essential to keep that rich, creamy texture intact. The best way to do this is to transfer your leftover smoothie into an airtight container; glass containers work beautifully as they don’t retain odors like plastic sometimes can. Place it in the refrigerator where it will stay fresh for about 1-2 days. Trust me on this: if you want to maintain the smooth and thick consistency, give the container a gentle shake or stir before serving again. And here’s a little tip I love: placing a slice of bread in the container can help absorb excess moisture and keep your smoothie bowl from getting too watery! When you take it out after storage, expect the flavors to meld even more profoundly—a bit like letting a fine wine breathe! Just give it a quick stir before diving back in.
Freezing Chocolate Peanut Butter Smoothie Bowl for Later
Now, if you’re looking to prolong the enjoyment of your Chocolate Peanut Butter Smoothie Bowl even further, freezing is an excellent option! To freeze, simply pour the smoothie into ice cube trays or silicone molds for easy portioning later on. It’s best to consume them within 1-2 months for optimal flavor and consistency, although they can last longer if stored properly. When you’re ready for a delightful treat, pop out a few cubes and blend them with a splash of non-dairy milk until smooth again—this method not only preserves flavor but also provides convenience on busy mornings when you need something quick yet indulgent. I promise this makes life easier while still allowing you to enjoy that utterly intoxicating taste whenever the craving strikes!
Chocolate Peanut Butter Smoothie Bowl
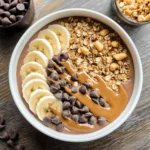
Indulge your senses with this rich Chocolate Peanut Butter Smoothie Bowl—a creamy, dreamy delight that feels like dessert but is packed with wholesome goodness. Perfect for breakfast or a satisfying snack, this smoothie bowl combines the natural sweetness of frozen bananas with the nutty richness of peanut butter and the deep flavor of cocoa powder. In just minutes, you can create a decadent treat that you can customize with your favorite toppings.
- Prep Time: 5 minutes
- Cook Time: 0 minutes
- Total Time: 5 minutes
- Yield: Serves 1
- Category: Breakfast
- Method: Blending
- Cuisine: Vegan
Ingredients
- 2 large frozen bananas
- 2 tbsp peanut butter
- 2 tbsp cocoa powder
- 1/4 cup non-dairy milk (almond, oat, coconut, etc.)
- Optional: sweeteners like medjool dates or maple syrup, vanilla extract
Instructions
- Gather all ingredients and measure them out.
- In a high-speed blender, combine frozen bananas, peanut butter, cocoa powder, and non-dairy milk.
- Blend until smooth and creamy; adjust consistency by adding more non-dairy milk if needed.
- Transfer to a serving bowl and smooth the top.
- Add your favorite toppings such as banana slices, chopped peanuts, chocolate chips, or granola.
Nutrition
- Serving Size: 1 bowl (350g)
- Calories: 380
- Sugar: 25g
- Sodium: 150mg
- Fat: 18g
- Saturated Fat: 3g
- Unsaturated Fat: 15g
- Trans Fat: 0g
- Carbohydrates: 53g
- Fiber: 8g
- Protein: 9g
- Cholesterol: 0mg