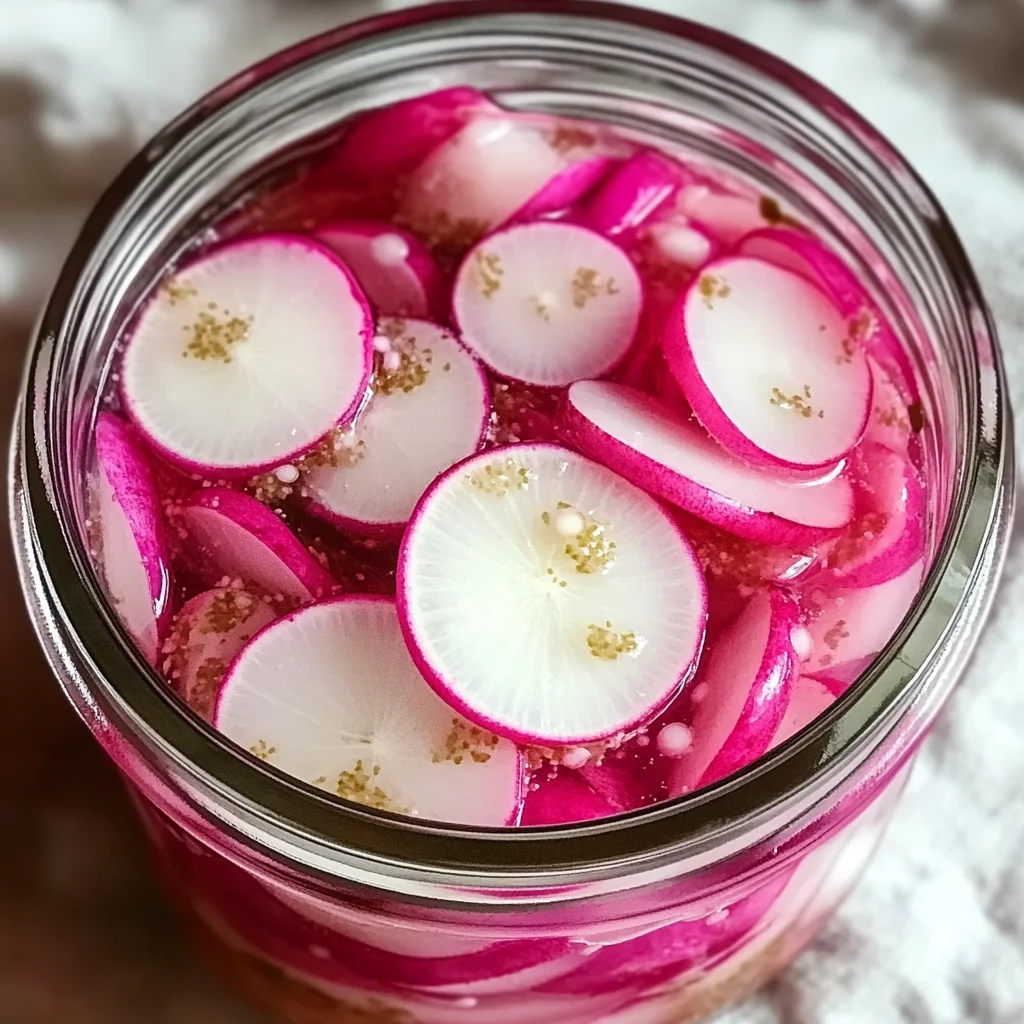
Quick & Easy Pickled Radishes
There’s something utterly mesmerizing about transforming humble ingredients into a culinary masterpiece. Quick pickled radishes are not just a recipe; they are an experience, a burst of flavor that can elevate any meal from mundane to extraordinary in the blink of an eye. As the tangy brine seeps into the crisp, vibrant radishes, you’re left with a symphony of flavors that dance on your palate – sweet, salty, and slightly sour all at once. Imagine the crunch as you bite into one, the way it awakens your senses and brightens your plate. This is what cooking is all about! It’s a celebration of freshness and creativity that beckons to be shared.
I’ve always been captivated by the simplicity and speed of this recipe. In just about ten minutes of prep time, you can create something that not only complements your meals but also brings a pop of color to your table. These quick pickled radishes are perfect for tossing on tacos, adding to salads, or enjoying straight from the jar as a delightful snack! The beauty lies in how easily they fit into various cuisines and occasions – from summer barbecues to cozy winter dinners. Trust me when I say, once you make these pickled wonders, they’ll become a staple in your kitchen repertoire!
Quick & Easy Pickled Radishes: A Vibrant Addition to Any Meal
Let’s dive into making these quick & easy pickled radishes that will soon have your taste buds singing! This recipe is straightforward yet profoundly satisfying, blending tangy vinegar with just the right touch of sweetness and saltiness. There’s something incredibly rewarding about watching those fresh vegetables transform in their brine, soaking up all those magnificent flavors that will enhance any dish you prepare.
Ingredients:
As we embark on this culinary adventure together, let’s take a moment to appreciate each ingredient that plays its part in this delightful recipe. Every component matters and contributes uniquely to the final outcome.
- 1 bunch of radishes (about 18-20 medium radishes): These vibrant beauties are truly the stars of our dish! When selecting radishes, look for ones that feel firm and heavy for their size – this ensures maximum crunchiness and flavor. Their natural peppery bite adds depth to the pickling process, providing a refreshing counterbalance to the vinegar and sugar brine. You can experiment with different varieties too; while traditional red radishes work beautifully here, consider trying watermelon or black radishes for a unique twist!
- 1/2 cup apple cider vinegar: This ingredient is essential as it serves as the foundation for our brine. Apple cider vinegar is not only tangy but also adds a touch of fruity sweetness that pairs wonderfully with the radishes’ natural earthiness. If you’re looking for alternatives due to availability or taste preferences, white wine vinegar or rice vinegar could work well too; however, I promise you’ll love the nuanced flavor apple cider brings!
- 1 tablespoon white sugar: Sugar might seem like an odd addition in a pickle recipe, but it plays a crucial role in balancing out acidity with its sweet embrace. It transforms our brine into something truly harmonious rather than overwhelmingly sour. If you’re keen on keeping things more natural or wish to reduce refined sugars, consider using honey or agave syrup – both provide sweetness without overwhelming the palate.
- 1 1/2 teaspoons salt: Salt is non-negotiable here; it enhances flavors and acts as a preservative in our pickling process. I recommend using kosher salt because it dissolves easily in liquids and doesn’t have any additives that may affect flavor. Sea salt can also be used if that’s what you have on hand; just ensure it’s fine enough to dissolve well!
- 1 cup hot water: The hot water helps dissolve our sugar and salt quickly while also allowing everything to meld together seamlessly before cooling down. This step is crucial – it ensures that when we combine it all with our radishes, every slice gets coated evenly with flavor right from the start!
Now that we have our ingredients ready, let’s gather our tools so we can make magic happen!
Equipment You’ll Need:
Having the right tools at your disposal makes all the difference when creating something wonderful in the kitchen! While these aren’t ingredients per se, they are essential partners in your culinary journey.
- A sharp knife: A good-quality knife is indispensable when it comes to slicing our radishes thinly and uniformly. A sharper blade provides better control and precision which leads to even slices that pickle beautifully.
- Cutting board: This sturdy platform is where all the chopping magic happens! Opt for one made from durable materials like bamboo or plastic; they help keep your knife sharp longer while providing stability during use.
- Mixing bowl: A medium-sized mixing bowl will be essential for whisking together our brine components before pouring them over the radish slices. Choose one that’s large enough to hold everything comfortably without spilling.
- Mason jar or airtight container: Once we’ve prepared our quick pickled radishes, storing them properly is crucial for preserving their freshness! A glass mason jar not only looks beautiful on your countertop but also provides an airtight seal necessary for long-lasting flavor infusion.
Step 1: Slicing Into Perfection
Begin by rinsing your radishes under cold water – this removes any dirt while maintaining their crispness! Grab your trusty sharp knife and chop off both ends before slicing them thinly (about ¼ inch thick). Trust me on this; thin slices absorb flavors more effectively than thicker ones do! As you slice through those vibrant disks, pay attention – their beautiful colors should brighten up your cutting board and fill your kitchen with an enticing aroma. Take care not to rush through this step; even thickness ensures even pickling results across every piece!
Step 2: Crafting Our Liquid Gold
In your mixing bowl, combine the hot water with apple cider vinegar first—this helps create warmth which encourages faster dissolution of sugar and salt! Next comes adding in our tablespoon of white sugar along with 1 ½ teaspoons of salt—give everything a good whisk until fully dissolved. This step is absolutely paramount; if either element isn’t fully mixed in before hitting those lovely slices of radish then some might end up too salty while others remain bland! We want every bite bursting with that perfect balance between acidity & sweetness—it’s what makes these quick & easy pickled radishes so special!
Step 3: Marrying Flavors
Once dissolved completely (you’ll know because there won’t be any granules left!), pour this fragrant concoction over your sliced radishes placed neatly inside an airtight jar or container. Make sure they are submerged fully – you may need to press down gently until they’re nestled just beneath liquid surface level—this ensures optimal penetration throughout! Don’t rush through this step either; letting each piece soak deeply allows them time absorb those complex flavors which ultimately leads us closer toward pickle perfection!
Step 4: The Waiting Game
Now comes arguably one of my favorite parts—the waiting game! After sealing up tightly (to prevent any leakage), let them sit at room temperature for about one hour before transferring into refrigerator storage where they’ll continue developing deliciousness overnight if possible (Hello flavor bomb!). Why chill? Cold temperatures slow down molecular activity allowing tastes meld harmoniously over time—it’s critical towards achieving full potential here so resist temptation nibble prematurely despite how tempting these lovely jars might look sitting pretty on countertop!
And there you have it—your own homemade quick & easy pickled radishes ready-to-go whenever inspiration strikes next! Just remember every step taken contributes toward achieving culinary bliss—each slice cut precisely alongside right combination crafted carefully ensures no detail goes unnoticed along way… Happy cooking my friend!
Step 5: The Art of Slicing Radishes
Now that you have your ingredients gathered and your heart set on creating these Quick & Easy Pickled Radishes, it’s time for one of the most satisfying parts: slicing the radishes. Grab that bunch of radishes and wash them under cool water to remove any dirt or grit, because every bite deserves to be pristine. Once they’re clean, it’s time to slice! Using a sharp knife (this is crucial, trust me!), cut off the root ends and the leafy tops. You want to achieve uniform slices—about a quarter-inch thick—so each piece absorbs the brine evenly and delivers that delightful crunch when you munch on them later.
Why does uniformity matter? Well, simply put, it ensures that every radish gets equal love from the vinegar mixture. If you slice some too thick and others too thin, you’ll end up with uneven pickling; some may become mushy while others remain tough. We don’t want that! So take a moment to enjoy this process; feel the texture of the radishes as you slice through them, their vibrant pink skin revealing a crisp white interior. As you create this beautiful medley of radish slices, imagine all the wonderful ways these will brighten up your meals—tacos, salads, or even just as a zesty snack!
Step 6: Mixing Your Brining Liquid Bliss
With your radishes beautifully sliced and ready to mingle with flavors, it’s time to prepare the brine that will transform them into something utterly intoxicating. In a medium heatproof bowl (or jar, if you’re feeling adventurous), combine half a cup of apple cider vinegar with one tablespoon of white sugar and one and a half teaspoons of salt. This combination is what I like to call liquid gold because it balances tanginess with just the right amount of sweetness—trust me on this!
Next comes the fun part: pour in one cup of hot water. Now, here’s where patience pays off beautifully! Stir everything together until the sugar dissolves completely; you’ll know it’s perfect when you can no longer see those granules at the bottom. This step is absolutely paramount because dissolving the sugar fully ensures an even flavor throughout your pickles. The warmth from the water helps speed up this process—and don’t worry if there are still tiny flecks of salt; they’ll dissolve as everything cools. Just take a moment to inhale deeply as those fragrant notes waft up; this brine not only brings life to our radishes but also fills your kitchen with an inviting aroma.
Step 7: Marrying Radishes with Brine
Now that we’ve crafted our perfect brine, it’s time for the big moment—the marriage of radishes and liquid magic! Carefully add your sliced radishes into the bowl or jar filled with that exquisite brining solution you’ve just conjured up. Use a spoon or spatula gently to ensure all slices are submerged; consider this step akin to tucking them into bed after a long day—they need proper coverage! It’s essential for each slice to be enveloped by that flavorful liquid so they can absorb all those delicious nuances over time.
At this point, I want you to pause for just a second and appreciate how simple yet transformative this is! Cover your bowl or jar with a lid or plastic wrap (if using a bowl), but do leave it slightly ajar if you’re using glass—this prevents any pressure buildup as they pickle. Allow these beauties to sit at room temperature for about 30 minutes; during this time, those crisp slices will begin absorbing all those tangy-sweet flavors while releasing their own essence into the brine—a true symphony of flavors taking place right before your eyes!
Step 8: Chilling Out for Flavor Development
After letting those lovely radish slices soak in their brining bath for half an hour at room temperature, it’s time for my favorite part: chilling! Transfer your jar or bowl into the refrigerator where they can relax for at least another 30 minutes (though I often recommend letting them chill for several hours or even overnight if you can resist!). Why is chilling so important? Well, cooling intensifies flavor absorption while also enhancing texture—remember how we talked about uniformity? This resting period allows each slice to fully embrace its pickling journey.
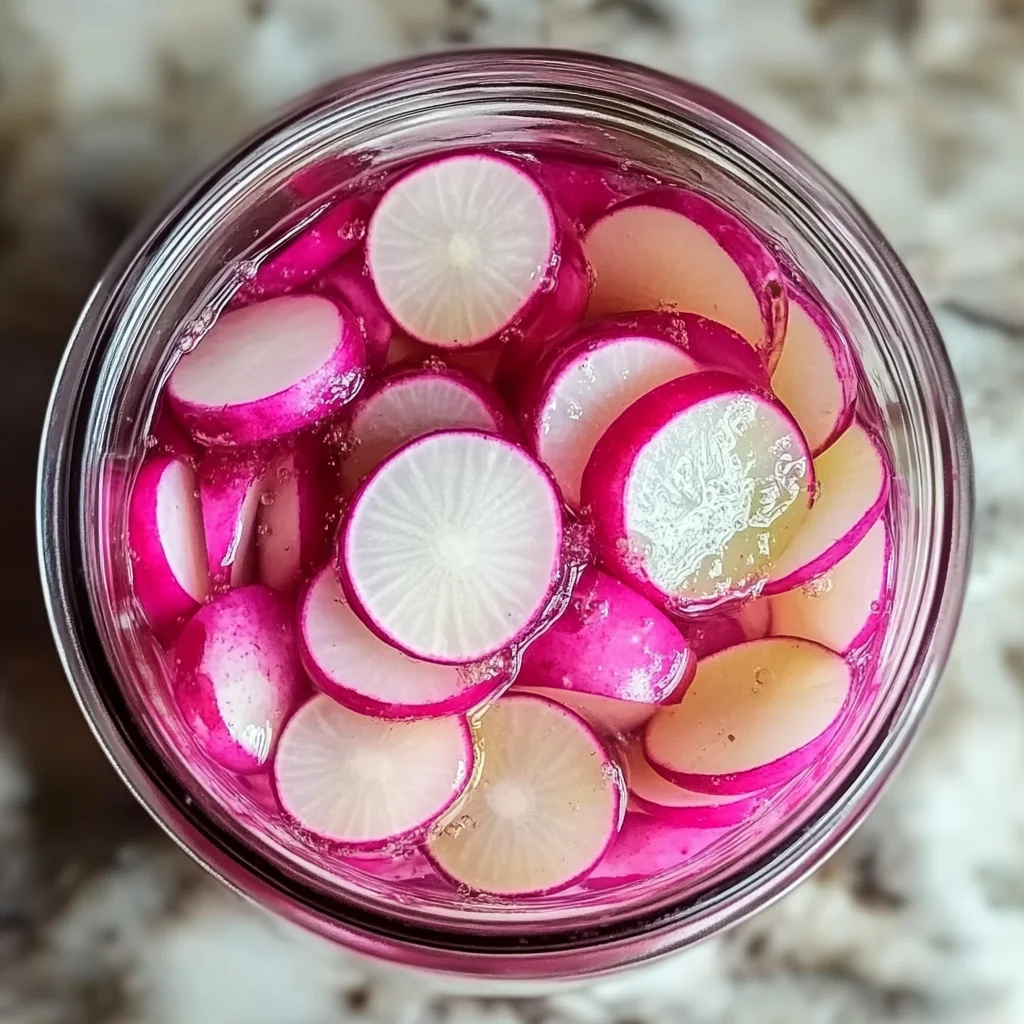
As they chill out in their flavorful bath, keep an eye on them; you’ll notice how beautifully vibrant they’ve become—a testament to their transformation! When you finally take them out after being patient (I promise it’s worth it), give them another gentle stir before serving. You’ll find that they’ve taken on a lovely hue thanks to their time in vinegar and have developed an utterly satisfying crunch that makes each bite an experience in itself. Trust me on this one: once you’ve tasted these Quick & Easy Pickled Radishes after they’ve had their chill time, you’ll understand why I never skip this step!
Next Major Phase – Final Touches
Now that your Quick & Easy Pickled Radishes have been lovingly prepared and chilled, let’s dive into how best to serve these delightful bites! They’re not just condiments but rather flavor-packed companions ready to elevate any meal you serve.
Step 9: Serving Suggestions That Shine
When you’re ready to enjoy these pickled wonders, simply scoop them out using a fork or slotted spoon—there’s no need for draining unless you’d prefer less brine on your plate. These vibrant little gems are perfect atop tacos or served alongside grilled vegetables; they bring brightness and acidity that cuts through rich dishes wonderfully well. Also consider tossing them onto salads as a crunchy topping—their zingy flavor will awaken even the simplest greens!
But wait—there’s more! Don’t hesitate to get creative by incorporating these Quick & Easy Pickled Radishes into grain bowls or wraps; they add both color and zest in every bite. And let’s not forget about snacking—you can absolutely enjoy them straight from the jar whenever cravings strike (just watch out—they’re addictive!).
As you savor each tangy morsel, remember that cooking is all about sharing love through food. These radishes have traveled from garden fresh delights into quick culinary magic right in your kitchen—a true testament to simplicity meeting flavor in harmony. I promise you’ll find yourself making these again and again—they’re bound to become one of those cherished recipes you’ll pass down through generations!
Storage and Enjoyment Tips for Your Quick & Easy Pickled Radishes
Now that you’ve embarked on this delightful journey of making Quick & Easy Pickled Radishes, the fun doesn’t have to stop here! The vibrant colors, the zesty crunch, and that tangy-sweet flavor are ready to elevate your meals. These pickled gems are not just perfect as a side dish; they can transform salads, sandwiches, and even tacos into an extraordinary culinary experience. Let’s dive into how to keep these beauties fresh and tasty so you can enjoy them again and again!
Storing Leftover Quick & Easy Pickled Radishes
To keep your Quick & Easy Pickled Radishes at their best, I recommend storing them in an airtight glass container. Glass is non-reactive and ensures that the lovely flavors don’t mingle with any pesky odors from your fridge. Once sealed tightly, these colorful radishes will maintain their delightful crunch for up to two weeks when stored in the refrigerator. Just remember, the longer they sit in their brine, the more pronounced their tanginess becomes—it’s truly fascinating how they evolve! For an extra tip to preserve their crispness, you can pop a slice of bread into the jar; it absorbs excess moisture while letting those radishes shine. When you’re ready to serve them again, simply pull out a few slices and marvel at how they still possess that vibrant snap—a testament to your culinary prowess!
Freezing Quick & Easy Pickled Radishes for Later
If you find yourself with an abundance of radishes or want to save some for later enjoyment, freezing is a fantastic option! Just be sure to slice them first before placing them in a freezer-safe bag or container—air is the enemy here! They can last up to three months in the freezer without losing their delightful flavor. When you’re ready to use them, just remove as many as you need and let them thaw in the refrigerator overnight. This approach not only saves time for future meals but also ensures you always have this bright burst of flavor on hand whenever inspiration strikes. Trust me; having these quick-pickled goodies stashed away will make weeknight dinners feel like a gourmet experience without any extra effort on your part!
Quick & Easy Pickled Radishes
Quick & Easy Pickled Radishes are a vibrant and tangy addition to any meal, transforming simple dishes into flavorful culinary experiences. In just ten minutes of prep time, you can create these delightful pickles that offer a perfect balance of sweetness, saltiness, and acidity. Ideal for topping tacos, enhancing salads, or enjoying straight from the jar, these quick pickled radishes will brighten up your plate while adding a satisfying crunch. Plus, they’re versatile enough to complement various cuisines and occasions—from casual summer barbecues to cozy winter dinners. Once you discover the joy of making these colorful pickles, they’ll quickly become a staple in your kitchen!
- Prep Time: 10 minutes
- Cook Time: 0 minutes
- Total Time: 10 minutes
- Yield: Approximately 4 servings 1x
- Category: Side Dish
- Method: Pickling
- Cuisine: Various
Ingredients
- 1 bunch of radishes (about 18–20 medium radishes)
- 1/2 cup apple cider vinegar
- 1 tablespoon white sugar
- 1 1/2 teaspoons salt
- 1 cup hot water
Instructions
- Rinse radishes under cold water. Trim off root ends and leafy tops, then slice thinly (about ¼ inch thick).
- In a medium bowl, combine hot water with apple cider vinegar, sugar, and salt; whisk until dissolved.
- Place sliced radishes in an airtight jar or container and pour the brine over them until fully submerged.
- Allow to sit at room temperature for about one hour before refrigerating for optimal flavor development.
Nutrition
- Serving Size: 1/4 cup
- Calories: 15
- Sugar: 2g
- Sodium: 330mg
- Fat: 0g
- Saturated Fat: 0g
- Unsaturated Fat: 0g
- Trans Fat: 0g
- Carbohydrates: 4g
- Fiber: 1g
- Protein: 0g
- Cholesterol: 0mg