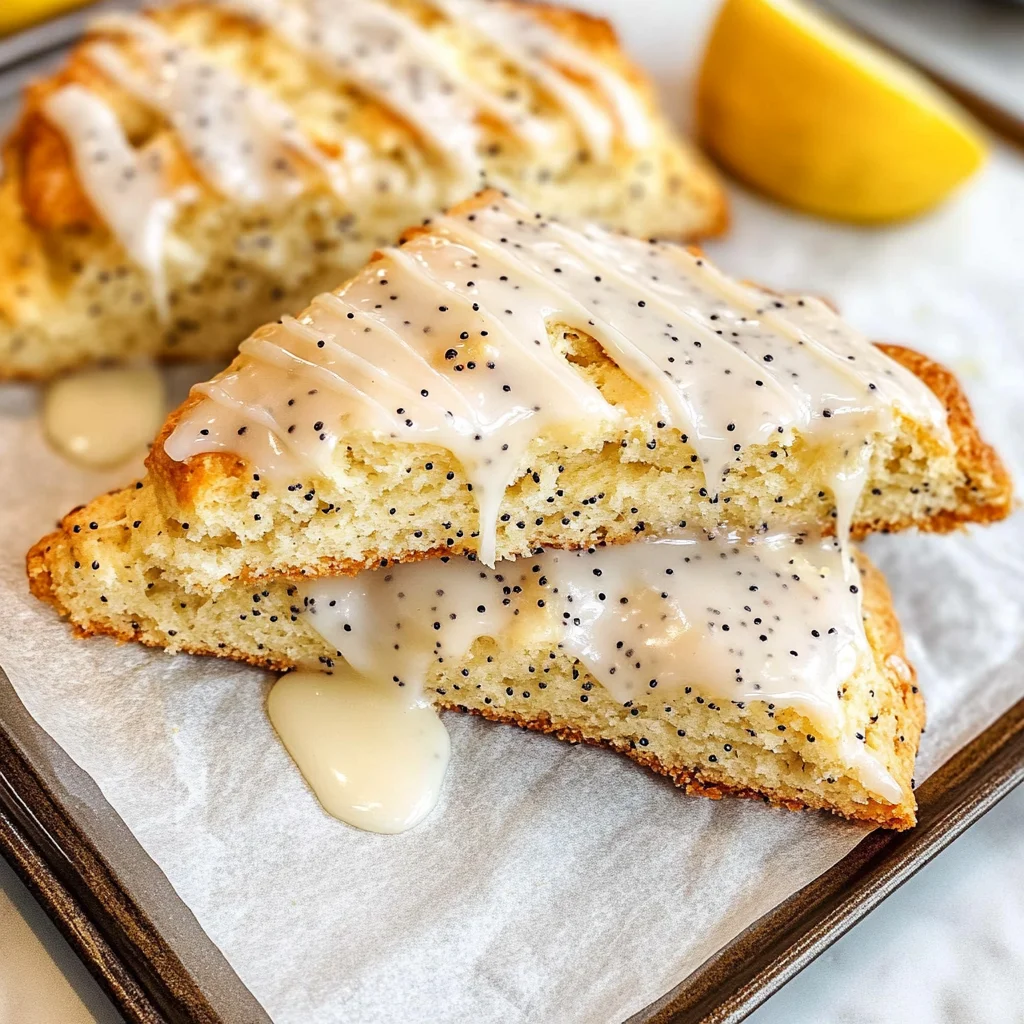
Ridiculously Easy Lemon Poppy Seed Scones
There’s something undeniably magical about the aroma of freshly baked scones wafting through your kitchen. Imagine this: warm, tender scones, infused with the bright zest of lemon and the delightful crunch of poppy seeds, create an experience that transcends mere nourishment. Each bite is a harmony of flavors, where the citrusy brightness dances with the nutty undertone of the seeds, resulting in a symphony that’s both uplifting and comforting. You see, these Ridiculously Easy Lemon Poppy Seed Scones aren’t just a treat for your taste buds; they are an invitation to pause and savor life’s simple pleasures. Trust me on this one – once you take a bite, you’ll understand exactly why this recipe holds such a special place in my heart.
What makes these scones so extraordinary? It’s not just their melt-in-your-mouth texture or their inviting sweetness. It’s the way they bring people together during those leisurely Sunday brunches or lazy weekday mornings when you need something special to lift your spirits. With each flaky layer, you can feel a connection to tradition while also embracing innovation in baking. The beauty lies in how easy they are to whip up! Yes, you heard that right – no complicated techniques or long lists of ingredients here. Just straightforward goodness that feels like a warm hug on a plate.
Ridiculously Easy Lemon Poppy Seed Scones: A Bright Start to Your Day
These scones are perfect for any occasion, whether it’s a cozy breakfast with loved ones or an afternoon pick-me-up alongside your favorite cup of tea. They’re light yet satisfying, making them ideal for those who crave something sweet but not overly indulgent. So grab your apron and let’s embark on this delightful culinary journey together!

Ingredients:
As we dive into this baking adventure, let’s take a moment to appreciate each ingredient we’ll be using. Each one plays a vital role in creating the delectable scones we’re after.
- 1 cup (240 ml) heavy cream: This creamy liquid gold is essential for achieving that rich, tender crumb we all adore in scones. The fat content in heavy cream helps keep our scones moist while contributing to their delightful richness. If you’re looking for an alternative, full-fat coconut milk can provide similar moisture without compromising flavor.
- 8 tablespoons (1 stick or 113g) unsalted butter: Butter is non-negotiable here; it’s what gives our scones that irresistible flaky texture and buttery flavor. Make sure it’s softened to room temperature before using—this helps it blend smoothly with the other ingredients. If you’re out of butter or want to lighten things up just a tad, you can use an equal amount of margarine or coconut oil.
- 2 cups (240g) all-purpose flour: Flour is our backbone ingredient and is responsible for structure in our scones. I always recommend using unbleached all-purpose flour as it lends more flavor and texture than its bleached counterpart. Remember not to overmix; we want tender scones rather than tough ones!
- 6 tablespoons (75g) sugar: A little sweetness goes a long way! This sugar helps balance the tartness from our lemon zest while also contributing to browning during baking. Feel free to adjust based on your personal preference—using coconut sugar can add a lovely caramel note if you’re feeling adventurous!
- 1 tablespoon cornstarch: This ingredient is crucial because it helps create that tender texture by reducing gluten formation when mixed with flour. It acts as a wonderful softening agent, ensuring our scones don’t turn out too dense.
- 1½ tablespoons poppy seeds: These tiny seeds bring not only visual appeal but also an earthy flavor that pairs beautifully with lemon’s brightness. They add that delightful crunch we all love! If you’re looking for variety or simply don’t have poppy seeds on hand, sesame seeds can serve as a charming substitute.
- 1 tablespoon baking powder: The leavening agent is essential for helping our scones rise! Ensure your baking powder is fresh; otherwise, your scones may not achieve that perfect fluffy height.
- ½ teaspoon baking soda: This ingredient works alongside baking powder to give us that nice lift while also aiding in browning due to its alkaline properties—it reacts with our acidic ingredients like lemon juice.
- ½ teaspoon salt: Salt enhances flavors and balances sweetness; it’s like magic dust! Don’t skip this step—without salt, even sweet treats can taste flat and lack depth.
- Zest of 1 medium-size lemon: Here comes the star ingredient—the zest! Grated lemon peel adds vibrant flavor without excess moisture. Always use organic lemons if possible since we’re using the skin directly; this ensures fewer pesticides make their way into our beloved recipe.
- 2 cups (240g) powdered sugar: We’ll use this to make our luscious glaze later on—it’s what gives our scones that beautiful sweet finish!
- 3-4 tablespoons milk or half-and-half: This liquid will help us achieve the right consistency for our glaze—feel free to use whatever milk alternative suits your palate!
- 1 tablespoon fresh lemon juice: Adding freshness and acidity balances out sweetness perfectly, making every bite utterly intoxicating! Freshly squeezed juice always yields better flavor than bottled versions.
Equipment You’ll Need:
Having the right tools is key to making baking smoother and more enjoyable! While they may not be ingredients, these essential partners will help us create something truly wonderful in our kitchen.
- Mixing bowls – A couple of good-sized mixing bowls are essential for combining ingredients without overflow chaos! Use one large bowl for dry ingredients and another for wet ones—this keeps things organized and ensures thorough mixing without lumps.
- Whisk – A sturdy whisk will help incorporate air into our mixture as well as thoroughly combine dry ingredients together without clumping—this is crucial for achieving those light-as-a-feather scones!
- Rubber spatula – Ideal for folding together wet and dry ingredients gently without overworking the dough—a critical step towards keeping those lovely air pockets intact!
- Baking sheet lined with parchment paper – This will prevent sticking while allowing even browning during baking—no one wants sad-looking burnt bottoms on their beautiful creations!
- Grater/zester – To capture all that fragrant zest from our lemon! A microplane zester works best here since it produces fine shavings without much effort at all.
Now that we’ve gathered everything we need let’s jump into preparing these utterly delicious Ridiculously Easy Lemon Poppy Seed Scones!
Step 1: Prepping Your Ingredients
Before diving into mixing our batter, it’s important to measure everything out ahead of time—you’ll thank yourself later! Start by gathering all your ingredients on the counter; having everything visible allows you to move seamlessly through each step without hesitation. Preheat your oven to 400°F (200°C), which means once we’re ready to bake these beauties will go straight into a hot oven – absolutely paramount for achieving that golden-brown exterior! While waiting on preheating time means measuring accurately becomes even more rewarding.
Step 2: Mixing Dry Ingredients
In one large mixing bowl, combine the flour, sugar, corn starch, poppy seeds, baking powder, baking soda—and salt! Whisk them together until fully incorporated—this process evenly distributes leavening agents throughout ensuring uniform rise during baking later on; don’t skimp on this step as uneven blending could yield lopsided results! Take a moment here too—it’s quite therapeutic watching dry ingredients come together into something so harmonious…
Step 3: Creaming Butter & Heavy Cream
Next up is creaming together softened butter along with heavy cream—in another mixing bowl pour in your measured cream first followed by chunks of butter cut down small enough so they can easily blend within minutes! Using either an electric mixer fitted with paddles or simply whisking vigorously by hand creates air bubbles within fats giving us lighter textures down below once baked off nicely! Remember—the goal isn’t just melting away but incorporating airiness throughout entire mixture…
Step 4: Combining Wet & Dry
Once you’ve achieved creamy perfection from both mixtures bring them together gently using your rubber spatula until just combined—we don’t want overmixing leading towards toughened dough instead lift carefully folding through until no dry streaks remain visible…
Keep those spirits high; soon enough you’ll be enjoying warm bites bursting forth bright flavors dancing amongst crunchy textures surrounding delightful pops from every bite shared around table filled laughter—we’re almost there my friend!
Step 5: Mix Your Dry Ingredients with a Touch of Love
In a large mixing bowl, start by adding your two cups of all-purpose flour, six tablespoons of sugar, one tablespoon of corn starch, and the zest of one medium-sized lemon. As you combine these ingredients, take a moment to inhale the bright, fragrant aroma of the lemon zest; it’s like capturing a little piece of sunshine in your bowl! Next, sprinkle in your baking powder, baking soda, poppy seeds, and half a teaspoon of salt. Now, why is this step so crucial? Mixing your dry ingredients thoroughly ensures that every bite of your scone will be infused with that delightful sweetness and zesty flavor. It’s essential for achieving even leavening—a key factor that will keep your scones beautifully fluffy and prevent any one area from becoming too salty or too sweet.
Using a whisk or a fork, blend these ingredients together until they’re well combined—think of it as creating a harmonious symphony where each note plays its part perfectly. This is also an excellent time to check for any lumps; you want everything to be light and airy. If you see clumps, gently break them up because those can lead to uneven textures in your baked goods later on. Don’t rush this step; give yourself permission to really meld these components together—it’s the foundation for what will soon become an utterly intoxicating treat.
Step 6: Incorporate the Creamy Goodness
Now we’re diving into the heart of our scone batter! It’s time to add one cup of heavy cream into your dry mixture. Pour it in slowly, almost reverently, because this is where the magic happens—the cream brings richness and moisture that contributes to that melt-in-your-mouth experience we’re aiming for. Using a spatula or wooden spoon, stir the mixture gently until it just begins to come together. At this stage, it may look slightly shaggy or rough—don’t worry! This is totally normal. What you want to avoid is overmixing; when you do this, you risk developing gluten which could lead to tough scones rather than the tender texture we desire.
As you fold the dough together, let it bring itself into formation—trust me when I say that patience is key here! You might notice some pockets of dry flour still lingering; that’s okay! Just bring those elements together without forcing it into submission. The key here is to stop mixing as soon as you see no more dry bits—this will help create that wonderfully flaky texture we love about scones.
Step 7: Forming Your Scones with Care
Now comes the fun part—shaping our dough into those charming little scone triangles! On a lightly floured surface (you want just enough flour to prevent sticking), turn out your dough and gently pat it into a circle about 1-inch thick. This gentle handling is non-negotiable; think of it as giving your dough a comforting hug rather than wrestling with it! Once it’s shaped nicely into a round disc, use a sharp knife or pizza cutter to slice it into twelve equal wedges (like slicing a pizza!).
The reason we shape them like this? Each triangle will bake evenly and allow for those lovely crispy edges while keeping the insides soft and fluffy—a perfect balance! Transfer each piece onto an ungreased baking sheet (or lined with parchment paper if you’re feeling fancy). Make sure there’s enough space between each scone so they have room to puff up beautifully during baking—the last thing you want is for them to crowd each other!
Step 8: Chill Out Before Baking!
Here comes another critical step: chilling your shaped scones in the refrigerator for at least 15-20 minutes before baking. Why chill? This isn’t just about letting them relax; cooling helps solidify the butter in your dough which means flakier layers once baked! When chilled properly, steam created during baking puffs up those layers beautifully instead of melting away too quickly—a non-negotiable part of achieving that dreamy texture we crave.
While you’re waiting patiently (I promise it’s worth it!), preheat your oven to 400°F (200°C). I recommend placing an oven thermometer inside if you’ve got one; sometimes home ovens can be sneaky about their temperatures! When ready to bake after chilling, you’ll notice that the dough has firmed up slightly—that’s exactly what you’re looking for! Being mindful during this phase ensures every bite melts in your mouth while delivering bursts of lemon flavor complemented by delightful little pops from the poppy seeds.
And there you have it—the journey from simple ingredients to Ridiculously Easy Lemon Poppy Seed Scones completed with love and joy! Whether savored alongside afternoon tea or enjoyed as breakfast bliss with friends and family gathered around the table sharing stories, these scones are sure to create memories worth cherishing. Enjoy every bite!
Storage and Enjoyment Tips for Your Ridiculously Easy Lemon Poppy Seed Scones
Now that your kitchen is filled with the delightful aroma of freshly baked Ridiculously Easy Lemon Poppy Seed Scones, it’s time to savor every bite! But what if you find yourself with a few extra scones? Fear not, my friend; these little gems can be stored and enjoyed later without losing their charm. The joy of baking doesn’t have to end when the last crumb is devoured—let’s talk about how to keep them fresh and fabulous!
Storing Leftover Ridiculously Easy Lemon Poppy Seed Scones
To keep your scones soft and tender, I recommend placing them in an airtight container lined with parchment paper. This simple trick helps absorb excess moisture while keeping the scones from drying out. Stored this way, they’ll remain delicious for about 2-3 days at room temperature. If you want to elevate their freshness even further, consider popping a slice of bread into the container; trust me on this one! It acts as a moisture magnet, ensuring your scones stay delightfully moist. When you’re ready to enjoy them again, you’ll find that their flavor has only deepened, with the lemony brightness still shining through. For a quick revival, simply warm them in the oven for a few minutes until they’re just heated through—utterly intoxicating!
Freezing Ridiculously Easy Lemon Poppy Seed Scones for Later
Now, if you want to prepare ahead or simply save some scones for a rainy day (which I promise will come), freezing is an excellent option! To freeze your scones properly, ensure they are completely cooled and then wrap each one individually in plastic wrap or aluminum foil before placing them in a freezer-safe bag or container. This method prevents freezer burn and allows them to maintain their wonderful texture. You can keep them frozen for up to three months—how convenient is that? When you’re ready to indulge, just take one out and let it thaw at room temperature or pop it straight in the oven for a few minutes. The moment it warms up will transport you back to that lovely kitchen aroma all over again! Isn’t it fantastic how these little delights can be ready whenever you crave something sweet?
Ridiculously Easy Lemon Poppy Seed Scones

Ridiculously Easy Lemon Poppy Seed Scones are a delightful addition to any breakfast or tea time. These scones are tender and moist, bursting with the bright flavor of lemon zest and the subtle crunch of poppy seeds. Perfectly sweet without being overwhelming, they are ideal for leisurely brunches or quick afternoon snacks.
- Prep Time: 15 minutes
- Cook Time: 20 minutes
- Total Time: 35 minutes
- Yield: Approximately 12 scones 1x
- Category: Breakfast
- Method: Baking
- Cuisine: American
Ingredients
- 1 cup heavy cream (or full-fat coconut milk)
- 8 tablespoons unsalted butter (softened)
- 2 cups all-purpose flour
- 6 tablespoons sugar
- 1 tablespoon cornstarch
- 1½ tablespoons poppy seeds
- 1 tablespoon baking powder
- ½ teaspoon baking soda
- ½ teaspoon salt
- Zest of 1 medium lemon
- 2 cups powdered sugar (for glaze)
- 3–4 tablespoons milk (or milk alternative)
- 1 tablespoon fresh lemon juice
Instructions
- Preheat your oven to 400°F (200°C).
- In a large bowl, whisk together the flour, sugar, cornstarch, poppy seeds, baking powder, baking soda, salt, and lemon zest until well combined.
- In another bowl, mix the heavy cream and softened butter until creamy.
- Fold the wet mixture into the dry ingredients gently using a rubber spatula until just combined.
- Transfer the dough onto a floured surface and pat into a circle about 1-inch thick. Cut into triangles and place on a baking sheet lined with parchment paper.
- Chill for 15–20 minutes in the refrigerator before baking.
- Bake for about 20 minutes or until golden brown. Let cool slightly before glazing.
- For the glaze, mix powdered sugar with milk and fresh lemon juice until smooth; drizzle over cooled scones.
Nutrition
- Serving Size: 1 scone (approximately 60g)
- Calories: 230
- Sugar: 12g
- Sodium: 160mg
- Fat: 12g
- Saturated Fat: 7g
- Unsaturated Fat: 4g
- Trans Fat: 0g
- Carbohydrates: 30g
- Fiber: <1g
- Protein: 3g
- Cholesterol: 30mg