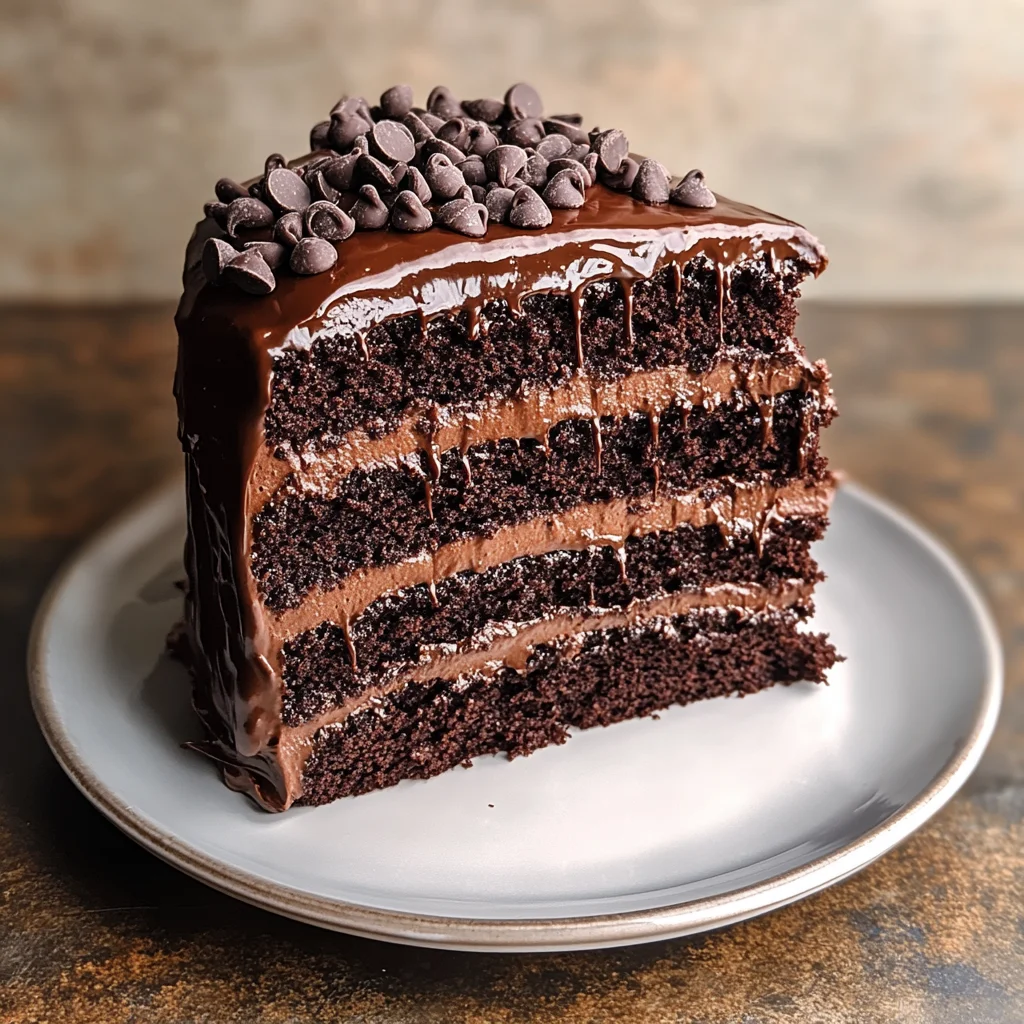
Matilda Chocolate Cake
There’s something utterly magical about baking a cake, isn’t there? It’s not just about the ingredients or the precise measurements; it’s about the love and care that goes into every single step. Each time I whip up a batch of my beloved Matilda Chocolate Cake, I am reminded of how this simple act can transform a regular day into a cherished memory. This cake is more than just a dessert; it’s an experience, a celebration of sweetness that evokes nostalgia and joy. Imagine the rich aroma of dark chocolate wafting through your kitchen, enveloping you in warmth as you create something truly special. As you slice into the ultra-moist layers, each bite reveals a symphony of deep cocoa flavor, making this cake nothing short of extraordinary—a true Bruce Bogtrotter-worthy delight!
Inspired by the iconic scene from Matilda, this cake has become a staple in my home for birthdays, movie nights, and any occasion that deserves a touch of decadence. There’s an undeniable thrill when served at gatherings, with everyone eagerly anticipating their slice. The glossy ganache glistens like liquid gold on top, calling to you to indulge. I promise you, once you share this cake with friends or family, it will quickly become their favorite too—there’s just something universal about chocolate that brings us all together. So roll up your sleeves and let’s embark on this delightful journey together; trust me when I say that every moment spent preparing this Matilda Chocolate Cake will be worth it.
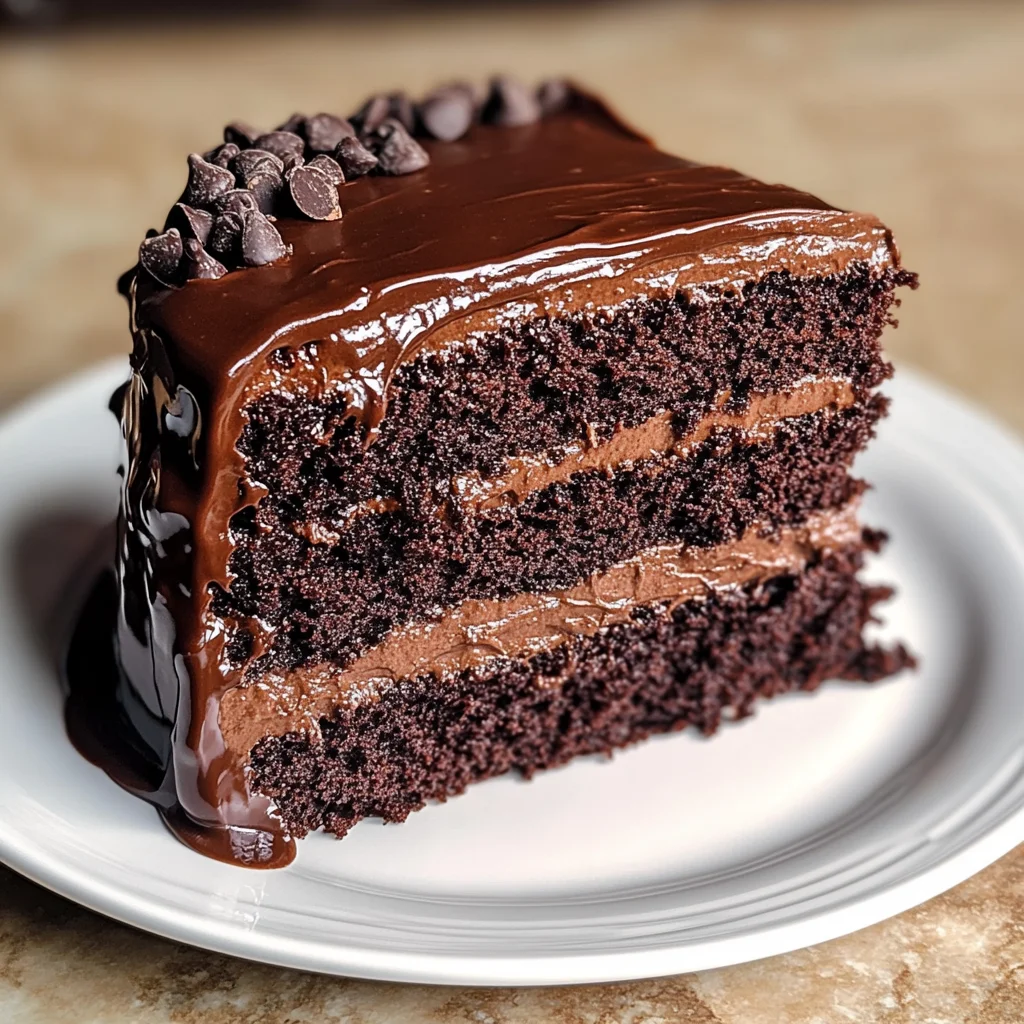
Matilda Chocolate Cake: A Decadent Delight
This rich triple-layer chocolate cake is sure to impress! With its velvety texture and deep cocoa flavor, your taste buds are about to embark on an unforgettable experience.
Ingredients:
As we gather our ingredients for this delectable Matilda Chocolate Cake, remember that each one plays a crucial role in crafting the perfect dessert. The beauty of baking lies not only in following recipes but also in understanding why each ingredient matters.
- 6 oz dark chocolate, chopped. When selecting dark chocolate for this recipe, opt for high-quality chocolate with at least 60% cocoa content to ensure a robust flavor that will elevate your cake to new heights. The richness from the chocolate melds beautifully with the other ingredients, creating an indulgent depth that is simply irresistible. Melting it down before adding it to your batter enhances the overall moisture and adds a luxurious texture that makes each bite melt in your mouth.
- ¾ cup Dutch-processed cocoa powder, sifted. Dutch-processed cocoa powder is non-negotiable here because it has been treated to neutralize acidity, which gives our cake a smoothness and rich color that standard cocoa cannot match. The sifting process helps eliminate any lumps while aerating the powder so it mixes beautifully into our batter without clumping. Trust me on this step—it’s all about achieving that silky consistency!
- 2 cups all-purpose flour. This versatile ingredient provides structure to our cake while ensuring it remains tender and soft. When measuring flour, it’s essential to spoon it into your measuring cup lightly instead of scooping directly from the bag; this prevents packing and yields more accurate measurements for consistent results every time.
- 1 cup granulated sugar. Sugar contributes sweetness but also helps with caramelization during baking, giving our cake a lovely golden-brown crust on the outside while keeping the inside moist and tender. Choosing fine granulated sugar ensures quick dissolution when creamed with butter—a crucial step in creating that airy texture we’re after.
- ½ cup light brown sugar, packed. Brown sugar brings not only sweetness but also moisture thanks to its molasses content. This extra moisture helps keep our cake from drying out while adding subtle hints of caramel flavor that will leave everyone guessing what makes this cake so special.
- 1 cup unsalted butter, at room temperature. Using unsalted butter allows us to control the salt levels throughout our recipe without any unexpected surprises! Room temperature butter is vital as it creams more effectively with sugars than cold butter does; achieving that light and fluffy texture is paramount for our luscious cake.
- 3 large eggs, at room temperature. Eggs are essential for binding all ingredients together while providing structure and moisture as they bake—think of them as glue holding everything deliciously together! Room temperature eggs blend more seamlessly into your batter than cold ones do; if you forget to take them out ahead of time, simply place them in warm water for about five minutes.
- 1¼ cups buttermilk, at room temperature. Buttermilk brings tanginess and tenderness to our cake thanks to its acidity interacting with baking soda; this reaction creates lift that leads us toward those perfectly fluffy crumb textures we crave! If you’re short on buttermilk, feel free to substitute by mixing 1 cup of milk with 1 tablespoon of vinegar or lemon juice—a lifesaver!
- 1 tsp baking soda and ½ tsp baking powder are both leavening agents working in harmony! Baking soda requires acidity (from our buttermilk) to activate while baking powder contains its own acid; using both ensures optimal rise—it’s absolutely paramount for achieving lightness in each layer.
- 1 tsp espresso powder (optional). This little gem enhances the chocolate flavor without imparting coffee taste—why skip such an easy way to amplify richness? Just imagine how much deeper those cocoa notes will sing when they have espresso backing them up.
- 1 tsp pure vanilla extract adds warmth and depth—the essence elevates flavors beyond mere sweetness alone! Always choose pure vanilla extract over imitation versions for unrivaled quality—your taste buds deserve nothing less!
- ½ tsp salt rounds out flavors beautifully by balancing sweetness while enhancing overall complexity—never underestimate salt’s power in desserts!
- 1 cup semi-sweet chocolate chips, folded in gently add bursts of melty goodness throughout each bite—these morsels add delightful texture contrasts against our smooth crumb!
- 1½ cups heavy cream creates our luscious ganache; it’s essential for drizzling decadently over each layer—it transforms ordinary moments into unforgettable memories!
- 12 oz dark chocolate, chopped again serves as our ganache base ensuring robust flavor shines through—be sure it’s good quality; after all we’re striving for excellence here!
- 1 Tbsp corn syrup (optional) gives shine & smoothness—if you’re feeling extra indulgent let’s go ahead & use it!
- 2 Tbsp unsalted butter enhances richness within ganache too!
- 1 tsp vanilla extract rounds off ganache flavor just like with batter—we can’t skimp on anything here!
With all these ingredients ready at hand, let’s continue cooking up some sweet magic!
Equipment You’ll Need:
Before diving into mixing bowls and batter bowls galore, let’s discuss some essential tools—you know what they say: “The right tools make all the difference!” Having these kitchen companions by your side not only makes things smoother but also elevates your baking experience.
- Mixing bowls – A set of varying sizes will be invaluable here! Look for sturdy materials like glass or stainless steel which can withstand beating and whisking without warping or cracking under pressure—trust me on this one! A large bowl will comfortably accommodate batter mixtures while smaller ones work wonders during ingredient prep stages.
- Measuring cups & spoons – Precision is key when crafting cakes! Invest in good-quality measuring sets designed specifically for wet/dry ingredients—it’ll save you time (and potential messes) during assembly stages later on!
- Rubber spatula – This tool isn’t just handy; it’s essential! A flexible spatula helps scrape down sides easily ensuring no flour pockets remain behind while gently folding ingredients together without deflating air bubbles we’ve worked hard creating earlier!
- Electric mixer or whisk – An electric mixer speeds up creaming processes significantly compared traditional hand-whisking methods do—but if you prefer getting some arm exercise (I totally get it!), grab an old-fashioned whisk instead!
As we gear up towards creating beautiful layers filled with joyfulness (and lotsa chocolate), remember: patience pays off big time when handling delicate batters like these!
Preparing the Matilda Chocolate Cake
Step 1: Preheat Your Oven
First things first: preheating your oven is crucial for achieving even baking results throughout every layer—we want perfectly risen cakes without any pesky sunken centers ruining our masterpiece! Set your oven temperature to 350°F (or 175°C) so it’s nice & ready by time we pour in that glorious batter later on! While waiting patiently (which feels like forever), take some time lining two 9-inch round pans with parchment paper along bottoms before lightly greasing sides—that way cakes release effortlessly post-bake without sacrificing those precious edges we cherish most about homemade desserts.
Step 2: Melt That Dark Chocolate
Now onto melting our high-quality dark chocolate—it involves either using a microwave or double boiler method depending on preference! If opting microwave method: chop chocolate finely first allowing quicker melting times then heat gently at medium power increments until melted stirring between intervals until fully smooth & glossy emerges before allowing cooling slightly off heat before proceeding onward blending into batter later on… You’ll know when done by watching closely avoiding burnt bits ruining flavors altogether—we definitely want nothing standing in way deliciousness here today!
Step 3: Cream Butter & Sugars
Time now for one of my favorite steps—the creaming process! Grab yourself yet another mixing bowl big enough because we’ll need space aplenty whipping together room-temperature unsalted butter along granulated & brown sugars until light & fluffy consistency forms—it’ll take around three minutes at medium speed using electric mixer beats hands down versus hand-whisking here trust me (unless getting workout vibes)! This technique creates air pockets within mixture essential achieving desired lofty heights once baked yielding tender crumbed goodness worth savoring long after last bites consumed…
Step 4: Incorporate Eggs One At A Time
After creaming has reached airy perfection next comes adding eggs individually one at-a-time ensuring thorough incorporation between additions blending well before moving forward adding subsequent egg—you want everything fully unified before introducing additional components since uneven mixtures lead potential risk dense outcomes—not what we’re going after today folks! Once eggs have been added smoothly alongside pure vanilla extract stirring until combined fully ensure no visible traces remain behind…
Now let’s keep going—I can feel excitement bubbling already knowing what’s next awaits us as we continue layering flavors upon flavors leading blissful moments shared around tables filled laughter snacking away blissfully indulging decadent slices cut generously…
Stay tuned as we dive deeper into finishing touches needed crafting stunning creations celebrating life itself through delicious desserts made lovingly from scratch…
Step 5: Embracing the Eggs and Vanilla
Now that your butter and sugars are all beautifully fluffy, it’s time to bring in the eggs. This step is crucial because eggs are not just a binding agent; they also add moisture and richness, which are essential for our ultra-moist Matilda Chocolate Cake. Crack each of the three large eggs into a bowl first—this way, you can ensure no shell fragments sneak into your batter (we don’t want any crunchy surprises!). Add them one at a time to your butter-sugar mixture, allowing each egg to fully incorporate before adding the next. This process may take about 2 minutes of mixing but trust me, it’s well worth it. You’ll notice the mixture becoming lighter in color and fluffier with each addition, which is exactly what you’re looking for.
Once all the eggs are mixed in, it’s time to add that luxurious touch of pure vanilla extract. This isn’t just for flavor; vanilla complements the chocolate beautifully and enhances its depth, making every bite feel like a warm hug. Scrape down the sides of your bowl with a spatula to make sure everything is well combined and there are no remnants hiding at the bottom. I promise you, this step is like building a solid foundation for an incredible cake—without it, things could go awry later.
Step 6: The Magic of Chocolate Integration
With the eggs and vanilla mingling harmoniously in your batter, now we introduce that velvety melted dark chocolate. By adding this slightly cooled chocolate, we’re introducing a rich cocoa flavor that will permeate every crumb of our cake. The heat from the chocolate will help to continue emulsifying our mixture, creating an incredibly smooth batter that is full of potential! Pour in your melted chocolate and mix on low speed until just combined—overmixing here can lead to a denser texture than we want in our cake.
As you blend the chocolate into your batter, take a moment to appreciate how it transforms from a light yellow hue into an indulgent brown color that promises decadence. This visual change is not just aesthetically pleasing; it signifies that you’re on track to creating something truly special! You’ll know you’ve reached perfection when all traces of chocolate are seamlessly incorporated without any streaks left behind.
Step 7: The Dry Ingredients – A Cocoa Symphony
Now comes one of my favorite parts—bringing together those dry ingredients! In a separate bowl, whisk together your all-purpose flour, sifted Dutch-processed cocoa powder, baking soda, baking powder, espresso powder (if you’re using it), and salt. Whisking evenly distributes these components and aerates them as well; this is vital because we want our cake to rise evenly without any dense pockets lurking about. The cocoa powder adds not just color but also an intense flavor profile that elevates this thoroughly chocolaty experience.
When combining the dry ingredients with your wet mixture, remember the rule of alternating—this technique helps maintain moisture while also preventing gluten overdevelopment which can lead to toughness. Start by adding about one-third of your dry mix into the wet batter followed by half of your buttermilk; repeat this process until everything is combined. Don’t rush this step! Take care to mix gently yet thoroughly until just combined—there should still be some lumps remaining as we don’t want to activate too much gluten here. That’s crucial for achieving a tender crumb!
Step 8: Folding in Chocolate Chips – A Sweet Surprise
With our batter coming together beautifully, it’s time for perhaps my favorite part—the incorporation of semi-sweet chocolate chips! Gently folding these delightful morsels into the batter adds unexpected pockets of molten chocolate throughout each slice of cake—a truly extraordinary experience when you bite into one during dessert! Using a spatula or wooden spoon instead of an electric mixer here preserves that airy texture we worked so hard to create earlier.
As you fold them in with tender strokes from the bottom up, watch how they mingle delightfully with the rich batter—each chip promises its own burst of sweetness amidst all that deep cocoa flavor. It’s important not to overmix here either; aim for a uniform distribution without breaking up those luscious chips! Once everything looks harmonious and invitingly chocolaty (and believe me—it will!), prepare yourself for baking magic as you get ready to pour this divine concoction into prepared pans.
There you have it—the last steps leading us closer toward indulging in this Matilda Chocolate Cake masterpiece! In our next part together, we’ll assemble these layers draped under luscious ganache—a celebration awaits us! Get ready because I promise you’re going love every single bite!
Storage and Enjoyment Tips for Your Matilda Chocolate Cake
Now that you’ve crafted this sublime Matilda Chocolate Cake, it’s time to revel in the joy of sharing it with loved ones or simply indulging yourself. This cake is more than just a dessert; it’s an experience steeped in rich flavors, nostalgia, and a little bit of magic that comes with every bite. But before we dive into the enjoyment phase, let’s chat about how to keep this beauty fresh for those moments when you want to savor it later.
Storing Leftover Matilda Chocolate Cake
To keep your leftover Matilda Chocolate Cake as delightful as the first slice, I recommend transferring it to an airtight container or wrapping it tightly in plastic wrap. This will ensure that every bite remains moist and flavorful. If stored properly, your cake can last up to five days at room temperature—though I doubt it’ll stick around that long! For an extra trick, consider placing a slice of bread in the container; this non-negotiable technique helps maintain moisture while adding a touch of nostalgia. Even after a few days, you’ll find that the flavors continue to meld beautifully, creating a cake that’s just as profoundly satisfying as when it was freshly baked. When you’re ready to enjoy another slice, simply serve it at room temperature or give it a quick pop in the microwave for about 10-15 seconds—just enough to warm it slightly without losing its delectable texture.
Freezing Matilda Chocolate Cake for Later
If you find yourself with more cake than you can handle (which is always a good problem to have!), freezing is an excellent option. To do this properly, slice the cake into individual portions and wrap each piece tightly in plastic wrap before placing them inside a freezer-safe bag or container. This method protects against freezer burn and keeps your cake tasting divine. Your Matilda Chocolate Cake can stay frozen for up to three months—perfect for those unexpected cravings or surprise guests! When you’re ready to delight in these frozen treasures, simply transfer them to the fridge overnight or set them on the counter for about 30 minutes before serving. The convenience factor here is absolutely paramount because who wouldn’t want a slice of rich chocolate heaven waiting for them whenever they desire?
Matilda Chocolate Cake
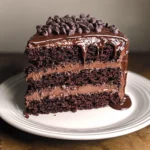
Indulge in the ultimate comfort dessert with our Matilda Chocolate Cake, an ultra-moist triple-layer chocolate delight that will take your taste buds on a joyous ride. Inspired by the beloved film *Matilda*, this cake is perfect for any celebration or simply as a sweet treat to brighten your day. Each bite reveals layers of rich cocoa flavor and bursts of melty chocolate chips, topped with a glossy ganache that adds a luxurious finish. Whether for birthdays, family gatherings, or movie nights, this cake promises to be a showstopper that brings everyone together in pure bliss.
- Prep Time: 25 minutes
- Cook Time: 35 minutes
- Total Time: 1 hour
- Yield: Approximately 12 servings 1x
- Category: Dessert
- Method: Baking
- Cuisine: American
Ingredients
- 6 oz dark chocolate, chopped
- ¾ cup Dutch-processed cocoa powder, sifted
- 2 cups all-purpose flour
- 1 cup granulated sugar
- ½ cup light brown sugar, packed
- 1 cup unsalted butter, at room temperature
- 3 large eggs, at room temperature
- 1¼ cups buttermilk, at room temperature
- 1 tsp baking soda
- ½ tsp baking powder
- 1 tsp espresso powder (optional)
- 1 tsp pure vanilla extract
- ½ tsp salt
- 1 cup semi-sweet chocolate chips
- For ganache: 12 oz dark chocolate, chopped
- 1½ cups heavy cream
- 2 Tbsp unsalted butter
Instructions
- Preheat oven to 350°F (175°C). Grease and line two 9-inch round cake pans with parchment paper.
- Melt dark chocolate in a microwave or double boiler until smooth; set aside to cool slightly.
- In a large bowl, cream unsalted butter with granulated and brown sugars until light and fluffy.
- Add eggs one at a time, mixing well after each addition. Stir in vanilla and melted chocolate until combined.
- In another bowl, whisk together flour, cocoa powder, baking soda, baking powder, espresso powder (if using), and salt.
- Alternate adding dry ingredients and buttermilk to the wet mixture; mix until just combined. Fold in chocolate chips gently.
- Divide batter between prepared pans and bake for 30-35 minutes or until a toothpick inserted in the center comes out clean. Cool in pans for 10 minutes before transferring to wire racks.
- To prepare ganache, heat heavy cream until simmering; pour over chopped dark chocolate and let sit for 2 minutes before stirring until smooth. Add butter and mix until glossy.
- Once cakes are completely cooled, layer with ganache between them and drizzle the remaining ganache over the top.
Nutrition
- Serving Size: 1 slice (85g)
- Calories: 355
- Sugar: 32g
- Sodium: 210mg
- Fat: 22g
- Saturated Fat: 13g
- Unsaturated Fat: 7g
- Trans Fat: 0g
- Carbohydrates: 36g
- Fiber: 2g
- Protein: 4g
- Cholesterol: 55mg