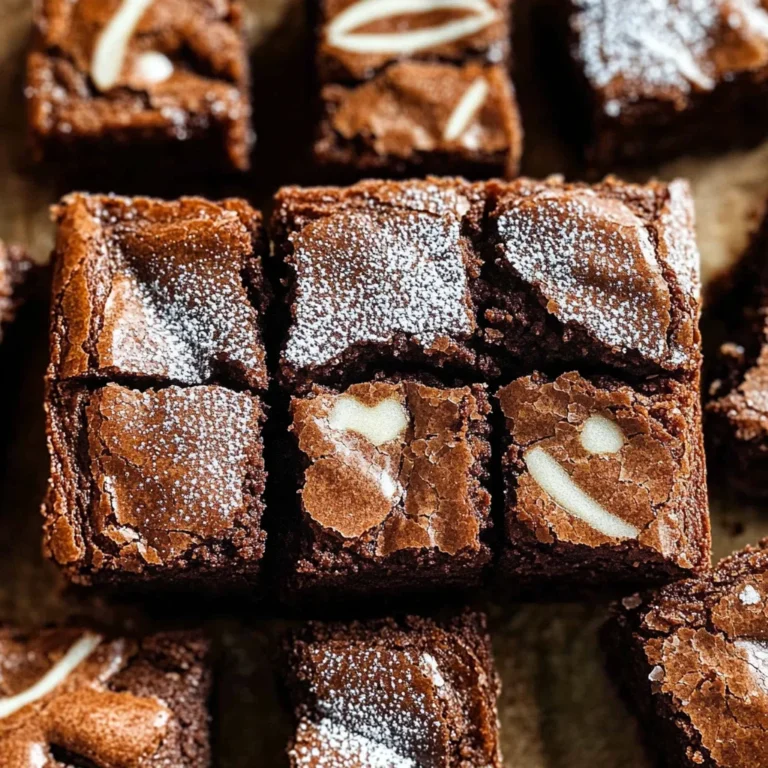
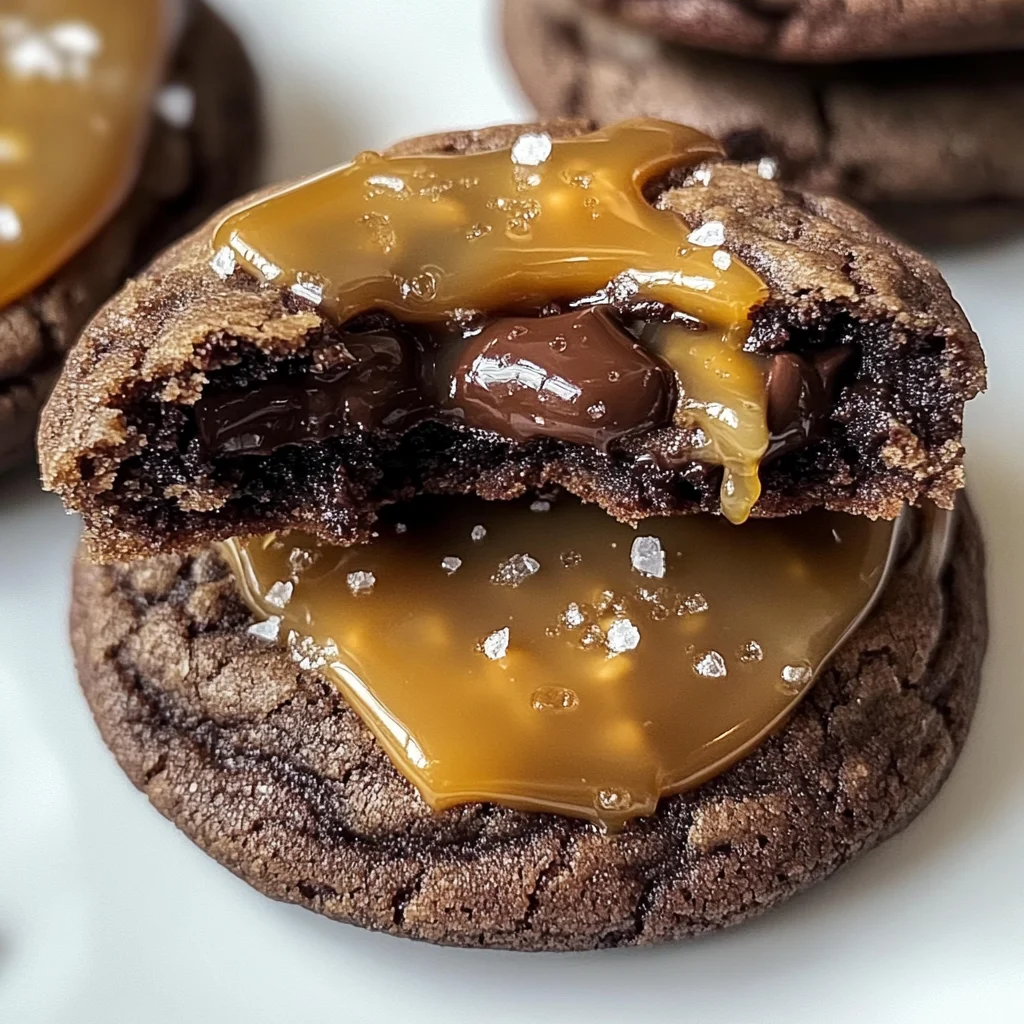
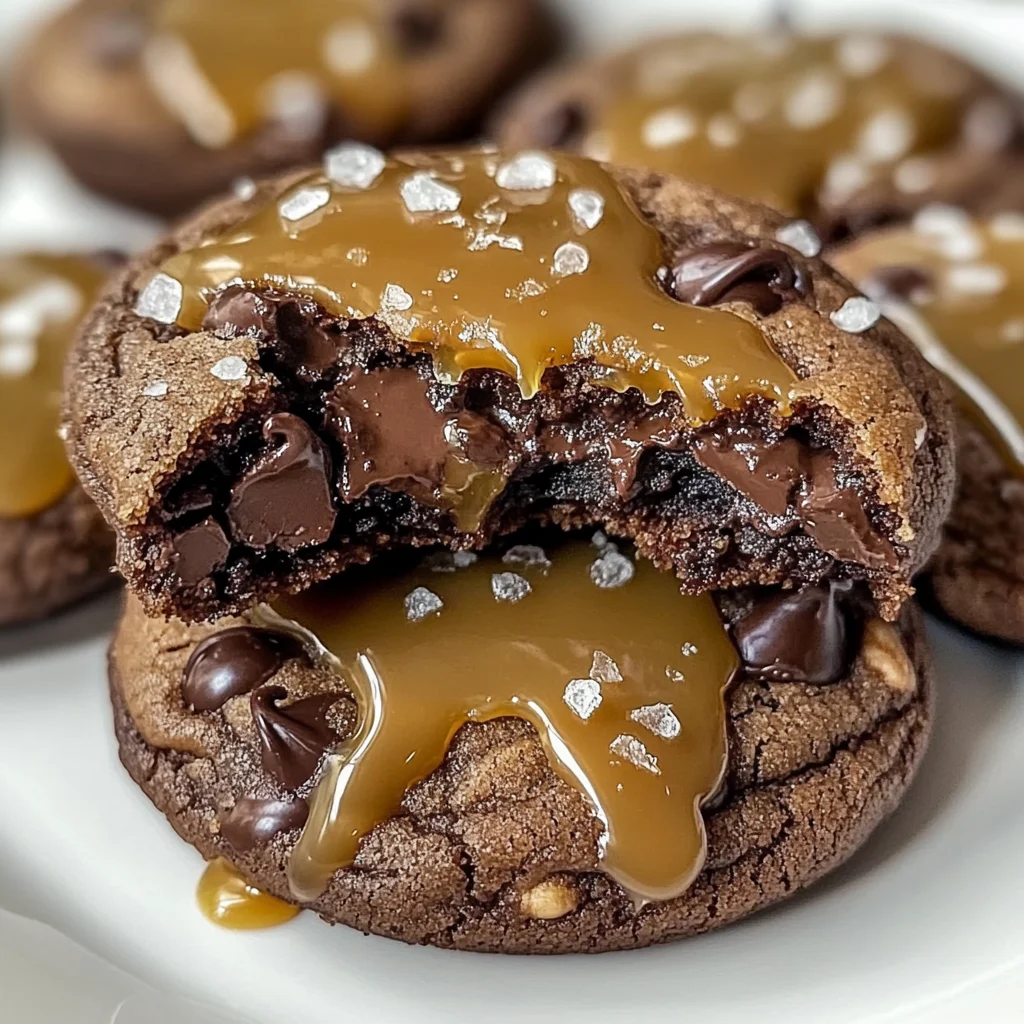
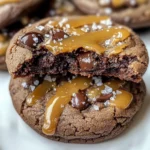
Salted Caramel Chocolate Cookies
There’s something utterly enchanting about the aroma of freshly baked cookies wafting through your home, isn’t there? When I think about those warm, inviting scents, my mind drifts to my beloved Salted Caramel Chocolate Cookies. These cookies are not just a treat; they’re an experience that wraps you in a cozy embrace, like a warm hug on a chilly day. Each bite is a delightful dance between the rich, dark cocoa and the silky salted caramel, creating an explosion of flavor that is both sweet and just a touch salty. Imagine breaking one open to reveal the gooey caramel center that oozes out, tempting you to take another bite before the first one has even disappeared. This recipe is truly more than just food—it’s about connection, comfort, and joy.
As I share this recipe with you, it’s important to reflect on what makes these cookies so special. The contrast of sweet and salty creates an irresistible allure that’s hard to resist. Salted caramel has become a beloved flavor in recent years, captivating everyone from gourmet chefs to home bakers like us. It’s perfect for any occasion—whether you’re hosting a gathering or simply indulging yourself after a long day. I promise you, baking these cookies will turn any mundane moment into something magical.
Salted Caramel Chocolate Cookies: A Sweet Symphony of Flavors
Allow me to guide you through this recipe with all the warmth and enthusiasm I can muster. These Salted Caramel Chocolate Cookies are not only easy to make but also incredibly satisfying to eat. Trust me when I say that once you’ve tried them, they will quickly become a staple in your baking repertoire.
Ingredients:
Before we dive into the baking process, let’s gather our ingredients! Each one plays a crucial role in creating these remarkable cookies that are bound to impress anyone who takes a bite.
- 1 cup (2 sticks or 226g) unsalted butter, softened. This is absolutely paramount for achieving the light and fluffy texture we desire in our Salted Caramel Chocolate Cookies. Softened butter emulsifies with the sugars during creaming, creating tiny air pockets that expand while baking, resulting in tender cookies instead of dense ones. If your butter is too cold, it won’t cream effectively; if it’s melted, you’ll end up with overly flat cookies. Opt for high-quality butter—European-style butter with its higher fat content will give you an even richer flavor and texture.
- 1 cup packed brown sugar. Brown sugar brings moisture and depth to our cookies thanks to its molasses content. It contributes not just sweetness but also enhances the overall chewiness of each cookie—something we absolutely crave! When measuring brown sugar, be sure to pack it firmly into your measuring cup; this ensures you’re using enough for optimal flavor and texture.
- 1/2 cup granulated sugar. This ingredient helps balance out the richness of brown sugar while contributing crispness to the edges of our cookies. Its fine granules dissolve easily during creaming with butter and create that delightful contrast in texture—soft centers with slightly crunchy edges.
- 2 large eggs. Eggs act as binders in our cookie dough while also adding moisture and richness. They help give structure and stability as well as contribute to that beautiful golden hue once baked. Room temperature eggs incorporate better into the batter than cold ones straight from the fridge—so be sure to leave them out for about 30 minutes before starting!
- 1 teaspoon vanilla extract. Vanilla extract is like music to our dish; it complements all flavors harmoniously! It adds warmth and depth without being overpowering while enhancing both chocolate and caramel notes beautifully. Always opt for pure vanilla extract over artificial varieties for best results!
- 2 cups all-purpose flour. Flour provides structure for our cookies; it’s what holds everything together! The protein content in all-purpose flour helps create that wonderful chewiness we look for while still allowing the cookies to spread slightly during baking for a perfect shape.
- 1/2 cup unsweetened cocoa powder. Cocoa powder introduces rich chocolatey goodness without additional sweetness—it’s essential for imparting that deep color and flavor profile we love! Choose high-quality Dutch-process cocoa powder if possible; it offers a smoother taste compared to regular cocoa powder due to its alkalization process.
- 1 teaspoon baking soda. Baking soda acts as a leavening agent here; it reacts with acids in other ingredients (like brown sugar) during mixing or baking releases carbon dioxide gas which helps our cookies rise ever so slightly while keeping them nice and chewy inside.
- 1/2 teaspoon salt. A touch of salt enhances flavors overall; it’s like magic dust! It balances out sweetness beautifully while elevating every other ingredient’s taste profile—making those chocolate chips pop!
- 1 cup chocolate chips (milk, dark or mix). Let’s talk chocolate! The choice between milk or dark chocolate chips affects sweetness levels significantly: milk chips provide creaminess versus dark chips’ richer bitterness balance against caramel notes perfectly! Feel free to mix both types if you’re feeling adventurous!
- 1/2 cup salted caramel sauce, plus extra for drizzling later on! This luscious liquid gold adds an indulgent touch—a sweet surprise waiting at every bite’s center! Make sure it’s chilled beforehand so it holds its shape when added inside dough balls.
- Chilled salted caramel sauce or caramel-filled candies (like Rolos) optional—but definitely recommended if you want gooey surprises hidden within each cookie!
- Sea salt flakes for sprinkling at the end—this final flourish amplifies flavors further by adding textural contrast against soft cookie bites!
Equipment You’ll Need:
Baking is always easier when you have the right tools at hand! While they might not be ingredients per se, these essential partners help ensure everything goes smoothly as we create our delicious treats together.
- Mixing bowls – A set of mixing bowls (preferably glass or stainless steel) allows you great versatility in measurements while combining wet ingredients effortlessly before introducing dry ones later on!
- Electric mixer – Investing in an electric mixer will save time & energy during creaming phases significantly compared hand-mixing alone would require—you’ll achieve fluffy textures faster too! If using manually instead, ensure sufficient upper body strength throughout those lengthy creaming processes!
- Rubber spatula – A rubber spatula comes handy when folding delicate inclusions like chocolate chips & caramel sauces without deflating air pockets formed earlier during creaming stages too much—it’s excellent at scraping down sides too so nothing goes wasted!
- Cookie scoop – A medium-sized cookie scoop ensures uniformity across batches making them bake evenly together rather than having some burnt while others remain underdone—it also minimizes messiness overall!
With everything prepped up ahead let’s dive right into preparing these heavenly Salted Caramel Chocolate Cookies next!
Step 1: Preheat Your Oven & Prepare Your Baking Sheet
The very first step might seem simple but trust me—it sets up everything else beautifully! Preheating your oven allows steady heat distribution leading towards even baking results throughout every single batch made afterward! Set yours at 350°F (175°C), then line your chosen baking sheet(s) with parchment paper—which will prevent sticking while producing nicely browned bottoms without burning edges—a non-negotiable step for success here!
Step 2: Cream Together Butter & Sugars
Now comes one of my favorite parts—the creaming process where magic starts happening! In a large mixing bowl combine softened unsalted butter along with packed brown sugar & granulated sugar until light & fluffy—a good two-three minutes should suffice here using either your electric mixer set on medium speed or handheld whisking away vigorously until achieving desired consistency becomes evident visually—the mixture should appear pale & almost creamy looking due incorporation air pockets generated during this phase which leads us towards lighter-textured baked goods further down line!
Step 3: Beat In Eggs & Vanilla
Once creamed properly let’s add those eggs one at time into bowl mixing thoroughly between additions ensuring proper emulsification occurs—this step helps bind everything together whilst enriching flavors overall through their inherent fats present within yolks themselves! Finally stirring vanilla extract last guarantees an aromatic boost throughout entire dough batch without overpowering anything else either way—just enough pizzazz needed here folks!
Step 4: Whisk Together Dry Ingredients
In separate bowl whisk together all-purpose flour along cocoa powder alongside baking soda & salt until fully combined—this keeps any potential clumps formed from occurring later on ensuring smooth distribution throughout remaining stages ahead—it also promotes uniformity among all cookie batches created down line eliminating variations caused by unevenly mixed components beforehand thus ensuring consistent outcomes guaranteed every time enjoyed thereafter too sharing amongst loved ones becomes truly effortless afterwards!!
Now we’ve set ourselves up beautifully—we’re almost ready for pure deliciousness ahead stay tuned as we explore more steps shortly diving deeper into shaping these beauties soon!!
Step 5: Mixing the Dry Ingredients – A Floury Embrace
Now that we have that divine butter and sugar mixture ready, it’s time to introduce the dry ingredients. In a separate bowl, whisk together 2 cups of all-purpose flour, 1/2 cup of unsweetened cocoa powder, 1 teaspoon of baking soda, and 1/2 teaspoon of salt. I can almost hear the flour whispering, Mix me in! as you combine these components. This step is crucial because it ensures that our leavening agent (the baking soda) is evenly distributed throughout the dough, which will give our cookies that perfect rise without any weird lumps or uneven textures. Remember, the cocoa powder adds not only flavor but also a rich color that will make your cookies look absolutely decadent.
Make sure to whisk thoroughly until everything is well combined; this should take just about a minute or two. As you do this, take a moment to inhale the beautiful aroma of cocoa—trust me, it’s utterly intoxicating! Once these dry ingredients are beautifully blended, it’s time for them to meet our creamy butter-sugar mix. But hold on! We want this process to be gentle and careful, which leads us directly into our next step.
Step 6: Uniting Wet and Dry – The Magic Moment
Now comes one of my favorite moments in baking: combining our wet and dry ingredients! Gradually add the flour mixture into your butter-sugar concoction. Do this in parts—perhaps in three additions—to keep things manageable and ensure everything gets incorporated evenly. Using a spatula or a wooden spoon, gently fold them together until just combined. This is where we need to exercise a little patience because overmixing at this stage can lead to tough cookies. We want them soft and chewy, not dense and hard!
As you mix, watch the transformation happen before your eyes—the batter will start to come together in a smooth embrace of chocolatey goodness. You’ll notice some small streaks of flour here and there—that’s completely normal! The goal here is not perfection but rather achieving a batter that holds together yet remains tender. Trust me on this; when you take your first bite of these cookies, you will be grateful for every bit of care taken during this step.
Step 7: Folding in Chocolate Chips and Caramel – Sweet Indulgence
Now comes the fun part: folding in those glorious chocolate chips! Use 1 cup of chocolate chips—you can choose milk chocolate for sweetness, dark chocolate for depth, or even a mix for an exciting flavor profile. Gently fold them into the cookie batter until they are evenly distributed throughout. This folding technique is important because it ensures that each cookie has pockets of melted chocolate waiting to burst forth with every bite.
But we’re not done yet! It’s time to add 1/2 cup of chilled salted caramel sauce—and oh my goodness, this is where magic happens. When you fold this luscious liquid gold into the batter, you’re essentially weaving threads of indulgence through each cookie. Just imagine biting into one later and encountering gooey caramel melting away—it’s going to be profoundly satisfying!
Now here’s where we must pause for a moment: if you’ve chosen to include chilled caramel-filled candies like Rolos instead of sauce, simply scoop about 1 tablespoon of dough into your palm; flatten it slightly before placing a Rolo in the center and wrapping the dough around it completely. This step requires care so that no caramel escapes during baking—what a delightful surprise it will be when you bite into one!
Step 8: Scoop and Shape – Crafting Your Cookies
Get ready for some hands-on fun! Using a cookie scoop or two tablespoons, drop rounded balls of dough onto your prepared baking sheet lined with parchment paper. Make sure to space them about 2 inches apart; they may spread slightly while baking, so give them room to breathe! Before popping them into your preheated oven at 350°F (175°C), take a moment to admire their beautiful shapes—you’ve crafted little balls of happiness!
Bake these beauties for 10-12 minutes, but keep an eye on them towards the end! You’re looking for edges that are set while keeping the centers delightfully soft; they may appear slightly underbaked—that’s perfectly okay! They will continue cooking on the hot baking sheet after being removed from the oven due to residual heat—a process known as carryover cooking—and that’s what makes these cookies extra chewy and gooey inside.
I encourage you not to rush this step; those last few minutes in the oven are crucial for achieving that perfect balance between crisp edges and soft centers. After they come out—oh goodness—they will smell heavenly! Allow them to cool on the baking sheet for about 5 minutes, giving yourself plenty of time to bask in anticipation as their aroma envelops your kitchen.
Conclusion:
As we wrap up our delightful exploration of Salted Caramel Chocolate Cookies, I can’t help but smile thinking about all the joy these little gems can bring into your life. From the very first creaming of butter and sugars—a moment filled with potential—to that thrilling instant when you take your first bite and experience the explosion of flavors: it’s truly something special. The marriage of rich chocolate with luscious salted caramel creates a symphony of flavors that dance together in perfect harmony. Each cookie embodies not just indulgence but also comfort; it’s the kind of treat that wraps around you like a warm hug on a chilly evening.
Why should this recipe be on everyone’s must-try list? It goes beyond taste alone—it’s about the process too! Baking together brings friends and family closer; imagine gathering around the kitchen counter as laughter fills the air while measuring ingredients and sharing stories alongside the sweet aroma rising from your oven. Whether it’s a cozy family gathering or an afternoon pick-me-up during a busy week, these salted caramel chocolate cookies fit seamlessly into any occasion. Picture pulling out that tray from the oven, golden edges peeking through—the anticipation builds as you allow them to cool just long enough before taking that first heavenly bite.
For serving suggestions that’ll elevate your experience even further: imagine savoring one alongside a steaming cup of coffee or tea—what an enchanting pairing! Or perhaps serve them with vanilla bean ice cream after dinner; just picture that warm cookie melting into creamy bliss—it’s absolutely divine! And if you’re feeling adventurous, try drizzling them with even more salted caramel sauce right before serving for an extra touch of decadence.
Feeling adventurous? This recipe is wonderfully adaptable! You might consider adding toasted nuts like pecans or walnuts for an earthy crunch or swapping half of the chocolate chips for white chocolate chunks for an enticing contrast! You could even experiment with different flavored extracts—almond could add an unexpected twist that elevates your cookies to new heights! So go ahead, make it your own; I invite you not only to bake but also to explore these variations and share your experiences with friends and family. Let’s create delicious memories together—one cookie at a time!
Salted Caramel Chocolate Cookies
Indulge in the irresistible allure of Salted Caramel Chocolate Cookies! These cookies are a delightful blend of rich dark cocoa and silky salted caramel, creating a flavor explosion that dances on your palate. With each bite, you’ll experience the perfect balance of sweet and salty, complemented by gooey caramel centers that are sure to tempt you back for more. Ideal for any occasion, from cozy nights in to festive gatherings, baking these cookies will elevate your mood and bring joy to all who partake. So gather your ingredients and let’s embark on this sweet adventure!
- Prep Time: 15 minutes
- Cook Time: 12 minutes
- Total Time: 27 minutes
- Yield: Approximately 24 cookies 1x
- Category: Dessert
- Method: Baking
- Cuisine: American
Ingredients
- 1 cup unsalted butter, softened
- 1 cup packed brown sugar
- 1/2 cup granulated sugar
- 2 large eggs
- 1 teaspoon vanilla extract
- 2 cups all-purpose flour
- 1/2 cup unsweetened cocoa powder
- 1 teaspoon baking soda
- 1/2 teaspoon salt
- 1 cup chocolate chips (milk or dark)
- 1/2 cup chilled salted caramel sauce
Instructions
- Preheat your oven to 350°F (175°C) and line baking sheets with parchment paper.
- In a large bowl, cream together softened butter, brown sugar, and granulated sugar until light and fluffy.
- Beat in eggs one at a time, then mix in vanilla extract.
- In a separate bowl, whisk together flour, cocoa powder, baking soda, and salt.
- Gradually add the dry ingredients to the wet mixture until just combined.
- Fold in chocolate chips and chilled salted caramel sauce gently.
- Using a cookie scoop or spoon, drop rounded balls of dough onto prepared baking sheets about 2 inches apart.
- Bake for 10-12 minutes until edges are set; allow to cool slightly before drizzling with extra caramel sauce and sprinkling with sea salt.
Nutrition
- Serving Size: 1 serving
- Calories: 180
- Sugar: 12g
- Sodium: 95mg
- Fat: 8g
- Saturated Fat: 4g
- Unsaturated Fat: 3g
- Trans Fat: 0g
- Carbohydrates: 25g
- Fiber: 1g
- Protein: 2g
- Cholesterol: 20mg