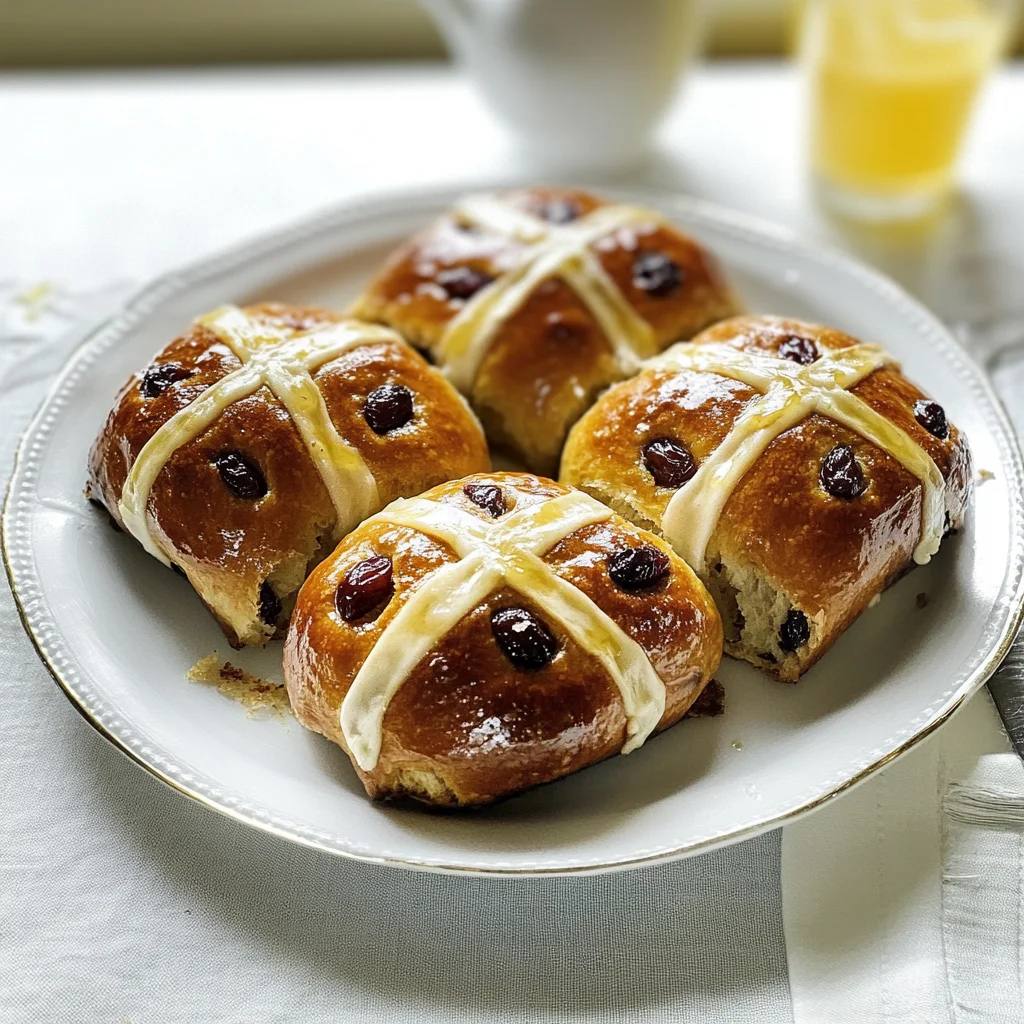
Mary Berry’s hot cross buns
There’s something utterly magical about the aroma of freshly baked hot cross buns wafting through your home, isn’t there? As the sweet spices mingle with the warmth of the bread, it becomes more than just a treat; it’s an experience that connects us to our roots and celebrates the joy of sharing. Mary Berry’s hot cross buns are not just a recipe; they represent a time-honored tradition, wrapped in nostalgia and love. I promise you, when you take that first bite—soft, slightly sweet, with hints of citrus and spice—it’s like a warm hug from your grandmother. This Easter, let’s embrace the spirit of togetherness and create these delightful buns to share with family and friends.
You see, the beauty of Mary Berry’s hot cross buns lies not only in their taste but also in their rich history. Traditionally made to mark Good Friday, these buns symbolize the end of Lent and are infused with spices that reflect the celebratory nature of the occasion. The cross on top represents the crucifixion, while the sweet dough is a reminder of the joys to come. When you make these buns, you’re not just following a recipe; you’re stepping into a lineage that spans generations, exploring flavors that have brought families together for centuries. So grab your apron and let’s dive into this delicious journey!
Mary Berry’s Hot Cross Buns: A Sweet Tradition Reimagined
This recipe for Mary Berry’s hot cross buns is incredibly straightforward and sure to impress anyone lucky enough to taste them. What I love most about this version is how forgiving it is—perfect for both seasoned bakers and those just starting out on their culinary adventures. And trust me when I say that once you bake your own batch, you’ll feel an overwhelming sense of accomplishment that no store-bought bun can match.
Ingredients:
Embarking on this culinary journey requires some key ingredients that transform simple elements into something truly extraordinary. Each component plays its part in creating those soft, fragrant, and utterly delightful hot cross buns.
- 500g/1lb 2oz strong white flour, plus extra for dusting. This strong white flour is crucial for developing gluten—a protein that gives our buns their structure and chewy texture. When selecting flour, look for one labeled as strong or bread flour, which has a higher protein content than all-purpose flour. This extra strength allows our dough to rise beautifully while holding onto those lovely sultanas and candied peels without falling apart.
- 75g/2¾oz caster sugar. Caster sugar dissolves quickly in our dough mixture, ensuring we achieve a nice balance between sweetness and texture without any graininess interrupting our soft bites. If you’re unable to find caster sugar at your local store, simply blitz regular granulated sugar in a food processor for a few seconds until fine—but don’t go too far or you’ll end up with powdered sugar!
- 2 tsp mixed spice. This aromatic blend typically includes cinnamon, nutmeg, and allspice—all essential flavors that evoke warmth and comfort in every bite of our hot cross buns. The spices work together in harmony to create an inviting fragrance; it’s like wrapping yourself in your favorite cozy blanket on a chilly day.
- 1 tsp ground cinnamon. While mixed spice brings complexity to our flavor profile, ground cinnamon adds its unique warmth and sweetness that truly makes these buns sing! If you’re feeling adventurous, consider adding fresh grated nutmeg or even cardamom for an additional layer of depth.
- 1 lemon, finely grated zest only. Zest is such an underrated ingredient! It brings brightness to our dough without overwhelming it with acidity—it’s like capturing sunshine in your baking! When zesting lemons (or any citrus), be sure to only use the colored part; avoid the white pith underneath as it can impart bitterness.
- 10g/¼oz salt. While seemingly simple, salt plays a vital role by enhancing flavors throughout our dough while also controlling yeast activity during fermentation—a little goes a long way! Using fine sea salt will ensure it blends seamlessly into your mixture without leaving any gritty texture behind.
- 10g/¼oz fast-action dried yeast. Yeast is what brings life to our dough! Fast-action yeast is fantastic because it doesn’t require proofing beforehand—you can mix it directly into your dry ingredients! However, do check expiration dates when purchasing; expired yeast won’t give us those beautifully risen buns we’re aiming for.
- 40g/1½oz butter. Butter brings richness to our dough while also contributing flavor; melted butter integrates better than softened butter here since we want to disperse fat evenly throughout our mixture rather than clumping it together.
- 300ml/10fl oz milk. Milk adds moisture and tenderness to our dough while providing richness that helps elevate our buns beyond ordinary bread! Warm it gently before adding so it’s tepid—not too hot—to keep our yeast happy!
- 1 free-range egg, beaten. Eggs are essential for binding ingredients together as well as enriching flavor and texture! They contribute vital fats which assist in achieving that pillowy soft crumb we’re all striving for with every bite.
- 200g/7oz sultanas. These plump little gems bring bursts of sweetness into every mouthful—oh my goodness! Make sure they’re fresh; old sultanas can become dry or tough instead of delightfully juicy!
- 50g/1¾oz finely chopped mixed candied peel. Candied peel adds an intriguing texture alongside fruity notes—a delightful surprise hidden within each bun! Choose high-quality peel (preferably from organic fruits) so as not to introduce any artificial flavors or colors into our beautiful creation.
- Oil, for greasing. A light coating ensures nothing sticks during rising or baking—simple but absolutely non-negotiable if we want perfectly formed hot cross buns!
- 75g/2¾oz plain flour (for topping). Reserved solely for creating those iconic crosses on top! If you’ve ever wondered why we pipe crosses onto these buns—it’s both decorative AND symbolic!
- 2 tbsp golden syrup (for glazing). Golden syrup lends not only sweetness but also creates an irresistible glossy finish on top—who can resist shiny pastries? If unavailable where you live (or if you’re seeking alternatives), try honey or agave syrup instead—they’ll work beautifully!
Equipment You’ll Need:
Now that we’ve gathered all our ingredients together like old friends reuniting after years apart—let’s talk about the essential tools needed for this baking adventure! Having the right equipment will make everything smoother while allowing us to enjoy each step along the way without unnecessary stress or frustration.
- Large mixing bowl: A sturdy mixing bowl is perfect for holding all your dry ingredients initially—and trust me when I say having ample space helps prevent spills when incorporating wet components later on! Opt for glass or stainless steel versions as they withstand heat well if needed later during warm rises.
- Piping bag fitted with a 3mm nozzle: This tool is crucial when creating those iconic crosses atop each bun! If you don’t have one handy—you can improvise by using any clean plastic food bag: simply snip off one corner once filled with paste—and voilà!
- Baking trays: You’ll need one or two lined with baking paper so your lovely creations don’t stick while baking away until golden brown goodness emerges from their warm cocoon!
- Wire rack: Once baked perfectly golden-brown—it’s important they cool off properly before serving; this wire rack allows air circulation around them so they won’t become soggy underneath after cooling down post-baking!
Preparing Mary Berry’s Hot Cross Buns
Step 1: Mixing Up Our Magical Dough
To kick things off on this exciting journey towards making Mary Berry’s hot cross buns, we start by combining our dry ingredients in a large mixing bowl—a very satisfying task indeed! Add 500 grams of strong white flour along with 75 grams of caster sugar—the symphony begins here as whisking unites these components beautifully! Next comes 2 teaspoons each of mixed spice and 1 teaspoon ground cinnamon—oh my heavens—the aroma wafting through the kitchen at this stage will have everyone gathering around curiously! Then sprinkle in 10 grams each of salt and fast-action dried yeast—but here’s an important tip: place them on opposite sides within the bowl before blending everything together—that small detail ensures optimal fermentation later on by preventing direct contact too soon between salt (which can inhibit yeast) during initial mixing stages!
Step 2: Welcoming Warmth
Now let’s melt down 40 grams of butter gently over low heat along with warming up 300 milliliters of milk separately until tepid—not boiling—as scalded milk could kill off precious yeast lives fighting valiantly within those tiny granules waiting eagerly for activation magic moments ahead! Once combined successfully into creamy liquid bliss—pour half directly onto dry mixes alongside one beaten egg while stirring fervently until everything starts coming together beautifully like best friends needing no introduction at all—trust me when I say stopping here would be entirely unwise!
Step 3: Kneading Joyfully
Once incorporated fully—you’ll want to gradually add remaining milk until achieving soft pliable dough consistency—it might take some trial-and-error depending upon humidity levels present today versus tomorrow—but don’t fret if things feel sticky initially either way; simply flour hands lightly before tipping out onto floured surface next where kneading begins joyfully greeting its arrival among other hopefuls eager awaiting fellowship soon enough themselves too… Incorporate sultanas along with mixed candied peel gently folding them evenly throughout whilst working up perseverance over next ten minutes—this kneading process transforms mere ingredients into silky elastic wonders ready promising fluffy heights ahead inviting patience rewarded generously later once baked properly just right…
Step 4: Resting & Rising
Once kneading completes satisfactorily—we now oil large bowl lightly then place rolled-up ball inside covering tightly with cling film before leaving somewhere warm—ideally around one-and-a-half hours until doubles size approximately watch closely though since various environmental factors influence timings here too don’t forget keep checking liberally giving good nudges occasionally reminding everyone involved coziness matters immensely during such delicate transformations taking place softly nurturing spirits alike whilst dreaming about upcoming delights promised soon enough!
As we continue this enchanting process further into shaping these beauties—I hope you’re feeling inspired already because I absolutely can’t wait till everyone gets their hands on these fluffy marvels fresh outta oven shortly thereafter… Stay tuned as we explore each step lovingly devotedly crafting memorable moments shared through baked wonders created together truly unforgettable experiences indeed await us ahead…
Step 5: The Art of Resting and Rising
Ah, the moment when your dough starts its magical transformation! After kneading that lovely mixture for about 10 minutes, you’ll want to transfer it into an oiled bowl. This is not just a resting step; it’s crucial for allowing the yeast to work its magic. Yeast is a living organism, and when it’s given warmth and time, it releases carbon dioxide, which causes the dough to rise. Covering your bowl with cling film creates a cozy environment, trapping warmth and moisture—think of it as a warm blanket for your dough! Now, find a warm spot in your kitchen (perhaps near the oven or a sunny windowsill) and let it rest for about 1½ hours. You’re aiming for the dough to double in size; this will give you those delightfully fluffy hot cross buns. When you return, the sight of that puffed-up dough will bring a smile to your face—it’s proof that patience truly pays off in baking!
Step 6: The Knock Back—A Vital Technique
Once that gorgeous dough has risen beautifully, it’s time for what bakers affectionately call “knocking back.” This step might sound counterintuitive—why would we want to deflate all that hard-earned air? Trust me; this part is absolutely paramount! Gently turning out the dough onto a floured surface allows us to release some of the gases produced by the yeast. This not only helps to redistribute those yeast cells but also strengthens the gluten structure we’ve been developing. Knead it gently for another five minutes while incorporating those sweet sultanas and mixed peel; they’ll infuse your buns with delightful bursts of flavor. You’ll feel how silky and elastic the dough becomes under your hands. Once done, return it to the bowl, cover it again, and let it rise for another hour until it doubles in size once more. This second rise ensures your hot cross buns will be light as air and profoundly satisfying.
Step 7: Shaping Your Buns—Crafting Perfection
Now comes one of my favorite parts—the shaping! This step allows you to get hands-on with this beautiful dough you’ve created. First, turn your risen dough out onto a floured work surface again and divide it into twelve equal pieces. I find that using a bench scraper can help you achieve neat cuts without squishing all those lovely air pockets you’ve cultivated. As you shape each piece into a ball, make sure to tuck any loose edges underneath; this technique creates tension on the surface of each bun, resulting in an even rise during baking. Place these little rounds on lined baking trays quite close together—they should almost be touching! Flatten them slightly; this gives them room to expand without becoming too flat while maintaining their round shape.
To foster another rising phase here—which is what will create that classic bun texture—you’ll want to cover these trays with either oiled cling film or slip them into large polythene bags (just make sure they don’t touch those precious buns). Let them sit for around 40-60 minutes until they’ve puffed up significantly. Watching them grow is akin to witnessing a beautiful sunrise—the anticipation builds as you imagine how delightful they will taste!
Step 8: Prepping Your Oven—The Crucial Heat Source
While those buns are rising beautifully, let’s talk about preheating your oven—a step often overlooked but essential for achieving that perfect bake! Set your oven temperature at 220°C (or 200°C if you’re using a fan oven), which is crucial because hot cross buns need that initial blast of heat to spring up beautifully in the first few minutes of baking—a process called oven spring. While you’re waiting for the oven to reach its peak temperature, prepare yourself mentally; this is where all your hard work pays off!
After waiting patiently for those buns to fully rise (they should look puffy and soft), it’s time to prepare the flour paste topping that will form those iconic crosses. Mix plain flour with water until you achieve a smooth paste; think of it as crafting edible art! Use this paste in a piping bag fitted with a small nozzle—or just snip one corner off if using a plastic food bag—to create crosses on top of each bun before they head into the oven. Trust me on this one: piping straight lines takes practice, but don’t worry if they’re not perfect—it adds character!
Final Touches: Baking Mary Berry’s Hot Cross Buns
Now we arrive at perhaps the most exciting moment—the baking itself! Gently slide your trays into that preheated oven and set your timer for 15-20 minutes. Keep an eye on them as they bake; they should turn golden-brown and smell utterly intoxicating as they rise and develop their crusts. Halfway through baking, turn the trays around so they cook evenly—a little tip from my own experiences where I’ve had lopsided bakes before!
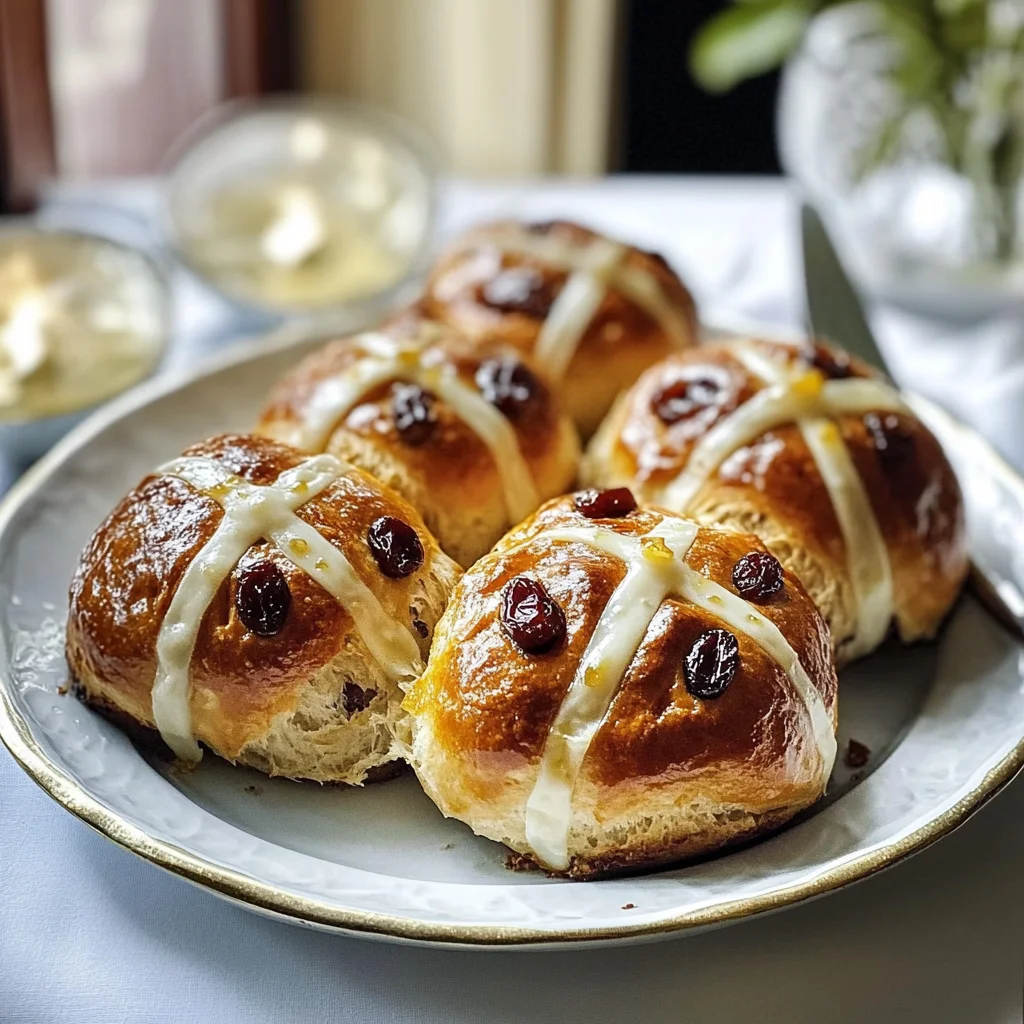
When they’re done—and you’ll know because they’ll have turned a beautiful pale golden-brown—it’s essential not just to take them out but rather give them some love afterward too! Melt some golden syrup in a pan while they’re still warm; brushing this over your buns adds an irresistible shine and sweetness that elevates them from delicious to divine. Let them cool completely on wire racks before serving—if you can resist nibbling on one immediately (I never can!). You’ll find these buns are best enjoyed split in half with a generous pat of butter melting into each crevice.
Baking Mary Berry’s hot cross buns isn’t just about following steps—it’s about creating memories infused with warmth and love that you’ll cherish forever. So gather loved ones around when it’s time to serve these beauties—you’ll be proud sharing something so extraordinary!
Storage and Enjoyment Tips for Your Mary Berry’s hot cross buns
Now that your kitchen is filled with the intoxicating aroma of freshly baked hot cross buns, it’s time to revel in the joy of enjoying them! These delightful little rounds of goodness are not just a treat for Easter but can bring a smile to any day of the week. Whether you’re sharing them with loved ones or savoring them quietly with a cup of tea, I just know you’ll find a way to enjoy every last bite. But what happens if you have some leftover? Let’s dive into how to keep that warmth and flavor lingering a bit longer.
Storing Leftover Mary Berry’s hot cross buns
When it comes to preserving those golden, fragrant buns, storing them in an airtight container is absolutely paramount. A bread box or a resealable plastic bag works wonders for keeping them fresh, but be sure to let them cool completely before sealing them up. Stored this way at room temperature, they’ll remain delicious for about 3-4 days—if they even last that long! If you want to maintain their incredible texture, consider placing a slice of bread in the container with them; this little trick helps keep moisture levels balanced and prevents the buns from becoming overly dry. Trust me on this—your taste buds will thank you! Even after those few days, toasting slightly stale buns can breathe new life into them, transforming each bite into a warm, comforting hug. Imagine slathering some butter onto that toasted slice—pure bliss!
Freezing Mary Berry’s hot cross buns for Later
If you find yourself with more hot cross buns than you can devour in a few days (which is a delightful problem!), freezing them is an excellent option. To do this properly, allow your buns to cool completely before wrapping each one tightly in plastic wrap or aluminum foil. Place them in a freezer-safe bag or container and you can keep their delightful essence frozen for up to three months—what a fantastic convenience! When you’re ready to indulge again, simply take out the desired number of buns and allow them to thaw at room temperature or pop them directly into the oven at a low heat until warmed through. This method ensures they retain their soft, fluffy texture as if they were just baked! The beauty of having these sweet treasures stashed away means that any moment can turn into an impromptu celebration.
So go ahead and embrace those storage tips; your homemade Mary Berry’s hot cross buns are about to become your new favorite go-to snack!
Mary Berry’s Hot Cross Buns
Experience the joy of baking with Mary Berry’s hot cross buns, a delightful twist on a classic Easter treat. These soft, spiced bread rolls are infused with sweet sultanas and fragrant citrus zest, making them the perfect accompaniment to your holiday gatherings or cozy afternoons. With an easy-to-follow recipe, even novice bakers can create these aromatic and comforting pastries that evoke warmth and nostalgia. As they rise in your oven, the enticing aroma will fill your home, promising a delicious experience for family and friends alike. So grab your apron and embark on this baking adventure—delightful moments await!
- Prep Time: 20 minutes
- Cook Time: 20 minutes
- Total Time: 40 minutes
- Yield: Serves 12 1x
- Category: Dessert
- Method: Baking
- Cuisine: British
Ingredients
- 500g strong white flour
- 75g caster sugar
- 2 tsp mixed spice
- 1 tsp ground cinnamon
- Zest of 1 lemon
- 10g salt
- 10g fast-action dried yeast
- 40g melted butter
- 300ml warm milk
- 1 beaten egg
- 200g sultanas
- 50g mixed candied peel
- Oil for greasing
Instructions
- In a large mixing bowl, combine flour, sugar, mixed spice, cinnamon, salt, and yeast (keeping salt and yeast separate initially).
- In a saucepan over low heat, melt butter and warm milk until tepid. Add half to the dry ingredients along with the beaten egg; mix well.
- Gradually add remaining milk until you form a soft dough. Knead for about 10 minutes until smooth.
- Incorporate sultanas and candied peel gently into the dough.
- Place the dough in an oiled bowl, cover with cling film, and let it rise in a warm spot for about 1½ hours or until doubled in size.
- Knock back the dough gently and shape it into twelve equal balls; place them on lined baking trays close together.
- Cover again and let rise for another 40-60 minutes until puffed up.
- Preheat oven to 220°C (200°C fan). Mix plain flour with water to create a paste for piping crosses on top of the buns.
- Bake for 15-20 minutes until golden brown. Brush with melted golden syrup while still warm.
Nutrition
- Serving Size: 1 bun (80g)
- Calories: 210
- Sugar: 8g
- Sodium: 150mg
- Fat: 4g
- Saturated Fat: 2g
- Unsaturated Fat: 2g
- Trans Fat: 0g
- Carbohydrates: 38g
- Fiber: 2g
- Protein: 5g
- Cholesterol: 30mg