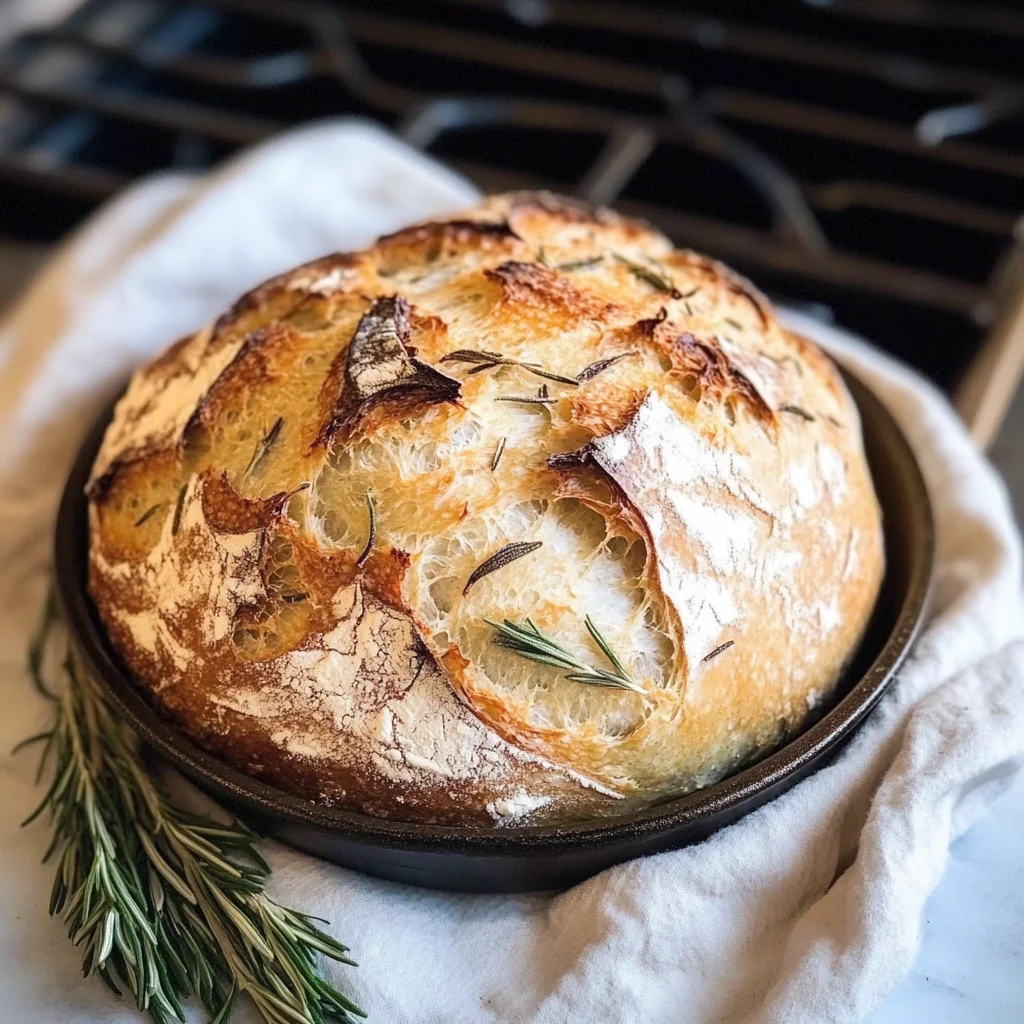
Easy Roasted Garlic Rosemary Artisan Bread – The Best Homemade Loaf
There’s something utterly magical about the process of making bread at home. It’s more than just mixing flour and water; it’s a journey that awakens the senses and stirs deep emotions. The warmth of the dough under your hands, the intoxicating aroma of garlic roasting in the oven, and the glorious sight of a golden crust forming as it bakes all come together to create an experience that is profoundly satisfying. When you pull that loaf from the oven, its crust crackling as it cools on the counter, you can’t help but feel a sense of accomplishment that is truly extraordinary. This Easy Roasted Garlic Rosemary Artisan Bread – The Best Homemade Loaf isn’t just food; it’s an expression of love, a connection to tradition, and an invitation to gather around the table with those you cherish.
I’ve always been captivated by how a simple loaf of bread can bring people together. There’s something incredibly comforting about breaking bread with family and friends, sharing stories while savoring each bite. This particular recipe has found its way into my heart because it effortlessly marries rustic charm with gourmet flavor. Infused with roasted garlic and fresh rosemary, this artisan loaf has a way of elevating even the simplest meals—be it a cozy soup night or a festive gathering. Trust me when I say that once you taste this bread, you’ll find yourself wanting to make it again and again. So, let’s roll up our sleeves and dive into this beautiful culinary adventure!
Ingredients:
As we embark on this culinary journey together, I promise you that each ingredient plays a pivotal role in crafting our Easy Roasted Garlic Rosemary Artisan Bread – The Best Homemade Loaf. We’re going to explore not just what we need but why each component matters so much.
- 1 whole head garlic. This humble ingredient is key to our flavor profile; roasting transforms its pungency into a mellow sweetness that enriches the entire loaf. When you roast garlic, it becomes soft and spreadable—a beautiful contrast to the chewy texture of our bread. Look for firm heads without blemishes for optimal flavor. And don’t forget: using freshly roasted garlic will give your bread an utterly intoxicating quality that pre-packaged alternatives simply can’t match.
- 1 tablespoon extra-virgin olive oil (divided). Olive oil is liquid gold in this recipe! Not only does it add richness and depth of flavor, but it also helps create a tender crumb in our artisan bread. Using high-quality extra-virgin olive oil is crucial here because its fruity notes will shine through in every bite. Make sure to reserve half for drizzling over the roasted garlic before baking—it adds a lovely finish and enhances both taste and texture.
- Coarse sea salt & freshly ground black pepper. These two companions are non-negotiable when it comes to seasoning our dough properly! Salt not only brings out the flavors in the other ingredients but also strengthens gluten structure—vital for achieving that delightful chewiness we crave in artisan bread. Freshly ground black pepper adds an aromatic touch, balancing out the sweetness of the roasted garlic beautifully.
- 1½ cups water (room temperature, ~70°F / 21°C). Water serves as the foundation for our dough; it’s essential for hydrating the flour and activating the yeast we’ll be using soon. Using room-temperature water ensures that your yeast wakes up gently without being shocked by extreme temperatures—this allows for an even fermentation process.
- 1 teaspoon active dry yeast. Yeast is our magical little worker here! By consuming sugars in flour, it produces carbon dioxide gas which makes our dough rise—leading us to that light texture we adore in artisanal loaves. Always check your yeast’s expiration date before use; fresh yeast means robust rising power!
- 3 cups bread or all-purpose flour (plus more for dusting). Flour is where all our gluten magic happens! Bread flour has a higher protein content than all-purpose flour, which provides us with stronger gluten strands essential for creating that beautiful structure in artisan bread. If you’re using all-purpose flour instead, just know it may yield slightly less chewy results—but still delicious!
- ½ teaspoon dried oregano. This aromatic herb adds another layer of flavor complexity to our bread without overwhelming the palate. Think of oregano as a background note that complements both garlic and rosemary beautifully—creating a symphony of flavors within each slice.
- 1 teaspoon kosher or fine sea salt. Similar to coarse salt but dissolves quickly—allowing us to distribute seasoning evenly throughout our dough. It’s vital for controlling fermentation speed; too much salt can inhibit yeast activity while too little can lead to overly rapid fermentation.
- 2 teaspoons finely chopped fresh rosemary (plus more for topping). Fresh rosemary brings an earthy fragrance that’s undeniably captivating! It’s one ingredient I encourage you not to skip; its distinct flavor pairs exquisitely with roasted garlic and adds depth we crave in homemade breads.
- 1 head roasted garlic cloves (smashed). Yes, we’re using roasted garlic twice here! After roasting until sweet and caramelized, these cloves get smashed into submission—integrating their luscious flavor right into our dough mixture.
Equipment You’ll Need:
To make your baking experience smooth and enjoyable, having the right tools at hand is essential! While they may not be “ingredients,” these pieces are crucial partners in bringing our Easy Roasted Garlic Rosemary Artisan Bread – The Best Homemade Loaf to life.
- Large mixing bowl: A sturdy bowl is vital for combining ingredients efficiently without worrying about spills or messes as we mix everything together.
- Dutch oven: This heavy pot retains heat exceptionally well—creating steam during baking that leads to that perfect crust we long for in artisan breads! If you don’t have one on hand, any oven-safe pot with a lid can work—but do keep an eye on moisture levels throughout baking.
- Parchment paper: A simple yet indispensable tool! It allows us to easily transfer dough into hot Dutch ovens without sticking or tearing while also ensuring clean removal after baking—a lifesaver when dealing with sticky dough!
- Kitchen towel: Used primarily for covering rising dough, this towel keeps moisture in while allowing air circulation needed during fermentation—essential for getting those lovely bubbles!
With these ingredients lined up beautifully before us—and our trusty equipment ready—we’re poised to create something truly special together! Let’s roll up our sleeves and get started on preparing this mouthwatering Easy Roasted Garlic Rosemary Artisan Bread – The Best Homemade Loaf!
Step 1: Roast the Garlic
First things first: let’s roast that glorious head of garlic—the cornerstone of flavor in this loaf! Preheat your oven to 400°F (204°C), then take that whole head of garlic and slice it horizontally through its equator so those sweet cloves peek out at you like little gems waiting to shine! Drizzle those exposed cloves with half of your measured extra virgin olive oil; sprinkle them generously with coarse sea salt and freshly cracked black pepper before wrapping them snugly in foil like little presents destined for greatness. Pop them into your preheated oven where they’ll luxuriate for about 40 minutes until soft and caramelized—the aroma wafting through your kitchen will be nothing short of heavenly! Once done roasting, allow them some time to cool so you can handle them easily before squeezing those deliciously tender cloves from their skins—you want them smashed but not pureed—that chunky texture will add wonderful character later!
Step 2: Mix the Dough
Now let’s bring everything together like old friends reuniting after years apart! In a small bowl or measuring cup, dissolve your active dry yeast into room-temperature water—let it sit undisturbed for about 10–15 minutes until frothy bubbles form on top like tiny fireworks celebrating life! Meanwhile, grab your large mixing bowl where we’ll combine three cups worth of either bread or all-purpose flour along with kosher salt—the salt needs direct contact here as it’ll help control fermentation rates later on down this delicious road we’re traveling together—with oregano sprinkled joyfully throughout followed by those finely chopped fresh rosemary leaves adding fragrant finesse right away! Once you’ve mixed everyone thoroughly together (don’t rush this step—the goal is uniformity!), pour in your frothy yeast-water concoction alongside smashed roasted garlic plus remaining extra virgin olive oil before mixing energetically until everything combines into one sticky mass—it should feel tacky yet manageable underhand!
Step 3: First Rise
With dough now united harmoniously within its vessel (our large mixing bowl), cover it lovingly with a clean kitchen towel—allowing nature’s magic (yeast) enough time here at room temperature to work its wonders over approximately 8–10 hours—it should double beautifully during this period if given proper care! Don’t rush this step; patience truly pays off since longer rises lead us towards deeper flavors developing within every single bite later down when tasting begins!
Step 4: Shape and Cold Ferment
After waiting patiently through nightfall or perhaps even partaking upon waking next morning—we’re finally ready now… Time seems almost ethereal sometimes amidst such anticipation built by aromas lingering from previous steps—but fear not—for shaping shall commence soon enough! Gently turn out risen dough onto floured surface without deflating too much energy built therein thus far—it may feel quite sticky at first but embrace gentle kneads instead along edges forming desired ball shape before placing seam-side up inside another well-floured bowl/basket meant specifically designed just for cold ferment phase ahead lasting anywhere from one hour up till twenty-four hours max depending how daring feeling today might be regarding flavor development—you could even stretch further nearly forty-eight hours if seeking maximum satisfaction level achieved afterwards upon tasting blissful bites made possible through patience rewarded splendidly served warm straight outta oven previously preheated alongside Dutch oven awaiting arrival shortly thereafter…
And there we have it—a fantastic beginning toward crafting something truly wonderful together filled full flavors resonating joyfully throughout each slice enjoyed alongside loved ones gathered ‘round tables sharing precious moments created anew over hearty meals prepared lovingly underneath roofs filled laughter shared endlessly between hearts bound close forevermore…
Step 5: Preheat Oven & Score – The Crucial Moment for Crust Perfection
Now that your dough has risen beautifully, it’s time to bring it to life in the oven. Start by preheating your oven to a sizzling 450°F (232°C). This high temperature is absolutely paramount for achieving that crusty exterior we all crave from artisan bread. You see, the heat of the oven will create steam inside the Dutch oven, which helps the bread rise quickly and gives us that gorgeous golden crust. While your oven is warming up, take a moment to appreciate your dough. It should be puffy and airy, with a few bubbles forming on the surface—this is a sign that fermentation has worked its magic!
Once the oven is ready and you’ve got your Dutch oven inside heating up, it’s time to prepare your dough for baking. Carefully remove the bowl from wherever it’s been resting (watch out; it may be warm!). Now comes an exciting part: we’re going to shape this beautiful dough. Gently turn it out onto a floured surface. You don’t want to deflate it too much; just coax it into a ball with floured hands, taking care not to be too rough. Then, place the shaped dough seam-side up in a well-floured basket or bowl—this will help maintain its structure as it bakes. Cover it once again while you prepare for scoring. Scoring is vital; not only does it allow steam to escape during baking, but it also creates those signature patterns on top of your loaf that make it so visually enticing.
Step 6: Bake – Transforming Dough into Liquid Gold
With everything set, it’s finally time for the big moment—baking! Gently invert your dough onto a piece of parchment paper so that it’s seam-side down now. This step ensures that when you place it in the Dutch oven, you’ll achieve that perfect rise without any sticking issues. Before you place your dough into the hot Dutch oven, use a sharp blade or a lame to score the top of your loaf with a couple of shallow cuts—think of them as artistic expressions! These slashes are not just decorative; they control how your bread expands while baking, allowing it to rise beautifully without bursting at seams.
Now carefully lift the parchment paper with your scored dough and place it into the preheated Dutch oven. This sizzling environment will create an enchanting steam chamber for your loaf during those first critical minutes of baking. Cover with the lid and bake for 30 minutes; trust me—the aroma wafting through your kitchen during this time will have you dreaming about slicing into this loaf! After those initial 30 minutes, remove the lid and let this beauty bake uncovered for another 15–20 minutes until it’s gloriously golden brown and crusty. You’ll know it’s done when you tap on the bottom of the loaf and hear a hollow sound—a clear indication that you’ve achieved bread perfection!
Step 7: Cool & Slice – The Anticipation Builds
Once you’ve pulled that magnificent loaf from the Dutch oven, resist the urge to slice right into it! I know—it smells utterly intoxicating—but letting your bread cool properly is crucial for developing its full flavor and texture. Place your loaf on a wire rack and allow it to cool for at least one hour before cutting into it. This cooling period might seem like an eternity after such anticipation, but trust me on this: during this time, moisture redistributes throughout the loaf, making each slice fabulously chewy yet tender.
Picture yourself slicing into that loaf—the crust crackles gently under your knife while steam escapes softly from within; it’s simply magical! And oh, how wonderful will those warm roasted garlic cloves mingle with fresh rosemary when you finally take that first bite? Each mouthful is an explosion of flavor—crusty on the outside and soft inside—a truly extraordinary experience! So please be patient; I promise you every moment spent waiting will reward you tenfold when you finally serve up slices of this Easy Roasted Garlic Rosemary Artisan Bread.
Final Touches – Indulge in Your Masterpiece
As we wrap up this delightful journey of baking together, let’s talk about serving suggestions because this Easy Roasted Garlic Rosemary Artisan Bread deserves nothing less than some culinary love! Imagine slathering thick slices with creamy butter or dipping them in fragrant olive oil mixed with balsamic vinegar—pure bliss! You can even pair these warm slices with soups or stews; their rustic charm complements hearty dishes beautifully.
And if you’re feeling adventurous (and I hope you are!), consider creating an elegant garlic toast topped with fresh tomatoes or perhaps using leftover slices for decadent sandwiches filled with roasted vegetables or fresh herbs—you’ll find they elevate any meal to something truly special! Remember, though: homemade bread doesn’t last long—so enjoy every bite and share generously with friends and family because nothing warms hearts quite like breaking bread together.
So there you have it—the complete guide to making Easy Roasted Garlic Rosemary Artisan Bread—a recipe that’s not just about food but about creating memories in your kitchen. From roasting garlic to savoring each slice, I hope this experience brings as much joy to you as it has brought me over countless gatherings around my table. Happy baking!
Storage and Enjoyment Tips for Your Easy Roasted Garlic Rosemary Artisan Bread – The Best Homemade Loaf
Now that your kitchen is filled with the intoxicating aroma of freshly baked bread, it’s time to savor every moment! This Easy Roasted Garlic Rosemary Artisan Bread – The Best Homemade Loaf is not just a treat for the senses during baking; it continues to delight long after you’ve pulled it from the oven. Whether you’re planning a cozy family dinner, a picnic in the park, or simply want to enjoy a slice with your morning coffee, this loaf is an absolute treasure. But what happens when you have leftovers? Fear not! Let’s talk about how to keep this wonderful creation fresh and flavorful.
Storing Leftover Easy Roasted Garlic Rosemary Artisan Bread – The Best Homemade Loaf
To preserve the rustic charm of your bread, it’s important to store it correctly. I recommend placing your leftover Easy Roasted Garlic Rosemary Artisan Bread in a paper bag or wrapping it in a clean kitchen towel. Avoid plastic bags if possible as they can trap moisture and lead to that dreaded sogginess. If you keep it at room temperature, it will stay delightful for about two days, but trust me—you’ll want to enjoy it well before then! For longer storage, consider slicing the loaf before storing; this way, each slice retains its crusty exterior while being truly easy to grab whenever that craving strikes! After a day or two, the flavors may mellow slightly, but don’t worry—the essence of roasted garlic and aromatic rosemary still shines through beautifully. When you’re ready for another bite, simply pop those slices in the toaster or warm them in the oven for a few minutes until they’re crisp again. Picture pulling out that golden slice with its crunchy crust and soft center—absolutely divine!
Freezing for Later
If you find yourself with more than you can eat (which let’s be honest, can be hard with such deliciousness!), freezing is an excellent option. To do this properly, wrap your bread tightly in plastic wrap followed by aluminum foil—this double-layered approach helps prevent freezer burn and keeps your artisan loaf tasting fresh. You can freeze it for up to three months without sacrificing quality! When you’re ready to indulge again, just take it out of the freezer and allow it to thaw at room temperature. For an even better experience, warm it gently in the oven for a few minutes after thawing; this revives that heavenly crust and brings back its lovely aroma as if it was just baked. Imagine having homemade artisan bread on hand whenever you fancy—it’s like having a little piece of culinary magic waiting for you!
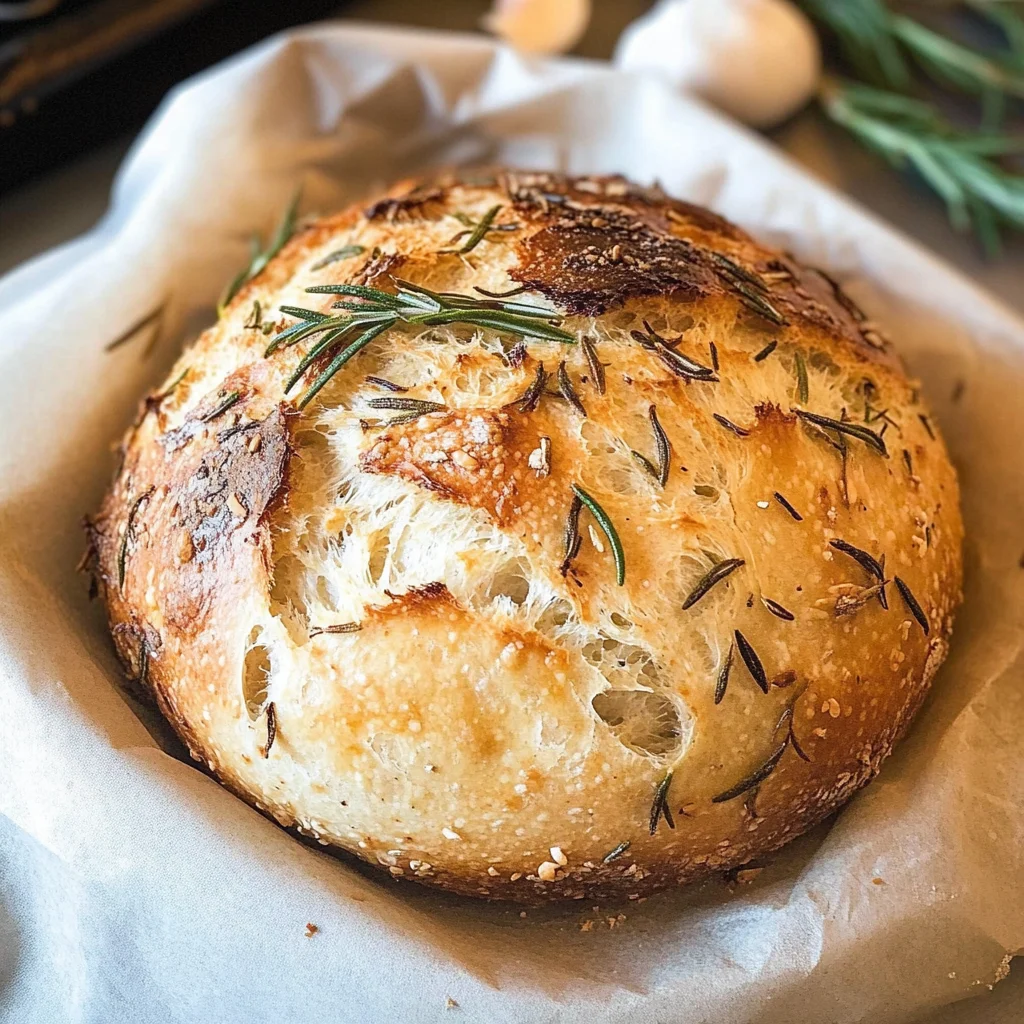
Easy Roasted Garlic Rosemary Artisan Bread – The Best Homemade Loaf
Easy Roasted Garlic Rosemary Artisan Bread – The Best Homemade Loaf is a delightful experience that combines the heartwarming aromas of roasted garlic and fresh rosemary in a rustic, chewy loaf. This artisan bread is not only simple to make but also elevates any meal, making it perfect for cozy dinners or festive gatherings. Imagine pulling a golden-brown loaf from the oven, its crust crackling as it cools—ready to be sliced and shared with loved ones. Each bite offers a warm embrace of flavors, making it an essential addition to your baking repertoire.
- Prep Time: 15 minutes
- Cook Time: 55 minutes
- Total Time: 1 hour 10 minutes
- Yield: Approximately 12 servings 1x
- Category: Baking
- Method: Baking
- Cuisine: American
Ingredients
- 1 whole head of garlic
- 1 tablespoon extra-virgin olive oil (divided)
- Coarse sea salt & freshly ground black pepper
- 1½ cups water (room temperature)
- 1 teaspoon active dry yeast
- 3 cups bread or all-purpose flour (plus more for dusting)
- ½ teaspoon dried oregano
- 2 teaspoons finely chopped fresh rosemary (plus more for topping)
Instructions
- Preheat your oven to 400°F (204°C) and roast the garlic wrapped in foil with olive oil, salt, and pepper for about 40 minutes until soft.
- Dissolve yeast in room-temperature water for about 10–15 minutes until frothy.
- In a large bowl, combine flour, salt, oregano, and rosemary. Add the yeast mixture and roasted garlic, then mix until a sticky dough forms.
- Cover the bowl with a kitchen towel and let it rise at room temperature for 8–10 hours until doubled.
- Shape the dough into a ball and place seam-side up in a floured basket; cover again while preheating your oven to 450°F (232°C).
- Score the top of the dough before transferring it onto parchment paper and into the Dutch oven. Bake covered for 30 minutes, then uncover and bake for another 15–20 minutes until golden brown.
Nutrition
- Serving Size: 1 serving
- Calories: 130
- Sugar: 0g
- Sodium: 180mg
- Fat: 2g
- Saturated Fat: 0g
- Unsaturated Fat: 2g
- Trans Fat: 0g
- Carbohydrates: 24g
- Fiber: 1g
- Protein: 4g
- Cholesterol: 0mg