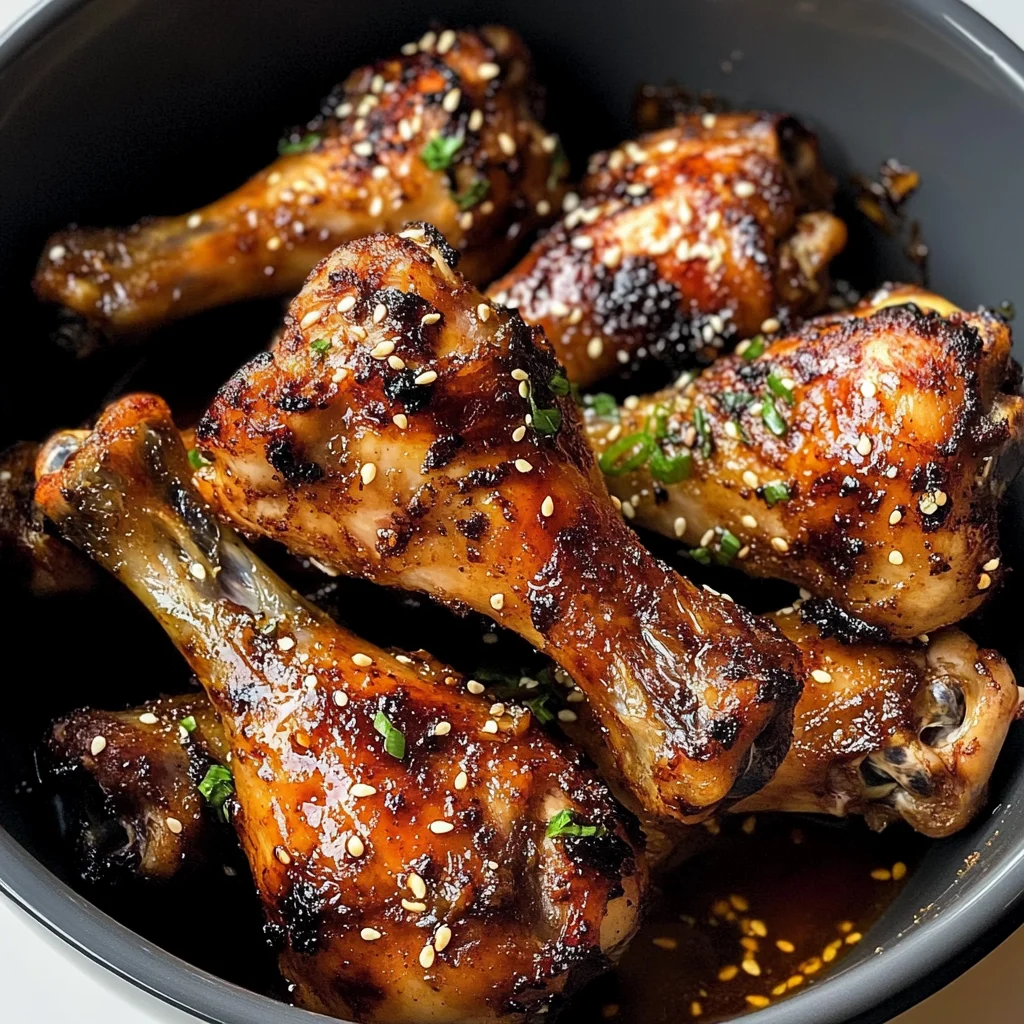
Kalbi Chicken Legs in Air Fryer
It’s truly magical how food can connect us to our roots and evoke fond memories, isn’t it? When I think of Kalbi Chicken Legs in the Air Fryer, I’m reminded of family gatherings, laughter, and the warm aroma of Korean barbecue wafting through the air. This dish is not just a meal; it’s a celebration of flavors that dance on your palate, bringing together the sweet and savory elements that define Korean cuisine. The juicy chicken legs, marinated to perfection, are truly a revelation. You’ll find yourself captivated by the bold flavors enveloping each bite, making you feel like you’re dining at a bustling BBQ joint without ever leaving your kitchen. Trust me when I say that this recipe is an experience that transcends ordinary cooking – it’s about creating memories around the dinner table with loved ones.
Now, let’s talk about why these Kalbi Chicken Legs are so special. The marriage of ingredients in this marinade tells a story of tradition and innovation. From the rich soy sauce to the refreshing notes of apple and ginger, each component contributes something unique to the dish. It’s all about balance; the sweetness from the apple and sugar contrasts delightfully with the umami from soy sauce, while ginger and garlic add warmth and depth. This recipe is perfect for any occasion—from a cozy weeknight dinner to an impressive feast for friends. And here’s a little secret: your kitchen will become your happy place while these chicken legs are cooking away in your air fryer, filling your home with an utterly intoxicating aroma.
Kalbi Chicken Legs in Air Fryer: A Delightful Korean BBQ Experience
I can hardly contain my excitement as I share this simple yet mouthwatering recipe with you! Kalbi Chicken Legs in Air Fryer marries convenience with deliciousness, allowing you to enjoy authentic Korean BBQ flavors right at home without any fuss. With just six chicken quarters and a handful of accessible ingredients, you’re on your way to creating something truly extraordinary in just 30 minutes. Grab your apron; let’s embark on this culinary journey together!
Ingredients:
As we get ready to dive into this flavorful adventure, let’s take a moment to appreciate each ingredient we’ll be using. Each one plays an essential role in crafting those delectable Kalbi Chicken Legs!
- 6 Chicken quarters. These succulent cuts are perfect for absorbing our kalbi marinade’s vibrant flavors. When selecting chicken quarters, look for fresh pieces with skin intact; they offer more moisture during cooking and help ensure that crispy outside we all love! If you’re looking for alternatives or want something leaner, you could use chicken thighs or drumsticks instead – they will still yield fantastic results.
- Kalbi marinade (homemade). This liquid gold is what makes our dish sing! To create this marinade’s delightful balance of flavors, we blend sweet and savory elements that embody Korean barbecue traditions. The base consists of soy sauce for saltiness and mirin for a touch of sweetness—this combination is absolutely paramount because it brings out the natural juiciness of our chicken.
- ½ apple (grated or pureed). Yes, you read that right! Adding apple lends a subtle sweetness while also helping tenderize our chicken due to its natural enzymes. Using half an apple means we get just enough sweetness without overpowering other flavors—trust me on this one!
- ¼ cup soy sauce. This ingredient is crucial for infusing umami flavor into our dish while also adding saltiness that balances the sweetness from other components beautifully. Opt for low-sodium soy sauce if you’re watching your salt intake; it still delivers great flavor but allows us better control over seasoning.
- ¼ cup mirin. Mirin imparts a mild sweetness that’s integral to achieving that characteristic kalbi flavor profile. It’s important not to skimp on quality here—choose a good brand because its distinct taste elevates our marinade to new heights!
- 2” ginger, freshly grated or minced. Ginger brings warmth and complexity to our dish—its aromatic profile complements garlic perfectly too! Fresh ginger packs more punch than dried varieties when it comes to flavor; always use fresh whenever possible.
- 4 cloves of garlic, minced or crushed finely. Garlic adds depth and richness while harmonizing beautifully with all other ingredients within our marinade mix—never underestimate its power! For maximum impact, try mincing garlic rather than using pre-minced options.
- 2 stalks of green onion, chopped finely. These little beauties add freshness as well as crunch—a lovely contrast against tender chicken! Green onions are non-negotiable here—they provide brightness that rounds out all those intense flavors.
- 2 tbsp sesame oil. This ingredient is absolutely essential—it contributes nutty undertones reminiscent of traditional Korean dishes while enhancing overall richness too! Choose high-quality toasted sesame oil for best results—it makes every bite feel like an indulgence.
- 2 tbsp rice vinegar. Rice vinegar introduces acidity which balances out richer components within our marinade wonderfully—it helps brighten everything up! Use unseasoned rice vinegar so as not to overwhelm other delicate notes in this dish.
- 2 tbsp sweetener (I used sugar). Whether it’s sugar or another sweetener substitute like honey or agave syrup, having some sweetness counteracts saltiness beautifully—a crucial element in building layers upon layers of flavor here!
- 1 tsp pepper (black preferred). A sprinkle gives just enough kick without overshadowing other elements present—feel free to adjust according to personal preference!
- Sesame Seeds (Optional, for topping). These tiny seeds pack extra crunch & visual appeal when sprinkled atop finished dishes—they’re optional but highly recommended if you’re aiming for presentation perfection!
Equipment You’ll Need:
Before we jump into preparing these delicious Kalbi Chicken Legs in Air Fryer, let me share some essential tools that will make your cooking experience smoother and much more enjoyable! Having the right equipment can elevate even simple recipes into culinary triumphs.
- Air fryer – This appliance is our star performer today! An air fryer circulates hot air around food which results in crispy textures similar to frying but without tons of oil—it’s truly revolutionary! Look for models with adjustable temperature settings so you’ll have full control over cooking times & doneness levels.
- Mixing bowl – A sturdy bowl will become invaluable during marination time when we’re combining our ingredients together—it should be large enough for mixing comfortably without spills happening everywhere!
- Grater or microplane – You’ll want one handy especially for fresh ginger & garlic—these tools help release essential oils & maximize flavors when grating which enhances overall taste significantly!
- Measuring cups & spoons – Precision matters when it comes down to balancing tastes perfectly—we want every ingredient measured accurately so keep these tools close by!
With all our ingredients lined up nicely alongside proper equipment assembled on hand now let’s dive headfirst into making these scrumptious Kalbi Chicken Legs in Air Fryer!
Step 1: Preparing Your Flavorful Marinade
First things first: let’s whip up that irresistible kalbi marinade! In your mixing bowl, combine the grated apple with soy sauce and mirin; trust me when I say this combination creates magic right off the bat! As soon as those liquids mingle together along with sweet notes from apple—you’ll notice their fragrance filling up your kitchen already—it’s utterly intoxicating! Next up adds minced ginger & garlic into this mix followed by green onions chopped finely—we’re building layers upon layers here folks because each element plays its part beautifully in unison; don’t rush through this step either since taking time ensures well-developed flavor profiles shine through later on during cooking time!
Step 2: Marinating Your Chicken Quarters
Now grab those beautiful chicken quarters—the stars of our show—and place them directly into the bowl filled with that luscious marinade we prepared earlier! Make sure every piece gets coated evenly because this is crucial—the longer they soak up all those delightful flavors before hitting heat source—the better results achieved after cooking time elapses too! Cover tightly using plastic wrap if necessary letting sit aside at room temperature while prepping air fryer settings accordingly—it doesn’t take long before amazing aromas start dancing around kitchen already!
Step 3: Preheating Your Air Fryer
While marinating works its magic (don’t worry about timing here), set air fryer temperature accordingly—most models recommend pre-heating anywhere between 350°F – 400°F depending on design specifics—but ultimately aim towards higher end range since crispiness factor plays huge role once meal finally finishes cooking later down road too! Once pre-heated correctly maintain patience waiting patiently until signal prompts arrival indicating readiness next stage begins—we’re almost there friends!
Step 4: Cooking Those Juicy Kalbi Chicken Legs
Once marination period wraps up nicely along side pre-heated air fryer awaits eagerly prepared vessels containing coated chicken pieces waiting eagerly—gently lay them inside basket ensuring space between each piece exists promoting airflow circulation throughout entire batch effectively ensuring maximum crispiness achieved during final stages cooking process ahead now awaits us…
Stay tuned as we continue unfolding delicious secrets behind perfecting those Kalbi Chicken Legs straight from air fryer magic soon coming forth ahead next stage instructions following shortly afterward…
Bringing Your Kalbi Chicken Legs to Life
Step 5: Marinating Magic
Now, let’s dive into the heart of this recipe—marinating your chicken. This step is truly where the magic happens! Begin by placing your chicken quarters into a large mixing bowl or, if you prefer, a resealable plastic bag that can handle all that flavor. This is crucial because it allows the marinade to envelop each piece of chicken fully, ensuring every bite bursts with succulent flavor. Next, take your kalbi marinade and pour it over the chicken. The mixture of soy sauce, mirin, sesame oil, and rice vinegar will create a symphony of flavors that dance harmoniously together. Don’t forget to toss in that grated apple; its natural sweetness and acidity will tenderize the meat while adding an extra layer of complexity to the overall flavor profile.
Now here comes the patience part—this is where you’ll want to let your chicken marinate for at least 15 minutes, although if you have more time (let’s say up to an hour), I promise you it will be worth it! During this time, those bold Korean barbecue flavors will seep deep into the meat. Just think about how juicy and flavorful each bite will be after soaking up all that goodness! If you have the time, consider marinating overnight in the refrigerator; this longer duration allows those rich flavors to really penetrate each piece of chicken. Trust me on this: rushing through this step can lead to less flavorful results, and who wants that?
Step 6: Prepping for Air Frying
With your chicken beautifully marinated and ready to go, it’s time to prepare your air fryer for action! First things first: preheat your air fryer to 380°F (193°C). This temperature is absolutely paramount because it ensures that the outside of your chicken gets beautifully crispy while locking in all those incredible juices on the inside. While it’s heating up, remove your chicken from its marinade. Now here’s a little tip: don’t just toss them straight into the air fryer! Instead, give each piece a gentle shake to remove excess marinade—this helps prevent excess moisture from making your chicken soggy instead of crisp. You want that lovely golden-brown exterior!
After shaking off any excess liquid, arrange the chicken legs in a single layer in your air fryer basket. It’s important not to overcrowd them; otherwise, they won’t cook evenly or achieve that glorious crispiness we’re aiming for. If necessary, cook them in batches—trust me when I say it’s better than squishing them together like old friends at a crowded party! While you’re doing this, take a moment to admire how gorgeous they look; glossy from their marinade and ready to transform into something utterly intoxicating.
Step 7: Cooking Time Bliss
Now comes one of my favorite moments—the actual cooking! Slide that basket into your preheated air fryer and set your timer for 25 minutes. But don’t just walk away during this time; keep an eye on these beauties! After about 15 minutes have passed, flip each piece over with tongs so both sides can get equal love from the hot air circulating within the fryer. This flipping process ensures that every inch gets cooked thoroughly while also allowing for an even browning effect—an absolute feast for both the eyes and taste buds!
As they cook away, you’ll start smelling those tantalizing aromas wafting through your kitchen—a smell so wonderful it might make you want to dive right in before they’re even done! Keep an eye on them around the last few minutes of cooking; depending on how thick your chicken pieces are and how powerful your specific air fryer model is, they might need a couple more minutes or could be perfect right at 25 minutes. To test doneness without cutting into them (which would let those precious juices escape), use a meat thermometer if you have one—it should read at least 165°F (74°C) when inserted into the thickest part of the meat.
Step 8: The Resting Revelation
Once those glorious Kalbi Chicken Legs are done cooking—and trust me when I say they’ll look divine—you must resist the urge to dig in immediately! This resting phase is non-negotiable; allowing your beautifully cooked chicken to rest for about five minutes creates a profoundly satisfying outcome as all those juices redistribute themselves throughout the meat. Picture what happens when you slice into something right away—it’s like all those luscious flavors just run away instead of staying put where they belong!
During this resting period, feel free to sprinkle some sesame seeds over the top if you desire; they add not only visual appeal but also a delightful crunch with every bite! As you wait (and I know waiting can be tough when deliciousness calls), take a moment to savor those lingering smells filling up your kitchen—after all, cooking is not just about food; it’s about creating memories and experiences that warm our hearts.
Final Touches: Serving Up Your Masterpiece
Step 9: Plating Perfection
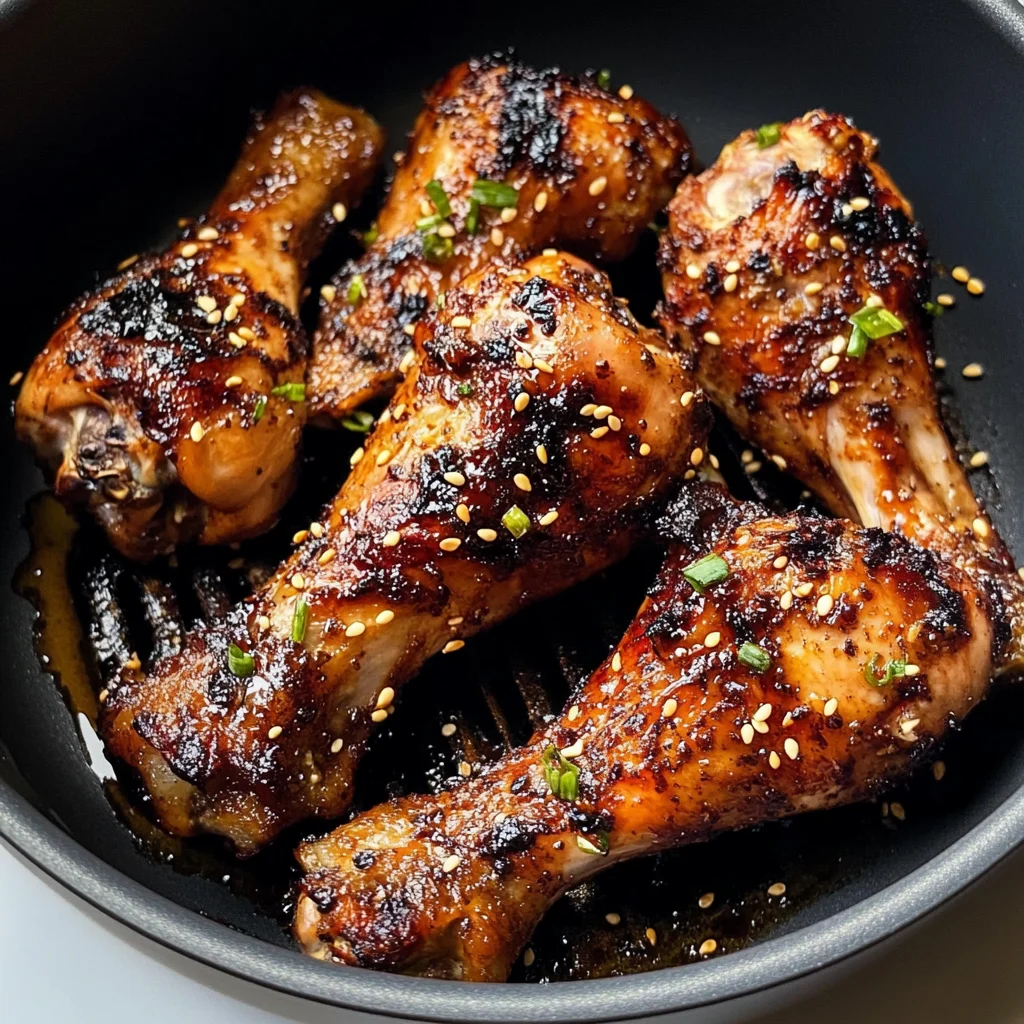
At last—the moment we’ve been waiting for has arrived! Carefully transfer those succulent Kalbi Chicken Legs onto a beautiful serving platter or individual plates. Take pride in arranging them artfully; remember we eat with our eyes first! The sight of glistening dark-brown skin adorned with specks of sesame seeds is bound to make anyone’s mouth water. Now imagine serving these beauties alongside some fluffy white rice or perhaps a refreshing cucumber salad to balance out their richness—a pairing that’s simply heavenly!
Before you present this dish at dinner or gather around with family and friends for an unforgettable meal, pause for one last moment—breathe in deeply and revel in what you have created today. I promise you that every forkful will transport you straight to Korea with its bold flavors and satisfying textures that remind us why we love food so much. So go ahead—dig in and enjoy these Kalbi Chicken Legs cooked perfectly in your air fryer; it’s sure to become a cherished addition to your weeknight dinners or special gatherings alike!
Happy cooking—and remember: every meal made with love is always extraordinary!
Storage and Enjoyment Tips for Your Kalbi Chicken Legs in Air Fryer
Now that your kitchen is filled with the intoxicating aroma of your freshly prepared Kalbi Chicken Legs in Air Fryer, it’s time to dive into the joyful experience of savoring this dish. But let’s be honest, sometimes life happens, and you may find yourself with leftovers. No need to fret! Proper storage can keep those delectable chicken legs tasting just as wonderful as they did fresh from the air fryer. You’ll want to place any leftover chicken in an airtight container—preferably glass or BPA-free plastic—to lock in that mouthwatering flavor and moisture. If stored correctly in the fridge, these beauties will stay good for about 3 to 4 days. To maintain their quality even longer, consider placing a slice of bread in the container with them; it helps absorb excess moisture and keeps your chicken legs from becoming too soggy. When you’re ready to enjoy them again, simply reheat in the air fryer for about 5-7 minutes at 375°F until warmed through; trust me, the crispiness will amaze you!
Storing Leftover Kalbi Chicken Legs in Air Fryer
Now, if you find yourself with a bit more foresight and want to prepare for future cravings, freezing is an excellent option! To freeze your Kalbi Chicken Legs properly, let them cool completely before wrapping each piece tightly in plastic wrap. Then place them all together into a freezer-safe bag or container—this prevents freezer burn while keeping their succulent flavors intact. When frozen this way, they can last for up to three months without losing their delightful taste! The beauty of having these flavorful legs ready in your freezer means that on busy weeknights or sudden gatherings, you can pull them out, thaw overnight in the fridge, and then pop them straight into the air fryer for an effortless yet impressive meal. Isn’t that just fantastic? The convenience factor is absolutely paramount here because it allows you to indulge in a beautiful homemade meal without any last-minute stress!
As we wrap up this section on storage and enjoyment tips for your Kalbi Chicken Legs in Air Fryer, I hope you feel empowered to not only relish these delicious pieces but also preserve their magic for future feasts. There’s something so rewarding about knowing that a piece of culinary delight is waiting for you whenever you desire it!
Kalbi Chicken Legs in Air Fryer
Enjoy irresistible Kalbi Chicken Legs in Air Fryer bursting with Korean BBQ flavors—all ready in just 30 minutes! Try this recipe today!
- Prep Time: 15 minutes
- Cook Time: 25 minutes
- Total Time: 40 minutes
- Yield: Serves 6
- Category: Main
- Method: Frying
- Cuisine: Korean
Ingredients
- 6 chicken quarters
- ½ apple (grated or pureed)
- ¼ cup soy sauce
- 2 inches ginger (freshly grated)
- 4 cloves garlic (minced)
- 2 stalks green onion (chopped)
- 2 tbsp sesame oil
- 2 tbsp rice vinegar
- 2 tbsp sugar
Instructions
- In a mixing bowl, combine grated apple, soy sauce, ginger, garlic, green onion, sesame oil, rice vinegar, and sugar to create the marinade.
- Place chicken quarters in the bowl or a resealable bag and coat them evenly with the marinade. Let marinate for at least 15 minutes (up to overnight).
- Preheat the air fryer to 380°F (193°C).
- Remove chicken from the marinade and shake off excess liquid. Arrange in a single layer in the air fryer basket.
- Cook for approximately 25 minutes, flipping halfway through until internal temperature reaches at least 165°F (74°C).
- Allow resting for 5 minutes before serving.
Nutrition
- Serving Size: 1 serving
- Calories: 290
- Sugar: 4g
- Sodium: 680mg
- Fat: 17g
- Saturated Fat: 4g
- Unsaturated Fat: 13g
- Trans Fat: 0g
- Carbohydrates: 10g
- Fiber: 0g
- Protein: 26g
- Cholesterol: 100mg