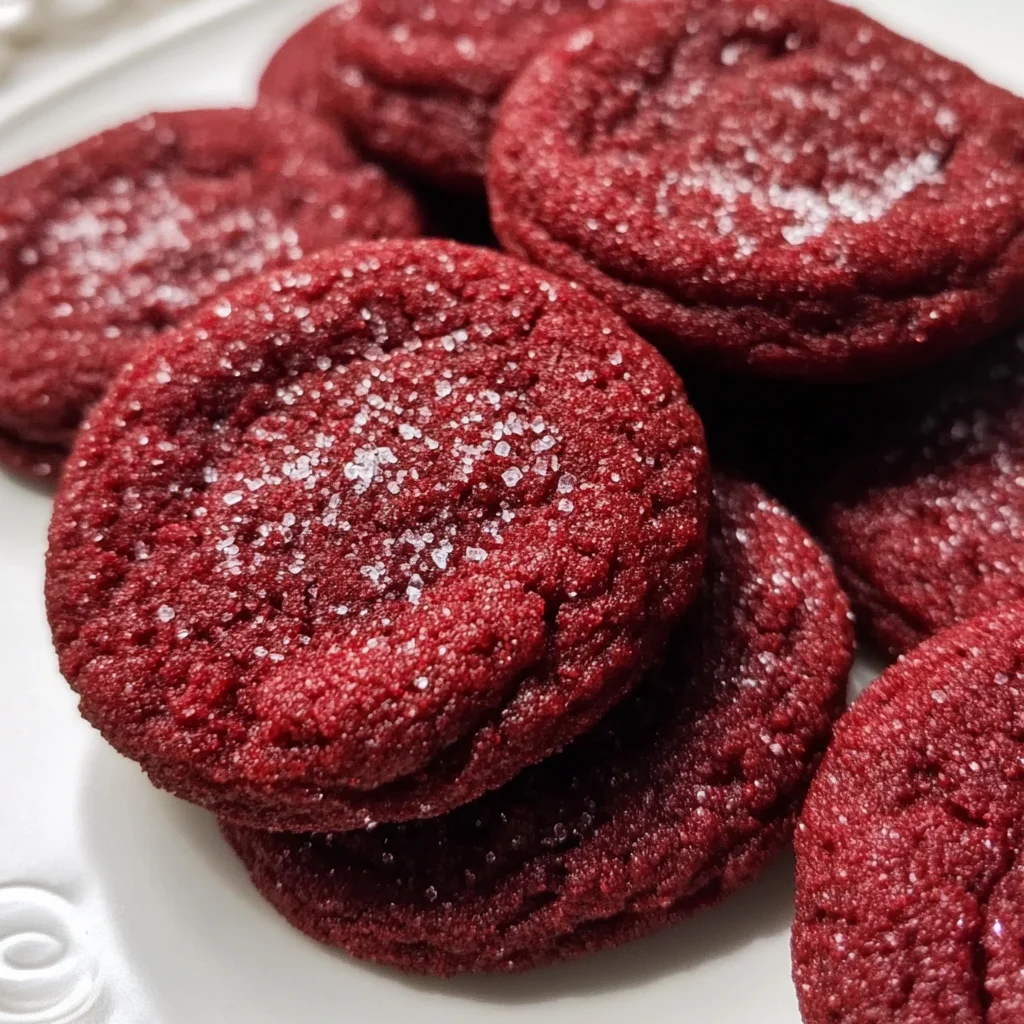
Red Velvet Cookies Recipe
There’s something genuinely magical about baking, don’t you think? It’s more than just mixing ingredients; it’s a heartfelt connection to tradition, a splash of creativity, and an invitation to share love with those around us. Today, I’m excited to take you on a delightful journey as we create my cherished Red Velvet Cookies Recipe. Imagine opening your oven door and being greeted by the warm, inviting aroma of freshly baked cookies that perfectly captures the essence of a classic red velvet cake—soft, chewy, and utterly irresistible. With each bite, you’ll experience a symphony of flavors that dances on your palate, bringing joy and nostalgia that only homemade treats can provide.
The vibrant hue of these cookies isn’t just for show—it symbolizes celebration and comfort. I’ve always been captivated by the rich history behind red velvet desserts; they evoke memories of special occasions and family gatherings. These cookies embody the spirit of those cherished moments while offering a quicker, easier way to indulge in this beloved flavor profile. Perfect for sharing with friends or enjoying quietly with a cup of tea (or coffee!), this recipe is not just about satisfying a sweet tooth; it is an experience that brings warmth into our lives. Trust me when I say that once you try these Red Velvet Cookies, they will become a staple in your baking repertoire!
Red Velvet Cookies Recipe: Sweet Indulgence in Every Bite
Let’s dive into this beautiful recipe together! As we embark on this culinary adventure, remember that every ingredient has its own story to tell and contributes uniquely to the final outcome. I promise you’ll find joy not just in devouring these cookies but also in the process of making them.
Ingredients:
As we gather our ingredients for these exquisite Red Velvet Cookies, let’s take a moment to appreciate how each component plays an essential role in creating the perfect treat.
- 1/2 cup (113 g) unsalted butter, softened to room temperature. This is crucial for achieving that light and airy texture we’re aiming for in our Red Velvet Cookies Recipe. When butter is at the right temperature, it creams beautifully with sugars to create tiny air pockets that will help the cookies rise and maintain their chewy consistency. Always opt for high-quality butter; the richness will elevate your cookies and make them taste truly extraordinary.
- 1/2 cup plus 1 tablespoon (110 g) light brown sugar adds depth and moisture to the dough. The molasses present in brown sugar not only enhances flavor but also contributes to that lovely chewiness we desire in cookies. If you’re in a pinch, you could make your own by mixing granulated sugar with a little molasses—it’s a fantastic alternative!
- 1/4 cup (50 g) granulated sugar provides sweetness while balancing out the flavors from the brown sugar. This combination creates a layered sweetness that’s simply irresistible—trust me on this one! It helps achieve that delicate balance between rich cocoa notes and vibrant red color without overwhelming your taste buds.
- 1 large egg, at room temperature, binds all our ingredients together while also adding moisture and richness. Using an egg that’s warmed up slightly helps it blend better into the mixture. If you’re vegan or looking for alternatives, consider using flaxseed meal or chia seeds mixed with water as an egg substitute.
- 1 1/2 teaspoons vanilla extract gives our cookies warmth and complexity—it’s like liquid gold! Vanilla enhances all other flavors while providing an aromatic experience that makes these cookies feel luxurious. Always use pure vanilla extract if possible; it’s worth the investment.
- 1 ½ teaspoons red gel food coloring is what transforms these simple cookies into stunning pieces of art! Unlike liquid food coloring, gel coloring provides vibrant color without altering the dough’s consistency—a non-negotiable element for achieving that classic red velvet look.
- 1 1/4 cups (160 g) all-purpose flour serves as the backbone of our cookie dough. It provides structure while allowing our cookies to hold their shape as they bake. When measuring flour, be sure to spoon it into your measuring cup instead of scooping directly from the bag; this prevents packing it down too tightly.
- 2 tablespoons cocoa powder, sifted (I love using Dutch-process or Hershey’s Special Dark), adds rich chocolate flavor without overpowering the signature red velvet taste. Sifting ensures there are no lumps which can impact texture—this step is absolutely paramount!
- 1/2 teaspoon baking soda helps our cookies rise beautifully while contributing to that soft texture we adore. It’s important not to skip this ingredient because it activates upon combining with acidic elements like cocoa powder; together they create carbon dioxide bubbles which lighten our dough.
- 1/2 teaspoon baking powder works hand-in-hand with baking soda, providing additional lift during baking for those perfectly fluffy cookies we crave.
- 1/2 teaspoon salt balances flavors wonderfully! A pinch of salt enhances sweetness without making things taste salty; it rounds out all those rich notes beautifully.
- 1/2 cup red sanding sugar for rolling gives our cookies an eye-catching sparkle on top—a visual feast that invites people to indulge! Its larger crystals won’t dissolve during baking like regular sugar would; instead, they keep their shape and create delightful crunchiness.
- 1/4 cup (50 g) granulated or coarse sugar adds another layer of sweetness while giving contrast against the vibrant red hue when rolled before baking.
- A dollop of red gel food coloring (avoid using liquid food coloring here!) ensures each cookie retains its vibrancy throughout baking—this final touch is what sets them apart visually!
Equipment You’ll Need:
Before we dive into creating these scrumptious Red Velvet Cookies, let’s talk about some essential equipment you’ll need along the way. Having the right tools makes this process smoother and more enjoyable—trust me when I say it can be quite therapeutic!
- Mixing bowls – A sturdy set of mixing bowls is essential for combining ingredients smoothly without any spills or messes! Opt for glass or stainless steel as they’re durable and easy to clean—plus they often look great in photos if you’re feeling Instagrammable!
- Electric mixer or whisk – Whether you prefer using a hand mixer or standing mixer depends on personal preference; both do wonders at creaming butter and sugars together efficiently! If you’re using a whisk instead, don’t forget to channel your inner workout—the arm strength will pay off when you see those fluffy results.
- Measuring cups & spoons – Precision matters in baking! Invest in high-quality measuring tools so you can accurately capture every ingredient needed for success—you’ll thank yourself later when everything turns out just right!
- Baking sheets lined with parchment paper – Parchment paper acts as a non-stick surface ensuring easy removal without damaging those perfectly baked bottoms! Plus, cleanup becomes effortless—a true win-win situation.
Now that we’ve gathered our essentials and prepared ourselves mentally for this delightful adventure ahead let’s jump into preparing these fabulous Red Velvet Cookies!
Step 1: Creaming Butter & Sugars
To begin our cookie-making journey, let’s start by creaming together our softened unsalted butter along with both types of sugar until light and fluffy—a process known as creaming! This step is crucial because it incorporates air into your batter which helps create tender yet chewy textures once baked. Using either an electric mixer on medium speed or elbow grease with your trusty whisk will yield excellent results here—don’t rush this step! Take about 3–5 minutes until everything transforms into a pale golden mixture that’s smooth yet slightly thickened—this indicates enough air has been incorporated successfully.
Step 2: Mixing In Egg & Vanilla
Next up comes adding one large room-temperature egg along with one-and-a-half teaspoons of pure vanilla extract into our creamed mixture—let’s give them time to mingle harmoniously! Beat them gently until combined thoroughly—you want everything blended evenly without overmixing at this stage since doing so could lead us down an unwanted path towards tough cookies instead! Keep an eye out for any streaks left behind from either ingredient—a completely uniform mix means we’re ready for what’s next!
Step 3: Introducing Color & Dry Ingredients
Now it’s time for some fun—as we add one-and-a-half teaspoons of vibrant red gel food coloring directly into our batter! Mix until evenly distributed—it should resemble luscious crimson goodness by now! Next comes introducing dry ingredients: carefully sift together flour along with cocoa powder before adding them gradually into your wet mixture—we’re aiming for harmonious integration here too without any lumps remaining behind which could detract from overall texture later on down line (and who wants lumpy cookies?). Stir gently but don’t overdo it—the goal here is merely combined rather than fully smooth—it’s okay if small flecks remain visible!
Step 4: Activating Leaveners
Finally comes another important stage before diving headfirst onto shaping dough balls: incorporating half-teaspoon each baking soda alongside baking powder followed by half teaspoon salt—all key players ensuring perfect rise during bake-off session ahead! Once mixed through well enough then allow resting briefly while preheating oven allows flavors meld together nicely before rolling individual balls dipped generously into vibrant sanding sugar awaiting their transformation soon thereafter…
I hope you’re feeling as excited as I am about these next steps leading us closer towards tasting sweet rewards soon enough—and remember don’t hesitate reaching out if ever uncertain throughout process—I’m cheering you on every step way!
Baking Your Perfect Red Velvet Cookies Recipe
Step 5: Creaming the Butter and Sugars
Now, let’s dive into the heart of our Red Velvet Cookies Recipe with the creaming of butter and sugars. You’ll want to start by grabbing your unsalted butter, which should be softened to room temperature—this is crucial because it helps the butter incorporate air when mixed, leading to that delightful softness we crave in cookies. In a large mixing bowl, combine your ½ cup of softened butter with ½ cup plus 1 tablespoon of light brown sugar and ¼ cup of granulated sugar. Using an electric mixer or a sturdy wooden spoon, beat these ingredients together on medium speed until the mixture is light and fluffy—this usually takes about 3-5 minutes. Trust me on this; you want to be patient here! The fluffiness is key to creating cookies that are tender and have that melt-in-your-mouth quality.
You might notice that the mixture will turn a lovely pale color, which is a sign that you’re on the right track. As you cream, take a moment to breathe in the sweet aroma—the scent of butter and sugar coming together is nothing short of intoxicating! Once fully creamed, add in your room temperature egg and 1½ teaspoons of vanilla extract. Continue mixing until everything is well combined; this will add moisture and flavor depth to our cookie dough.
Step 6: Adding Color and Cocoa
Next up, we’re introducing the star components that give these cookies their signature look and flavor: red gel food coloring and cocoa powder. To achieve that stunning red hue without compromising taste, carefully measure out 1½ teaspoons of red gel food coloring. Add this vibrant color directly into your creamed mixture, then mix well until you see a beautiful scarlet swirl develop throughout the batter—this visual cue is part of what makes baking so magical!
Now it’s time for the cocoa powder. Sift in 2 tablespoons of Dutch-process or Hershey’s Special Dark cocoa powder; this not only enriches the flavor but also enhances the deep chocolate notes that complement the red velvet beautifully. Mixing these ingredients well ensures an even distribution throughout your dough—a critical step if you want each cookie to be consistently delicious. At this point, don’t forget to scrape down the sides of your bowl with a spatula; it’s important to ensure no ingredients are left behind as they contribute to the overall texture and taste.
Step 7: Dry Ingredients Unite
The next phase involves bringing together our dry ingredients to create a cohesive cookie dough that embodies all those delightful flavors we’ve developed thus far. In a separate bowl, whisk together 1¼ cups of all-purpose flour (be sure to spoon it into your measuring cup for accuracy), along with ½ teaspoon each of baking soda, baking powder, and salt. Why do we take this extra step? Combining these dry elements separately allows for better distribution within our dough—this ensures even leavening as they react during baking.
Once your dry ingredients are mixed well, gradually fold them into your wet mixture using a rubber spatula or wooden spoon. I encourage you to go slow here; folding gently will help maintain air pockets created earlier during creaming while also ensuring everything comes together beautifully without over-mixing—over-mixing can lead to tough cookies instead of soft ones! As you work in the flour mixture, watch for any dry streaks; once there are none left visible, you’ve reached perfection!
Step 8: The Importance of Chilling
Now comes one of my favorite steps—the chilling process! After mixing all those glorious ingredients together into a luscious cookie dough, you’ll want to cover your bowl with plastic wrap or transfer it into an airtight container before placing it in the refrigerator for at least 30 minutes (or up to an hour). You might wonder why chilling is essential; let me tell you—it does wonders for both flavor and texture! During this time, the dough firms up slightly as fats solidify again after being warmed during mixing, which helps maintain shape while baking.
Moreover, chilling allows flavors to meld beautifully; just like a good sauce benefits from resting time, so too do our cookies! This patience transforms them from ordinary treats into something truly extraordinary with rich depth and complexity. So don’t rush through this step; pour yourself a cup of tea or coffee while waiting—you deserve it!
Final Touches
Step 9: Rolling Into Sweetness
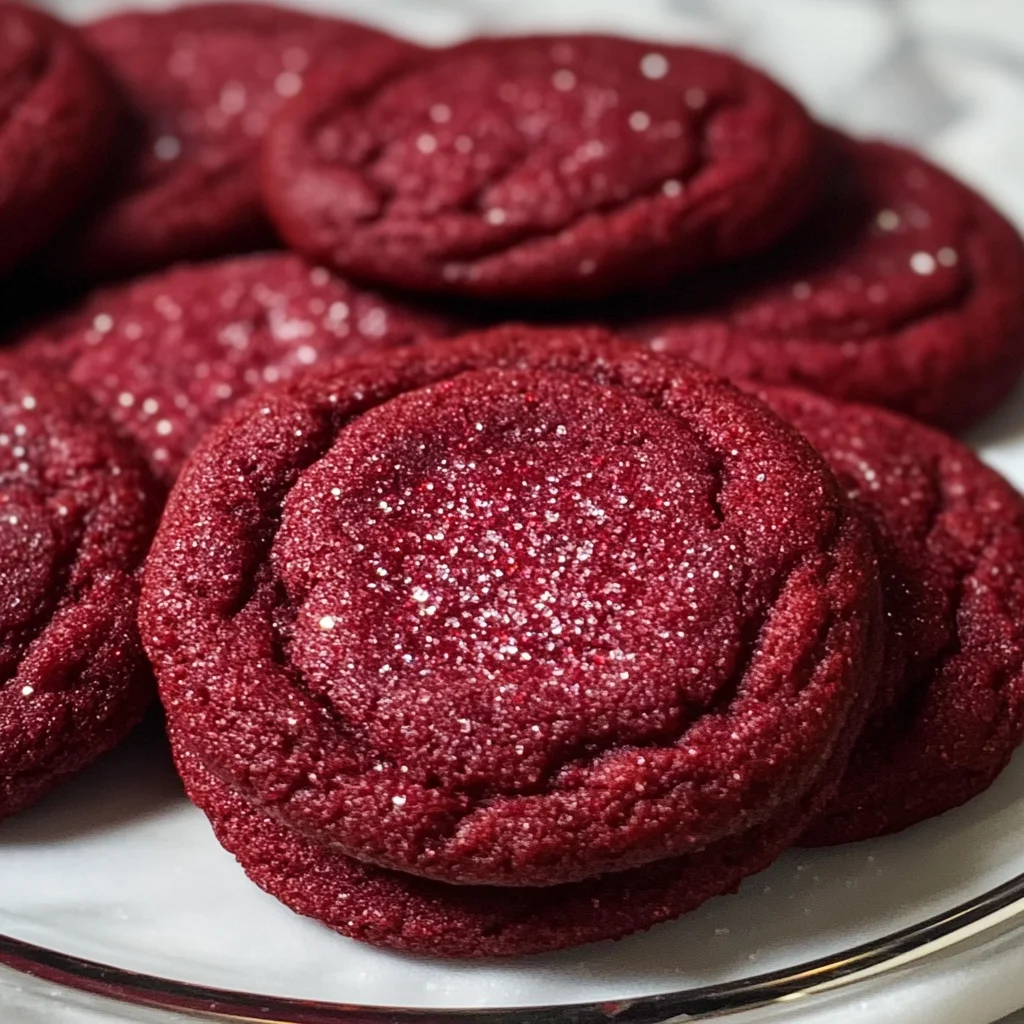
Once your dough has chilled satisfactorily (and believe me when I say it’s worth every second!), prepare yourself for some fun—rolling out those gorgeous cookie balls! Preheat your oven to 350°F (175°C) while you gather your rolling supplies: keep handy about ½ cup of red sanding sugar for rolling alongside another ¼ cup of granulated or coarse sugar for added sweetness on top. The contrasting colors will make each cookie visually pop!
Using a small cookie scoop or simply two tablespoons, portion out your chilled dough onto parchment-lined baking sheets—make sure they’re spaced around two inches apart since these beauties will spread just enough during baking. Now here’s where we get creative: roll each ball first in granulated sugar before dunking it into red sanding sugar. This double-coating adds layers of sweetness and creates an eye-catching finish that mirrors that classic red velvet cake vibe!
Once rolled and ready on your sheets, pop them into your preheated oven for about 10-12 minutes. Keep an eye on them as they bake; they should appear set around the edges but still soft in the center—that’s exactly what we want! Underbaking just slightly will ensure those chewy centers that create such a profound satisfaction in every bite.
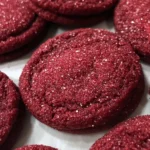
Step 10: Cooling & Enjoying
After their journey through heat transforms them into divine creations straight from heaven , remove those cookies from the oven and let them rest on their baking sheets for about 5 minutes before transferring them onto wire racks—you definitely want them cool enough so they hold their shape but still warm enough where they melt slightly when bitten into! It’s pure bliss watching them cool down as they puff up ever so slightly—a promise that there’s magic happening beneath those surfaces.
Let me tell you—the aroma wafting through your kitchen at this moment is utterly intoxicating! Finally—and I mean finally—once they’ve cooled completely (if you can wait), grab yourself one (or two) of these indulgent delights paired perfectly with a glass of cold almond milk or hot coffee. Each bite transports you back to memories shared around dessert tables filled with laughter—these Red Velvet Cookies carry love baked right inside them.
So there you have it—a comprehensive guide on creating sumptuous Red Velvet Cookies that are sure to impress anyone lucky enough to indulge in them! Remember this recipe next time you’re craving something sweet or need a crowd-pleaser at gatherings—trust me when I say you’ll be met with smiles all around! Enjoy every crumb!
Storage and Enjoyment Tips for Your Red Velvet Cookies Recipe
Now that you’ve whipped up a batch of these delightful red velvet cookies, it’s time to talk about how to savor every last crumb. The aroma wafting through your kitchen is simply intoxicating, and I can just imagine the smiles on everyone’s faces as they take that first bite. But what do you do when you find yourself with a few cookies left over? Fear not! Preserving their rich, fudgy goodness is easier than you think.
Storing Leftover Red Velvet Cookies Recipe
To keep your red velvet cookies fresh and utterly delicious, store them in an airtight container at room temperature. This will lock in the moisture and ensure they stay soft for days. If stored properly, they can last up to one week—though I doubt they’ll stick around that long! For an extra touch of tenderness, you might even want to toss in a slice of bread with the cookies; this little trick helps retain moisture beautifully. Trust me when I say that after a day or two, they taste even better, as the flavors meld together into something profoundly satisfying. If you’re craving a warm cookie experience again, pop them in the microwave for about 10 seconds—just enough to bring back that fresh-baked warmth without compromising their texture.
Freezing Cookies for Later
If you find yourself with more cookies than you can devour in a week (I know, it’s hard to resist!), freezing is the perfect solution. To freeze your red velvet cookies, simply let them cool completely before placing them in a single layer inside an airtight freezer-safe container or wrapping them individually in plastic wrap. They can be frozen for up to three months without losing their divine flavor and texture! When you’re ready to enjoy them again, simply pull out as many as you like and let them thaw at room temperature or warm them up straight from the freezer—no need to wait! This method not only preserves their delightful taste but also offers a fantastic convenience factor; imagine having these scrumptious treats ready whenever those cravings hit!
Red Velvet Cookies
Experience the joy of baking with these delightful Red Velvet Cookies! Soft, chewy, and bursting with rich cocoa flavor, these cookies are a modern twist on the classic red velvet cake. Each bite offers a vibrant sweetness that perfectly balances the chocolatey undertones, making them an irresistible treat for any occasion.
- Prep Time: 15 minutes
- Cook Time: 12 minutes
- Total Time: 27 minutes
- Yield: Approximately 16 cookies 1x
- Category: Dessert
- Method: Baking
- Cuisine: American
Ingredients
- 1/2 cup unsalted butter, softened
- 1/2 cup plus 1 tablespoon light brown sugar
- 1/4 cup granulated sugar
- 1 large egg
- 1 1/2 teaspoons vanilla extract
- 1 1/2 teaspoons red gel food coloring
- 1 1/4 cups all-purpose flour
- 2 tablespoons cocoa powder
- 1/2 teaspoon baking soda
- 1/2 teaspoon baking powder
- 1/2 teaspoon salt
- 1/2 cup red sanding sugar for rolling
Instructions
- Preheat oven to 350°F (175°C). Line baking sheets with parchment paper.
- In a mixing bowl, cream together softened butter, light brown sugar, and granulated sugar until fluffy (3–5 minutes).
- Add in the egg and vanilla extract; mix until fully combined.
- Stir in red gel food coloring until well blended.
- In a separate bowl, sift together flour, cocoa powder, baking soda, baking powder, and salt.
- Gradually fold dry ingredients into wet mixture until just combined.
- Chill dough for at least 30 minutes.
- Roll chilled dough into balls and coat with sanding sugar before placing on prepared baking sheets.
- Bake for 10–12 minutes until edges are set but centers are soft. Let cool for 5 minutes before transferring to wire racks.
Nutrition
- Serving Size: 1 cookie (30g)
- Calories: 150
- Sugar: 10g
- Sodium: 90mg
- Fat: 7g
- Saturated Fat: 4g
- Unsaturated Fat: 2g
- Trans Fat: 0g
- Carbohydrates: 20g
- Fiber: <1g
- Protein: <1g
- Cholesterol: 20mg