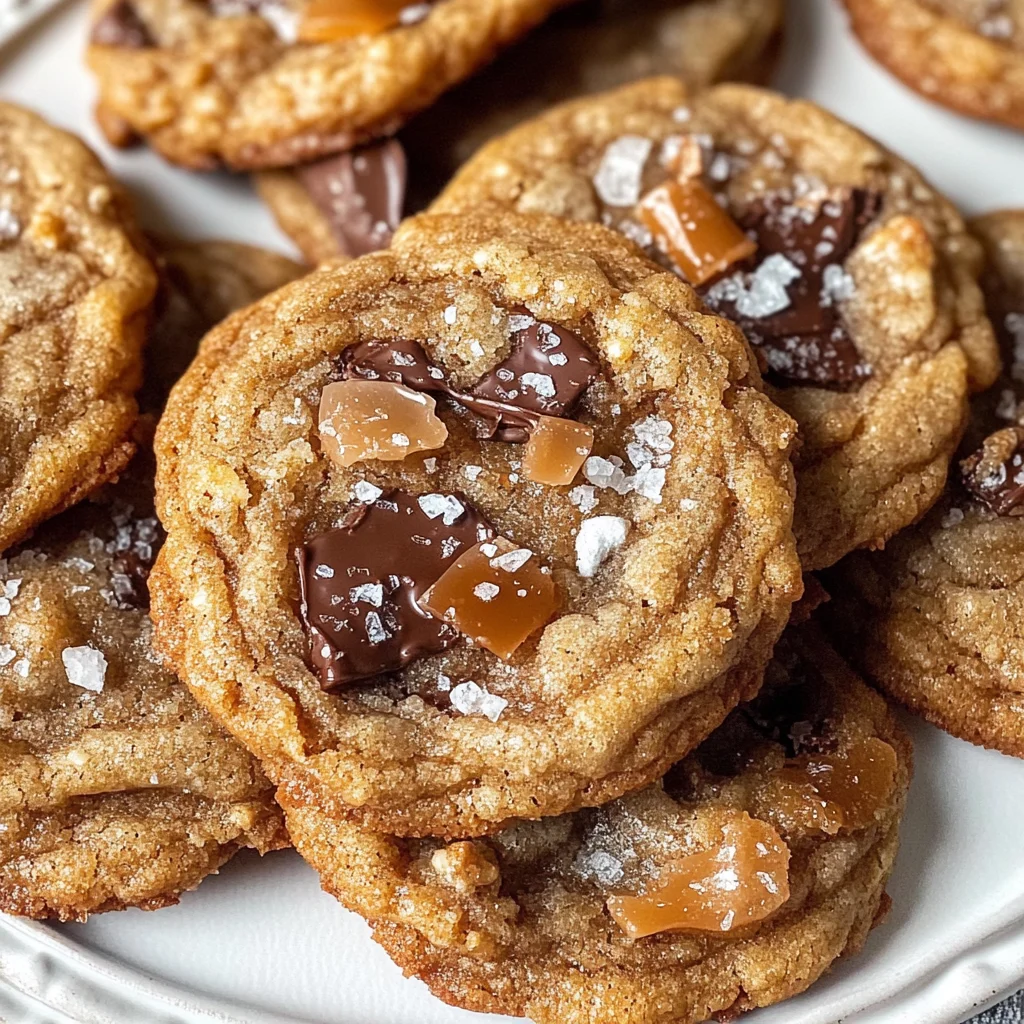
Brown Butter Toffee Cookies
There’s something incredibly magical about baking, isn’t there? The way the kitchen fills with warm, inviting aromas, the anticipation that builds as you wait for your creation to emerge from the oven—it all combines to create an experience that’s more than just food. Today, I’m thrilled to share a recipe that beautifully encapsulates this joy: Brown Butter Toffee Cookies. This isn’t merely a cookie; it’s a delightful journey of flavors and textures that dances on your palate. Picture this: chewy brown butter cookies infused with a deep, nutty essence, generously studded with bits of homemade saltine cracker toffee. The combination of sweet and salty is utterly intoxicating, creating a symphony of flavors that’s both comforting and exciting.
As we dive into this recipe, I want you to consider it not just as a set of instructions but as an invitation to connect with your inner baker. Each step in making these cookies serves a purpose; every ingredient plays its role in crafting something truly extraordinary. I promise you, once you’ve experienced the magic of these Brown Butter Toffee Cookies, they’ll become a cherished part of your baking repertoire—perfect for holiday gatherings or simply indulging yourself on a cozy afternoon. So grab your apron, and let’s embark on this delicious adventure together!
The Irresistible Allure of Sweet and Salty
Isn’t it fascinating how certain flavor combinations can evoke such strong feelings? The interplay between sweet and salty has captivated taste buds throughout history—think chocolate-covered pretzels or caramel popcorn! In Brown Butter Toffee Cookies, we embrace this divine contrast through the addition of homemade saltine cracker toffee (often referred to as Christmas crack). It’s like a little gift from the universe tucked inside each cookie! This delightful addition not only adds crunch but also introduces a buttery caramel flavor that complements the rich brown butter perfectly. And while the process might seem a bit involved at first glance, trust me when I say it’s 100% worth it for the depth of flavor you’re about to create.
Now that we’ve whetted our appetites for these cookies, let’s gather our ingredients and get started on this culinary journey together!
Ingredients:
Before we dive into baking, let’s take a moment to appreciate the ingredients that will transform into our glorious Brown Butter Toffee Cookies. Each component is essential in crafting those irresistible flavors and textures we’re after.
- 20 saltine crackers. These humble crackers serve as the foundation for our exquisite toffee layer. Their crisp texture contrasts beautifully with the chewiness of the cookie itself while providing just enough saltiness to balance out the sweetness. If you’re feeling adventurous or want more variety in texture, consider experimenting with different types of crackers—like whole wheat or even buttery Ritz.
- 1/2 cup unsalted butter (for the toffee). This butter is where we start creating our luscious caramel sauce that will coat those saltines like liquid gold. Always choose unsalted butter so you can control the salt levels in your recipe perfectly. The quality matters here; opt for grass-fed or European-style butter if possible for an even richer flavor.
- 1/2 cup light brown sugar (packed). Brown sugar brings depth and moisture to our toffee layer thanks to its molasses content. It creates that lovely caramel note that pairs so well with our butter and crackers. When measuring brown sugar, make sure it’s firmly packed into your measuring cup; this step is crucial for achieving that delightful chewy texture!
- 6 ounces semisweet chocolate chips. The chocolate is what makes everything come together in harmony! As they melt over our warm toffee layer, they create an utterly decadent topping that’s both creamy and rich—an essential element in elevating these cookies from ordinary to extraordinary.
- Sea salt for topping (optional). A sprinkle of sea salt over the melted chocolate adds an elegant touch—it intensifies all those flavors and provides a delightful contrast that makes each bite pop! Trust me; don’t skip this step if you love balancing sweet with savory!
- 1 cup unsalted butter (cubed) (for the cookie dough). This is where we introduce richness and depth into our cookie dough through browned butter—a game changer in flavor! Browning the butter gives it nutty undertones that are simply divine when paired with our other ingredients.
- 2 1/2 cups all-purpose flour (spooned and leveled). Flour provides structure to our cookies while allowing them to maintain their soft chewiness inside—a perfect canvas for all those wonderful flavors we’re building upon! Be sure not to pack it too tightly when measuring; spooning it into your cup helps prevent dense cookies.
- 1 teaspoon baking soda. This little leavening agent is absolutely paramount for helping our cookies rise beautifully in the oven while contributing slight crispness at the edges—allowing them to hold their shape while remaining soft at heart.
- 1 cup light brown sugar (packed) (for cookie dough). Just like in our toffee layer, brown sugar brings moisture and flavor complexity here as well! It ensures our cookies have that coveted chewy center while enhancing their overall sweetness.
- 1/3 cup granulated sugar. We use granulated sugar alongside brown sugar for balance; it adds sweetness without overpowering the other flavors while contributing subtle crispness around the edges as they bake.
- 2 large eggs (at room temperature). Eggs act as binders in our cookie dough while adding richness—the yolks provide fat which gives us tenderness amidst all those crunchy elements from earlier! Make sure they’re at room temperature so they blend seamlessly into your mixture.
- 2 teaspoons pure vanilla extract. Vanilla extract doesn’t just flavor our cookies; it elevates them beyond mere sweetness by adding warmth and aromatic qualities—a non-negotiable ingredient if you want your treats bursting with personality!
Now that we’ve gathered everything we’ll need, let’s move on to preparing these incredible Brown Butter Toffee Cookies!
Equipment You’ll Need:
Having the right tools makes all the difference in creating something wonderful—it’s like having trusty companions by your side throughout this delicious adventure! While these tools may not be ingredients themselves, they’re essential partners in bringing your vision to life.
- Medium saucepan – This versatile piece is crucial for both making your homemade cracker toffee and browning butter effectively; you’ll want one that’s sturdy enough to handle high heat without warping during cooking sessions.
- Parchment paper or silicone baking mat – Using parchment paper or silicone mats prevents sticking during baking while ensuring even heat distribution—a small but significant detail that can affect how perfectly baked your cookies turn out.
- Large mixing bowl – A must-have for combining dry ingredients before introducing wet ones into your cookie dough mix! Choose one wide enough so you can whisk without making too much mess.
- Rubber spatula – This handy tool helps scrape down every last bit of batter from bowls effortlessly—you don’t want any precious cookie dough left behind! Plus, it’s perfect for folding ingredients gently without deflating air pockets created during mixing.
- Cookie scoop or tablespoon – For uniformity when portioning out dough balls onto trays—this ensures even baking times across batches! If you don’t have one handy yet don’t fret; using two tablespoons works just fine.
Now let’s roll up those sleeves and dive into preparing these unforgettable Brown Butter Toffee Cookies!
Step 1: Create Your Saltine Cracker Toffee
The first step in this delectable journey begins with making our homemade saltine cracker toffee—a component so enchanting you’ll find yourself wanting more than just what’s needed for these cookies! Preheat your oven carefully at 425°F (220°C) because timing matters here—this temperature will help us achieve perfectly bubbly caramel without burning it later on. Line a 9×13-inch baking dish with parchment paper; trust me when I say parchment is non-negotiable here—it prevents sticking and simplifies cleanup later on!
Once lined up nicely within reach comes laying down those 20 saltine crackers evenly across its base—they’ll form an impeccable foundation once bathed underneath luscious layers soon enough! In a medium saucepan over medium-high heat combine half a cup each of unsalted butter along with half-a-cup packed light brown sugar—and stir occasionally until everything melds together beautifully before bubbling begins indicating boiling has commenced!
When bubbles appear don’t walk away either—turn down heat slightly ensuring gentle boiling occurs consistently over four-to-five minutes without stirring constantly; allow time so flavors develop richly within this molten concoction before pouring over laid-out crackers afterward carefully spreading evenly using either wooden spoons/rubber spatulas alike while avoiding any spills along edges if possible—for shaping perfection matters immensely here too!
The next important moment arises when placing everything back into preheated oven—the goal being just four-to-five minutes until edges begin bubbling vigorously—that’s when we’ll know it’s ready! Afterward remove carefully sprinkling six ounces semisweet chocolate chips atop warm tar-coated crackers allowing them ample time resting patiently beneath warmth melting gently bringing forth smooth coverage across surface area below savoring aroma wafting through kitchen simultaneously inviting anticipation palpable amongst loved ones waiting nearby…
Step 2: Brown Your Butter
With that deliciously fragrant cracker-toffee base done simmering away let’s turn attention toward browning some good quality unsalted butter now—one whole cup cubed awaits warming!!! Place these cubes inside another medium saucepan over medium heat allowing them melted blissfully swirling around gracefully until five minutes elapsed revealing golden hues emerging slowly…
This process known as browning creates nutty undertones enveloping entire batch elevating ordinary cookie dough recipes straight-up extraordinary territory—it’s crucial here since it’ll yield depth unlike anything else encountered before so don’t rush this step either… Continually stirring keeps milk solids moving preventing any burning along bottom surfaces witnessing transformation taking place within seconds leading us towards fragrant notes lingering long after finishing tasks ahead…
After roughly five minutes have passed keeping vigilant eyes peeled observe closely turning from pale yellow shades towards darker tones hinting nearing completion aroma filling air becomes utterly intoxicating leaving everyone craving what lies ahead once cooled slightly afterward—we’re aiming cool enough chill down ten minutes before proceeding next steps transforming everything further into scrumptious morsels later on…
Step 3: Prepare Your Cookie Dough
While butter cools off gently let’s prepare ourselves by whisking together two-and-a-half cups all-purpose flour alongside one teaspoon baking soda within spacious large bowl beforehand ensuring proper distribution before adding subsequent wet ingredients later down line…
Once cooled sufficiently combine both packed cups light brown sugar granules plus one-third cup granulated sugars back inside original saucepan where browned beauties await returning warmth back onto stovetop briefly mixing thoroughly until incorporated properly yielding silky mixture bubbling irresistibly enticing anyone passing nearby…
Following creamy stage achieved whisk-in two large room temperature eggs alongside two teaspoons pure vanilla extract completing wet ensemble flawlessly blending seamlessly no yellow streaks remain visible upon inspection… Finally pour entire contents straightaway into flour mixture stirring diligently using rubber spatula helping bring together textures initially appearing dry transforming effortlessly cohesive around edges forming beautiful dough ready embrace future additions awaiting shortly thereafter…
Step 4: Chill & Prepare Your Toffee
Now comes perhaps my favorite part—the chilling phase!!! Placing finished dough inside freezer allows firm up slightly enhancing overall shape consistency later during baking processes thus preventing spread whilst also improving chewiness factor immensely resulting perfect balance achieved finally…
Meanwhile retrieve freshly crafted warm/toasted cracker-toffees previously made less then half hour ago chopping them down finely utilizing sharp knife caution required here so no chocolate melting occurs inadvertently breaking apart pieces instead yielding smaller bits enhancing distribution throughout entire bulk batch ahead!!! Reserve some bits aside sprinkling atop baked goodies right afterwards giving added flair visually appealing finishing touches definitely worth effort invested thus far…
And there we have it—the initial steps completed toward achieving heavenly batches awaiting final touches soon arriving oven’s embrace soon enough populating homes aromatic bliss filling lives warmly beckoning friends gathering round savoring moments shared forever cherishing memories made within kitchens passed down generations cultivating love through shared experiences…
Stay tuned as we’ll continue diving deeper following detailed instructions moving forward unlocking secrets behind achieving ultimate success crafting those irresistible bites everyone will crave endlessly seeking snacking opportunities around corners galore…
Brown Butter Toffee Cookies: The Magic Unfolds
Step 5: The Art of Browning Butter
Now, let’s dive into one of the most transformative steps in our Brown Butter Toffee Cookies recipe — browning the butter. This step is all about coaxing out the deep, nutty flavors that will elevate our cookies from ordinary to extraordinary. Start by placing your cubed butter in a medium saucepan over medium heat. As you melt it, I want you to swirl it gently around; this motion helps ensure even heating. Keep your eyes on it because this process is as much about patience as it is about technique. After about five minutes, you’ll notice the butter bubbling and foaming—this is a good sign!
As the bubbles subside, you’ll start to see the milk solids at the bottom of the pan turning a golden brown color. Trust me when I say that this stage smells heavenly; it’s that intoxicating aroma of toasted nuts that signals you’re on the right track. The transformation from plain melted butter to beautifully browned butter is crucial—this step brings depth and richness to your cookies that cannot be replicated with regular butter. If you accidentally let it go too far, though, and it turns dark brown or burnt, fear not! It’s non-negotiable to catch that sweet spot where the butter is golden and aromatic before removing it from the heat and letting it cool for about ten minutes.
Step 6: Creating Cookie Dough Bliss
While your browned butter cools ever so slightly — because we want it warm but not hot — it’s time to prepare our dry ingredients. In a large bowl, whisk together 2 ½ cups of all-purpose flour and 1 teaspoon of baking soda until well combined. This simple act not only mixes these two components but also aerates them, which is vital for achieving those light yet chewy cookies we desire. Once your browned butter has cooled enough (think warm bath rather than scorching hot), add both 1 cup of packed light brown sugar and ⅓ cup of granulated sugar directly into the saucepan with the browned butter.
Whisk vigorously until no yellow streaks remain—this action helps dissolve those sugars completely into the buttery goodness and creates a smooth base for your dough. Next, crack in two large eggs (make sure they’re at room temperature for optimal blending) along with 2 teaspoons of pure vanilla extract; oh my goodness, can you smell that? The combination of brown sugar and vanilla is sheer bliss! After incorporating everything well, pour this luscious mixture into your flour blend and fold gently with a rubber spatula until just combined. It may look dry at first — don’t worry! As you mix, you’ll see it come together beautifully like magic.
Step 7: The Essential Chilling Process
Now comes one of my favorite parts: letting our cookie dough chill out for a bit! This step might seem tedious, but trust me; it’s absolutely paramount for achieving that perfect texture in your Brown Butter Toffee Cookies. Cover your dough tightly with plastic wrap and let it chill in the refrigerator for at least two hours or up to three days if you’re planning ahead! Why chill? Well, during this time, the flour hydrates fully while flavors deepen and develop—this resting period ensures a richer taste in every bite.
You might be tempted to skip this step because who wants to wait? But I promise you; allowing time for these flavors to meld creates cookies that are profoundly satisfying. When you finally get back to your dough after chilling, take a moment to enjoy its transformation — it’ll be firmer and easier to scoop as well! Just remember: if you’ve chilled longer than a day, let it sit out briefly so it softens enough for scooping.
Step 8: Prepping for Baking Perfection
Preheat your oven to 350°F; this ensures an evenly baked cookie right from the start—no one likes unevenly cooked treats! Line a large baking sheet with parchment paper or use a silicone baking mat; both options provide beautiful non-stick surfaces that help achieve those perfectly golden edges we all adore. As you scoop out your chilled dough using about 2 tablespoons per ball — think generous golf ball size here — place them on your prepared baking sheet spaced a few inches apart because they’ll spread quite nicely while baking.
Bake these beauties in your preheated oven for approximately 8-10 minutes, keeping an eye on them as they bake. You’re looking for edges that are just turning golden brown while the tops appear slightly set; they’ll continue firming up as they cool on the tray afterward. When they emerge from the oven smelling like heaven itself (I can almost taste them!), resist diving in immediately! Let them rest on the baking sheet for five whole minutes before transferring them to a wire rack where they can cool completely—a little patience here ensures they maintain their perfect texture!
Final Touches: The Grand Finale
Step 9: Finishing Touches & Serving Up Joy
As if these Brown Butter Toffee Cookies weren’t already special enough, we have one last delightful touch before they’re ready to wow everyone around you! Remember those reserved bits of homemade saltine cracker toffee we set aside earlier? Now’s their moment to shine! Gently sprinkle those delicious pieces atop each warm cookie right after removing them from the oven; this adds an extra layer of crunch and sweetness that takes these cookies over the top—trust me when I say it’s absolutely worth every moment spent making them!
Once you’ve added those final touches and allowed your cookies to cool completely on that wire rack (the anticipation building!), grab yourself a glass of milk or cup of coffee because you’re going to want something delicious alongside these little morsels of joy. Each bite will deliver an unforgettable symphony of flavors—sweet caramel mingling with rich chocolate against a backdrop of warm brown butter notes—and I promise they’ll become an instant favorite among family and friends alike. So go ahead, share these treasures or keep them all for yourself (I won’t judge!) but whatever you choose, enjoy every moment spent savoring these wonderful Brown Butter Toffee Cookies!
Storage and Enjoyment Tips for Your Brown Butter Toffee Cookies
Now that you’ve created these heavenly Brown Butter Toffee Cookies, it’s time to savor them! But what if you have a few left over (if they last that long!)? Don’t worry; I’ve got you covered with some practical tips on how to store these delightful treats so you can enjoy their rich flavors even longer. Whether you’re planning to share them with friends or keep them all to yourself, knowing how to preserve their deliciousness is absolutely crucial.
Storing Leftover Brown Butter Toffee Cookies
To keep your cookies fresh and flavorful, store them in an airtight container at room temperature. This simple step is essential because it helps maintain their chewy texture while preventing any unwanted moisture from making them soggy. If stored properly, these cookies can last up to a week—but trust me, they might not stick around that long! For an extra trick of the trade, consider placing a slice of bread inside the container; the cookies will absorb moisture from the bread, staying wonderfully soft. After a day or two, you’ll find that they still taste just as good as when they first came out of the oven. When you’re ready to indulge again, simply pop them in the microwave for about 10-15 seconds to restore their warm, gooey goodness—your taste buds will thank you!
Freezing Brown Butter Toffee Cookies for Later
If you’re someone who loves to plan ahead or simply wants to stockpile some treats for later indulgence, freezing your Brown Butter Toffee Cookies is an excellent option! To freeze them properly, allow the cookies to cool completely after baking, then place them in a single layer on a baking sheet and freeze until solid. Once frozen, transfer them to an airtight freezer bag or container—and voilà! They’ll keep well for up to three months without losing any of their delightful flavors. Whenever you find yourself craving something sweet, just take out a cookie or two and let them thaw at room temperature for about 30 minutes. You can also warm them up in the oven or microwave for that freshly baked experience any time you want! Isn’t it wonderful to have such convenience at your fingertips?
Brown Butter Toffee Cookies

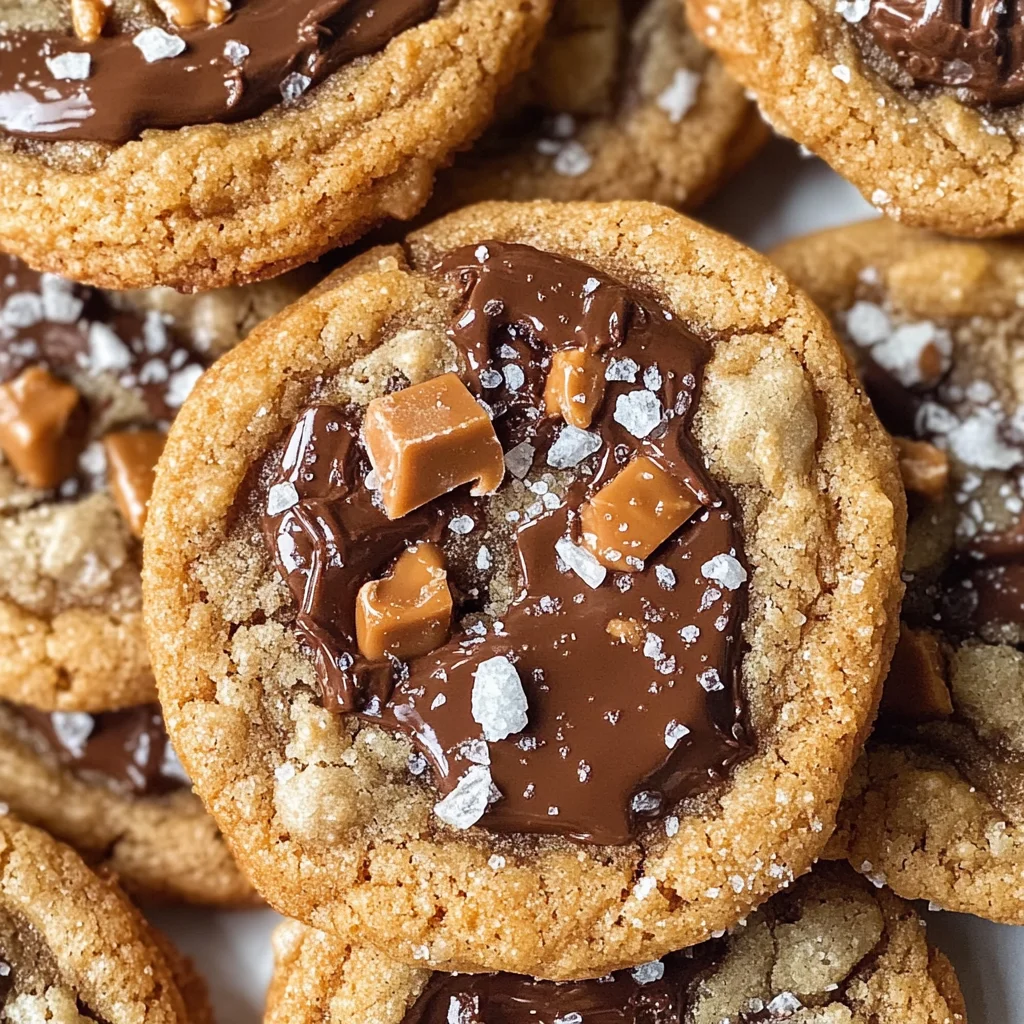
Indulge in the rich, nutty flavors of Brown Butter Toffee Cookies, where each bite offers a delightful contrast of chewy texture and crunchy toffee. These cookies are a celebration of sweet and salty, combining the depth of browned butter with homemade saltine cracker toffee for an unforgettable treat. Perfect for holiday gatherings or cozy afternoons, they promise to fill your kitchen with warmth and inviting aromas.
- Prep Time: 20 minutes
- Cook Time: 15 minutes
- Total Time: 35 minutes
- Yield: Approximately 24 cookies 1x
- Category: Dessert
- Method: Baking
- Cuisine: American
Ingredients
- 20 saltine crackers
- 1/2 cup unsalted butter (for toffee)
- 1/2 cup light brown sugar (packed, for toffee)
- 6 ounces semisweet chocolate chips
- Sea salt (optional, for topping)
- 1 cup unsalted butter (cubed, for cookie dough)
- 2 1/2 cups all-purpose flour
- 1 teaspoon baking soda
- 1 cup light brown sugar (packed, for cookie dough)
- 1/3 cup granulated sugar
- 2 large eggs (at room temperature)
- 2 teaspoons pure vanilla extract
Instructions
- Preheat the oven to 425°F (220°C). Line a 9×13-inch baking dish with parchment paper.
- Arrange saltine crackers in a single layer in the dish.
- In a medium saucepan over medium-high heat, combine butter and light brown sugar; stir until boiling. Pour over crackers and spread evenly.
- Bake for about 5 minutes until bubbly; remove from oven and sprinkle chocolate chips on top, allowing them to melt.
- In another saucepan, brown the cubed butter over medium heat until golden. Let cool slightly.
- In a large bowl, whisk together flour and baking soda. Combine browned butter with sugars, eggs, and vanilla; mix well.
- Fold wet ingredients into dry until combined. Chill dough for at least two hours.
- Preheat oven to 350°F (175°C). Scoop chilled dough onto lined baking sheets and bake for approximately 8-10 minutes until edges are golden.
- Sprinkle reserved toffee bits on warm cookies and let cool.
Nutrition
- Serving Size: 1 cookie (30g)
- Calories: 145
- Sugar: 12g
- Sodium: 50mg
- Fat: 7g
- Saturated Fat: 4g
- Unsaturated Fat: 3g
- Trans Fat: 0g
- Carbohydrates: 19g
- Fiber: <1g
- Protein: <1g
- Cholesterol: 15mg