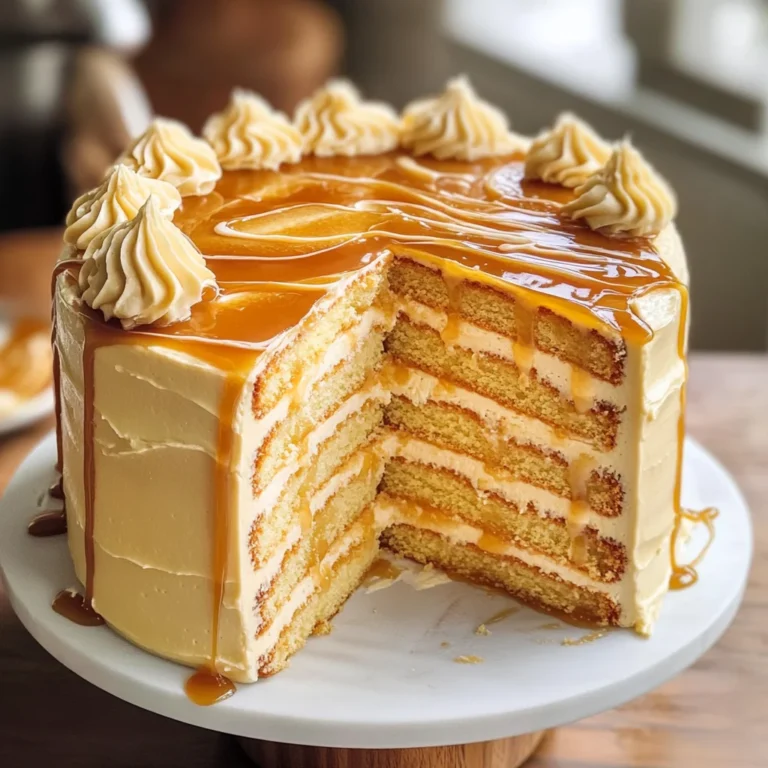
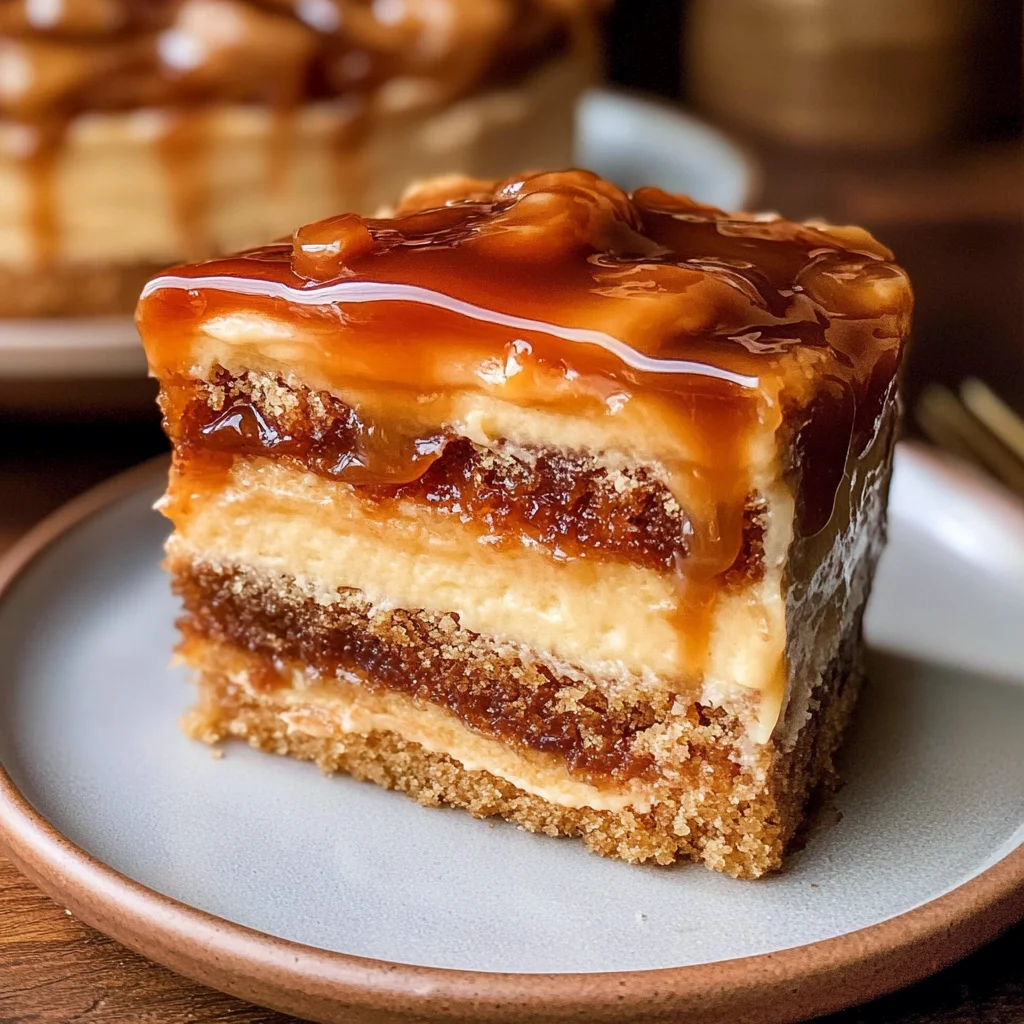
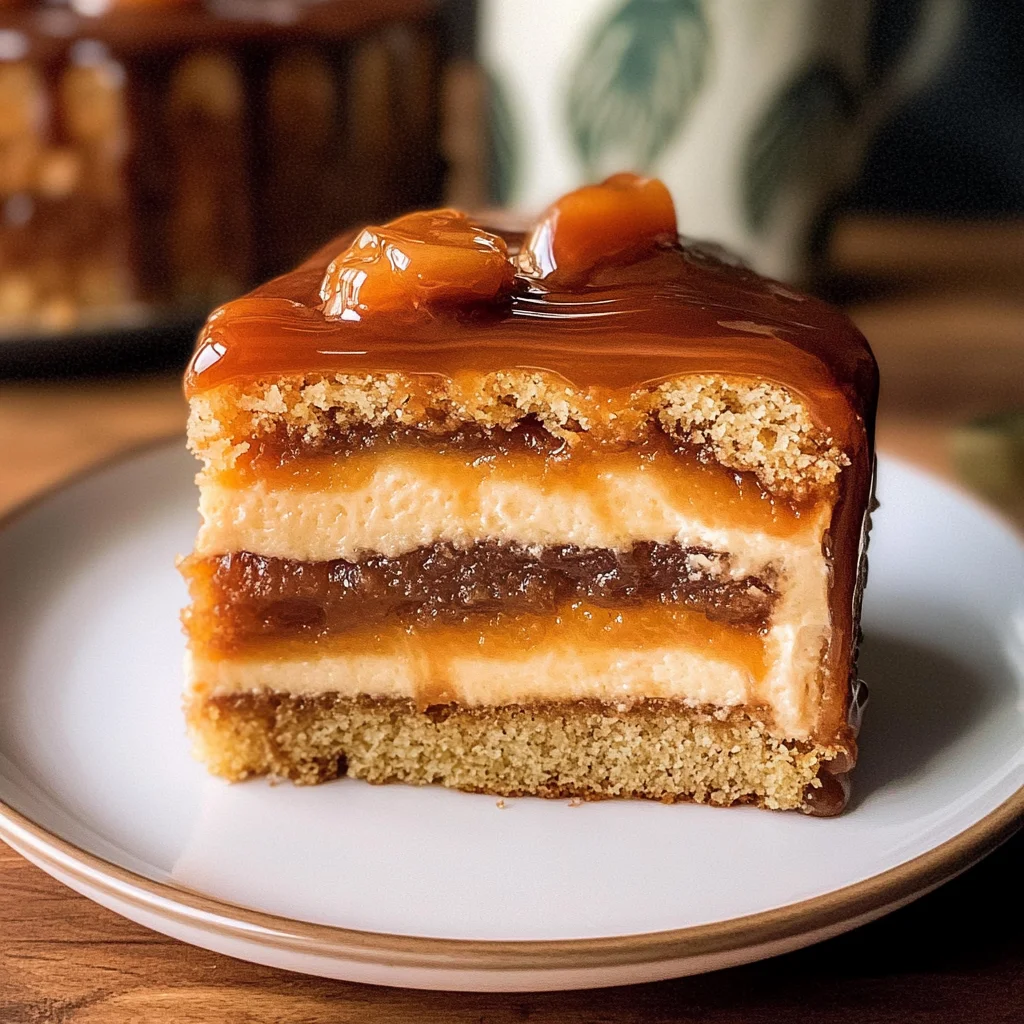
Gooey Coffee Caramel Cake
There are moments in life when something as simple as a cake can transcend the ordinary, weaving itself into the fabric of our memories and comfort. This Gooey Coffee Caramel Cake is one of those enchanting creations that doesn’t just fill your tummy; it wraps you in warmth and nostalgia, inviting you to indulge in every luscious bite. Imagine walking into a cozy kitchen, the air thick with the aroma of freshly brewed coffee mingling with sweet caramel. It’s a symphony of flavors that beckons you to sit down, relax, and savor each moment. This cake is more than just dessert; it’s an experience, a celebration of the everyday joys that coffee lovers cherish so deeply.
As I often reflect on my own culinary journey, this cake stands out as a testament to how food can connect us – whether it’s serving it at a weekend brunch with friends or as a sweet treat after dinner. The combination of rich coffee flavor and gooey caramel creates an utterly intoxicating experience that feels both indulgent and comforting. I promise you, each slice is like a warm hug on a plate, perfect for sharing or enjoying solo with your favorite cup of joe. So let’s dive into this recipe together; I’ll guide you through every step as if we were baking side by side.
Gooey Coffee Caramel Cake: A Sweet Indulgence for Coffee Lovers
This delightful dessert captures the essence of coffee in the most decadent way possible. Each forkful reveals layers of moist cake enveloped in a luscious caramel sauce that’s impossible to resist. Whether you’re looking for an easy recipe to impress your guests or simply craving something sweet after dinner, this cake promises to deliver joy in every bite. Trust me on this one; you’ll want to have this recipe tucked away for all those special occasions—or even just because it’s Tuesday!
Ingredients:
Embarking on this culinary adventure starts with gathering some essential ingredients that will transform simple elements into something extraordinary. Each ingredient plays a vital role in creating the rich flavors and textures we crave.
- 1 ½ cups all-purpose flour: This is the foundation of our cake, providing structure while keeping it tender. When choosing flour, look for unbleached all-purpose flour—it’s less processed and will yield a better texture. Sifting it before use can help aerate it, preventing any clumps and ensuring your cake bakes evenly.
- 1 cup granulated sugar: Sugar is not just for sweetness; it also helps with browning and moisture retention in our cake. Granulated sugar dissolves easily during mixing, contributing to that delightful crumb we’re aiming for. Make sure to measure it accurately; too much sugar can lead to overly sweet results while too little may impact the texture.
- 1 teaspoon baking powder: This leavening agent is crucial for achieving that light and airy texture we all love in cakes. It works by producing carbon dioxide bubbles when combined with moisture and heat, causing the batter to rise beautifully. Be sure to check the expiration date on your baking powder—it’s non-negotiable for success!
- ½ teaspoon baking soda: A wonderful partner to our baking powder, baking soda ensures proper rising and contributes to browning thanks to its alkaline properties. It requires an acidic ingredient (like our buttermilk) to activate its leavening power—don’t skip this step!
- ½ teaspoon salt: Salt enhances flavor across all components of our cake; without it, everything tastes flat and dull. It also strengthens gluten formation when mixed with flour—this balance leads to that perfect chewy bite.
- ½ cup unsalted butter, softened: Butter adds richness and moisture while creating a tender crumb through the creaming process—a vital step where air gets incorporated into fat for fluffiness! Be sure your butter is at room temperature for optimal mixing; cold butter won’t perform well here.
- 1 large egg: Eggs act as binders in our recipe while adding moisture and richness. They help provide structure but also contribute to tenderness—so don’t skimp on this ingredient! Make sure it’s at room temperature too; this helps emulsify better with other ingredients.
- ½ cup brewed coffee, cooled: Here’s where the magic happens! Brewed coffee infuses deep flavor into our cake without overwhelming sweetness—it’s what makes this dessert truly special. Use quality coffee you enjoy drinking because its flavor will shine through in every slice.
- ½ cup buttermilk: This ingredient lends moisture and acidity which works beautifully alongside our baking soda for leavening. If you don’t have buttermilk on hand, you can easily substitute by mixing regular milk with a tablespoon of vinegar or lemon juice—just let it sit for about 5 minutes until curdled.
- 1 teaspoon vanilla extract: Vanilla extract complements all other flavors beautifully, adding depth and warmth that elevates your cake from good to extraordinary! Always opt for pure vanilla extract over imitation whenever possible—it makes a world of difference.
- 1 cup brown sugar, packed: Brown sugar adds moisture due to its molasses content while providing deeper flavor notes compared to white sugar—think caramel undertones! When measuring brown sugar, pack it firmly into your measuring cup so you get the right sweetness balance.
- ½ cup unsalted butter (for caramel): Just like before, using unsalted butter allows us full control over the dish’s saltiness while ensuring rich flavor in our caramel sauce as well!
- ¼ cup heavy cream: Heavy cream gives our caramel its signature silky texture—without it, we’d be left with something quite different! The fat content helps create that luscious mouthfeel we adore when drizzling sauce over cake.
- 1 teaspoon vanilla extract (for caramel): Adding vanilla here enhances the overall complexity of flavors; trust me when I say it’s worth including!
- Pinch of salt: A little pinch will heighten sweetness without making things taste salty—it’s a balancing act that brings out nuances beautifully!
- 2 tablespoons brewed coffee (for caramel): Just like before but now lending depth directly into our sauce! This addition rounds out flavors perfectly—don’t skip this step!
- 1 tablespoon powdered sugar (for serving): Lastly, powdered sugar adds an elegant touch when dusted over slices before serving—it looks beautiful visually but also provides just another hint of sweetness against those bold flavors beneath!
Equipment You’ll Need:
Before we dive into preparing our delicious Gooey Coffee Caramel Cake, let’s gather some essential tools that will make this experience smoother and more enjoyable. Having the right equipment is key—it turns cooking from a chore into an art form!
- 9×9-inch baking pan: A sturdy square pan ensures even cooking throughout—you want all sides baked perfectly! If you prefer easier cleanup or worry about sticking cakes later on, consider lining it with parchment paper first!
- Mixing bowls (medium & large): You’ll need two bowls—a medium one for combining dry ingredients like flour & leaveners while using larger ones accommodates wet ingredients comfortably during mixing stages without overflow mishaps happening along way!
- Whisk & rubber spatula: A whisk helps blend everything thoroughly together while maintaining airiness throughout batter creation (it’s important!). Use rubber spatula later on during folding processes gently—this avoids deflating any incorporated air pockets we’ve worked hard at creating earlier!
- Measuring cups & spoons: Precision matters hugely when baking—it’s crucial here so treat these tools well! Invest in good-quality ones made from stainless steel if possible—they last longer compared plastic varieties commonly found elsewhere.
With everything set up nicely around us—the stage is ready now let us embark upon making something truly magical together!
Preparing the Gooey Coffee Caramel Cake
Step 1: Preheat Your Oven & Prepare Your Pan
First things first—let’s get your oven preheating at 350°F (175°C). It’s absolutely paramount not only because we want even heat distribution while baking but also ensures proper rise once batter hits hot surface inside! While waiting for that delightful warmth radiating forth from within oven walls—we’ll prepare our baking pan by greasing lightly then dusting flour across bottom/sides gently coating entire interior surface evenly prevents sticking later during removal process post-baking efforts completed successfully!
Step 2: Make the Cake Batter
In one medium bowl combine your flour mixture including granulated sugar along with baking powder/baking soda/salt whisking until they’re evenly blended together—that way no lumps remain lurking about potentially ruining final product aesthetics wise down road ahead! Now take another large bowl introducing softened butter/egg beating them vigorously until mixture appears light/fluffy consistency forms becoming pale yellow hue overall speaking volumes about how much air has been incorporated already within confines thereof… Next comes exciting part; pouring cooled brewed coffee alongside buttermilk/vanilla extracts mixing diligently yet gently afterwards until completely combined! Don’t rush through these steps—you want everything mixed seamlessly without overmixing which could lead tough textures instead desired softness everybody loves indulging within cakes such as these!
Step 3: Bake Your Cake
Once batter looks smooth enough pour contents directly into prepared pan spreading evenly across surface area ensuring corners filled nicely too—we don’t want any sad gaps remaining unfulfilled here do we? Now slide carefully onto middle rack inside preheated oven allowing magic happen via heat transforming raw ingredients altogether into deliciousness ahead… Bake anywhere between 25–30 minutes keeping an eye peeled closely towards end time frame inserting toothpick test upon reaching designated mark! Toothpick should emerge clean once inserted center indicating proper doneness achieved successfully—if not place back few minutes checking periodically thereafter till signs show readiness confirmed finally yay!!
Step 4: Prepare Your Caramel Sauce
While heavenly aroma wafts about room signaling completion ahead let’s turn attention towards crafting luscious caramel sauce meanwhile cooling takes place uninterruptedly… In small saucepan combine brown sugars/butter/heavy cream stirring constantly over medium heat till simmer forms bubbling away cheerfully below surface level seeing colors deepen slightly golden hue emerging therein gradually showing signs thickening occurring soon after around three-four minutes pass elapsed time frame since started stirring initially noting how consistency changes prior compared early stages observed previously… Once satisfied remove carefully off heat letting cool momentarily before stirring together remaining ingredients including vanilla/extracts/pinch salt alongside brewed coffees blending harmoniously altogether further enhancing overall tastes throughout resulting dish created thus far leaving everyone asking where next slice might come from next!!
And there you have it—a stunning masterpiece awaits just waiting patiently ready enjoyably devoured shortly thereafter once cooled sufficiently enough enticingly displayed atop plates garnished lightly sprinkled powdered sugars completing picture perfection achieved ultimately fulfilling cravings beyond measure guaranteed everyone walks away smiling victoriously accomplished together today!!
Step 5: Assemble the Cake Layers with Love
Once your cake has cooled completely—trust me, this is crucial; you want it to be cool to the touch so that the caramel doesn’t melt into a puddle—you’re ready to bring everything together. Carefully invert the cake onto a serving platter. If you’ve lined your pan with parchment paper, this should be a breeze! Gently peel away the parchment if you used it, and admire that perfectly golden surface. Now, take a serrated knife and slice the cake horizontally into two even layers. This step isn’t just about aesthetics; it allows for more of that luscious caramel sauce to seep into every bite, elevating your dessert from good to utterly intoxicating.
Once you’ve carefully cut through, place one layer back on the platter and generously drizzle half of that rich caramel sauce over it. I promise you, watching that golden liquid cascade over the cake is like witnessing magic in motion. The warm caramel will slowly soak into the sponge, creating those gooey pockets of flavor that are simply divine. Now gently place the second layer on top and repeat the process with the remaining caramel sauce. Trust me on this—taking the time to let those flavors meld is absolutely paramount for achieving that gooey texture you’re aiming for!
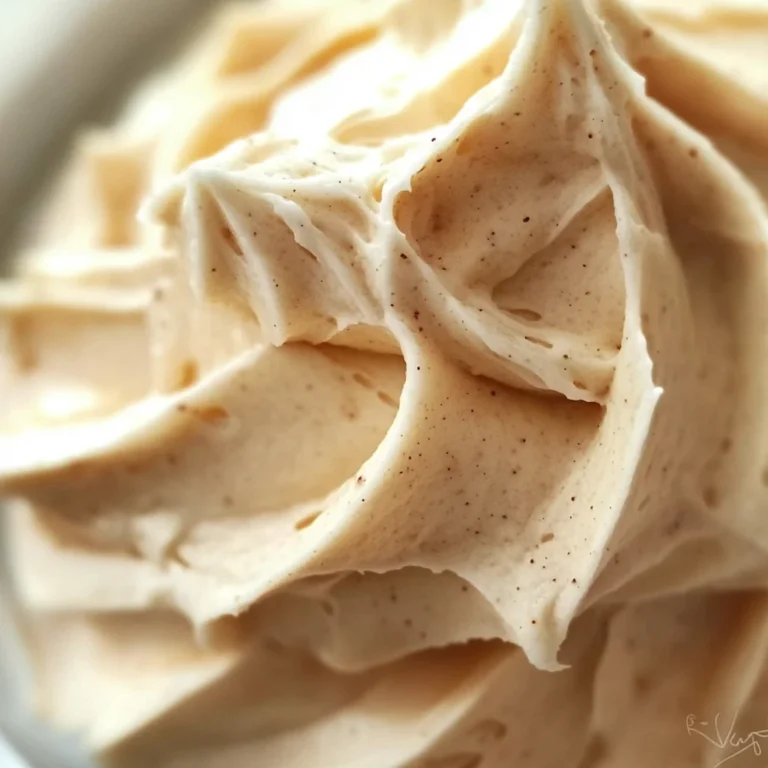
Step 6: Whip Up Your Coffee Cream Topping
While your cake layers are soaking in all that caramel goodness, it’s time to prepare a delightful coffee cream topping that will take this dessert over the top. In a medium mixing bowl, combine 1 cup of heavy cream (yes, we’re going for decadence here), 2 tablespoons of brewed coffee, and a tablespoon of powdered sugar. Using an electric mixer or whisking by hand (if you’re feeling ambitious), beat until soft peaks form. This step isn’t merely about making whipped cream; it’s about adding lightness and an airy texture that balances out all that richness from the cake and caramel.
As you whip, pay attention to how quickly those peaks form—it can happen fast! You want them to hold their shape but not be overly stiff; think of soft clouds rather than cement bricks. The combination of heavy cream and coffee is truly extraordinary; it adds another layer of flavor while keeping everything beautifully harmonious. Don’t forget to taste as you go—a little more sugar? A splash more coffee? Feel free to adjust it according to your palate because this is your masterpiece!
Step 7: Top It Off with a Flourish
Now comes my favorite part—the final assembly! With your whipped coffee cream at hand, use a spatula or piping bag (if you’re feeling fancy) to elegantly spread or pipe dollops of this delightful topping over the entire surface of your cake. Take your time here! You want each slice, when served, to have an inviting swirl of cream atop its golden layers. This isn’t just decoration; it adds an essential cooling element that contrasts beautifully with the warmth of the cake and enhances that comforting experience we all crave.
After you’ve adorned your cake with fluffy clouds of coffee cream, consider finishing touches like sprinkling some chocolate shavings or finely crushed coffee beans over everything for an added texture and visual appeal. These small details create excitement and anticipation as everyone gathers around—just wait until they see this gorgeous creation! It’s not just about taste but also about engaging all senses—sight, smell, texture—and making everyone feel special as they dive into this dessert.
Step 8: Chill Your Cake Before Serving
Patience is key at this stage! After you’ve topped off your Gooey Coffee Caramel Cake with its luscious whipped cream crown, cover it gently with plastic wrap or foil and place it in the refrigerator for at least an hour—or even better, overnight if time allows. Why chill? Well, letting it sit allows those flavors to meld beautifully while giving everything a chance to set up just right. The cool temperature will help firm up the whipped cream slightly while allowing those gooey caramel layers below to become even richer in flavor as they continue to infuse into each other.
During this resting period, try not to sneak too many bites—even though I know how tempting it is! As hard as it may be waiting for that first slice, I assure you it will be worth every moment when you finally serve it up! When ready to serve after chilling (and if you can resist), remove your cake from the fridge and give yourself a moment to admire what you’ve created—a stunning centerpiece fit for any gathering or simply a cozy night in.
Conclusion:
As we wrap up this journey through making the Gooey Coffee Caramel Cake, I hope you’re feeling as excited as I am about this delightful creation! There’s something profoundly satisfying about crafting a dessert that marries rich coffee flavor with sweet caramel sauce; it’s not just about satisfying your sweet tooth but also creating memories with every bite shared with friends and family. The textures are truly extraordinary — soft, moist cake enveloped by velvety caramel that drips lovingly over each slice is what makes this recipe stand out among ordinary desserts.
This recipe isn’t merely about taste; it’s an experience filled with joy and creativity! From the moment you pour that luscious batter into the pan until the sweet aroma fills your home as it bakes away, every step invites you closer to something special. Whether you’re celebrating an occasion or simply treating yourself after a long day, pulling this cake from the oven will fill your heart with warmth — imagine that first slice revealing its gooey interior as everyone gathers around with eager anticipation.
When served warm and fresh from the oven, one could imagine savoring each bite alongside a steaming cup of coffee or tea—perfectly paired! Picture enjoying one as an afternoon pick-me-up while watching rain dance against your window or serving generous slices at gatherings where laughter fills the air. And for those moments when you’re seeking something extra special? A scoop of dairy-free vanilla ice cream melting atop each slice elevates this dessert to new heights!
Feeling adventurous? This recipe is wonderfully adaptable! You can enhance it by adding chopped nuts for crunch or swirling melted chocolate into the batter for an even richer flavor experience. Perhaps you’d like to experiment with different flavored coffees or even infuse spices like cinnamon or nutmeg into your caramel sauce — just think about how these variations could create new memories around this beloved dessert! So go ahead; gather those ingredients and get baking! I can’t wait to hear how your adventure with my Gooey Coffee Caramel Cake turns out — share your experiences and connect because cooking is always better when shared!
Gooey Coffee Caramel Cake
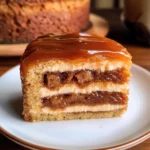
Gooey Coffee Caramel Cake is a delightful dessert that captures the essence of coffee in every luscious bite. This indulgent treat features rich, moist layers of cake soaked in a velvety caramel sauce, creating a comforting experience perfect for any occasion. The inviting aroma of freshly brewed coffee mingles with sweet caramel as it bakes, making it impossible to resist. Each slice is a warm embrace on a plate, ideal for sharing with friends or enjoying solo with your favorite beverage. This cake is not only a feast for the senses but also an opportunity to create beautiful memories around the dining table. Discover how simple ingredients transform into a decadent dessert that will leave everyone asking for more.
- Prep Time: 20 minutes
- Cook Time: 30 minutes
- Total Time: 50 minutes
- Yield: Approximately 12 servings 1x
- Category: Dessert
- Method: Baking
- Cuisine: American
Ingredients
- 1 ½ cups all-purpose flour
- 1 cup granulated sugar
- 1 teaspoon baking powder
- ½ teaspoon baking soda
- ½ teaspoon salt
- ½ cup unsalted butter, softened
- 1 large egg
- ½ cup brewed coffee, cooled
- ½ cup buttermilk
- 1 teaspoon vanilla extract
- 1 cup brown sugar, packed
- ½ cup unsalted butter (for caramel)
- ¼ cup heavy cream
- 2 tablespoons brewed coffee (for caramel)
- Pinch of salt
Instructions
- Preheat your oven to 350°F (175°C) and grease a 9×9-inch baking pan.
- In a medium bowl, whisk together flour, granulated sugar, baking powder, baking soda, and salt.
- In a large bowl, beat softened butter and egg until light and fluffy; mix in cooled coffee, buttermilk, and vanilla until combined.
- Gradually add dry ingredients to the wet mixture, mixing gently until smooth.
- Pour batter into the prepared pan and bake for 25–30 minutes or until a toothpick inserted in the center comes out clean.
- For the caramel sauce, combine brown sugar, unsalted butter, and heavy cream in a saucepan over medium heat; stir until bubbling and thickened.
- Once the cake cools completely, slice horizontally into two layers and drizzle half of the caramel sauce over one layer before stacking the second layer on top; repeat with remaining caramel sauce.
- Chill the assembled cake in the refrigerator for at least an hour before serving.
Nutrition
- Serving Size: 1 slice (100g)
- Calories: 360
- Sugar: 45g
- Sodium: 210mg
- Fat: 16g
- Saturated Fat: 10g
- Unsaturated Fat: 5g
- Trans Fat: 0g
- Carbohydrates: 54g
- Fiber: 1g
- Protein: 4g
- Cholesterol: 35mg