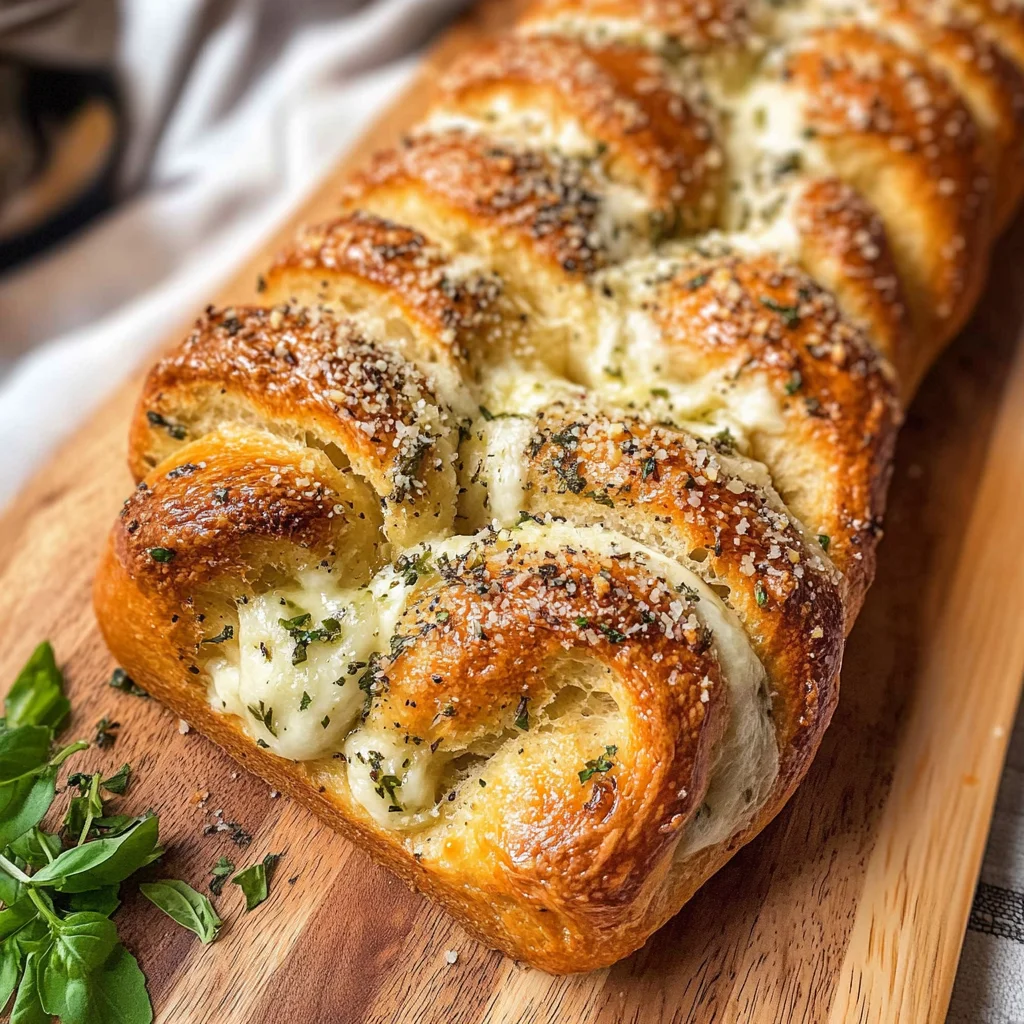
Swirled Garlic Herb And Cheese Bread
There’s something undeniably magical about the process of baking bread. It transcends mere nourishment; it’s about creating an experience that envelops you in warmth and comfort, a little slice of home that invites everyone to gather around. Picture this: a golden loaf emerging from the oven, its aroma a tantalizing blend of roasted garlic and fresh herbs, inviting you in like an old friend. My heart races at the thought of pulling apart that pillowy texture, with gooey mozzarella stretching invitingly, a sight sure to make anyone weak at the knees. This Swirled Garlic Herb And Cheese Bread is not just a recipe; it’s a testament to the joy of cooking and sharing love through food.
This lovely bread has roots in tradition while dancing playfully on the edge of innovation. The combination of garlic, herbs, and cheese creates an absolutely intoxicating aroma as it bakes—a symphony of flavors that fills your kitchen with warmth and anticipation. Perfect for family gatherings or cozy weeknight dinners, this loaf bridges the gap between simplicity and indulgence. Whether you’re pairing it with pasta or savoring it on its own, each bite is profoundly satisfying. Trust me when I say that once you’ve tasted this exquisite creation, it’s bound to become a cherished staple in your home.
Swirled Garlic Herb And Cheese Bread: A Cheesy Embrace
Welcome to one of my favorite recipes! This Swirled Garlic Herb And Cheese Bread is not merely about making bread; it’s about crafting an experience that celebrates flavor and togetherness. I promise you, every step will fill your heart with joy and your home with irresistible aromas.
Ingredients:
As we embark on this culinary journey together, let’s take a moment to appreciate each ingredient’s role in creating our masterpiece. Each element contributes its unique charm, promising an outcome that’s nothing short of extraordinary.
- 1 cup warm milk (approximately 110°F or 43°C). Using warm milk is crucial for activating our yeast optimally—it should feel like a gentle hug against your wrist. Milk enriches our dough, imparting tenderness and flavor. If you’re out of milk or prefer a non-dairy alternative, unsweetened almond or oat milk works beautifully too—just ensure it’s warmed to the right temperature!
- 2 ¼ tsp active dry yeast. This little powerhouse is what brings our bread to life! Yeast is essential for fermentation; it consumes sugar and releases carbon dioxide, making our dough rise into that glorious fluffy texture we crave. When purchasing yeast, always check the expiration date—fresh yeast ensures optimal rising power.
- 2 tbsp granulated sugar. Sugar isn’t just for sweetness here; it nourishes our yeast during fermentation and helps create a beautifully browned crust as it caramelizes in the oven. You can substitute honey if you desire a more natural option—just reduce the liquid slightly since honey adds moisture.
- 2 large eggs. Eggs add richness and structure to our bread while helping bind everything together beautifully. They also contribute to that lovely golden color we adore in baked goods. If you’re looking for an egg substitute, consider using flaxseed meal mixed with water; it mimics the binding properties well.
- 4 tbsp unsalted butter, softened. This creamy addition adds richness and flavor essential for achieving that melt-in-your-mouth texture we’re after in our Swirled Garlic Herb And Cheese Bread. Make sure your butter is soft but not melted; this is key for proper mixing—if it’s too cold, it won’t incorporate well.
- 3 ½ cups all-purpose flour. Flour forms the backbone of our dough! It’s essential for gluten formation—the network that gives our bread structure and chewiness. High-quality all-purpose flour will create wonderful results; avoid self-rising flour here because we want to control our rise.
- 1 tsp salt. Salt enhances flavor while also strengthening gluten development in our dough; this balance is absolutely paramount for great bread-making! Use fine sea salt for even distribution within the dough—it’s easier than coarse salt which may leave pockets of seasoning.
- 2 tbsp unsalted butter (for filling). Just like before, butter here is about adding richness but also helps create layers within our swirls—think buttery goodness with every twist! For those dairy-free folks out there, coconut oil can stand in beautifully without sacrificing flavor.
- 3 cloves garlic, finely minced. Oh garlic! The fragrant star of this show! Roasting enhances its natural sweetness while mellowing out its sharpness—it becomes utterly intoxicating as it bakes into our bread! You can swap fresh garlic for roasted if preferred—the depth it adds is simply divine!
- 2 tbsp chopped fresh herbs (thyme, parsley, or rosemary). Fresh herbs elevate flavors tremendously! Thyme brings earthiness; parsley contributes brightness; rosemary offers aromatic intensity—choose what speaks to you most! Dried herbs are okay in a pinch but fresh makes all the difference.
- 2 cups shredded mozzarella cheese. Mozzarella provides that gooey stretch we dream about when imagining cheese pulls! Opt for part-skim mozzarella for less fat without sacrificing flavor—be wary of pre-shredded varieties as they often have anti-caking agents which can affect melting quality!
- 1 large egg (for egg wash) & 1 tbsp water (for egg wash) combine to create a glossy finish on our beautiful loaf when baked—a visual cue that promises deliciousness inside! You can skip the wash if desired but trust me—it adds elegance!
Equipment You’ll Need:
Navigating through any recipe becomes smoother when equipped with the right tools! While these aren’t ingredients, think of them as essential partners guiding us toward success in crafting this delightful bread.
- Mixing bowl – A sturdy mixing bowl allows ample space for kneading ingredients together without mess spilling over everywhere—a must-have companion throughout this process!
- Measuring cups & spoons – Precision matters tremendously in baking; having reliable measuring tools ensures accuracy so each ingredient contributes precisely as intended toward building flavor and structure!
- Stand mixer or wooden spoon – If you own a stand mixer with a dough hook attachment—that’s fantastic! It takes much effort out of kneading by hand but don’t worry if you’re mixing manually—a wooden spoon works perfectly too; just be prepared for some arm workout!
- Rolling pin – This tool helps flatten your dough evenly to create those lovely layers we aim for within each swirl—it’s essential for shaping our masterpiece before it rises again!
- Baking pan (9×5 inches recommended) – The right size pan not only supports rising but also provides even heat distribution during baking ensuring no uneven browning occurs—we want consistency throughout every slice!
As we set off on this adventure together crafting Swirled Garlic Herb And Cheese Bread remember: cooking should be filled with joy—not stress! Each step draws us closer to creating something truly extraordinary worth savoring—and sharing with loved ones too!
Step 1: Activate Your Yeast
Let’s get things started by awakening those sleepy yeast granules nestled within their package! In a mixing bowl (preferably warm), combine warm milk along with granulated sugar and sprinkle the active dry yeast on top—no stirring just yet! Allow this mixture to sit undisturbed for about ten minutes until frothy bubbles appear atop—it’s like nature’s magic show at work! This foamy stage indicates that your yeast is alive and ready to work its wonders—this process known as proofing reassures us we’re on track toward fluffy greatness ahead.
Step 2: Mix It All Together
Once your yeast has bubbled up happily like little clouds in your bowl, now comes time to bring all those wonderful ingredients together harmoniously into one cohesive unit full of promise! Add eggs along with softened butter into your yeast mixture followed by flour and salt—it might feel overwhelming initially but trust me…mixing creates magic here! If using stand mixer beat on low speed until combined then increase speed gradually until smooth elastic dough forms—this may take several minutes so embrace patience as gluten begins developing giving strength needed later on during baking adventures ahead!
Step 3: Kneading Nirvana
Ahh…the zen-like art form known lovingly as kneading awaits you next! Dust your surface lightly with flour before transferring your sticky dough onto it—embrace its texture however messy initially feels because soon enough it’ll transform under loving hands into something beautiful resembling silkiness beneath fingertips instead roughness felt moments prior after initial mixing phase done meticulously well enough already accomplished thus far too much praise deserved indeed here now ahead still basking glory achieved thus far too before continuing further onward along journey unfolding beautifully beneath guiding eyes watching closely over every detail unfolding throughout whole adventure awaiting completion now soon nearing fruition quickly approaching ever closer ahead indeed…
Step 4: A Cozy Rise
Once kneaded successfully forming smooth ball place back inside lightly oiled mixing bowl cover tightly using clean kitchen towel allowing warmth envelop entire sphere resting comfortably enabling expansion necessary taking approximately hour time passing peacefully before returning eagerly checking progress made worth anticipation building finally occurring transformation desired state reached eventuality promised soon manifesting delicious outcome awaiting us upon horizon beckoning enticingly…
Stay tuned as we continue exploring more steps toward crafting this delightful Swirled Garlic Herb And Cheese Bread together—I can’t wait to share more secrets along the way so keep those aprons tied tight while excitement builds steadily alongside aromas wafting gently throughout kitchen space inviting everyone nearby yearning taste truly exceptional creation blossoming forth right out oven warmth radiating welcoming smiles everywhere around gathering moments shared fondly…
Step 5: Rolling and Shaping Your Dough into a Dreamy Swirl
Now that your dough has risen beautifully and doubled in size, it’s time to transform it into something truly extraordinary. Gently punch down the dough to release any trapped air; this step is called degassing and is crucial for achieving that tender crumb we all crave. Transfer the dough onto a lightly floured surface, and using a rolling pin, roll it out into a large rectangle about 12 inches by 18 inches. It should be around half an inch thick—this thickness is key! It allows for enough layers to develop as we create our lovely swirl while ensuring the bread stays soft and pillowy once baked.
Once you have your rectangle, it’s time to add that intoxicating garlic-herb butter mixture. Take your melted garlic butter—yes, that glorious concoction of sautéed garlic and fresh herbs—and brush it generously over the entire surface of the dough. This step not only imparts flavor but also helps to keep the cheese from sliding out during baking. Next, sprinkle your shredded mozzarella cheese evenly across the surface, making sure every bite is filled with that gooey goodness we all adore. Don’t be shy—more cheese equals more happiness! Now, roll the dough tightly away from you into a log shape, ensuring that all that delicious filling stays inside. This is where you can let your excitement shine; as you roll, imagine each layer coming together to create a marvelous symphony of flavors!
Step 6: Twisting and Creating Visual Delight
With your log in hand, it’s time for one of my favorite parts—the twist! Carefully slice the log lengthwise down the middle with a sharp knife. This reveals the beautiful layers within and allows those enticing swirls to show off their magic. Now here’s where you can really make it shine: gently twist the two halves together with the cut sides facing up. Imagine you’re creating a work of art; this twisting not only adds visual appeal but helps incorporate some air into the loaf, contributing to its lightness when baked.
As you twist, don’t rush this step; take your time to ensure each section maintains its integrity. If at any point you feel like it’s becoming too unwieldy or you’re losing shape, just pause for a moment—it’s perfectly normal! The more you practice this technique, the easier it will become. Once twisted, carefully place your masterpiece into a greased pan or on parchment paper on a baking sheet so it has room to rise again. You’ll want to let it rest for about 30 to 40 minutes in a warm spot until puffy—it’s like giving your creation one last chance to grow before it takes its final form in the oven.
Step 7: The Magical Oven Transformation
Now comes one of the most exciting moments in baking—the transformation in the oven! Preheat your oven to 350°F (175°C). This temperature is absolutely paramount because it ensures even cooking throughout while allowing those cheesy swirls to melt beautifully without browning too quickly. While the oven heats up, take those last moments to appreciate how much effort you’ve put into this labor of love—trust me, it will be worth every second.
Before placing your loaf in the oven, let’s give it one final touch—a luscious egg wash made from whisking together one large egg and one tablespoon of water. Use this mixture to brush over the top of your bread; not only does this enhance browning and create that gorgeous golden crust we all crave, but it also adds an appealing sheen that makes your swirled creation look utterly irresistible. Once brushed, gently slide your bread into that preheated oven and set your timer for 35-40 minutes.
As it bakes, you’ll notice an intoxicating aroma wafting through your home—one that’s sure to draw everyone into the kitchen like moths to a flame! Keep an eye on it towards the end; you’re looking for a deep golden brown color all over—a perfect indicator of doneness along with that delightful sound when you tap on the bottom and hear a hollow echo.
Step 8: The Poignant Moment Before Slicing
Once baked to perfection and golden brown all over, it’s crucial to let our creation cool for at least 15 minutes before slicing into this glorious loaf. I know how tempting it can be to dive right in while it’s still steaming hot—the aroma alone beckons you like an old friend—but trust me on this one! Allowing it to cool gives those cheesy layers time to settle and hold their shape during slicing; otherwise, they may ooze out unexpectedly (and nobody wants that!).
During these precious moments of anticipation, take in every detail—the way the crust glistens under warm lighting or how those enticing swirls reveal themselves just waiting for you to take that first bite. After patiently waiting (and I mean patiently!), grab a serrated bread knife for cutting; it’s non-negotiable for keeping those delicate layers intact as you slice through them effortlessly.
When you’re ready—and only then—slice yourself a generous piece and watch as molten cheese stretches tantalizingly from loaf to plate. Serve warm if possible; there’s something profoundly satisfying about enjoying freshly baked bread right out of the oven—it acts almost as comfort food encapsulated in each fluffy bite!
Conclusion:
As we reach the end of our journey through crafting this irresistible Swirled Garlic Herb And Cheese Bread, I hope you’re feeling inspired and excited about bringing this delight into your own kitchen! It’s not just about following a recipe; it’s about embracing the experience—the gentle kneading of dough under your fingertips, watching as it rises like magic, and finally pulling out that golden loaf from the oven. What truly sets this recipe apart is how each element harmonizes together: the robust flavor of roasted garlic paired with aromatic herbs and luscious mozzarella creates a symphony of textures and tastes that elevates your dining experience beyond anything ordinary.
This recipe is an absolute must-try—not only because of its mouthwatering flavor but also due to the sheer joy involved in making it. Imagine gathering with family or friends around the table, breaking into this warm loaf as savory steam wafts through the air; it’s an invitation for connection and laughter. Perfect for special occasions like holiday gatherings or cozy weeknight dinners alike, this bread serves as both an elegant sidekick to pasta dishes and a delectable standalone snack when slathered with butter or dipped in olive oil.
When considering how best to enjoy your masterpiece, picture yourself savoring a slice alongside a vibrant salad bursting with fresh vegetables or perhaps dipping into a rich marinara sauce while watching a favorite movie on a chilly evening. For an afternoon pick-me-up with friends over tea or coffee, imagine pairing one with fruity preserves—it transforms each bite into something utterly special! Alternatively, serve it alongside creamy soups where its cheesy goodness complements every spoonful; there are endless possibilities waiting for you!
Feeling adventurous? This recipe is wonderfully adaptable! Swap out mozzarella for pepper jack if you’re keen on adding some heat or experiment with different herbs like basil or oregano for unique flavor profiles that suit any occasion. You could even incorporate sun-dried tomatoes or olives into the filling for an exciting twist! I wholeheartedly encourage you to get creative—baking should be fun and personal after all! So gather those ingredients again soon, try out these variations, share your experiences with loved ones, and let’s keep spreading the joy of homemade goodness together!
Swirled Garlic Herb And Cheese Bread
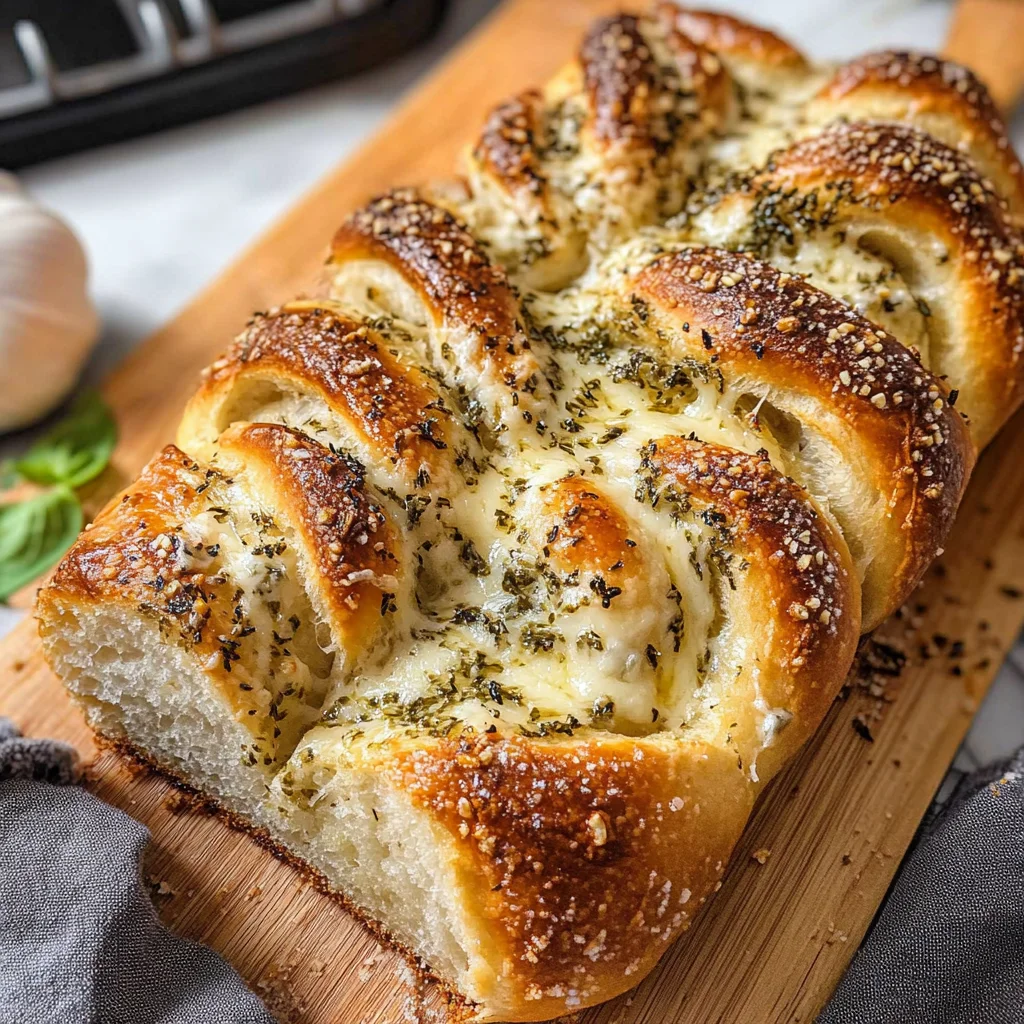
Indulge in the warm embrace of our Swirled Garlic Herb And Cheese Bread—a delightful creation that brings together the rich flavors of roasted garlic, fresh herbs, and gooey mozzarella cheese. This homemade bread offers a comforting experience, perfect for gatherings or cozy nights in. Imagine pulling apart a golden loaf, its soft texture revealing enticing cheesy swirls with each bite. Whether enjoyed on its own or paired with your favorite dishes, this recipe is sure to become a beloved staple in your kitchen.
- Prep Time: 30 minutes
- Cook Time: 40 minutes
- Total Time: 1 hour 10 minutes
- Yield: Approximately 12 servings 1x
- Category: Dinner
- Method: Baking
- Cuisine: Italian
Ingredients
- 1 cup warm milk
- 2 ¼ tsp active dry yeast
- 2 tbsp granulated sugar
- 2 large eggs
- 4 tbsp unsalted butter, softened
- 3 ½ cups all-purpose flour
- 1 tsp salt
- 3 cloves garlic, minced
- 2 tbsp chopped fresh herbs (thyme, parsley, or rosemary)
- 2 cups shredded mozzarella cheese
Instructions
- In a mixing bowl, combine warm milk and sugar; sprinkle yeast on top and let it sit for about 10 minutes until frothy.
- Add eggs and softened butter to the yeast mixture; then mix in flour and salt until a dough forms.
- Knead the dough on a floured surface until smooth and elastic, about 8-10 minutes.
- Place the dough in an oiled bowl, cover, and let it rise for about an hour until doubled in size.
- Roll out the dough into a rectangle, spread melted garlic butter over it, sprinkle with cheese and herbs, then roll tightly into a log.
- Slice the log lengthwise and twist the halves together before placing it in a greased baking pan.
- Let it rise again for about 30-40 minutes before brushing with egg wash.
- Bake in a preheated oven at 350°F (175°C) for 35-40 minutes until golden brown.
Nutrition
- Serving Size: 1 slice
- Calories: 210
- Sugar: 2g
- Sodium: 320mg
- Fat: 8g
- Saturated Fat: 4g
- Unsaturated Fat: 3g
- Trans Fat: 0g
- Carbohydrates: 30g
- Fiber: 1g
- Protein: 6g
- Cholesterol: 30mg