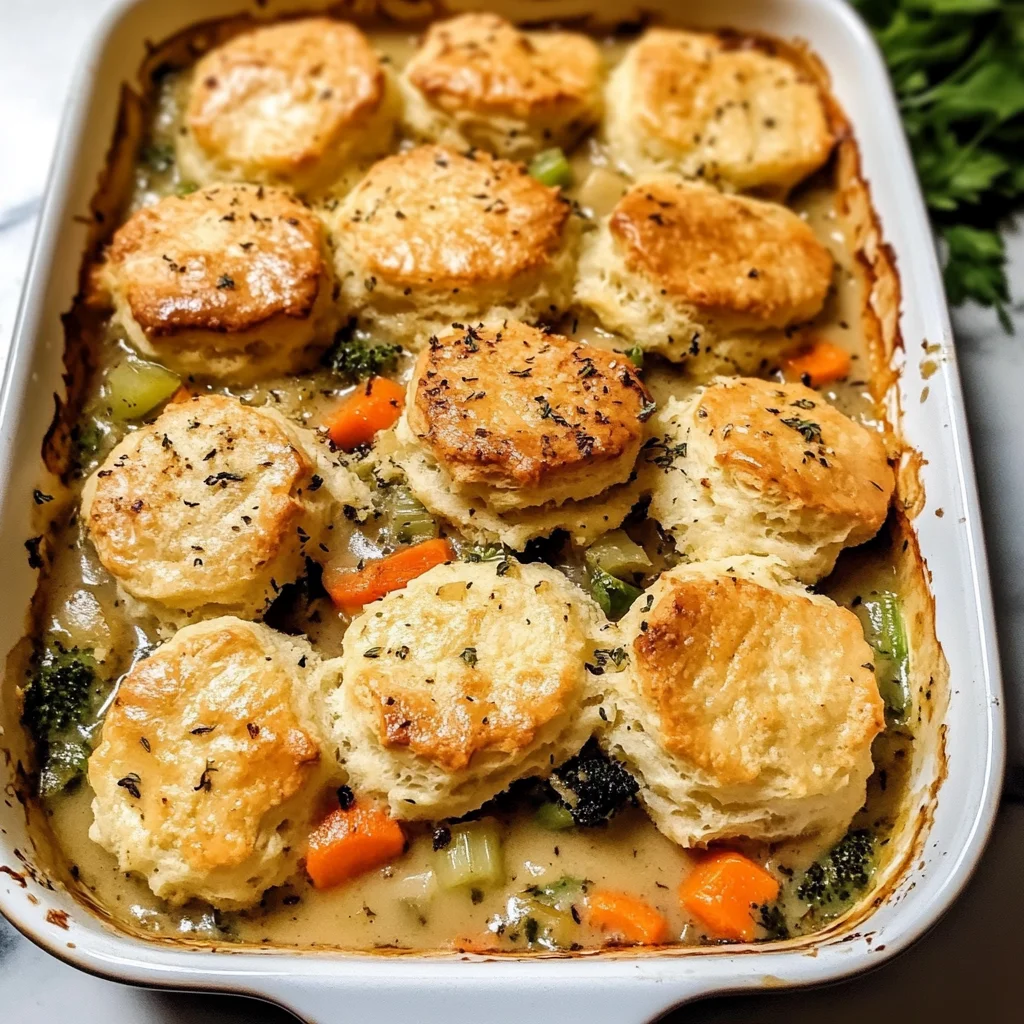
Biscuit Vegetable Pot Pie Casserole
There’s something utterly magical about gathering around a warm, comforting dish that feels like a big hug from the inside out. The Biscuit Vegetable Pot Pie Casserole is not just a recipe; it’s a heartfelt concoction that brings together the best of what nature has to offer in a symphony of flavors and textures. Imagine biting into tender vegetables swimming in a rich, creamy sauce, all topped off with golden, flaky biscuits that are simply irresistible. Each spoonful tells a story—of shared moments, laughter echoing through the kitchen, and the delightful aroma wafting through the air as it bakes. I promise you, this dish will become a cherished part of your culinary repertoire.
As the seasons change and cooler weather sets in, there’s an undeniable craving for heartwarming meals that nourish both body and soul. This Biscuit Vegetable Pot Pie Casserole is perfect for cozy family dinners or even as leftovers for lunch the next day. It’s a celebration of wholesome ingredients and simple pleasures, making it not just food but an experience that connects us with our loved ones. I’ve always been captivated by how food has this incredible power to bring people together, transcending mere sustenance to become something profoundly satisfying and joyful.
Biscuit Vegetable Pot Pie Casserole: A Cozy Comfort Food Delight
This recipe is truly special to me because it encompasses everything I adore about cooking—fresh vegetables, hearty flavors, and that unbeatable homemade touch. The beauty of this casserole lies not only in its deliciousness but also in its adaptability; you can mix and match your favorite seasonal vegetables to create your perfect version. Plus, who can resist those fluffy biscuits topping it all off? Let’s embark on this culinary journey together!
Ingredients:
Before we dive into crafting this delightful dish, let’s take a moment to appreciate each ingredient’s role in creating our Biscuit Vegetable Pot Pie Casserole. Each component contributes uniquely to the final masterpiece.
- 2 cups (250g) all-purpose flour (spooned & leveled), plus extra for hands. This flour serves as the foundation for our biscuit topping and provides structure to the casserole. When selecting flour, look for high-quality brands that are finely milled; this ensures our biscuits rise perfectly while remaining tender. Remember that spooning and leveling your flour is crucial here—too much flour can lead to dense biscuits instead of light and airy ones!
- 1 Tablespoon baking powder (yes, Tablespoon!). This leavening agent is absolutely paramount for achieving that lovely fluffiness in our biscuits. Baking powder works by releasing carbon dioxide when mixed with moisture and heat, causing our dough to rise beautifully during baking. Always check the expiration date on your baking powder; if it’s stale, you won’t get that wonderful lift we’re aiming for!
- 1/2 teaspoon salt. Salt is like magic when it comes to enhancing flavors—it brings out the natural sweetness of our vegetables while balancing richness in the buttery biscuit topping. Without it, the flavors can fall flat! Make sure you’re using fine sea salt or table salt so it dissolves evenly throughout the mixture.
- 6 Tablespoons (85g) unsalted butter, cold and cubed. This ingredient adds richness and flavor while creating those coveted flaky layers in our biscuit topping. Using unsalted butter allows you full control over the seasoning of your dish; trust me when I say that chilling your butter beforehand is non-negotiable! Cold butter creates steam during baking which results in those lovely lift-off layers.
- 1 cup + 2 Tablespoons (270ml) whole milk, divided. Whole milk gives our biscuits a creamy texture while ensuring they remain moist without becoming overly dense. The fat content helps create tenderness—essential for achieving that melt-in-your-mouth quality—and we’ll use some now for mixing into our dough while reserving a bit for brushing on top later.
- 1/4 cup (4 Tbsp; 56g) unsalted butter. In addition to helping make those beautiful biscuits, this butter lends luxuriousness to our vegetable filling by enriching its flavor profile without overpowering it with grease or heaviness.
- 1 cup (130g) diced yellow onion (1/2 of a large onion). Onions provide depth and sweetness as they caramelize during cooking; they’re truly foundational in building flavor in savory dishes like this one! Choose onions that feel firm without soft spots—the fresher they are, the more vibrant their flavor will be.
- 1 cup (130g) sliced or diced carrots (1–2 large carrots or a handful of baby carrots). Carrots add color, sweetness, and texture to our pot pie filling—a true comfort food staple! Opt for bright orange carrots with smooth skins; if you can find them locally sourced or organic, even better!
- 1 cup (120g) sliced or diced celery (2–3 stalks). Celery adds crunchiness alongside its aromatic qualities—it’s one of those veggies that really rounds out our flavor profile! Fresh celery should be crisp with vibrant green leaves; avoid any wilting as it’ll affect both texture and taste.
- 1 cup (120g) roughly chopped mushrooms. Mushrooms introduce earthiness into our casserole—they’re like little umami bombs bursting with flavor! You can use any variety you love—cremini or button mushrooms work beautifully here—but make sure they’re fresh with no dark spots or slimy patches.
- 3–4 garlic cloves, minced. Garlic infuses everything with its robust flavor; it’s aromatic magic! Use fresh cloves rather than pre-minced varieties if possible—nothing beats freshly minced garlic’s pungency.
- 1/3 cup (42g) all-purpose flour (spooned & leveled). This flour plays an essential role in thickening our vegetable filling as we cook it down—we want it to have just enough body without being too heavy or gloopy.
- 1 teaspoon salt & 1/2 teaspoon fresh ground pepper—these seasonings are vital for bringing balance while allowing each ingredient’s natural flavors to shine through.
- 2 teaspoons fresh thyme leaves (or 1 teaspoon dried)—thyme adds an aromatic note that’s so comforting! If you’re using dried thyme instead of fresh, remember it’s more potent so adjust accordingly!
- 2 cups (480ml) vegetable broth provides richness to our filling while keeping everything moist—it’s important not just for flavor but also mouthfeel!
- 1/2 cup (120ml) whole milk continues adding creaminess into our filling while balancing out savory elements from other ingredients.
- 2 cups (about 300g or 10 ounces) mixed vegetables such as frozen peas or broccoli florets offer vibrant colors along with added nutrition! Mix them up based on what you have on hand—the more colorful your veggie medley looks on your plate means more nutrients packed inside!
- 2 Tablespoons chopped fresh parsley (or 2 teaspoons dried) gives freshness at the end—a sprinkle makes everything pop visually too!
Equipment You’ll Need:
Cooking becomes infinitely more enjoyable when you have the right tools at your fingertips—it can turn what might feel like drudgery into sheer joy! While these items aren’t ingredients themselves, they are essential partners in crafting something wonderful together.
- Large mixing bowl – A sturdy bowl is vital for combining dry ingredients seamlessly before we incorporate wet ones; choose one that’s easy to handle yet spacious enough so mixtures won’t splatter everywhere!
- Food processor or pastry cutter – For cutting butter into dry ingredients efficiently—this step is crucial as we want those distinct flakes throughout! A food processor will save time if you’re short on it but using hands works well too if preferred!
- Skillet/pot/skillet-safe baking dish – Make sure this dish can go from stovetop heat directly into an oven safely; cast iron skillets are fantastic options here due their heat retention properties!
- Measuring cups/spoons – Precision matters when creating delicious dishes like ours! Invest in good quality measuring tools so measurements stay accurate—you’ll thank yourself down the line.
Step 1: Whisking Up That Biscuit Dough
The first step in embarking on your delightful Biscuit Vegetable Pot Pie Casserole adventure involves bringing together your dry ingredients: whisk together flour, baking powder, and salt until well-combined in a large mixing bowl or food processor if you prefer speed! This process ensures an even distribution of leavening agents throughout—trust me when I say this initial blending makes all future steps flow smoothly too! Once combined thoroughly sprinkle cold cubed butter over these dry ingredients before utilizing either a pastry cutter or pulsing gently until coarse crumbs form—you want tiny flecks here instead of fully melted butter since these bits will create steam during baking leading us towards those glorious flaky layers we crave so much!
After achieving coarse crumbs consistency within 5–7 minutes’ time frame depending upon method choice add 1 cup milk gradually whilst stirring gently until shaggy dough begins coming together nicely—it may look slightly wet at first which is perfectly normal but keep an eye out: if too dry fold another tbsp milk carefully into mixture until desired feel achieved!
Step 2: Shaping Your Biscuits
With floured hands—yes generously dust them first—you’ll shape dough into roughly eight discs about one inch thick depending upon how large you’d like each biscuit atop casserole base later on! Don’t worry about achieving absolute perfection here; rustic looks offer charm just as much as neat shapes do after baking finishes up beautifully anyway! Place shaped disks onto lined plate/baking tray then cover tightly before refrigerating until needed—that extra chill will help maintain structure as they bake later ensuring optimal results every single time without fail keeping warmth contained within them too which means ultimate enjoyment awaits ahead!
Step 3: Creating That Flavor-Packed Filling
In another pan set over medium heat melt remaining butter until bubbly before adding onion/celery/carrot/mushroom mix stirring frequently allowing everything time together harmoniously releasing fragrant aromas filling entire room around us within mere minutes’ time frame—this process not only cooks down veggies softening their textures but also encourages flavors meld creating rich foundation underneath layer we build next atop them once ready soon enough too! After approximately five minutes pass stir seasoning/flour mixture evenly distributing throughout ensuring nothing clumps up then pour broth/milk slowly stirring constantly while watching closely noticing gradual thickening process occurring right before eyes revealing luscious velvety soup-like consistency emerging from depths below inviting everyone gathered nearby closer wanting some spoons ready already…
Step 4: Assembling Casserole Magic!
As soon as mixture cools slightly at least five minutes minimum preheat oven around 400°F preparing atmosphere welcoming warmth promising deliciousness soon emerging from within its confines once assembled completely together next stage involving pouring cooled veggie mixture directly greased baking vessel chosen emerging victoriously triumphant finally reached point where arranged chilled biscuit tops squeezed snugly fitting atop casserole base letting anticipation build excitement levels higher than ever experienced before unleashing burst flavors promised earlier upon final reveal after brushing remaining milk atop surface giving golden hue expected while placing carefully inside heated oven awaiting transformation taking place illuminating kitchen area surrounding entire space radiating warmth spreading joy everywhere felt instantly after aroma begins wafting enticingly inviting hungry hearts smiling already knowing what awaits ahead…
And there you have it—a journey filled with warmth through every step taken leading towards culinary delight waiting eagerly ahead once baked fully cooked brought forth proudly presenting gorgeous inviting display served alongside loved ones gathered around enjoying every last bite shared between breaths taken relishing memories formed gathering strength comfort found forever among dishes like these reminding us why home-cooked meals remain cherished traditions passed down generation upon generations alike inspiring future cooks eager embarking their own paths discovering joys hidden amongst simple yet profound pleasures created via artfully crafted recipes shared lovingly across tables spanning distances uniting hearts altogether again…
Step 5: Pouring in the Filling – A Heartwarming Transformation
Now that your vegetable filling has cooled slightly, it’s time for the real magic to begin. Carefully pour this vibrant medley of flavors into a greased baking dish that’s at least 2.5 quarts in size or a deep 9-inch pie dish. This step is crucial because we want to ensure that every bite of your Biscuit Vegetable Pot Pie Casserole brims with all those luscious vegetables and the rich, creamy sauce you’ve created. Use a spatula to scoop out any remaining filling from the skillet; trust me, you won’t want to leave even a dollop behind! The mixture should resemble a thick soup, full of color and texture, enticing you with the promise of warmth and comfort.
Why grease the dish? This simple yet vital act prevents any sticking and guarantees that your beautiful pot pie slides right out when it’s time to serve. As you pour in the filling, take a moment to appreciate the aroma wafting from it—those fragrant herbs mingling with the sautéed vegetables create an utterly intoxicating scent that fills your kitchen with warmth and nostalgia. Once you’ve poured everything in, give it a gentle shake to settle the filling evenly across the bottom, ensuring each spoonful will be packed with flavor when served.
Step 6: Arranging Your Biscuits – Creating Layers of Comfort
Next up, we’re going to arrange those biscuits atop our glorious vegetable filling. With our biscuit dough chilled and ready for action, take it out of the fridge and let’s get creative! Generously flour your hands—this is non-negotiable since we want to prevent stickiness—and start shaping each disc into about one inch thick. Don’t worry about achieving perfection; rustic charm is what we’re after here! Some might be a bit thicker or thinner than others, but they’ll all bake beautifully together.
As you place these delightful discs on top of your filling, feel free to squeeze them together as necessary to fit them snugly over the surface. This step not only provides coverage but also ensures that each biscuit gets that golden brown crust while allowing steam from the filling to rise up through each biscuit—creating those lovely soft centers we all adore. Trust me when I say that this casual arrangement adds character to your dish! Once they’re all snugly situated atop the filling, brush them gently with those reserved two tablespoons of milk. This simple act is key; it helps achieve that beautiful golden color during baking and gives them a slight sheen that makes them look irresistible.
Step 7: Baking – The Anticipation Builds
Now comes one of my favorite moments—the baking process! Preheat your oven to 400°F (204°C). While waiting for it to reach temperature, take a deep breath and relish in the anticipation; there’s something truly extraordinary about how a humble assembly of ingredients can transform into something spectacular through heat and time. Once preheated, place your casserole in the oven and set a timer for 25 minutes.
It’s important not to rush this step; during this initial bake, the biscuits will start to rise and puff up beautifully while soaking in some of those scrumptious juices from below. When you peek inside after 25 minutes, you should see them starting to become golden around the edges—a sign they’re on their way to biscuit perfection! After this time is up, we’re going to crank up the heat to 425°F (218°C) for an additional 5-6 minutes. This final burst of heat is absolutely paramount as it elevates those biscuits into fluffy clouds with a beautiful golden crust—just like they deserve! Keep an eye on them during this phase; you’ll know they’re done when they’re irresistibly golden brown on top.
Step 8: Cooling – Patience is Key
Once you remove your Biscuit Vegetable Pot Pie Casserole from the oven—the aroma alone will have everyone racing towards you—allow it to cool for at least five minutes before serving. I know waiting can be tough when something looks so divine, but trust me on this one; letting it rest allows all those flavors to meld beautifully together while also helping thicken up any remaining juices inside so they don’t spill everywhere when you’re serving portions.
During this cooling period, gather around with friends or family—this recipe is perfect for sharing! As you chat about how delicious dinner smells or reminisce about past meals shared together, notice how well this casserole embodies comfort food at its finest. Remember: patience isn’t just about letting food cool; it’s about savoring these moments spent together over something homemade.
Final Touches
Step 9: Serving – The Moment You’ve Been Waiting For
Finally! It’s time for one last touch before diving in—the serving itself! Using a large spoon or spatula, serve generous portions onto plates or bowls. The moment you break into one of those biscuits, you’ll see steam rising from within—a visual cue signaling just how comforting and warm this dish truly is! As you scoop out servings filled with tender vegetables enveloped in that silky sauce topped by flaky biscuits, prepare yourself for an explosion of flavors that dance harmoniously across your palate.
Don’t forget garnishing each plate with freshly chopped parsley if desired—it adds not just vibrant color but also an extra layer of freshness that complements everything perfectly. And as everyone gathers around their plates ready to dig in, take pride in knowing you’ve created something profoundly satisfying and utterly delightful from scratch—a meal made with love that’s sure to become a family favorite!
Enjoy every bite; I promise you’ll find comfort in every mouthful of this Biscuit Vegetable Pot Pie Casserole long after it’s gone! And remember—the leftovers are just as delicious if stored properly in an airtight container for up to five days—perfect for quick lunches throughout the week. Now go ahead and make this recipe yours; I can’t wait for you all to experience its magic firsthand!
Storage and Enjoyment Tips for Your Biscuit Vegetable Pot Pie Casserole
Now that you’ve pulled your Biscuit Vegetable Pot Pie Casserole from the oven, the intoxicating aroma of warm, buttery biscuits mingling with a rich vegetable filling has likely enveloped your kitchen in an embrace of comfort. It’s a feast for the senses! The golden-brown biscuits are simply begging to be torn apart and dipped into that velvety, herb-infused filling. Trust me when I say that enjoying this dish is not just about eating; it’s about savoring every bite, relishing the warmth it brings to your soul. But what happens if you have leftovers? Fear not!
Storing Leftover Biscuit Vegetable Pot Pie Casserole
To keep your lovely casserole fresh for days to come, I recommend transferring any leftovers into an airtight container. This will help maintain the delightful texture of those biscuits while preventing them from becoming soggy. If stored properly in the refrigerator, your Biscuit Vegetable Pot Pie Casserole will stay delicious for up to five days. Now, here’s a little pro tip: placing a slice of bread into the container can help absorb moisture, keeping those biscuits wonderfully soft while preserving that cozy flavor you adore. After storage, you’ll find that the flavors meld beautifully together, creating a taste experience that’s even more profound than right out of the oven! When it’s time to enjoy again, simply reheat individual portions in the microwave or pop the whole dish back into a preheated oven until everything is warmed through—your home will fill with that heavenly scent all over again.
Freezing Biscuit Vegetable Pot Pie Casserole for Later
If you’re like me and love planning ahead, freezing this casserole is a fantastic option! To do so, allow it to cool completely before wrapping it tightly in plastic wrap or aluminum foil. For optimal freshness, place it inside a freezer-safe container or bag to guard against freezer burn. You can store it in the freezer for up to three months without losing its vibrant flavor and texture! When you’re ready for a quick meal during those busy weeknights or lazy Sundays, simply transfer it directly from the freezer to an oven preheated at 375°F (190°C) and bake until heated thoroughly—about 45-60 minutes should do it! This method not only saves cooking time but also ensures you have a hearty homemade meal waiting just for you when life gets hectic.
What I love most about having this dish on hand is that it offers both convenience and comfort—a true lifesaver when unexpected guests drop by or when you’re craving something nutritious yet easy to prepare. So go ahead, fill your freezer with this goodness!
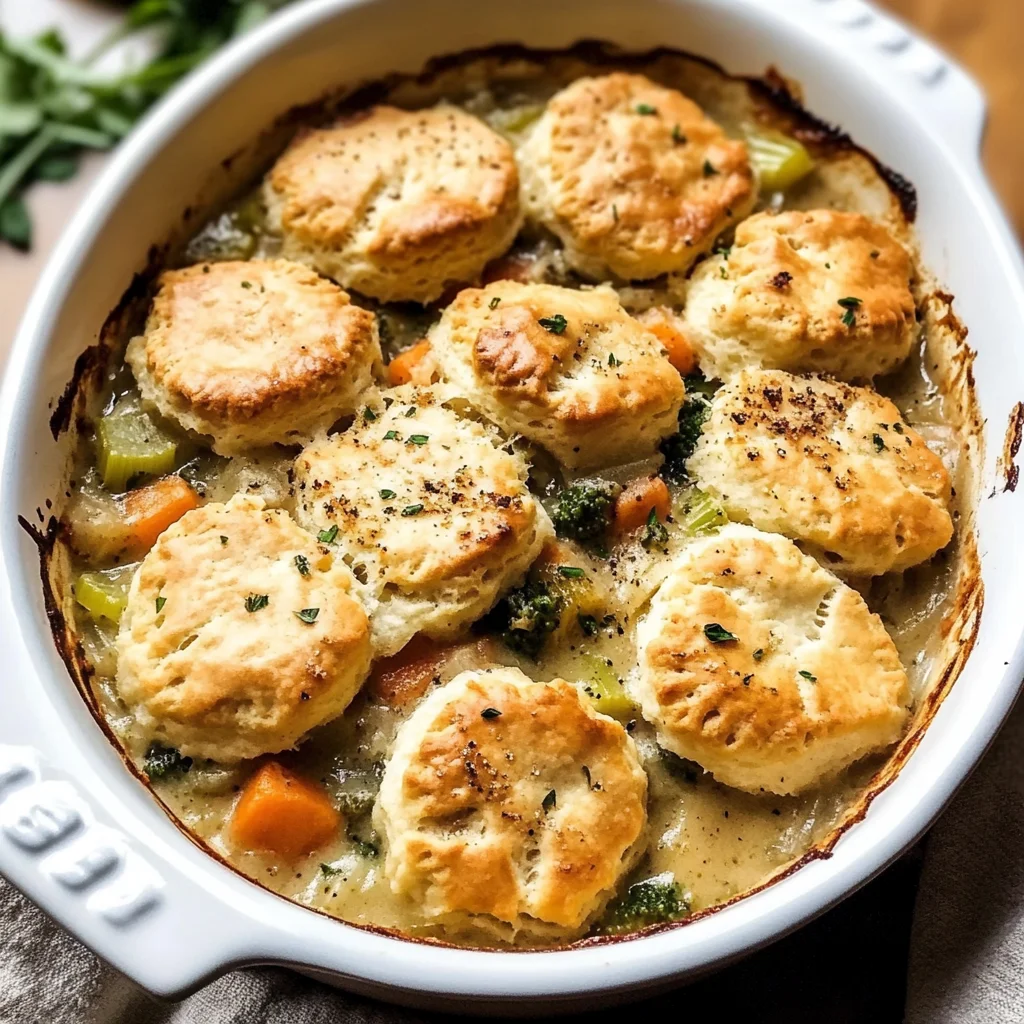
Biscuit Vegetable Pot Pie Casserole

Biscuit Vegetable Pot Pie Casserole is a heartwarming dish that blends tender vegetables in a creamy sauce, topped with fluffy homemade biscuits. This comforting casserole is perfect for cozy family dinners or as a satisfying leftover lunch. Each bite offers a delightful combination of flavors and textures, making it a truly memorable meal. As the seasons change and cooler weather sets in, this recipe brings warmth and joy to your table, creating lasting memories with loved ones.
- Prep Time: 30 minutes
- Cook Time: 35 minutes
- Total Time: 1 hour 5 minutes
- Yield: Serves approximately eight people 1x
- Category: Main
- Method: Baking
- Cuisine: American
Ingredients
- 2 cups all-purpose flour
- 1 tablespoon baking powder
- 1/2 teaspoon salt
- 6 tablespoons unsalted butter, cold and cubed
- 1 cup whole milk, divided
- 1 cup diced yellow onion
- 1 cup sliced carrots
- 1 cup sliced celery
- 1 cup chopped mushrooms
- 3–4 minced garlic cloves
- 1/3 cup all-purpose flour (spooned & leveled)
- 1 teaspoon salt
- 1/2 teaspoon fresh ground pepper
- 2 teaspoons fresh thyme leaves (or 1 teaspoon dried)
- 2 cups vegetable broth
- 1/2 cup whole milk
- 2 cups mixed vegetables (e.g., peas, broccoli)
- 2 tablespoons chopped fresh parsley (or 2 teaspoons dried)
Instructions
- Preheat oven to 400°F (204°C).
- In a large bowl, whisk together flour, baking powder, and salt.
- Cut in cold butter until mixture resembles coarse crumbs.
- Stir in milk gradually until dough forms; shape into discs and refrigerate.
- In a skillet, melt remaining butter over medium heat; sauté onions, carrots, celery, mushrooms, and garlic until softened.
- Sprinkle with flour; stir in broth and remaining milk; cook until thickened.
- Pour filling into a greased baking dish; arrange biscuit discs on top. Brush with reserved milk.
- Bake for 25 minutes at 400°F (204°C), then increase temperature to 425°F (218°C) for an additional 5–6 minutes until biscuits are golden brown.
- Cool slightly before serving.
Nutrition
- Serving Size: 1/8 of the casserole (approx. 300g)
- Calories: 360
- Sugar: 4g
- Sodium: 600mg
- Fat: 12g
- Saturated Fat: 6g
- Unsaturated Fat: 5g
- Trans Fat: 0g
- Carbohydrates: 56g
- Fiber: 5g
- Protein: 10g
- Cholesterol: 25mg